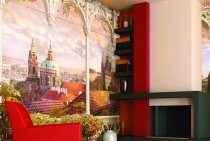
Airbrushing is a painting made using the technique of spraying paint from a spray can or using a special tool - an airbrush. The method is not new, but in recent years it has begun to gain more and more popularity. Airbrushing began to decorate the hoods of cars, the walls of houses and, of course, the interiors of apartments. Airbrushing on the walls in the apartment does not just look beautiful - it gives individuality to housing. Of course, you can paint the wall with the help of brushes, but during the same time, the airbrush master will have time to qualitatively apply a drawing on three walls of the same area. This does not mean that do-it-yourself airbrushing on the walls is a complex and impossible undertaking. Of course, the work of an amateur is unlikely to be able to claim the title of a masterpiece. But with some effort, even a beginner will be able to beautifully airbrush on the wall using a stencil.

What an aspiring artist needs
In addition to the desire to learn how to paint walls, the following tools and materials are needed:
- Airbrush. It is also a spray gun, which has a compact size, so that it is convenient to hold it for a long time.
- Compressor. Compressor models differ in price, power and noise.
- A hose that will connect these two items together.
- Airbrush paints.
- Lacquer to protect the finished painting.

The list can be supplemented with all sorts of spray nozzles, pressure controllers, containers for mixing and storing paints and, of course, auxiliary tools that any artist needs. This list may include:
- pencil and eraser - for sketching;
- markers, oil paints, brushes - for placing accents if necessary;
- thick film, masking tape, cardboard, plastic sheets - for making stencils.

What you need to know about the airbrush
Choosing a tool for applying airbrushing to the wall of the hallway is not so simple. You should not save and buy a model, the price of which is the lowest. Make sure the airbrush can adjust both the airflow and the amount of ink. It is such a device for airbrushing that will allow you to make smooth transitions, beautifully shade borders or densely paint over an area with paint of the same color.
The airbrush requires careful handling - it should be stored on a special stand and in no case be left on the floor during operation. Clean the instrument thoroughly as the paint inside may harden and render it unusable.

What colors to choose
The choice of paint depends on the effect you want to achieve.
- Transparent paints: watercolors in tubes, various other liquid pigments. This will make your drawing translucent, light and airy.
- Opaque paints: gouache, tempera. They give a dense color, which will avoid mixing shades during application and getting unplanned colors. For example, when drawing a yellow sun against a blue sky, the density of coverage will prevent the sun circle from turning green.

Step by step airbrushing on the wall
Before deciding to make your first drawing with an airbrush, you should first look at the photos of the work of professionals. It is better to choose a drawing about the size of about a square meter, smaller work is better suited for brushes, and it is not recommended for a beginner to take on large objects.

First of all, practice on a piece of drawing paper - try to press the airbrush key with different efforts, apply a stream of paint at different angles and from different distances. After that, you can start drawing a picture on the wall.
- Before starting work, make sure to cover the nearest areas with film or old newspapers - after the end of the creative process, small droplets of paint can be found even at a distance of three meters from the object of work.
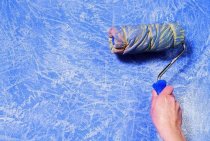
- The surface of the wall is leveled, puttied and primed.

- Beginners are advised to choose the stencil method for the first work. For example, you can depict flowers, geometric patterns, etc.
- The background for the picture can be solid or have transitions, for example, from light to dark. The main thing is to ensure that the paint lays evenly.

- After the background has dried, stick a pre-prepared stencil made of film or thick cardboard and proceed to painting the selected area.
- You can complete the work by placing accents, adding highlights and shadows.
- Do not forget to cover the paint applied to the wall with varnish - this will protect the picture from rapid fading.

Even if you do not have an art education and the work did not work out the first time, it does not matter. Paint the wall with plain paint and choose a simpler pattern. With experience comes the realization of exactly how to hold the airbrush, at what distance, etc. This is how all famous masters began, whose works are now photographed and admired!