Modern new buildings delight us with large areas, as well as free layouts, which caused the spread of fashion for studio apartments. It was the increase in space that led to the introduction of hatches for sockets mounted in the floor into the living quarters. Previously, they were used in large production areas, in public places, offices, warehouses, i.e., where a lot of electrical equipment is connected, but the presence of wires tangled underfoot is unacceptable. The use of this device makes life easier for designers and expands the possibilities of interior design, allowing you to move away from the usual layout of electrical appliances and furniture “along the walls”. And also eliminates the need for extension cords, splitters, surge protectors and other devices that do not fit into the design and cause a feeling of chaos.

Preparing to install the hatch
Make a decision and provide for the use of a hatch for sockets in the floor necessary at the design or development stage. Before the final installation of the device itself, it is necessary to carry out preparatory work during the laying of the floor. The draft stage consists in laying a cable (wire) from the point of entry of electricity into the apartment to the installation site of the socket block and contains the following nuances:
- It is necessary to choose a wire of a suitable section.
- The cable bred under the connector is taken with a margin of at least 0.5 meters.
- A wire is laid under the floor in a plastic or steel (if necessary with grounding) box and filled with a screed or simply covered with floors on logs.
- After laying the coating, the place where the hatch will be mounted is marked.

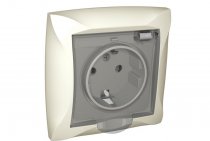
When choosing a floor option for connecting electrical appliances that are separated from the wall, it should initially be borne in mind that such an idea will cost an order of magnitude more than a standard wall version. Such a socket must have a special design, meet strict safety and ergonomic requirements and be a design element, because it often remains in sight.
Why can't standard sockets be used in the floor?
In addition to electrical and fire hazards, there are several more reasons not to mount standard socket models in the floor:
- A conventional source of electricity does not imply the presence of physical exertion - you can not step on it, put it on or drop furniture.
- Such models are not designed to be installed in a single plane with the coating and always protrude.
- The wall socket is not designed for the accumulation of dust, debris.
- This connector is not protected from liquid ingress into the case, which leads to short circuits.

It is also necessary to protect the wires (cables) supplied to the electrical connectors as much as possible from moisture, i.e. boxes for them are selected of good quality.
The main types of modules built into the floor
The design of the floor electrical connector is designed for flush mounting in a horizontal plane. It comes in the following modifications:
- Recessed floor hatches for sockets.
- Floor socket with socket cover.
When choosing a design, you should consider its purpose, this will help determine the required number of connectors. On this basis, devices are divided as follows:
- A socket containing one connector.

- Device for two or three sockets.

- Multifunctional design, equipped with up to 12 electrical outlets, phone and internet connectors.
uh
Swivel hatches in the floor for sockets are gaining popularity. This modification has the same functionality and is easy to use.

Features of choice
An important criterion for selecting the ideal model is the design component, that is, compliance with the style and overall interior design.Also, the material of the hatch design determines its mechanical properties and service life. According to these features, modules for sockets in the floor can be divided into the following types:
- Plastic. This model is cheaper, but it can withstand physical impact up to 300 kg. This is quite enough for an average residential apartment. Also, the plastic version of the floor hatch for sockets provides the largest selection of color variations. The most popular fixtures have neutral shades - white, black, beige, brown, gray, silver. If desired, you can choose any color or combination. There are complexly colored models, for example, imitating flooring.

- Metal. Such hatches, made mainly of stainless steel or aluminum, have an almost unlimited service life and resistance to loads up to 4 tons (which is not very important for an apartment). But their cost is much higher than plastic ones. Thus, the choice of a metal hatch to the floor is justified mainly by a design decision.

- Block in the floor for lining with flooring material. This model is used when it is necessary to use a hidden (disguised) hatch for sockets. It is a kind of metal structure with fasteners for the selected finishing material - carpet and parquet, laminate.

Important! Be sure to focus on such a criterion for choosing a hatch for sockets as the depth of its tie-in. This is an essential detail: the dimensions of the device must correspond to the height of the cover.
Safety
When choosing a hatch for sockets in the floor, special attention should be paid to its safety, i.e., the degree of protection against damage and moisture resistance. To be sure of the quality of the proposed product, it is necessary to study the IP index (Ingress Protection Rating). It is its value that shows how the device meets the required level of security. The range of IP indicators is quite wide. And if IP 22 is enough for wall connections of ordinary household appliances, then for sockets in the floor this value should approach the maximum - IP 69.
The optimal parameter for the outlet hatch in the floor is IP 67, and for the outlet, assuming a protective cover - IP 44.

Device package
Usually, high-quality hatches for floor connectors are sold in a complete set sufficient for complete self-assembly. As a rule, the standard set includes the following components:
- Installation box.
- Floor hatch box (with lid and lever).
- Mounts and clamps.
- Holders and clips of a cable (wire).
- Mounting supports.
- Partitions for connectors (if there is more than one connector).
- Sockets directly.

Note! The high-quality set will also contain an additional protection element - a support for sockets (for plastic models, the placement depth is 7-10 cm, for metal ones - 8-11 cm).
Installation of the hatch in the floor
In most cases, the device comes with step-by-step installation instructions, following which you can handle the installation yourself, especially with some knowledge of electrical engineering and equipment.

Installation of a standard product consists of the following steps:
- If it is planned to fill the screed, then the filler box included in the kit is initially installed. Wires are inserted into its grooves in cable channels. After the solution dries, the box is carefully removed (the resulting niche should remain as intact as possible).
- If the floor is wooden, then at the first stage a nest of the required size is cut out.
Further, the sequence of actions is the same for each type of floor:
- In the niche or nest obtained at the first stage, the body of the hatch for sockets is mounted (using the attached fasteners).
- The socket terminals are connected and installed on the rails.
- The hatch cover is put on the corresponding fasteners.
Upon completion of the work, it is necessary to make sure that the resulting structure is tight, that each element fits snugly and that all (including technological) holes are completely closed. Increased vigilance is extremely important when working with electricity.