Laying tiles on gvl in the bathroom installation features
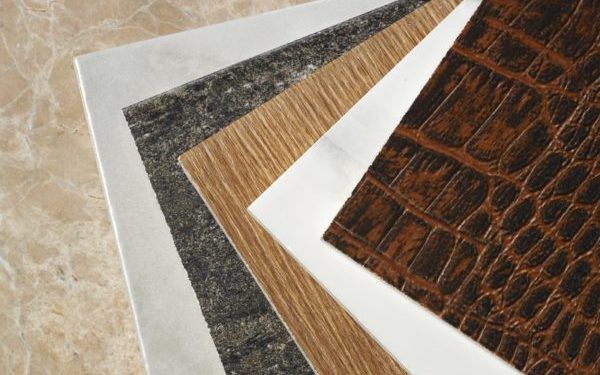
Ceramic tiles are one of the most common finishing materials. In the absence of a flat surface, tiling in the bathroom is carried out on GVL or gypsum fiber sheets. Installation can be carried out on the floor or wall, regardless of the type of coating. Sheets are securely attached to concrete, brick and other substrates, which makes this material truly versatile.
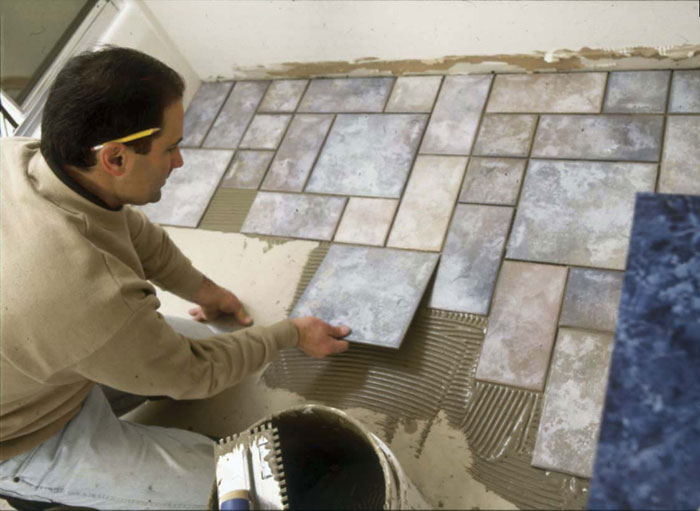
Laying tiles on GVL
In addition, GVL differ from typical drywall sheets or GKL in their reliability, durability, and long service life. Gypsum fiber sheets are characterized by high performance, therefore they are excellent as a base for laying tiles on the floor and walls. By and large, the installation of the material is no different from ordinary drywall, so no extra tools or skills are required.
Expert advice
In order to competently lay ceramics on GVL, you need to break all the work into several stages. This will allow you to accurately perform all the necessary procedures, maintain a balance between materials and use them rationally. In addition, the division into certain zones also makes it possible to most effectively distribute the load over the areas of tiling on the floor and walls in the bathroom.
GVL sheet layer
- Surface preparation. Initially, a thorough inspection of the old foundation is carried out, i.e. wooden boards are checked, defects are studied and the degree of their degradation is assessed. After identifying the flaws and inspecting them, a full or partial reconstruction of the flooring is carried out. Fastening with wooden lags is carried out, with unpleasant sounds in the form of a creak, the voids are filled with mounting foam.
- Laying GVL on the floor is a relatively easy process, however, it has its own nuances. For example, in order to reduce the consumption of building material, gypsum fiber sheets must be laid on the floor along the bathroom, and one must not forget about the dressing. In addition, the wooden base is fastened to the GVL with ordinary self-tapping screws up to 20 cm. This stage is completed by careful priming with a protective compound.
Laying gypsum boards
Installation of tiles on the floor in the bathroom is carried out using a special adhesive, the choice of which directly depends on its expiration date, as well as its purpose. Different adhesives may only be suitable for a particular surface, so an adhesive designed for plastic is not suitable for a wooden base. The manufacturer indicates all the necessary information on the packaging. It is worth remembering that ceramics on GVL need to be laid on a dry primer, and laying devices are used as for ordinary drywall - a hammer, as a rule, a spatula and others.
Seam sealing. When tiling walls and floors, grouting is carried out one day after the adhesive mixture has completely dried. Grouting of seams is carried out no faster than 3 days after the tile is laid on the surface. It should be taken into account that for the complete drying of the glue, it is necessary to create special conditions - minimum humidity, as well as to exclude contact with water. This primarily applies to the bathroom and kitchen.
Increased attention should be paid to the evenness of the seams between tiles, as well as products from GVL. It is necessary to avoid various offsets and, if a problem arises, correct them yourself. The distance between the joints of wooden rows should not be more than 20 cm.
Under the formation of a two-layer floor in the bathroom, there is a very convenient and practical way to create a quality floor.This method is perfect for applying GVL panels, which, in turn, can be glued to each other at the initial stage. The average thickness of such a product will be approximately 20 mm. Due to the specialized fold, their installation will take a small amount of time. All this makes laying fast, precise and easy.
Need to remember! To cut GVL panels to the required size, it is best to scrupulously coat all the folds with special glue, and then lay the tiles on the floor surface.
1 Nuances when working with wooden floors
A standard warm floor is a system of heating circuits that are laid under the screed. The contour can be water pipes, electrical cables or a special film called an infrared floor. In any case, the principle of action there is almost the same.
The floor is heated by the action of a circuit that releases heat. The contour is laid with a snake or a spiral. The laying principle is to cover every square decimeter of the floor so that there are no cold spots left.
Water and electric floors are laid under the screed, even if expanded clay is used to insulate the floor. The screed is made of lightweight materials with excellent thermal conductivity. That is, the screed takes on the entire temperature of the floor and fully gives its coverage. And it already, respectively, heats the room itself.
With film floors, things are different. For the most part, they are too weak to heat the screed directly. It is rather an additional source of heating, although quite powerful. They are placed immediately under the floor covering, covering only the substrate.
1.1 Features of the tree
The complexity of the situation in which the wooden floor drives us is its poor thermal conductivity. If the screed picks up heat well and retains it, gradually giving it back to the coating.
It is more difficult to warm up an ordinary board, and it gives off heat very reluctantly. That is, the influence of the underfloor heating system is limited due to the poor thermal conductivity of the material.
The next obstacle is the substrate under the coating and the coating itself. A wooden floor is rarely made from ordinary boards. Most often, the boards are a rough coating, on top of which the front is laid.
As you understand, the same parquet or laminate without a substrate with a polyethylene product cannot be mounted at all. But the substrate in most cases has the properties of a heat insulator, although not very reliable.
That is, a weak heat transfer from the boards will also be extinguished by the substrate. As a result, you will get a barely warm floor, even if it works at full capacity.
Let's also not forget the fact that a water or electric sample of a heating system, and indeed, like a film one, needs efficient heat transfer.
Another scheme for arranging the heating circuit, this time the installation is carried out on plywood
That is, the pipes must be in direct contact with the elements that are heated. Or is very close to them. With wooden floors in their standard application with similar nuances, difficulties also arise.
As you can see, the usual laying technology is not suitable here. We need to act differently, improvise. Fortunately, all technologies have long been invented, you just need to consider them and apply them in your work when designing a floor heating system.
1.2 Selection of the floor system
Let's deal with one important nuance right away. Not all heating systems of this type are advantageously used when working with wooden bases. Professional builders use only underfloor heating:
- Water;
- Electric.
Moreover, samples with high power are used, since the thermal conductivity of wood still leaves much to be desired.
For the same reason, film floors are practically not used. They are too weak, and are not able to effectively give off heat in such large quantities. And those models that can, consume too much energy.Using them becomes simply unprofitable.
Water and electric samples are another story.
Water floors are quite powerful and, most importantly, stable. With proper wiring of the heating unit and the installation of three-way valves, the cost of maintaining their normal temperature can be significantly reduced
At the same time, you should not be afraid that the floors will break through, and they will spoil the wood. As a rule, in working with them, in any case, only moisture-resistant samples are used for warming the lag floor.
Electric models, when finished with a wooden floor, are also good. Their maximum heating temperature is even higher than that of the previous version, but the problem here lies elsewhere.
In the event of a short circuit, there is a small chance of the coating igniting or of its thorough damage, which, of course, is completely unacceptable.
The coating on the film floor can be laid without preparation
Therefore, we still recommend using a water-heated floor as the best option.
Features of the gypsum fiber base
Gypsum-fiber sheets are the same drywall, only in a more advanced form. These coatings have a number of identical properties. However, there is a difference and it concerns the structure: GVL does not have a double-sided frame with cardboard. There are justifications for that. The strength of gypsum in this case is given by reinforcement with cellulose components, as well as by special additives with moisture resistance and fire resistance properties (these characteristics are higher for GVL than for GKL).
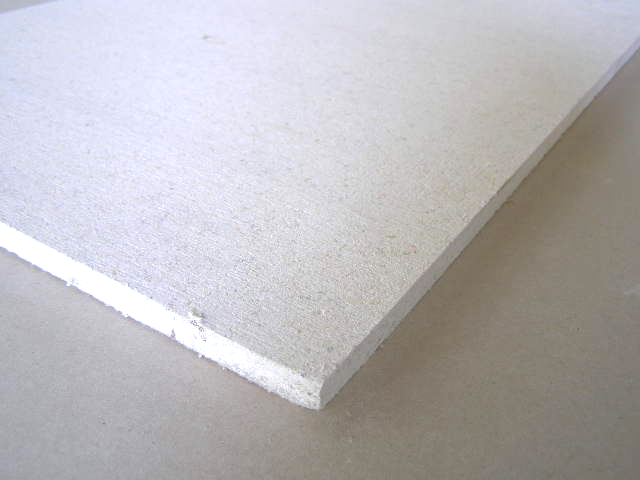
The strength of GVL is an order of magnitude higher than that of GKL, and therefore gypsum-fiber sheets are recommended for use in arranging a leveled dry screed base. When a dry screed needs to be done in a bathroom or bathroom, then a special moisture-resistant GVLV is used here.
To lay a high-quality floor with your own hands, it is important to follow the technology and have an idea of how to lay wall or floor tiles. Creating a new floor involves the following sequence of actions:
- dismantling of the old coating, repair of the base;
- arrangement of a dry screed from GVL;
- laying tiles;
- grouting.
It is possible to lay a GVL sheet on top of a wet screed. However, such work is difficult and is almost never used in modern home decorating practice.
How to lay tiles on a gypsum fiber base
Floor cladding work consists of several stages:
- Stage one. Prepare facing material.
- Stage two. Perform floor markings.
- Stage three. Prepare the adhesive composition according to the instructions.
- Stage four. Tiled floor work in progress.
- Stage five. Seam processing.
Before tiling the floor with ceramic tiles, prime the surface of the gypsum-fiber sheet and wait until the composition is completely dry. Next, we take a long cord and perform markings - connect the middle of the short and long walls and where the intersection point is the center of the floor
Correctly finding the center of the room is important if the tile is with a pattern. In addition, the markup allows you to minimize the number of cut tiles.
The installation of the first tile can be started by moving from the center of the room or from the corner.
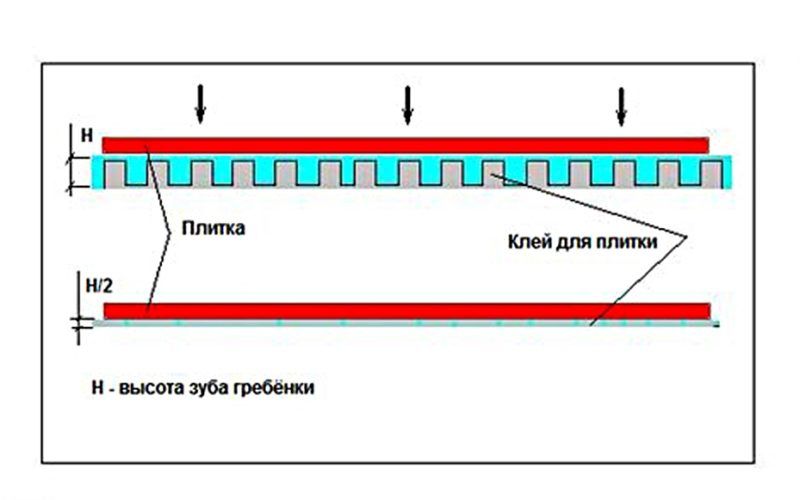
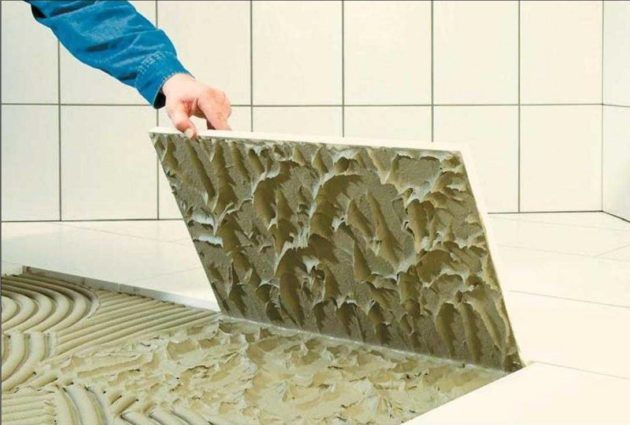
Now that the center has been found, prepare the solution according to the instructions. Next, we take a small amount of the solution with a spatula, apply it to the gvl base and smear it. After that, go through the mixture with a notched trowel. We take a tile and apply a small amount of the mixture on the wrong side, level it with a notched trowel and put it on the base. Apply the mixture on the tile in a thin layer. After the tile is laid on the mortar, press down and lightly tap with a rubber mallet.
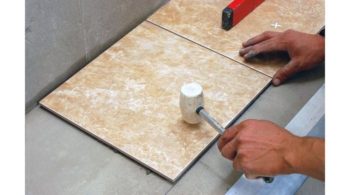 Tap the tile lightly with a rubber mallet
Do not prepare the adhesive mixture in large quantities, it is better in portions, so that it is enough to cover one square meter. During cladding, check the height of the surface; for this purpose, use the level.After laying three to four rows of tiles, take a half-hour break, this time is enough for the gypsum-fiber base to take the load. Maintain small gaps between tiles; for this, special crosses are used.
The adhesive mixture is peeled off from the seams, which comes to the surface of the tile during pressure. This is done immediately, because if the glue dries, then it is difficult to peel it off the surface of the tile. After the floor area is laid with ceramics, the floor should dry for several days. During the drying of the tiled floor, make sure that there is no moisture in the room. After the glue has dried completely, grouting is performed. To do this, you can use fine-grained sandpaper. That's all, the tiled floor is ready for use.
If you decide to lay the ceramic floor on the gypsum board yourself, but are afraid to make mistakes while working, then watch the video on how to install the tiles on the gypsum board and other surfaces:
Best Answers
NOT YET OLD:
If you put a chipboard, then the meaning of a warm floor is lost, it will not warm up the stove. If you want to lose a warm floor, then lay chipboard. It looks like you want to lay slabs to level the floor, but you can level the floor not with a slab, but with a self-leveling mixture (dry mixes), then the warm floor will fully fulfill its role as a heater.
vnemugI:
wood is a very poor conductor of heat! better screed, normal and immediately the material that you want to see on your floor.
Nick Storozhev:
nothing to do?
it:
Fuck? You don't know what to do anymore?
Haruhito:
When heated, chipboard will emit vapors of some kind of impregnation crap, formaldehyde, in my opinion ....
Vladimir Pykov:
What is chipboard for?
Expert advice
Before installing the tiles on the gvl, it is necessary to determine the stages of work, which will help to lay the tiled floor faster and better. Proper planning of work will help rationally use materials. Here are some helpful tips to help you get the job done when laying tile on gypsum board.
Preparing the surface. If the floor is wooden, then inspect the boards for defects. If they are, then get rid of them, replace the rotten boards with new ones, fix the loose ones, putty the cracks, and so on. In the case when the floor is very bad, dismantle it, because on such a flooring it is impossible to lay a sheet of gvl under a tiled floor.
Installation of moisture-resistant gypsum-fiber sheets is not difficult, but there are several nuances that need to be considered. For example: in order to reduce the consumption of gypsum sheets, you need to lay them on the base along the room, while remembering the dressing. Fastening of sheets with the base is carried out using self-tapping screws. This stage ends with priming work. As a primer, special compositions for woodworking act.
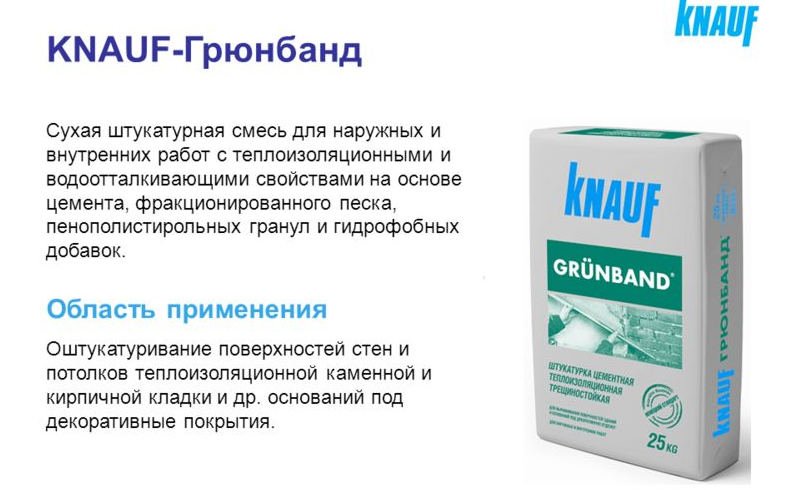
To lay the tiles securely, you need to use a special tile adhesive in the bathroom.
When choosing, pay attention to the service life, read the instructions and purpose. The fact is that if glue can be ideally suited for one surface, then it is not a fact that it can be applied to another surface.
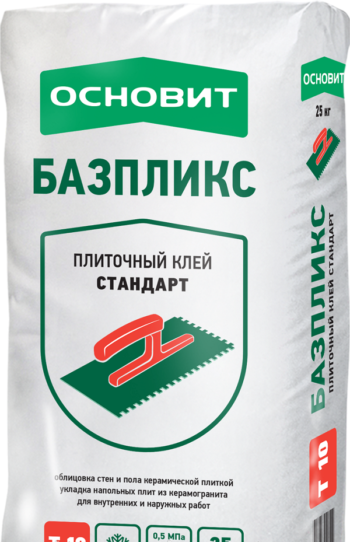 Adhesive composition for laying tiled floors on a gypsum fiber base
- Ceramic tiles should be laid on a gypsum fiber base on a dry primer.
- During facing work, grouting can be done a day after the glue has dried. Fully adhesive composition will dry in a few days, then wipe the seams again.
- The seams between the laid sheets of gvl and the seams between the ceramic tiles must be even. In the process of laying, carefully monitor that the tile does not move. If this happens, correct immediately.
It is important to close and grind the seams between the laid ceramics
The main components of the combined screed
- Hydro and vapor barrier.Such material separates the floors and other elements of the "pie" of the floor. If the floor is reinforced concrete, then a dense polyethylene film is an ideal option for a separating layer. If the sheets are laid on a wooden floor, then glassine is used.
- Soundproof and compensatory gasket. This is an edge tape that can be screwed or glued on. The material is fixed before laying the prefabricated screed around the entire perimeter of the room. Tapes are produced from isolon, basalt wool, foam and other materials.
- Leveling layer. It is created according to one of the above principles of laying a prefabricated screed from Gvl.
- Gvl plates - industrial two-layer or single in two layers, tightened with self-tapping screws and glued by hand.
Purchase of GVL slabs
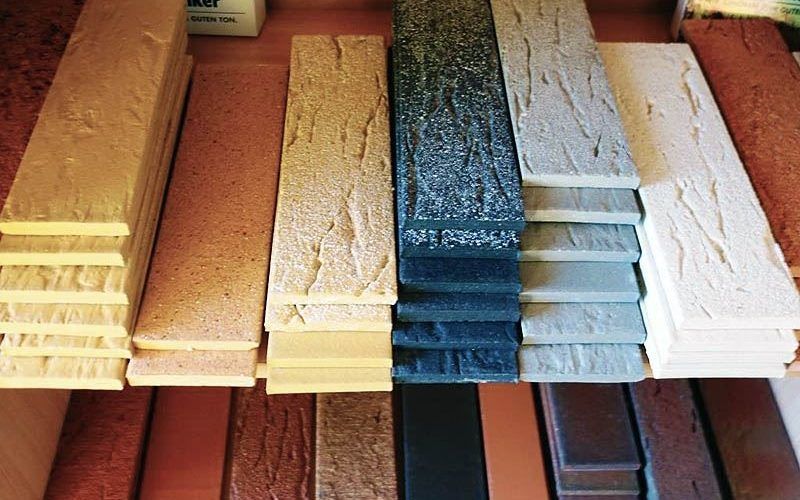
When buying gypsum fiber boards, consider the following:
- for the floor, only small-format plates measuring 1.5x1 m, the thickness of which is 10 mm, are needed. You can also find a variant of plates with a thickness of 12 mm and a width of 1.2 mm in the markets.
- gypsum fiber boards are laid in two layers, which means that their area should be twice the area of the room.
- do not forget that these plates are of two types - for walls and for floors, which in turn are divided into moisture resistant and non-moisture resistant. The first go on sale with a water-repellent solution.
If you need to insulate the floor, then it will be useful for you to know that heat insulators are divided into 3 types - polystyrene foam, backfill and fibrous.
Fibrous heat insulators. These include glass and mineral wool. Outwardly, they are similar to cotton candy, but instead of sweet threads, glass or molten granite. If you decide to make a choice in favor of heat insulators, it is better to purchase foreign-made materials, since domestic-made mineral and glass wool is not suitable for residential premises.
Expanded polystyrene heat insulators. Similar to polystyrene, have heat-saving qualities. Long service life. But there are also disadvantages - high cost and flammability.
Filling heat insulators. These include expanded clay sand, slag pumice, crushed stone from slag. Minus - low heat-saving properties. Plus - low cost.
In addition, it is very convenient to replace the old boring wooden floor in the country with Gvl material by laying tiles on it. High-quality tile laying is done on a prepared base, the surface of which can be Gvl. If the floor is without any particular errors, then the gypsum-fiber sheets are attached to the floor with a run-up to the floor of the sheet (the first row is laid with a whole sheet, and the second with a half, etc.) With this preparation, the tiling is done with ordinary glue, on which the tile is fixed. But first, the floor must be prepared.
It is imperative to drill holes in the wooden floor so that the process of rotting of the wooden raw materials does not start and there is good ventilation. Loose and creaky floorboards are additionally screwed to the logs with self-tapping screws designed for woodworking. If the floorboards are completely rotten, replace them with new ones.
Then a waterproofing film is laid on the floor to prevent moisture from entering the gypsum fiber sheets. Moisture in the floor can come from the earth or concrete floor.
If you need to increase the stiffness of the floor, then lay the sheets in two layers. Here, the seams of the initial layer should be located in the middle of the sheets of the next layer. The grooves - the joints of the sheets - are glued with glue, which is sold together with the sheets.
When facing, ceramic tiles are laid on a wooden floor using an adhesive designed for tiles, which, according to the description, is suitable for sticking tiles on GVL or GKL. Laying takes place according to the same principles as for a conventional screed.
Such floors are universal. You can immediately install the "warm floor" system when laying them.
They do not emit harmful substances, and the acidity level coincides with the acidity level of human skin.
Light weight (more than 18 kg).
Easily and quickly mounted.
The “wet process” is not used, which is very convenient during the winter period of construction and repair.
Durable: do not creak, do not bend, do not knock.
Able to withstand large point loads and weights.
They serve as an ideal barrier to the penetration of fire between the floors of the building.
They are successfully used both in low-rise buildings and in high-rise buildings.
Technology of work with GVL
- Stage of preparatory work
- GVL installation work
- GVL cladding work
Modern finishing works today cannot be imagined without a gypsum-fiber sheet (GVL). The popularity of this finishing material is due to a number of its advantages, such as environmental friendliness, strength, fire resistance, affordable cost, easy installation. Laying GVL on any surface, as well as tiling it, makes this surface perfectly even, giving an aesthetic look to any room. Therefore, this type of finishing work has become the most widespread. The technology of working with GVL consists of several successive stages.
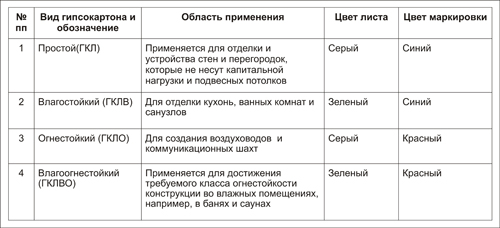
Types of drywall and their color marking.
Additional professional advice
Many years of professional experience with which experts share indicates that some manipulations should be done in a certain way, and not otherwise. After all, the secret of successful creation of a high-quality floor lies precisely in such nuances.
Tying GVL sheets together will provide them with greater resistance to stress. Fixing with self-tapping screws will allow you to hold on better;
Gypsum fiber flooring is kept indoors for about 3 days before laying the tiles, and only then covered with a primer;
When buying tile adhesive in a store, be sure to find out its capabilities with respect to gypsum fiber;
Laying tiles begin to do only on a completely dried primer. Do this using a hammer, beacons and a spatula.
In this case, all the rules described above are taken into account.
That's all the nuances that you have to face in the work.
We lay pipes for the water floor system
This can be done in two ways. Their differences lie in the design of channels for placing pipes. As a rule, installation technologies based on modules or rails are used.
For the first option, you should buy special ready-made modules from chipboard. They are already cut recesses at a certain distance from each other. These intervals depend on the expected heat transfer of the system.
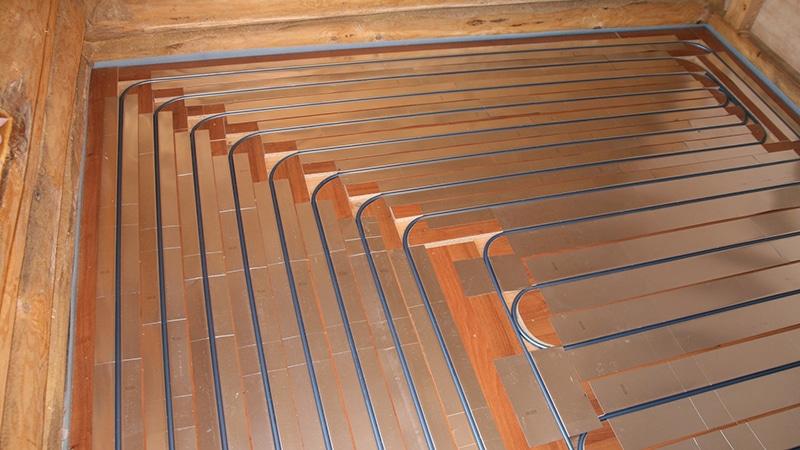
Modular laying of a water-heated floor
The kit of such a modular system, as a rule, includes everything you need: the modules themselves with grooves in them, metal plates, fasteners and pipes. It remains only to assemble the structure in accordance with the scheme attached to the product. However, flooring in a modular way is not cheap. Therefore, many prefer an alternative - the budget rack method.
It does not involve equipping channels in chipboard sheets, but stuffing rails. Planks are cut from board or plywood. The gaps between them should be equal to the thickness of the lath, since in the formed grooves the pipes, the outer diameter of which is 17 mm, must not only fit freely, but also not collapse from the displacement of wood. The width of the guide bars depends on the distance between the pipes in the manufactured structure. So, with the method of laying pipes with a “snake” in increments of 300 millimeters, a 22 millimeter plank should have a thickness of 278 mm.

Lathing scheme
Stage of preparatory work
Preparing the room and work surface is the first step in the work. Preparation of the premises includes work on the dismantling of existing equipment, the release of furniture, the dismantling of the old coating (paint, whitewash, linoleum and other types).The working surface (walls or floor) should not have large flaws in the form of cracks, crevices or voids. The screed must be strong, not have detachments. The surface must be flat to the light.
If the floor is concrete, it is cleaned, leveled and laid with plastic wrap. If the floor is wooden, it is treated with an antiseptic. The wooden floor is subject to rotting processes, the formation of fungi and must be protected as much as possible. Next, the tree needs waterproofing. Therefore, a roofing material should be laid on a wooden base, then a reinforcing mesh and a cement screed. As a waterproofing material, both ordinary film and bituminous mastic can serve.
GVL can be laid both on wooden and reinforced concrete structures, observing the features of each technology.
For this work, you will need the following basic tools and materials:
Drywall tool.
- Hammer.
- Self-tapping screws.
- Mounting foam.
- Knife for cutting GVL.
- Hacksaw.
- Tile cutter.
- Screwdriver.
- Putty knife.
- Primer.
- grinding devices.
- Level.
- Rubber mallet.
- Roulette.
- Marking cord.
- Construction stapler.
Floor device with GVL
After you lay the tape, you will need to cut off its excess - the upper edge of the edge of your future floor. The next step is to put a vapor barrier on top of the film (polyethylene), with each strip overlapping on top of the previous one.
Expanded clay should be carefully scattered on the surface covered with a film, the fractionation of which is not more than 0.5 cm. Use the level to set the guides. Your task is to level the floor.
Then we ram the expanded clay
We do this especially carefully if the expanded clay thickness exceeds 10 cm, paying great attention to places near doorways, walls and corners
The first layer of Gvl is mounted from the corner closest to the entrance. After you have laid the first layer, you need to apply PVA glue or adhesive mastic. The next layer is laid on the first only in the opposite direction!
This assembly implies that during the installation of the upper layers, parts of the Gvl floor should be fixed with fasteners and glued along the folds.
The fixing step for sheets is no more than 30 cm. In the event that your sheets are more than 1 centimeter thick, then a screw will be needed from 1.9 cm long. We chose plates 1.2 cm thick, then you will need self-tapping screws 2.3 long cm.
When installing the base floor, pay attention to the following: when gluing Gvl, you need to get rid of excess glue protruding at the seams and at the walls. We decided on a laminate or carpet, then all the seams and joints will have to be puttied
So, the second layer has already been laid, fixed and puttied, now the surface itself should be primed
Before buying a primer, we advise you to pay attention to its compatibility with the adhesive you have chosen for laying the screed
Features at work
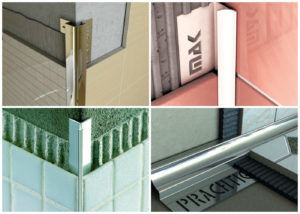 Trims for tiles
When installing a tiled floor, do not forget about the corners for tiles - trim (these are special plastic corners that can be purchased at any hardware and hardware stores). With their help, problems with laying tiles will not arise.
You should also not forget about the difficulty in performing some finishing work, namely, the corner laying of tiles. For beginners in construction and installation work, the classic butt-to-butt laying technique is suitable, where the tile, in which case, is cut off. However, even with this technique it will not be possible to get around all the difficulties, since angles with a trim of 45 are often encountered, and therefore one cannot do without a special machine - a tile cutter.
If you study all the intricacies of the classic tile laying technology, the process will go much faster, and even such questions as wrapping around corners and turns will not cause so much doubt.
Related video: Laying tiles in the bathroom on drywall with your own hands
A selection of questions
- Mikhail, Lipetsk — What discs for metal cutting should be used?
- Ivan, Moscow — What is the GOST of metal-rolled sheet steel?
- Maksim, Tver — What are the best racks for storing rolled metal products?
- Vladimir, Novosibirsk — What does ultrasonic processing of metals mean without the use of abrasive substances?
- Valery, Moscow — How to forge a knife from a bearing with your own hands?
- Stanislav, Voronezh — What equipment is used for the production of galvanized steel air ducts?
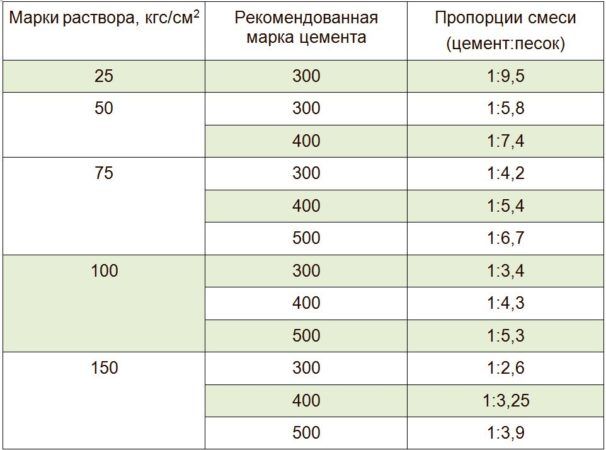
Mortars and mixtures for installing tiles on GVL
Mixtures for laying tiles are divided into 3 types:
- cement mortar;
- cement-adhesive mixture;
- solution based on powdered adhesive.
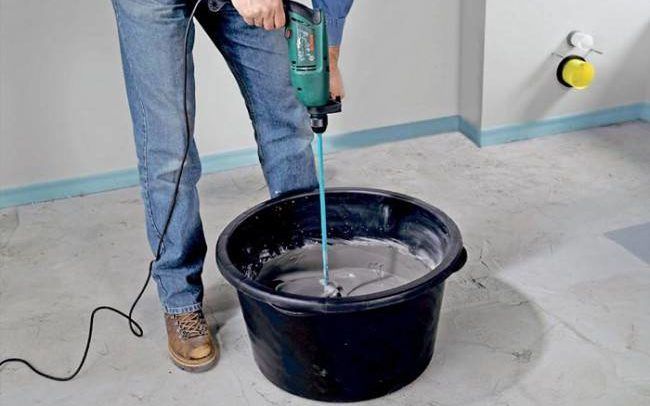
Each solution has its own limitations. It is better to plant paving slabs on cement mortar, while mixtures with the addition of PVA glue or based on dry glue are used for laying tiles in rooms. For laying tiles, you should not take cement, the quality of which will be below 300. Component ratio: 6x1x25.
To create a cement-adhesive mortar you will need:
- sand;
- cement;
- PVA.
Laying tiles on cement mortar on GVL without glue will not provide proper contact. It is better to use coarse-grained sand, before starting the procedure, it is necessary to rinse it and clean it of pieces of clay, shells and other debris, and allow it to dry completely. Otherwise, when sifting through a sieve, the wet sandy mass will pass hard and clog the sieve holes, sticking to the grate.
A dry adhesive mortar is used for laying tiles on any surface - walls, ceiling or floor. The main thing is to follow the ratios indicated on the pack of the dry mixture for the preparation of the adhesive solution. A mixture-based solution is used for the following group of finishing materials:
- ceramic tile;
- porcelain stoneware;
- cotto;
- clinker.
When choosing a dry powder for mixing the adhesive base for laying tiles, you need to pay attention to several nuances:
- expiration date of the composition;
- specifications;
- what surface it works with (although the adhesive is suitable for tiles, it must also adhere well to the surface).
GVL installation work
Stages of laying gvl on the floor
After all the preparatory work has been carried out, the remnants of the old coating have been removed, the gaps have been sealed, defects have been eliminated, the wall or floor has been treated with a primer, you should proceed to the stage of laying the GVL.
The flooring of gypsum-fiber sheets on a wooden floor, wall or ceiling has its own characteristics. So, when laying on the floor, it is necessary to file the doorway due to the rise in the floor level. In addition, it is better to first remove the wooden floor and make a screed. If it is not possible to remove the wooden floor, then the removal of rotten boards will be a prerequisite.
One of the installation options is as follows: GVL sheets should be laid on tile adhesive, fixed with self-tapping screws around the perimeter, while adhering to the following parameters: sheet thickness 10-12.5 mm; self-tapping screws 30-40 mm; step between self-tapping screws - 40 cm; the depth of fastening of self-tapping screws is 2-3 mm. Fastening sheets with self-tapping screws will eliminate cracks. After a day, you can proceed to the next stage.
Another option is the installation of GVL using metal guides (profiles). Alternatively, you can use a wooden frame made of slats, but a metal profile is more durable and reliable. The distance between the guide rails should be 40 cm. For structural strength, you can also use a plaster mesh fixed with glue and staples. Features of frameless wall cladding with a gypsum-fiber sheet consist in observing a certain gap width between the sheets (5-7 mm), sealing the joints with a special gypsum putty, and using special glue for GVL.
The technology of arranging a tiled floor on a dry screed made of GVL
The first step is to study the condition of the original floor. The old coating is dismantled.And the base is checked for defects. If the base is wooden, boards are evaluated. Either they are completely replaced or strengthened by additional fixation to the lags. Large gaps are sealed with foam.
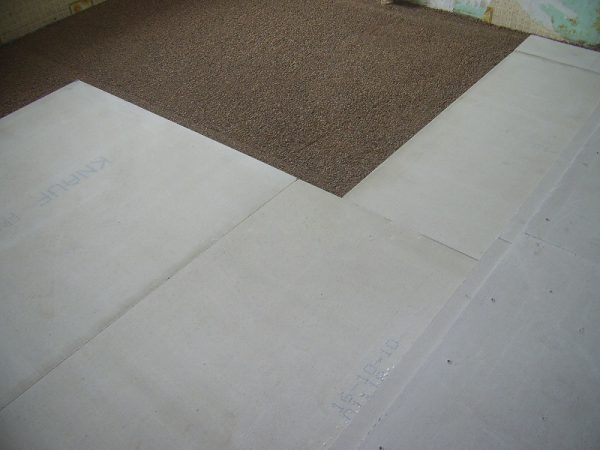
Next, GVL slabs are laid.
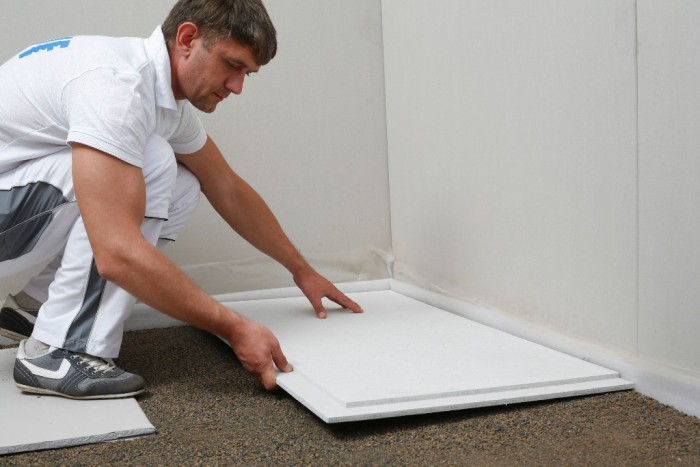
Features of laying GVL:
- The laying of sheets along the premises with the performance of dressing will significantly reduce the consumption of material;
- Fasteners for sheets to a wooden base are self-tapping screws, which are screwed in increments of 20 cm;
- Priming of GVL sheets after laying is a mandatory procedure. The primer will help hold the putty and better adhesion with the tile adhesive;
- Offset (otherwise - run-up) at the seams of gypsum-fiber sheets is clearly monitored when subsequent rows are formed. It should be within 20 cm when two rows are combined;
- The use of specialized GVL sheets (the so-called floor covering elements), which are glued together during the production process, is very convenient when forming a two-layer floor. The thickness of such plates is 20 mm, and a special fold at the ends allows you to significantly speed up and facilitate the installation process. Before laying tiles on sheets of this type, they are cut to the desired size, the folds are glued, and only then the sheets are laid on the floor surface.
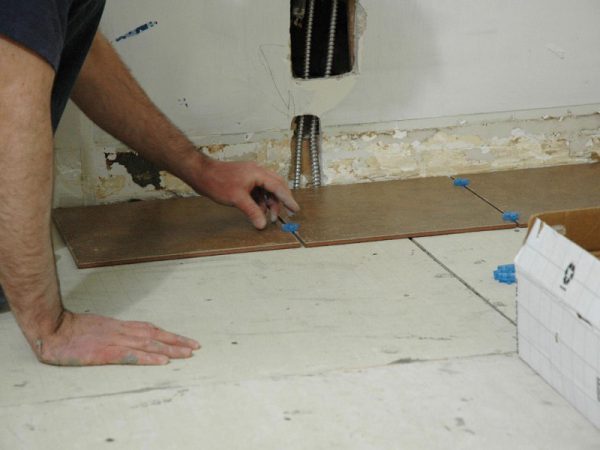
Creating a tiled finish
Next, proceed to laying out the finishing cladding of the tiles. Ceramic tiles are fixed to the base with glue, which was bought together with the tiles. When choosing an adhesive, they look at the purpose of the composition (for which surfaces it is suitable) and at the rest of the shelf life. All this information is on the package.
Laying tiles is carried out only on a primed and dry gypsum-fiber base. For work, use the following set:
If we are talking about wall tiles, then the sealing of the tile joints is started a day after the moment of gluing. This is usually enough time for the glue to dry. On the floor cladding, the seams are sealed no earlier than after 3 days. When the glue dries indoors, optimal conditions should be organized - a minimum of moisture and steam, that is, the use of water in the kitchen and bathroom is excluded.
A day after priming the gypsum-fiber base, they proceed to laying out the tile coating.
In order for the work to be argued faster, with a drawing, with the number of rows with solid fragments and with the number of rows with trimmed ones, they are determined in advance. Lay out the tiles begin either from the corner or from the central point of the room.
The diluted adhesive is applied with a notched trowel to the base. A tile is laid on top of it, pressing a little to the floor. And all the time check the evenness of the surface by means of a level.
When laying out the tiles, the gaps are observed, aligning them with special plastic crosses.
Tile adhesive is applied to individual sections, and not to the entire surface at once. Otherwise, the glue will harden before the elements are laid.
For a bathroom and a bathroom (rooms with a constantly changing heat and humidity regime), the optimal size of the seams is 10 mm. It is obligatory to control the level of tiles according to adjacent ones laid earlier. Excess glue protruding when pressing on each element is removed. The main thing is not to let them dry out, because then it will be very problematic to remove them.
When finished, take a break to let the glue dry. So, most of the work has been completed, after which they proceed to the final stage of creating a new floor - applying a special grout to the seams. Taking out the plastic crosses, the composition is simultaneously applied with a thin spatula. Excess mixture is wiped off with a damp cloth. In addition, in the bathroom and bathroom, on the apron in the kitchen, the seams can be further strengthened by treating them with water-repellent varnish.

After the grout has dried, they are engaged in the installation of plumbing fixtures and various equipment.