Solution preparation
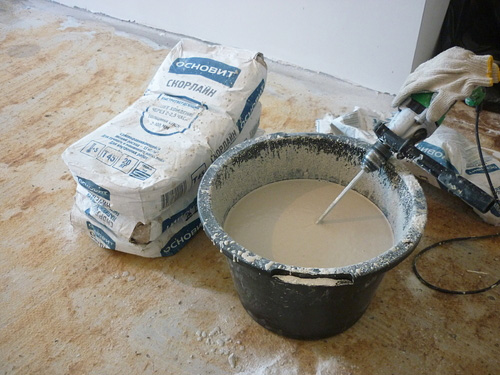
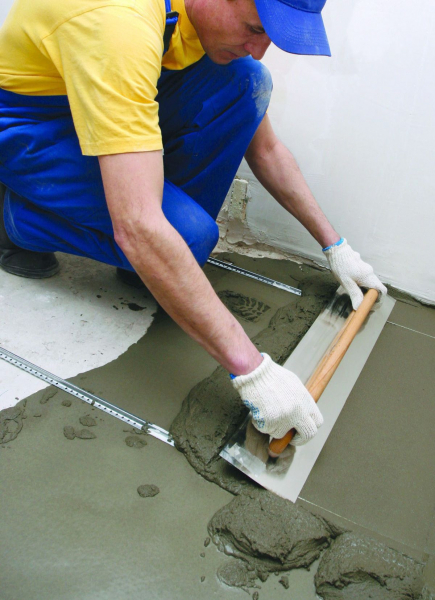
According to the instructions, the dry mixture is diluted with water and mixed with a construction mixer. Some mixtures are stirred at certain time intervals, others are diluted in the usual way.
Only strict adherence to the instructions guarantees the quality of the self-leveling floor. conversely, deviation from the manufacturer's instructions often leads to undesirable consequences. For example, an excess of liquid reduces the strength of the coating, and its lack leads to a loss of plasticity of the mixture.
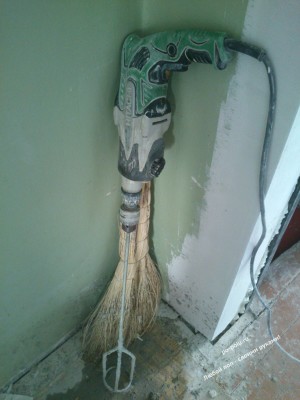
To make the solution homogeneous, first pour water, and then pour the mixture into it. Not the last role is played by the cleanliness of the container. In the absence of a construction mixer, you can mix the composition using an electric drill with a special nozzle.
The resulting mixture is used immediately after preparation, following the instructions on the package.
It is important to meet the time specified by the manufacturer, since the thickened solution can no longer be diluted with water without loss of coating strength.
Step 4 calculation of consumption and preparation before kneading
 The self-levelling compound requires one day's pouring to ensure even drying without air bubbles and cracks. So that after that you don’t have to add the mixture and not waste money, you need to correctly set the required number of bags.
For the correct consumption of material, you must adhere to certain rules:
- The general condition of the floor is assessed. If there are cracks on the coating with a depth of more than 5 cm, then the surface requires pouring with a base layer.
- The highest point on the surface is located. Its height is projected onto the walls using a level and a level, the results are marked with beacons. The biggest difference is taken as the thickness of the floor screed. If this is not done, the floor will have a large angle of inclination.
- The consumption of the mixture on the package is multiplied by the thickness of the layer and the area of the room, after which the number of required bags is found by dividing by the mass in one bag.
As a rule, the consumption of a dry mixture to a depth of 1 millimeter and an area of 1 square meter is 1.5-1.8 kg. Thanks to these data, it is possible to calculate the consumption at any layer thickness.
The next step is to prime the floor. The self-leveling floor has a thick coating, so it may not always bond well with the base coating. In order to increase mechanical adhesion, the room is sprinkled with quartz sand over the entire area. To avoid cracks already during the use of the floor, it is necessary to avoid damage around the perimeter. To do this, the room is pasted over with a damper tape, thereby isolating access to cracks and crevices between the walls and the floor.
On the video: criteria for choosing mixtures for self-leveling floors.
Surface preparation
The preparatory stage includes:
- dismantling of the old coating;
- removal of skirting boards and doors;
- cleaning the floor with a brush or a grinding device, removing glue, concrete crumbs, pieces of the mixture;
- cleaning of construction and other debris, dust and pollution;
- putty cracks and cracks.
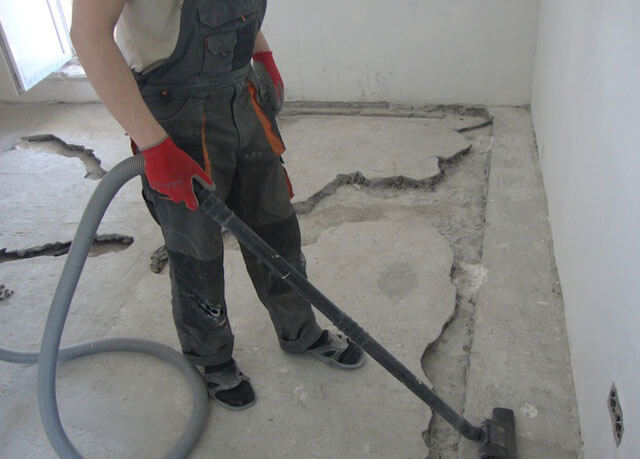
To enhance the adhesion between the layers of the screed, the old base should be moistened. Cleaning can be done with a conventional vacuum cleaner, and an ordinary soap solution is used to degrease the surface after dismantling.
Cracks and cracks are puttied with a thin and almost imperceptible layer. For this purpose, an agent containing a resin or an adhesive solution is suitable.
It is not recommended to work with open windows and low air temperature, as the result will not be the one you need.
Necessary materials and tools
From the materials you will need:
- Extruded Polystyrene Foam (EPS), sheet, thickness 30 mm;
- Plaster profile lighthouse;
- Deep penetration primer;
- Adhesive foam for EPPS;
- Polypropylene fiber;
- Cement-sand mixture.
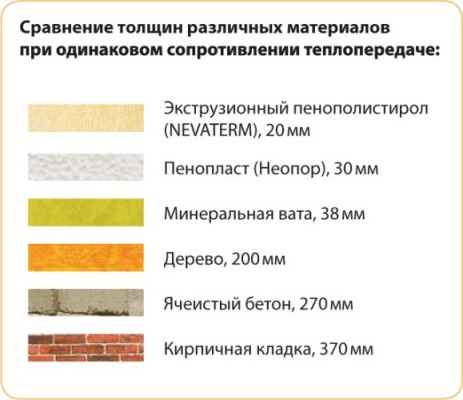
An explanation is needed here.EPS with a thickness of only 3 cm will provide thermal insulation equal to a half-meter layer of expanded clay. At the same time, it does not absorb moisture, is not affected by mold, is not combustible and is chemically inert. Price for 1 m 2 ≈130 p. For a room of 20 m 2, you need an EPPS in the amount of 2600 rubles.
But XPS sheets must be glued to the base and, most importantly, they must be fixed to each other. To do this, it is most convenient to use a special glue-foam
We use Akfix 960, SOUDATHERM and illbruck PU 010 in our work. With good adhesion, they have no secondary expansion. When using EPPS with a size of 1.5x0.6 m, one cylinder, costing 300-400 rubles. enough for a room of 20 m 2.
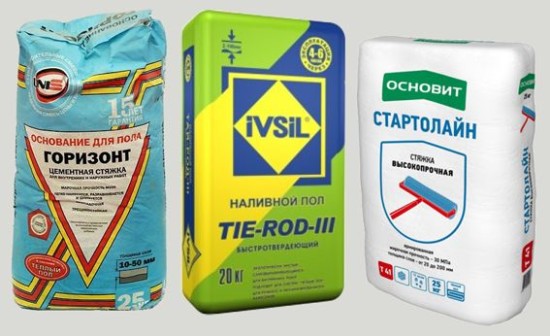
We will pay special attention to the cement-sand mixture for the screed. There are three options in total:
- "Dry screed". These are ready-made mixtures of sand, cement and various additives that do not affect the rate of maturation of the solution. A bag of 25 kg costs about 200 rubles. Those. 1 kilogram of the mixture costs 4 r;
- "Universal mix" or "Pescoconcrete". In this case, the manufacturer did not invent cunning marketing moves, but offers a pure mixture of river sand and cement. A bag of "Master Harz" 50 kg costs 160 rubles. and "Pescobeton" 40 kg - 85 p. And the price per kilogram, respectively, is from 3.2 r to 2.25 r;
- Make your own mixture. Cement M500 ≈220 r + river sand ≈100 r / bag. It turns out (220 + 3x100) / 200 \u003d 2.6 r / kg. But in this case, you are sure that the screed will contain M500 cement, river sand, and the proportions are observed. And since we took Moscow prices, they may be lower for you.
Based on the calculation that 1 m 2 screed with a thickness of 1 cm weighs ≈15 kg. This means that a layer of 3 cm will have a mass of 45 kg, at a price of 2.6 r / kg it turns out 117 r. And in a room of 20 m 2 the cost will be ≈ 2340 rubles.
In total, in order to fill the floor in a room of 20 m 2, materials will be required in the amount of 2600 + 400 + 2340 \u003d 5340. If you include polypropylene fiber, a beacon and a deep penetration primer, then the amount will increase to 6000 r.
How to fill the floors in the apartment
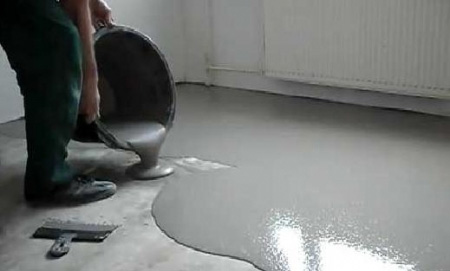
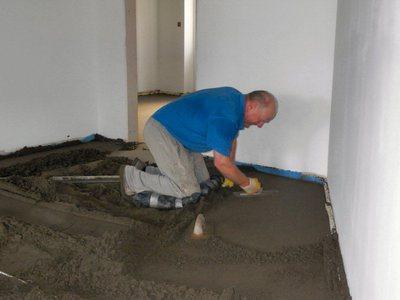
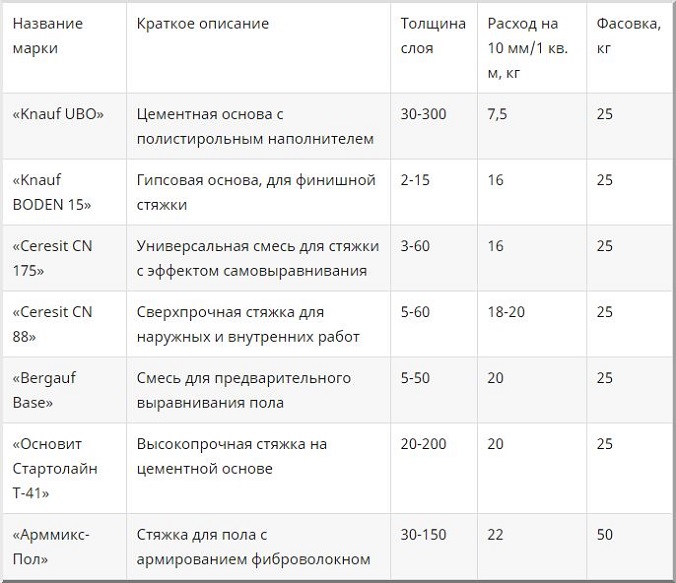
The cement mixture is poured over the floor, moving from the corner of the room. To better distribute the solution, it is necessary to level it using a spatula or trowel. This will control the thickness of the layer.
It is important to make sure that all gaps are filled so that no unevenness occurs during shrinkage. 30-40 minutes after pouring, it is recommended to wipe and finally level the surface
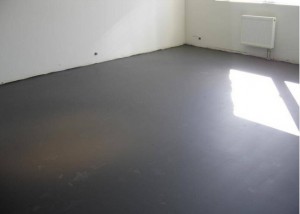
The flooded floor will gain full strength after 28 days. It dries for about 3 days, depending on the temperature in the room and a number of other factors.
There is another option. First, you can create a screed, and in order to eliminate irregularities and defects in its surface, put a layer of self-leveling floor on top. This will allow you not to suffer with the rule. Self-leveling floor mixes are diluted with water to the consistency of liquid sour cream or thick kefir. Then they are pulled apart along the base with a spiked roller.

20 photos of cats taken at the right moment Cats are amazing creatures, and perhaps everyone knows about it. They are also incredibly photogenic and always know how to be at the right time in the rules.

Top 10 Broken Stars It turns out that sometimes even the loudest glory ends in failure, as is the case with these celebrities.

Our ancestors slept differently than we do. What are we doing wrong? It's hard to believe, but scientists and many historians are inclined to believe that modern man sleeps in a completely different way from his ancient ancestors. Initially.

13 Signs You Have the Best Husband Husbands are truly great people. What a pity that good spouses do not grow on trees. If your significant other does these 13 things, then you can.

11 Weird Signs That You're Good in Bed Do you also want to believe that you're giving your romantic partner pleasure in bed? At least you don't want to blush and apologize.

Why are some babies born with an "angel's kiss"? Angels, as we all know, are kind to people and their health. If your child has the so-called angel kiss, then you have nothing.
How to fill the floors in the apartment correctly
January 29, 2014
 After completing the work with the walls, you can start leveling the floors. You can hire builders to fill the floors in the apartment. The price for these works is not too high.However, you can do everything yourself. It is not so difficult to fill the floor with concrete in the apartment.
First you need to install guide beacons, along which the floor will be leveled. The evenness of the surface of the cement screed during pouring will depend on their correct installation. They must be installed throughout the room. There are several installation rules: the first beacon should recede from the wall by 30-40 mm, and all the rest should be approximately 1000 mm from the previous one. During construction, it is impossible to do without cement. After all, this is the main building material for a larger number of construction and finishing works. For pouring, you need a good cement mortar. In the future, guide bars will be installed on it.
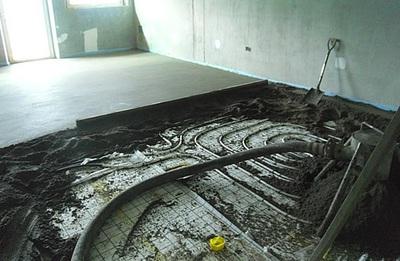
To ensure a high level of heat and sound insulation in the apartment, before pouring the floors in the apartment, a layer of expanded clay, crushed stone or sand is laid under the cement screed. You also need to lay a layer of special polyethylene film, which will provide vapor barrier. Installed beacons should be checked with a level. If they are installed evenly, then you can proceed to the next stage - pouring the floor with cement mortar.
Advantages and disadvantages of the material
Among the advantages of the composition are the following:
- It includes only environmentally friendly components.
- Mixtures such as Vetonit are quick to prepare and easy to use.
- The agent dries in the shortest possible time.
- For a good result, you do not need to make a thick layer.
- The modern market provides you with a wide range of different formulations.
Now consider the disadvantages of the product. For example, this material is much more expensive than conventional concrete screed. In addition, laying the flooring is allowed only one day after the completion of the preparatory work.
Important! Self-leveling compound has poor adhesion to dusty surfaces. If you decide to use self-levelling compounds for wood floors, then the base must be immovable.
The most popular manufacturers
There are such popular compositions:
"Vetonite". This tool is much better than the usual concrete screed. It is necessary to highlight such a substance as "Vetonit-plus". Most often, it is chosen by professionals, as the composition freezes very quickly. Please note that this product cannot be used as a top coat. In addition, painting "Vetonit" is also not recommended.
"Knauf". The presented solution is used quite often. Its characteristics ensure the demand for the material. Very popular on the market is the Knauf Baden mortar, which includes high quality gypsum. In addition, for better adhesion to the base, quartz sand can be added to the product. Modified additives make the Knauf composition easy to use and very high quality.
"Ceresite". This self leveling compound can be used on concrete and sandy substrates. After pouring such a solution, you can use wood, tile, linoleum, and even carpet as a floor covering.
I would like to say separately about the self-leveling floor "Hercules". This mixture is universal, dries quickly, has positive reviews. For example, the solution spreads well and provides a perfectly flat surface. The only drawback is that it needs to be made more liquid than what is written in the manufacturer's instructions.
What tools are needed for pouring?
Self-leveling mortar can be poured with your own hands. To do this, you need to prepare a tool:
- Mixing container.
- Drill with a special nozzle or construction mixer.
- Spatula for moving mortar.
- Needle roller.
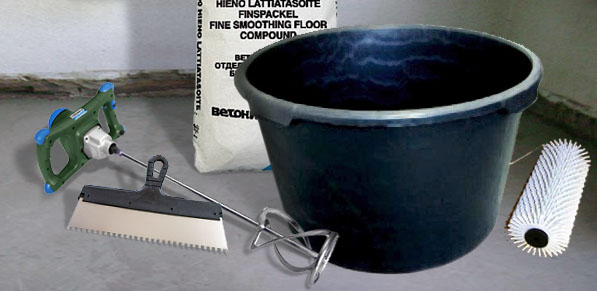
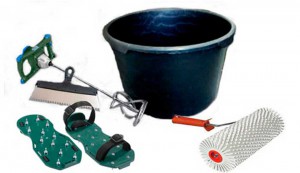 Everything you need to fill the mixture is shown in the photo. Container, mixing tool, squeegee, needle roller and wet shoes for walking on the floor surface.
Features of using the solution
So, first you need to prepare a solution ("Vetonit" in this case is the easiest to stir). The main guide to action here will be the instruction. When working, consider the characteristics of the material. During the pouring process, try to prevent drafts, and the temperature of the base should be at least 5-10 degrees.
The surface must be well vacuumed and cleaned, otherwise the solution may not stick. In some cases, the base needs to be moistened.
The pouring process should not take more than half an hour, since after this time the process of solidification of the composition begins.
Naturally, you first need to determine how much material you need to work. Usually about 25 kg of the substance is mixed, for which about 7 liters of water are used.
It will take at least three days for the screed to fully harden. During operation, errors may be made, due to which the quality of the coating suffers. For example, if the mixture does not want to spread on its own, then it needs to be helped with a spatula. Almost always, a special needle roller is used to remove air bubbles from the screed. Please note that it must have a long handle. The needles on the roller should be short. If they are long, the effectiveness of the tool is reduced.
Now you know how self-levelling compound is used. Thanks to him, you can quickly complete repairs at minimal cost.
Related Materials:
Floor Leveler Guide - From Selecting a Mixture to Pouring a Layer
Self-leveling the floor under the laminate - a practical overview
Leveling the subfloor with plywood - analysis of several ways
Overview of popular screed mixes
Among the main manufacturers of dry mixes are:
- "Knauf";
- "found";
- "Unis Horizon";
- "Stone Flower";
- "Ceresit";
- "Dauer";
- "Deluxe";
- "Bergauf";
- "Rusean".
Dry mixes
To form the carrier layer, it is best to take the "Stone Flower" with M300 cement. The solution from this mixture has a pot life of 120 hours, which reduces the risk of errors when pouring. Plus, the resulting screed is highly durable. You can also use the "Dauer Z-30" with a plasticizer for the device of the draft layer. This option is a little more expensive and sets faster, but it is allowed to work with it even in severe frost outside (optimal for work on balconies and terraces).
For underfloor heating, "De Luxe Osnova" and "Osnovit Startoline" are ideal. The first option is a little cheaper and dries faster, but the second can be used not only in dry, but also in wet rooms.
If you need a high-strength gypsum mixture for the final floor screed, then Knauf Boden 30 or Rusean Nivelir will do. The first costs less, but is stronger due to the presence of a small amount of Portland cement in the composition. And the second will allow you to fill in a thinner layer (3 mm versus 10 mm).
Choosing the optimal mixture for the screed is not a quick way to connect the dishwasher to the water supply and sewerage in the kitchen. Here you should study all the characteristics of the available proposals and clearly understand the needs (what gender is needed). Otherwise, the screed is unlikely to come out reliable and durable. And it must withstand considerable loads after complete drying.
Comparison of ready mixes
Screed technology
Next, we will briefly consider the technology of constructing a concrete screed without the involvement of professional builders. For these purposes, you can use a solution prepared both from a ready-made dry mix, and with your own hands using cement and sand.
Surface preparation
The pre-applied primer will improve the adhesion of the base to the concrete
Before proceeding with the construction of the screed, the bearing surface should be prepared:
- Prime.This will create additional protection for the subfloors and increase their adhesion (adhesion) with the materials applied above.
- Build waterproofing. For wooden floors, it is recommended to use a rolled moisture-repellent material, laid with overlapping joints. For concrete substrates, liquid mastics on a bitumen or polymer base, applied with a brush or roller, can be used.
- Warming. If necessary, a layer of thermal insulation can be arranged between the waterproofing layer and the screed itself. For these purposes, it is best to use a material with a density of more than 30 kg / 1 cubic meter, for example, extruded polystyrene foam.
Reinforcement and pouring screed
The next step is to reinforce the surface to avoid cracking the screed. A reinforcing mesh made of fiberglass or metal wire can be purchased at a building supermarket or knitted yourself from thin reinforcement.
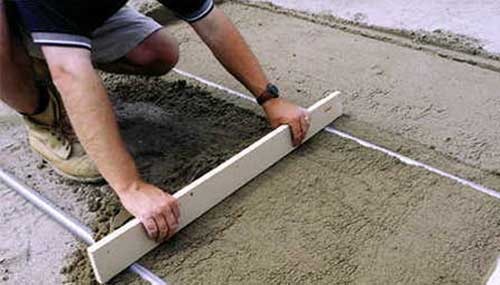
Next, using a hydraulic level or a laser level, we set the beacons. To do this, we use metal or wooden slats laid on the base surface in increments of about 1 m. For more information on the use of composite reinforcement, see this video:
Along the perimeter of the walls at the level of the fill, a damper tape should be mounted to compensate for the expansion-compression cycles of the screed when the temperature inside the room changes. After that, you can start pouring the solution into the compartments formed by the beacon rails. A long rule can be used to level the mixture.
Preparatory work
To create something new, you must completely remove everything old. Therefore, the room is freed from everything that is on the concrete slab - the flooring and the old screed. If there is linoleum or boards on the floor, then this is easy to do, much more difficult with ceramic tiles. You'll have to beat it off with a puncher. Do the same with the old screed.
If you want to leave these layers
then take into account that the screed with a thermal insulator will be 7 cm thick. Add the thickness of the flooring here and as a result, after organizing a new screed, the height of the room will decrease by almost 10 cm
Therefore, pay enough serious attention to the removal of old layers.
As a result of the work, the plate should be as even as possible. The floors are swept and treated with a deep penetration primer. In this case, the lower part of the walls must also be treated with a primer. It dries quickly enough and after a couple of hours you can proceed to the next step.
Tool preparation
First of all, it is necessary to prepare a tool, without which it will not be possible to do the pouring of the base with your own hands. Namely:
- lighthouses;
- building level;
- tape measure (preferably 8 meters long), pencil, construction knife;
- several spatulas;
- several rollers of different sizes;
- rule;
- drill with a special nozzle;
- Master OK;
- construction gloves, screwdrivers and keys, self-tapping screws.
Hardware stores sell T-profiles that can be used as beacons. They are made of aluminum, which is a fairly ductile metal. Therefore, during delivery, you need to make sure that the profiles do not break or bend. It is quite difficult to work with such material.
After the solution has dried, the profiles are not dismantled. Due to the fact that aluminum is quite light, this does not significantly increase the weight of the structure. So there is nothing to worry about here.
You can use steel pipes with a diameter of 7 cm as beacons. It is quite difficult to bend such a pipe, so the beacons will be even. In addition, they will not move during installation work. Therefore, the resulting surface will be perfectly flat.
Steel pipes are dismantled from a practically frozen screed and can be reused.In addition, the design will not contain metal elements that rust over time.
Alternatively, you can make beacons with your own hands from drywall sheets. But experts do not recommend doing this.
The level can be used water or laser. It is easier to work with laser levels, which are more accurate. A 2-meter level should be at hand.
We fill the floors in the apartment with our own hands

Not so long ago, just a few decades ago, a scientific group of building engineers invented innovative self-leveling floors that were intended for industrial premises and buildings of a fairly large size. It was the quick-drying and leveling mixtures that it was decided to use for this that showed themselves in the most favorable light. Over time, it became completely clear that such mixtures, due to simply unique performance indicators, can also be very effectively used for other purposes, for example, for filling gyms, kindergartens and gymnastic grounds, medical institutions, and so on. It remains unknown who came up with the idea that it is possible to pour the floors in the apartment in this way, and the cost of materials and work only confirmed this belief, after which the flooded floors firmly took their current place in the market.
Self-levelling floor technology
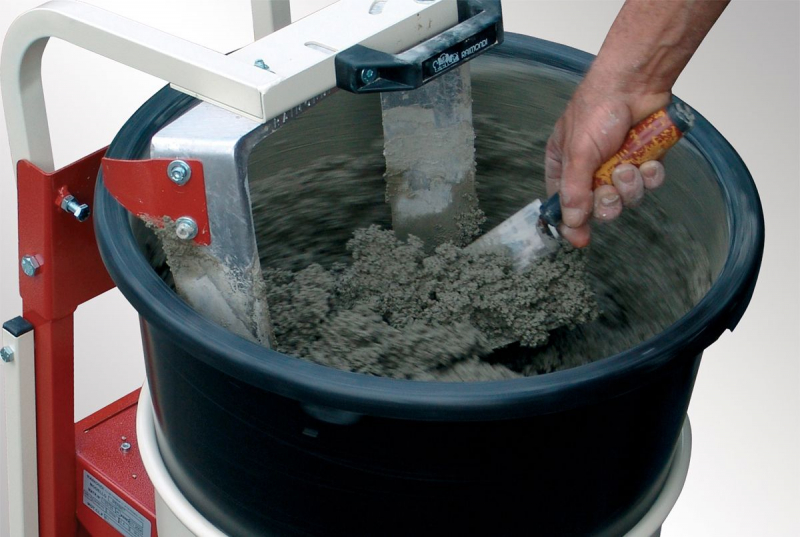
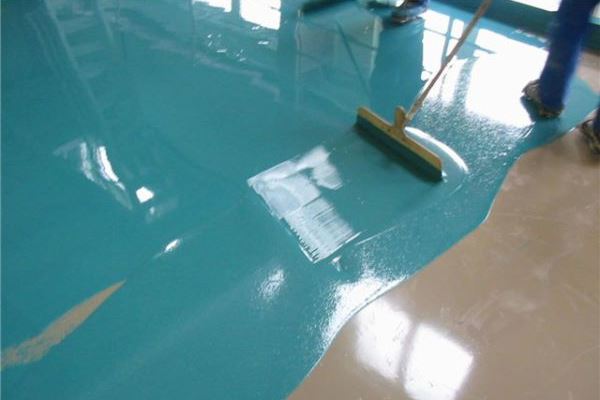
The prepared mixture is gradually poured onto a concrete base, starting from the recesses (if any). The mixture is then spread with a notched trowel and leveled with a notched roller.
Leveling the mixture with a notched roller
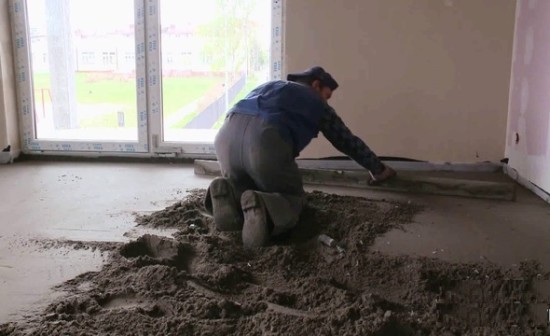
After pouring, the coating must be compacted, removing air from it. For this procedure, special shoes are used - “cats”. You can use the new floor only after it has completely dried (the time is determined according to the instructions).
Common Mistakes
- The bulk floor is called self-leveling because the plastic mixture spreads, forming a perfectly flat surface. But sometimes mixtures need help. When the spilled solution does not reach the corner, it is stretched there with a notched trowel.
- An improperly selected roller can move the mix too hard or not move it at all. The needles of the "correct" roller should be 1-2 mm higher than the fill level.
- It's best to have dampers in advance and take into account the height of the threshold, even if it seems that the threshold is high enough to keep the spilled mixture in the room. However, the slope of the room can be deceiving. In any case, the installed dampers will not interfere, but they will eliminate the need to urgently look for suitable materials to create a barrier to the outflowing mixture.
- Do not save time and make a preliminary measurement of the heights of the room. There are cases when, before pouring the mixture, some irregularities are not visible to the eye. And after the completion of the work, the protruding hillock will ruin the entire repair and require additional costs.
Despite some features and nuances, floor screed with a self-leveling ready-made mixture is a fairly simple and very interesting process that does not require professional skills and provides an excellent result.
We fill a self-leveling floor: mortar preparation and pouring technology Self-leveling floor screed: mixture composition and pouring technology Bulk floor: necessary materials and pouring technology How to make a concrete floor in a garage: requirements and pouring technology
How to fill the floor in the apartment
If you started a major overhaul in the apartment, then you should start with a long and laborious process - pouring the floor. This is especially true of old-style apartments. Modern floor finishes require a level surface. Not only the quality of the coating, but also the entire interior depends on this. Who wants to substitute improvised materials under the furniture that it stood exactly.Laminate is easily and simply placed on a flat floor, and in operation it shows itself to be a strong and durable material. While irregularities in the floor lead to the formation of cracks and deformation of the floor covering.
How to fill the floor in the apartment
Filling the floor in the entire apartment can be done independently, saving on the services of a master. Even if you are doing this for the first time, it is enough to practice in a small room and in the rest of the rooms the work will go like clockwork.
What mixes are best to use
Hardware stores offer just a huge selection of self-leveling floors, so you need to immediately decide which floors you want. Budget options are usually used as a base for other flooring. Decorative self-leveling floors will cost significantly more.

Floor filling mixes
To calculate the required amount of dry mix, you need to multiply the height of the future floor by its area. It is also necessary to carefully read the instructions for the selected mixture - it may contain information about the need for special tools or additional processing of the base.
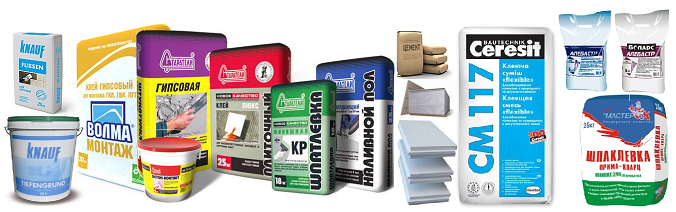
A variety of compositions choose the best brands
Regardless of the manufacturer, when choosing a mixture, be sure to pay attention to several indicators
- Best before date. Compositions that expire are often sold at a discount, but don't skimp on quality. If the expiration date is coming to an end, it is likely that during storage the material was exposed to low temperatures and humidity changes, which means that it has lost most of its useful qualities.
- Price. Too low cost of well-known brands is a sure sign that you have a fake. Today's building materials market is replete with them.
- Material color. If it has a pronounced yellowish tint, this is a sign of poor quality due to an excess of sand or clay in the composition.
In order for your floors to be filled quickly and with high quality, to serve for a long time and reliably, purchase materials from trusted manufacturers that have proven themselves in the construction market. By right, such manufacturers include the German chemical concern Henkel, in whose laboratories the famous Ceresit was developed. This is a material that works great in any conditions. Customers are amazed by the huge selection of Ceresit dry building mixes - universal and increased strength, with a high setting speed and for screeds up to 80 mm thick.

Knauf dry floor screed system
Another German company is Knauf, and another brand of mixtures of the highest quality. Knauf is famous for its gypsum-based materials, self-leveling floors from such a solution are distinguished by excellent strength and an ideal surface, you can read more about them here. Cement mortars from this manufacturer are no less popular; screeds made from them have noise-absorbing and thermal insulation properties. Worthy of attention, easy to use, high quality Russian-German project "Bergauf", domestic "Ivsil", "Bolars" and "Osnovit".
Fill technology - short and simple
Floor Filling Tool Set
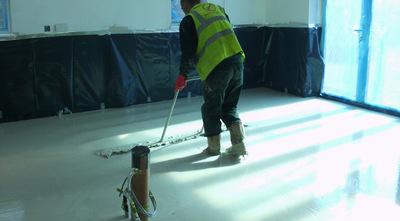
Treat the base surface with a primer to achieve better adhesion of the mortar. Mix the dry mixture with water immediately before pouring, it has a short setting time. Start pouring from the wall opposite the front door. Pour a portion of the solution and spread it over the surface with a wide metal spatula. To avoid seams, do not stop until the entire floor surface is covered with mortar.
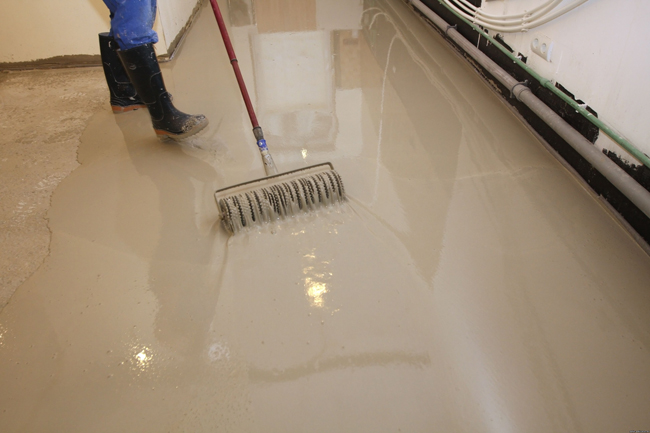
Remove air with a needle roller
To remove air, the entire freshly poured screed must be rolled with a spiked roller. Ideally, walking on the floor should be in shoes with needle soles.After a few days, depending on the curing time of the mortar, a durable, even and beautiful self-leveling floor is ready.
Do you have any questions? Ask our expert!
Our expert Nemirov Ivan Stepanovich
Civil Engineer with 20 years of experience
Screed pouring process
It is best to dilute the solution in small portions. With this approach, you can get by with a small capacity, and mixing is better. First, half a bag of cement and one and a half bags of river sand are poured. Then water is added at the rate of ≈1.5 - 2 liters. for every 10 kg of cement-sand mixture and mix thoroughly with a drill with an appropriate nozzle.
Polypropylene fiber has an exceptionally good effect on the quality of the coating. Only 50-60 gr. fibers added to 100 kg of the solution lead to the fact that after maturation of the screed, its surface will be absolutely smooth. And as a result of dispersed reinforcement, the strength of the screed increases not only in compression, but also in fracture.
The prepared solution is poured into the floor section between the first beacon and the wall. With the help of the rule, relying on beacons, they level the cement-sand mixture. It is necessary to move the rule not only forward and backward, but also with a small amplitude to the sides. The viability of the solution is 45-60 minutes. therefore, do not apply excessive force, do not put pressure on the beacons. Remember: beacons are not a fulcrum, but a means of control.
After leveling the first batch of the mixture, knead the second and fill the next section. It will be much faster to fill the floor with a solution if this stage of work is carried out together. One should prepare the solution, and the other should level the screed. In this case, all work in a room of 20 m 2 can be done without haste in 4-5 hours.
At the end of the work, do not forget to wash the tools and close access to the room for a couple of days.

How to choose a floor screed
A dry floor screed is selected according to the following parameters:
- Compressive and flexural strength - the more the better.
- Adhesion - the higher, the less chance of detachment of the screed from the base.
- Curing time after pouring in hours.
- Consumption calculated in kilograms per square meter of filling with a layer of 1 mm.
- The composition of the screed is gypsum or cement, as well as the presence of additives.
- Brand of cement and grain size in millimeters.
- Pot life - the time during which the solution seizes in an open container.
You also need to look at the purpose of the composition (the proportions of the solution depend on it) and the type of work (internal or external). The color usually goes gray.
How to make a floor screed
