Why is the shower leaking
The reasons may be different. First of all, the cabin may leak due to improper installation of the pallet
During installation, it is important that the edges of the pallet fit snugly against the wall. In addition, some types of pallets have their own characteristics that must be considered during installation.
Often shower stall constantly leaking due to a breakdown of the mixer or damage to the hoses supplying water. If this is the problem, then to eliminate the leakage, the failed elements should be replaced.
However, most often shower leaks occur due to insufficient sealing of the seams. Even at the installation stage, the shower cabin is carefully sealed, but gaps may form over time, as a result, it flows from the shower cabin. Resealing is required to fix this problem.
A clogged drain can also lead to leakage. Therefore, it is necessary to monitor the cleanliness of the pallet, to prevent various debris from entering the drain.
shower stall leaking
for many reasons. To find them out, you need to know the features of all types of cabins well. In addition, to eliminate leakage, it is often necessary to disassemble and reassemble some elements. Therefore, such work should be entrusted to professionals. Our masters will quickly and reliably eliminate any leakage, seal the seams, and also help you select spare parts. You can invite a specialist to your place by phone or online.
When the shower cabin is assembled, or even has served for more than one year, it is possible that it will start to leak. What to do in this situation, what actions to take? Let's look at the answers to these questions.
Operating procedure
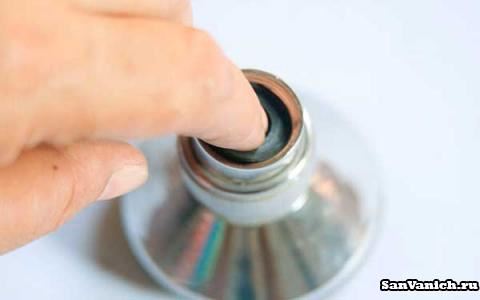
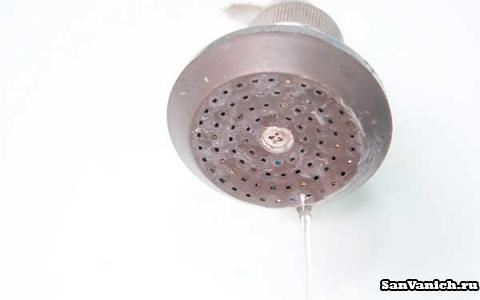
1. Using a wrench, pliers or adjustable wrench, unscrew the nut that secures the shower head. Do not apply excessive force, the nut may crack. And well, if only a nut! If you overdo it, you can break the watering can, and, worst of all, damage the pipe.
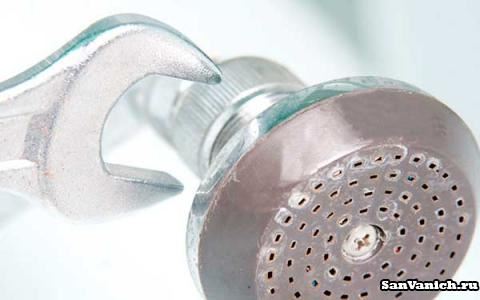
It will be easier to unscrew the "stuck" nut if you apply white lithium grease (for example, WD-40) to it and leave it for an hour. In the case when nothing helps, you should think about replacing the shower as a whole - in any case, it is cheaper than eliminating the consequences of a rough unscrewing.
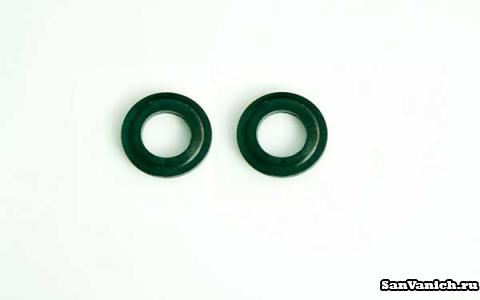
2. Remove the rubber seal that is inside the shower head and inspect it. If the pad is dry and shrunk or if it leaves black goo on your fingers, it's time to replace it.
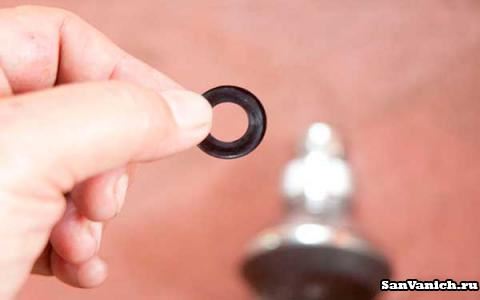
3. The new gasket must match the size of the old one. so it's better to take it with you to the store as a sample. It also makes sense to buy a few pads "in reserve".
It hardly makes sense to change them for preventive purposes, but if the shower starts to leak, the problem can be solved instantly.
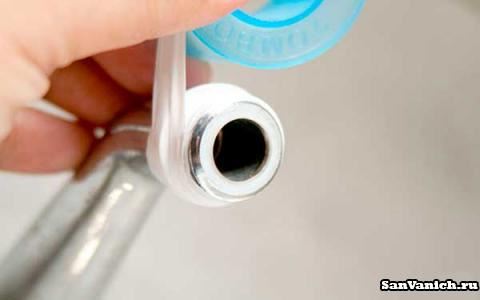
4. Install a new gasket in the shower head. It should go in with little effort. Make sure the gasket is seated straight.
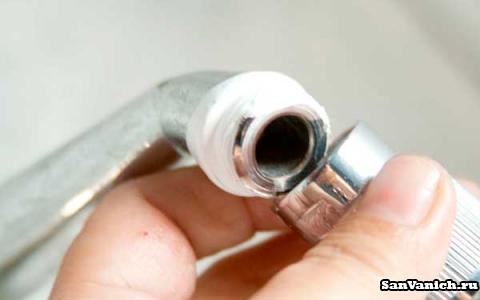
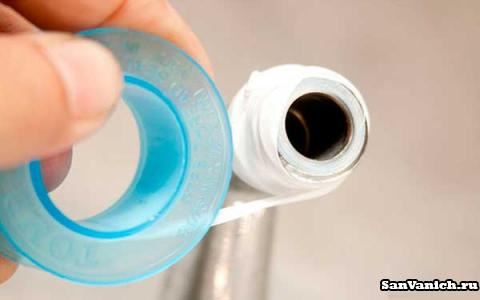
5. Wind the plumbing tape around the threads. It is better to use Teflon winding, it is a little more expensive than usual, but it fully justifies this slight difference in price. The winding must be wound in the direction of the thread
Please note that the winding is wound only on the thread, without entering the smooth parts. You need to wrap it tight enough.
The required number of turns is determined "by eye": the thread should still be noticeable, but not sharply protruding.
To start, make no more than 2 turns. Too much winding can cause a poor connection and therefore leakage.
6. Screw the shower head on by hand, without tightening too much.
7. Check! If there is no leakage or it digs just a little bit, you can tighten the wrench and tighten the nut more. Just don't drag!
8. If the leak remains, you will have to rewind the thread.It may even be necessary to choose a stiffer tape, especially if the threads are heavily worn.
9. Well, if several attempts were unsuccessful, it is worth stopping them and changing the shower.
Exactly the same steps:
- Gasket replacement
- Winding with plumbing tape
- Assembly and testing
will also be required in the event that a leak is found at the junction of the shower head and hose.
http://sanvanich.ru
Leak in cab
What to do if you see that water really accumulates under the pan? First you need to determine the cause of the leak. It could be:
A deep crack in the pallet cannot always be repaired. Sometimes you have to change the pallet.
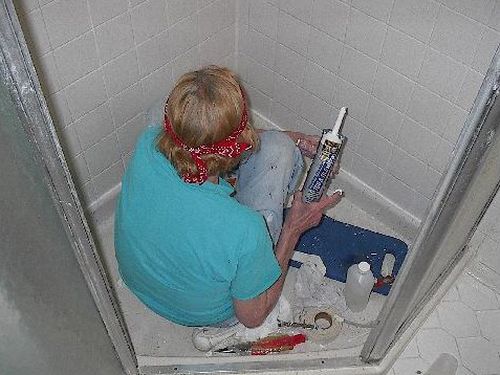
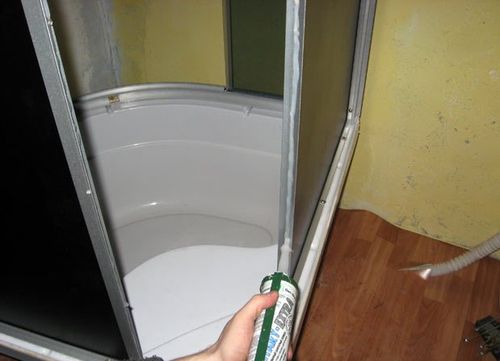
- Cabin depressurization. A very common breakdown that leads to the formation of puddles. If a low-quality sealant is used during work or waterproofing work was carried out with violations (on a dusty and damp surface), then the cracks at the joints begin to let water through. Look closely for visible defects or peeling of the sealant. If this is the problem that caused the shower stall to leak, then buy a quality waterproof sealant and isolate the flaw. Follow the instructions for applying the product indicated on the package.
- Low shower tray. This problem rarely occurs with hydroboxes, but the shower stall can leak if the threshold at the pallet is too low. Solving such a problem is almost impossible. Just try not to turn on the water to the fullest.
- The drain system is leaking. If the fasteners are loosely tightened, then the water from the cabin will not fall into the sewer, but under the sump. To make sure that it is the drain system that is leaking, you need to close its hole and collect some water (if the height of the pan allows it). Let her stand for about an hour. If there is no water under the cabin, then open the drain hole and observe. If water starts to flow out, the problem is improper installation of pipes, their weak fastening.
- Tray crack. For a long time, it can be invisible and only leak when a person with a large weight enters the cabin. It is not always possible to fix this problem. If the crack is too deep or is in a fold, the pan may need to be replaced.
- Door problem. Sometimes the doors of the shower cabin do not close tightly, have gaps and irregularities in the glass. In such cases, moisture gets on the floor. This problem is solved by a specialist when studying the cause of the leak. The cabin is always leaking in the same place. Leakage is exacerbated by the use of vertical massage nozzles in the cabin.
- Hot tub leaking. On the back wall of such a panel, very often there is no pallet under the nozzles. They are the ones that leak. It is better to discuss this problem when buying a box, since there will be no one to make claims after the purchase, and you will have to constantly wipe the puddles that have accumulated under the pallet.
A low pallet threshold can cause floor flooding, this cause cannot be eliminated.
If the shower cabin is leaking, then the first thing to do is to look for the cause. If the cabin is leaking, but you cannot independently identify the cause of the breakdown, contact the master plumber. Hydroboxes sometimes need to remove the side panel of the sump to check the condition underneath.
The situation when moisture remains invisible to the owners is more dangerous, since it will not be possible to identify the problem in time and eliminate it. As a result, mold will cover fairly large sections of the wall.
Add site to bookmarks
- Choice
- Installation
- Finishing
- Repair
- Installation
- Device
- Cleaning
What to do if the shower is leaking
-
- Choice of shower tray type
- Pallet installation
- Seam sealing
- Step by step troubleshooting
Shower cubicles can be attributed to simple plumbing fixtures. However, the ease of their assembly quite often becomes the reason for ignoring multiple tips designed to help in operation.As a result, the shower stall is leaking and users experience a lot of discomfort.
Scheme-an example of the dimensions of the corner shower.
A leaky shower cabin is a very unpleasant difficulty that you will not immediately notice. Gradually, moisture will accumulate in a specific part of the bathroom and cause harm not only to the finishing material, but also to human health due to the formation of mold.
This can be avoided only by installing high-quality air ventilation and exhaust hoods in the room. Moreover, it is desirable to carry out systematic cleaning and ventilate the bathroom. Otherwise, the problem may not be detected for a long time, which, in fact, will lead to the most adverse consequences. Thus, if you notice water flows on the walls, you should immediately take care of resolving the problem.
Pallet diagnostics and repair
The base of the booth plays one of the key roles: it holds the entire mass of a person, water is drawn into it. If the shower cabin is leaking from under the pallet, then the cause is most likely a crack that has formed. Repair work is much cheaper than replacing the entire pallet. There are some disadvantages: in most cases, the seam is very noticeable, but it is generally better to replace steel and cast iron models. If you plan to replace, then acrylic and artificial marble are best suited.
To diagnose the quality of the pallet, they check whether the bottom will bend under the weight of your body. With even a slight bending (about five millimeters), you need to change or put new stands.
Often a leak can be caused by a clogged drain system. It is advisable to take a drain with a circular cross section along the entire length. If it has a different shape, it is changed to a new one. And the sooner this is done, the better.
Leaking walls and roof
In the event that the shower cabin flows at the joints, the integrity of the structure is violated.
A leak can form at the site of soft seals - cords on the doors, or hard joints - the junction of parts.
Important! If the cord itself is leaking, then it will have to be changed without fail. It's impossible to revive him.
When the shower stall flows at the seams, the action plan is quite simple:
- unscrew the screws at the junction of the cabin elements;
- clean the remnants of the sealing agent without damaging the body of the parts itself;
- dry the places of the future joint;
- apply a thin layer of sealant;
- fasten the elements together.
Leakage at the junctions of the walls of the booth and the wall is eliminated by using additional seals - sanitary rubber, planted on the fixing silicone.
If the faucet is leaking in the shower cabin, and other plumbing elements at the junction with the shower body, then use gaskets and sealant.
General rules for sealing joints
The problem with the flow of the shower cabin can be completely eliminated on your own, if you follow the basic, fairly simple rules:
- All parts of the shower enclosure are installed in their places and fixed.
- The joints are coated with silicone sealant until the entire booth is assembled. Fasteners in relation to the place of application of the sealant should be located "outside".
- Cabin elements are sealed, connected and fastened with bolts or screws. The next step is sealing the facial seams. Silicone residues are removed in their raw form, carefully, without damaging the surface of the shower.
- Sealant is used without fail at the junction of the cabin parts with sealing gaskets. They will provide additional protection.
- If a leak is found after the shower is fully assembled, then thoroughly dry the entire surface before reusing the sealant. This will ensure that the silicone seals tightly.
- Even after the problem is eliminated, it is worth monitoring the integrity of the defective wall and monitoring the reappearance of a leak.
Attention! Tightness should have not only butt joints of the pallet and walls, fences, doors, but also additional plumbing equipment: pipes, hoses, siphon. Sometimes it is enough to replace a few parts and the problem will be solved.
But the repair work will have to be done constantly
Sometimes it is enough to replace a few parts and the problem will be solved. But the repair work will have to be done constantly.
A shower cabin is a multifunctional plumbing invention that allows us to turn a standard water procedure into a pleasure with a multi-level shower, a steam bath and even a hydromassage. But over time, any technological equipment fails and requires repair, and the shower cabin is no exception.
Causes and their elimination
Depressurization of joints
A common cause is poor-quality sealing of seams. There are always certain gaps between structural elements, especially if the installation is not done up to par. In this case, either the sealing elements should be replaced, or the sealant should be reapplied so that all loose connections disappear.
Particular attention when sealing the shower enclosure should be given to the junction of glass and frame. It is here that the leak is most often found subsequently.
It should be noted that it is better to choose silicone sealant. It can be colored, transparent or white.
Instruction
So, before processing the joints around the perimeter of the shower cabin, you should first assemble it. Further, with the help of a sealing cord (available in the kit) and sealant, all joints must be sealed so that water cannot penetrate beyond the cabin.

It should be noted that it is better to remove the remnants of the sealant while it is still wet. This will ensure that the tightness is not compromised. You can do this with your own hands, using, for example, a sharp clerical knife. Remember that before surface treatment it should be prepared. All joints must be dry and clean. This is the only way to guarantee a reliable connection of materials.
If the shower is leaking after a few years of operation, then it is worth checking the main elements for wear. After all, their integrity may be violated. Therefore, you need to use the cabin carefully, periodically clean and monitor the tightness of the connections.
Other reasons
In addition to depressurization, there can be many reasons why a shower stall is leaking. For example, the problem may be in the water supply and drain hoses. In this case, they need to be tested and a specific leak location determined. These are often the connection points. In some cases, the hoses themselves may leak. Then they will have to be changed. However, it is better to buy not the first ones that come across, but well-known manufacturers. This will ensure their reliable and durable operation. Therefore, this way you can protect yourself from such problems in the future.
Also, do not forget that the reason for the leak of the shower cabin may be its poor-quality assembly. But such problems should appear at the first start-up of water. If this happens, you need to determine where the shower cabin is flowing, and then disassemble it to this stage
When reassembling, you should pay attention to this place most of all, use the sealant more carefully
Design and necessary tools
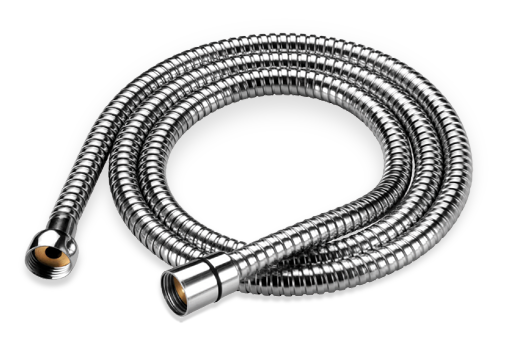
The shower hose is the most frequently broken part of the shower, most often it starts to leak.
By design, the shower hose is a rubber tube placed in a metal sleeve. The metal hose may be absent, in which case the hose is a flexible plastic tube. The quality of the rubber part will determine the life of the entire hose. The service life of the rubber tube, in turn, depends on water and is 5-15 years. Rubber has the ability to harden over time, the elasticity of the material decreases and this leads to the appearance of cracks, breaks. These tubes are easy to change.It is difficult to look for a replacement rubber tube for a shower, since most often there are ready-made replacement hoses with a metal sleeve on sale. And the cost of such a hose is not very high. Replacement is also carried out if the hose has a rusted metal sleeve. The aesthetics of such a mixer is generally worse, and rust can get on the enamel of plumbing units, which is quite difficult to remove.
Before carrying out a complete replacement of the shower hose, you can try to repair it yourself, unless, of course, it is quite old.
To repair the shower, if it is broken, you will need the following tools:
- wrench;
- screwdriver;
- knife.
Such a minimum will be a sufficient set, since there is no great difficulty in troubleshooting with your own hands.
Leakage of fixed parts of the roof, walls in the shower
Fixed parts flow less often, the reason is a violation of integrity. As a rule, water flows at the joints of parts or the inlet and outlet of cold, hot water.
Leaking cord seals
Seals can be of two types:
- soft (cord on the movement of the door);
- hard (at the junction of parts).
If the cord is leaking, resuscitation is not effective, so save time and change the cord immediately. In case of leaks at the junction of body parts, it is necessary to separate the parts by unscrewing the self-tapping screws. With the help of a sharp knife, the remnants of sealant are removed from the parts, without touching their body. Fixing the problem is simple: a thin layer of colorless silicone is applied to dry, cleaned mating parts, and then fasteners are connected.
In case of leaks at the junction of the cabin and walls, an additional seal is applied - plumbing rubber bands, which are lubricated on both sides with silicone, and then installed on the seat.
shower door leak
What to do when the shower stall flows on the door, you can see on the video. This is a fairly common question.
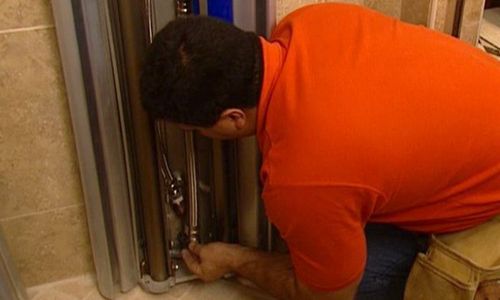
When the door is sliding, you must first check the condition of the rollers and guides. It is necessary to find the gap during the movement of the door. Sometimes it is worth removing the door and replacing the defective rollers, although they may well be repairable.
To eliminate the defects of the guides, there are no components, but it is possible to manufacture them from stainless steel, directly according to the diameter of the pipe. This method will take a lot of time and effort. But in this way they save money on the purchase of a new pallet.
Replacement will depend on the type of construction and the material from which it is made. For example, curved glass is the most expensive. But today, numerous workshops offer their services to replace curved glass doors. If the glass door is just flat, then replacing it will not be difficult.
It is very easy to fix the defects of swing doors. Often the problem is in the mounting loops. Leakage is eliminated by adjusting or replacing them.
Cleaning products
To clean the watering can of a conventional or more difficult to clean rain shower on your own, you can use:
- special chemicals;
- folk remedies.
Application of chemical compositions
How to clean the shower head from limescale and limescale? The easiest way is to use household chemicals, which are different:
- cleaning speed;
- no negative impact on the hull and other structural elements;
- economy.
The most popular means are:
- Cilli Bang;
- Toilet duck;
- Mister Muscle;

Lime remover
Cleaning of scale and lime with household chemicals must be carried out in accordance with the instructions indicated on the package, and in compliance with all safety rules.
Folk remedies
How to clean inside the watering can in the absence of specialized tools? You can use folk methods, among which are popular:
- vinegar.For the procedure, 7% vinegar is used. The use of essence is prohibited, as it negatively affects the body of the plumbing device. Cleaning is done like this:
- a solution is being prepared;
- all elements of the watering can are immersed in the solution for 6-10 hours (can be left overnight);
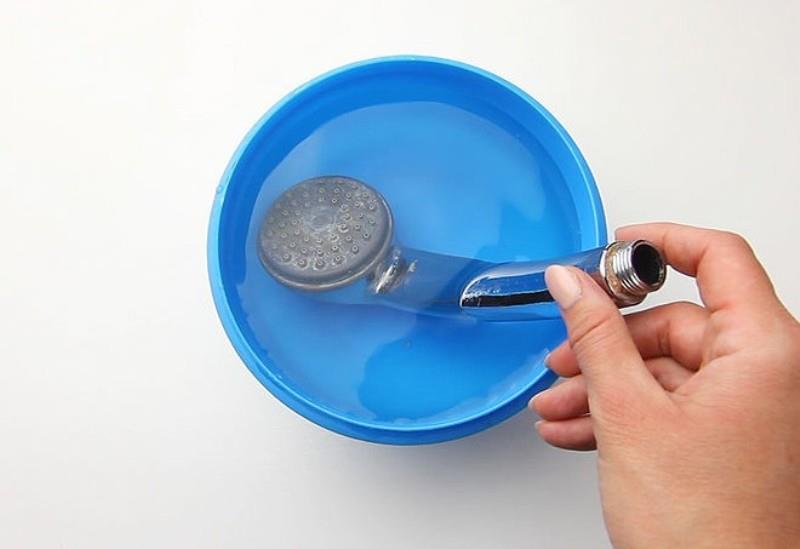
Using Vinegar
elements are washed with running water.
For greater efficiency, the vinegar solution can be periodically heated to a temperature of 55 ° - 60 ° C.
- lemon acid. Cleaning is done in a similar way. For full exposure, it is enough to soak the watering can in the solution (1 sachet of citric acid is required for 1 liter of water) for 2 to 3 hours;

Technology of using citric acid
- a solution of soda, ammonia and table vinegar. For 1 liter of water, you need 3 tablespoons of soda, 350 ml of 9% vinegar and 150 ml of ammonia. For a quick effect, it is recommended to heat the prepared solution to 60°C. Cleaning time is from 40 minutes to 1 hour;
- oxalic acid. In extreme situations, with a high degree of contamination, cleaning can be carried out using a solution of oxalic acid, which is purchased at a pharmacy. To prepare the solution, you need 1 liter of water and 2 tablespoons of acid. Processing time is 20 - 60 minutes.
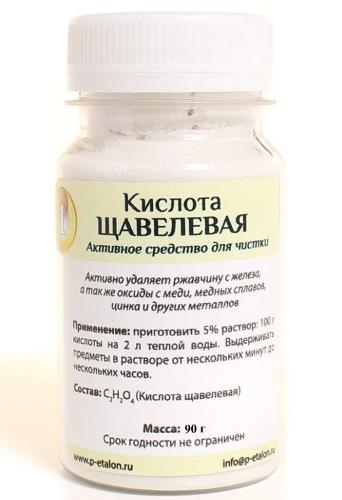
Aggressive cleaner
Cleaning of plumbing equipment by any means should be carried out exclusively with rubber gloves, as acid and other active substances can damage the skin of the hands.
After complete removal of contamination, assembly is carried out in the reverse order.
When assembling, it is important not to forget to install all the o-rings and, if necessary, seal the connections of the watering can with the shower hose
So that cleaning of plumbing equipment does not take much time, it is recommended to carry it out 1 time in 6-8 months (with filters) and 1 time in 4-5 months in the absence of such equipment.
What to do if the shower doors are leaking
Let's start with the fact that the doors are on hinges - hinged and on rollers - sliding. In sliding doors, the first thing to do is a visual diagnosis of the condition of the guides and rollers. If there is any doubt, the door is removed by removing the stoppers, and the defective rollers are replaced. Roles can be revived.
It is more difficult to reanimate the guides, since there are no components. But there is experience when parts were made of stainless steel pipes. The pipe is bent along the radius, and the pallet is fixed with through screws. The method is laborious, but you do not need to buy a new pallet.
A rare case when the geometry of a segment door is violated or destroyed. The most expensive element in showers is. The only way to reduce the cost of replacing an element is to give it to specialized glass workshops. On hinged doors, defects occur on the mounting hinges. Repair is as follows - adjust or replace the hinges.
Leak diagnostics
The appearance of puddles under the cab indicates only the presence of a problem, but does not explain the reason for its occurrence. If the inspection of the shower stall did not give an accurate explanation of the places of leakage, do not despair, but show technological tricks. Put paper under the bottom of the cabin, the drops that appear will indicate the place of their occurrence. If the drops flow down uneven surfaces, then starch will help you. Apply white powder to the dry, suspected leak site. Starch that has changed color under the influence of water will indicate the exact location of the problem.
shower stall leaking
? We'll fix it! Experienced craftsmen will quickly cope with such a nuisance. They will determine the cause of the leak and perform the necessary work to eliminate it. If you find that your shower stall is leaking, seek professional help as soon as possible. Otherwise, further operation may result in more serious problems.Our masters have extensive experience working with shower cabins, so they will fix any problems professionally and promptly. You can leave a request on the website or by phone.
Main reasons to contact us:
- Our masters work with shower cabins of all types and brands
- We guarantee an individual approach to each case
- The masters of our company will perform the work qualitatively and in the shortest possible time.
- You pay for the work only after it is completed.
- Our specialists will come to any district of Moscow and the nearest suburbs
Diagnostic work
When water flows from under the shower cabin, it can be difficult to determine the location of the leak. It is not always possible to identify a defect after a simple inspection of the booth. There is a technological trick - a sheet of paper is placed under the pallet, the drops will approximately orient at the place of leakage or indicate the direction of the search.
Starch is used to determine leakage. With it, you can detect even the most inconspicuous and hidden cracks and gaps. Turn off the water taps. The cabin is completely dried and a thin layer of starch is applied to the "doubtful" places. The product will change color under the influence of moisture, after which it will be possible to start work to eliminate the leak.
Causes of clogging
The main causes of shower head clogging are:
- low quality of supplied water. Due to the quality of the water, lime deposits form on the body of the sanitary equipment, which leads to a gradual reduction in the passage holes;
- the absence of filters in the water supply system that can trap particles of sand, rust and other pollutants at the inlet to the system.
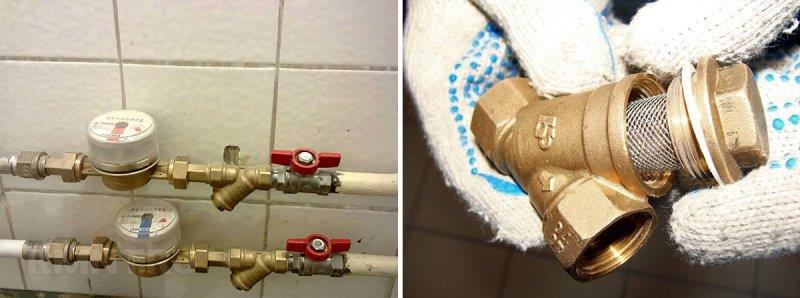
Filtration of water before supply to plumbing
To reduce the frequency of cleaning the shower head, it is recommended to install equipment made of copper or stainless steel. Plastic products are more prone to clogging with small particles, while steel products are more susceptible to corrosion.