Instructions for destroying leaks
Joint sealing
Not very pleasant enough when the shower stall is leaking.
That is why we present you the following instructions according to the solution of this issue:
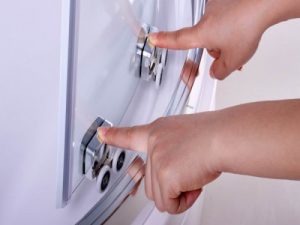
- Before finishing the junction of parts with sealants, you need to assemble the shower cabin (rails and side walls are attached to the pallet, the upper part, hoses are attached).
- All joints are coated with silicone sealants until the cabin is assembled together.
The sealant should be applied so that in relation to it the hole for the fasteners is located "from the outside". - When the sealed parts are aligned and fastened with bolts or screws, the seams on the outside of the cabin are sealed. Residues of silicone should be removed before it dries.
- Necessary finishing with sealants is subject to the junction of cabin parts with sealing gaskets.
-
In the variant of the manifestation of leakage after the complete assembly of the system, before sealing the shower cabin again, it is necessary to dry all its planes.
Only in this embodiment, the silicone will hold tightly and not let in moisture. - After the elimination of leaks, it is necessary to check the sealing of the rear wall of the cabin during operation in order to currently detect possible leaks.
Remember that not only the junctions of the pallet and the wall, fences and the pallet, fencing and moving components, but also pipes, hoses, and drain items should have impenetrable qualities.
If, for example, the cabin is leaking up to the point of use (at the stage of the test run of water), then the reason may be contained either in the incorrect assembly of the shower cabin with one's own hands or in a factory defect in detail.
If the leak occurred during the long period of operation of the shower cabin, then it is better to pay attention to which seals, pipes and connections could have been compromised. You may need to change many components
So that there is no pollution of the cabin drain, which also leads to leaks, you need to do proper care for the pallet, look after its cleanliness.
In order not to run into difficulties of this kind, you need to buy plumbing equipment from trusted manufacturers, and trust the installation of it in the hands of specialists. After all, in addition to the convenience of the shower cabins on which you stopped, it is obliged to give a high level of quality of operation.
Have you read the post on:
Causes of leaking shower
The first of them is a pallet, namely, those two holes into which water flows: a drain (below) and an overflow (above). Initially, to prevent this from happening, fittings are installed on them, which are pressed against the pallet through a rubber gasket and screwed on with nuts. And this is where it's at its weakest. Nuts can loosen over time, so the pressure becomes loose and water seeps out.
The same applies to the overflow holes. Accordingly, to determine the leakage, it is also plugged, and water is collected above this level.
If you have a non-enclosed cabin (better known as a "shower enclosure"), problems with the joint between the floor and the wall may be the cause. The most frequent of them:
- drying out of low-quality sealant;
- its washing out from long use;
- insufficiently strong pallet, which is deformed under the weight of a person, due to which the closure with the wall becomes loose and a crack appears.
The third reason is the fragility of acrylic pallets, which can crack. This can happen both during inaccurate delivery and installation, and if the weight of the person being washed is greater than the pallet can support.
The fourth reason is leakage at the joints of sewer pipes. As a rule, this is due to the drying of the rubber cuff.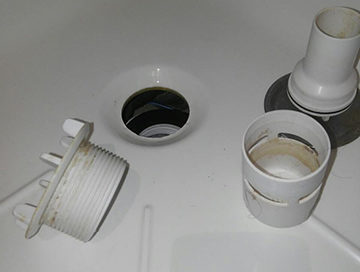
Small closed showers often suffer from the fact that a person washing in them inadvertently hits the door or wall with his elbows. From this, the plastic detaches over time, cracks form and the doors do not close tightly, and therefore the splashes come out.
The last reason is leakage at the point of connection to the water supply. As in the drain system, this can be caused by loose nuts or aged rubber gaskets. A more rare, but also occurring problem is an excess of sealant, which causes the screw-on part to burst. Also, if the shower is connected with a flexible hose, and not directly connected to the pipeline, then over time the polymer tube in it may burst.
Leaking walls and roof
In the event that the shower cabin flows at the joints, the integrity of the structure is violated.
A leak can form at the site of soft seals - cords on the doors, or hard joints - the junction of parts.
Important! If the cord itself is leaking, then it will have to be changed without fail. It's impossible to revive him.
When the shower stall flows at the seams, the action plan is quite simple:
- unscrew the screws at the junction of the cabin elements;
- clean the remnants of the sealing agent without damaging the body of the parts itself;
- dry the places of the future joint;
- apply a thin layer of sealant;
- fasten the elements together.
Leakage at the junctions of the walls of the booth and the wall is eliminated by using additional seals - sanitary rubber, planted on the fixing silicone.
If the faucet in the shower cabin is leaking, and other plumbing elements at the junction with the shower body, then use gaskets and sealant.
Shower door leak
What to do when the shower stall flows on the door, you can see on the video. This is a fairly common question.
When the door is sliding, you must first check the condition of the rollers and guides. It is necessary to find the gap during the movement of the door. Sometimes it is worth removing the door and replacing the defective rollers, although they may well be repairable.
To eliminate the defects of the guides, there are no components, but it is possible to manufacture them from stainless steel, directly according to the diameter of the pipe. This method will take a lot of time and effort. But in this way they save money on the purchase of a new pallet.
Replacement will depend on the type of construction and the material from which it is made. For example, curved glass is the most expensive. But today, numerous workshops offer their services to replace curved glass doors. If the glass door is just flat, then replacing it will not be difficult.
It is very easy to fix the defects of swing doors. Often the problem is in the mounting loops. Leakage is eliminated by adjusting or replacing them.
Assembly, preventive maintenance and high-quality materials reliability and durability of work
If the assembly of the shower cabin is done by hand, then this should be done especially carefully so that there are no problems in the future.
And for this, only high quality materials should be used, as well as regular cleaning procedures.
All this will become the key to long-term operation without problems. Additionally, you can watch a video on how to do this.
A shower leak is a rather unpleasant problem that you may not immediately notice. Moisture can accumulate in any area in the bathroom for a long time, and thus cause harm to both the finishing material and human health.
To avoid such a problem, it is important to take care of the reliable sealing of the shower cabin, and the bathroom must also have high-quality ventilation, etc.
One of the reasons for a shower leak may be cabin depressurization. This happens if the seams were sealed with a not quite high-quality sealant, which dried up and began to let water through.
Therefore, it is important to pay special attention to sealing the shower cabin.
Work process:
- - assemble construction elements
- - treat with sealant
- - remove excess sealant
- - dry
Before assembling the shower cabin, treat all joints of structural elements with high-quality sealant. It is necessary to apply sealant so that the holes for bolts and screws are located on the outside, and the sealant strip is inside.
Now that the shower sealant elements are connected, take a good look at the front side of all the elements and check all the seams.
If there is excess sealant, remove gently with a cloth. Seal the joints with gaskets with sealant, check everything well, let the seams dry.
All seams in the end must be absolutely dry, then you can check the strength of the sealing of the shower cabin. If a water leak is found, then dry the cabin thoroughly again and then only seal the leaks with sealant.
It will not be difficult to properly silicone the joints of the shower cabin if you follow a certain technology.
We prepare materials for work:
- - gloves
- - sealant
- - staple
- - adhesive masking tape
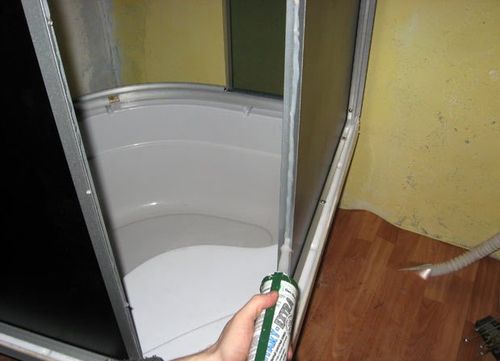
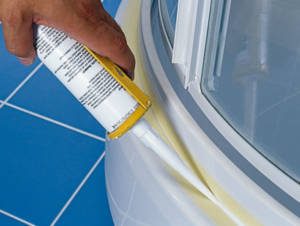
Silicone, in addition to performing an insulating function, is also a means by which the frame is strengthened on the pallet. It is worth remembering that before applying silicone, it is still necessary to temporarily fix the frame.
To do this, use adhesive masking tape, which is glued on top and bottom of the junction of the carrier profiles, as well as at the bottom of the carrier profiles.
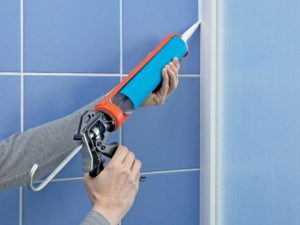
Now that everything has been strengthened, silicone can be applied, we distribute it directly from the tube to the joint. We treat the entire surface of the pallet and profiles well with silicone, when everything is filled, carefully level the silicone.
This can be done with a small staple, which is sold in all hardware stores.
We also remove all excess silicone and, as a final process, we trim and smooth all silicone fresh seams with our fingers.
To do this, fingers must be moistened in a solution of detergent, then the silicone will not stick and can be easily smoothed over the surface. Remove the masking tape when the silicone is completely dry.
Most often, the pallet leaks due to the appearance of cracks in it, which form for various reasons.
Eliminating cracks is not an easy process and first you need to find out the cause of their occurrence. Cracks can be repaired with the following materials:
- - desmocol
- – gelcoat
- - epoxy glue
We will look at how to glue the pallet with glue, and prepare the shower room before work:
- - release the pallet so that it is available for further processing
- - prepare the pan, namely clean and dry, degrease
- - prepare a special support that could hold the pallet and prevent it from bending
While applying the adhesive, wear a respirator to prevent breathing harmful adhesive and gloves, then dry the area to be treated. Carefully place a piece of fiberglass on the cracks and apply glue with a staple.
Now let it dry for about a day, then glue the cracks on the other side and let it dry again for about a day.
Before installing an already glued pallet, treat it on the reverse side with mounting foam. This process will help the pallet become more rigid and prevent future cracking.
Leakage of fixed parts of the roof, walls in the shower
Fixed parts flow less often, the reason is a violation of integrity. As a rule, water flows at the joints of parts or the inlet and outlet of cold, hot water.
Leaking cord seals
Seals can be of two types:
- soft (cord on the movement of the door);
- hard (at the junction of parts).
If the cord is leaking, resuscitation is not effective, so save time and change the cord immediately. In case of leaks at the junction of body parts, it is necessary to separate the parts by unscrewing the self-tapping screws. With the help of a sharp knife, the remnants of the sealant are removed from the parts, without touching their body.Fixing the problem is simple: a thin layer of colorless silicone is applied to dry, cleaned mating parts, and then fasteners are connected.
In case of leaks at the junction of the cabin and walls, an additional seal is applied - plumbing rubber bands, which are lubricated on both sides with silicone, and then installed on the seat.
General rules for sealing joints
The problem with the flow of the shower cabin can be completely eliminated on your own, if you follow the basic, fairly simple rules:
- All parts of the shower enclosure are installed in their places and fixed.
- The joints are coated with silicone sealant until the entire booth is assembled. Fasteners in relation to the place of application of the sealant should be located "outside".
- Cabin elements are sealed, connected and fastened with bolts or screws. The next step is sealing the facial seams. Silicone residues are removed in their raw form, carefully, without damaging the surface of the shower.
- Sealant is used without fail at the junction of the cabin parts with sealing gaskets. They will provide additional protection.
- If a leak is found after the shower is fully assembled, then thoroughly dry the entire surface before reusing the sealant. This will ensure that the silicone seals tightly.
- Even after the problem is eliminated, it is worth monitoring the integrity of the defective wall and monitoring the reappearance of a leak.
Attention! Tightness should have not only butt joints of the pallet and walls, fences, doors, but also additional plumbing equipment: pipes, hoses, siphon. Sometimes it is enough to replace a few parts and the problem will be solved.
But the repair work will have to be done constantly
Sometimes it is enough to replace a few parts and the problem will be solved. But the repair work will have to be done constantly.
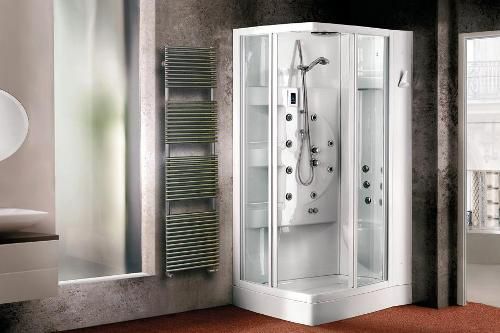
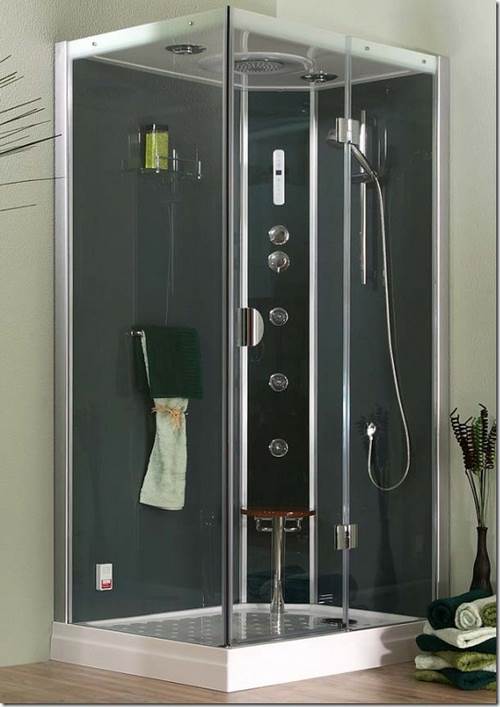
A shower cabin is a multifunctional plumbing invention that allows us to turn a standard water procedure into a pleasure with a multi-level shower, a steam bath and even a hydromassage. But over time, any technological equipment fails and requires repair, and the shower cabin is no exception.
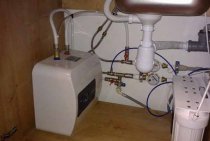
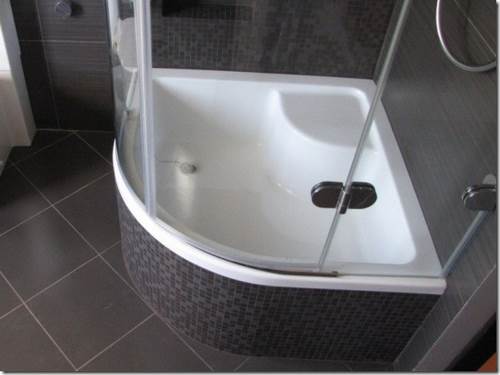
Pallet diagnostics and repair
The base of the booth plays one of the key roles: it holds the entire mass of a person, water is drawn into it. If the shower cabin is leaking from under the pallet, then the cause is most likely a crack that has formed. Repair work is much cheaper than replacing the entire pallet. There are some disadvantages: in most cases, the seam is very noticeable, but it is generally better to replace steel and cast iron models. If you plan to replace, then acrylic and artificial marble are best suited.
To diagnose the quality of the pallet, they check whether the bottom will bend under the weight of your body. With even a slight bending (about five millimeters), you need to change or put new stands.
Often a leak can be caused by a clogged drain system. It is advisable to take a drain with a circular cross section along the entire length. If it has a different shape, it is changed to a new one. And the sooner this is done, the better.
What to do if the shower is leaking
For every problem there is a solution. If it's a drain or overflow leak, tighten the nuts more tightly and experiment with collecting water again. If there is still a leak, then most likely the reason is the gasket, which tends to harden and crack over time. Will have to be replaced.
Is the corner leaking? If the sealant has dried out, loosen the fasteners, clean it off and replace it with a new one. Remove the excess with a cloth, and then level it with your fingers dipped in a solution of water and soap.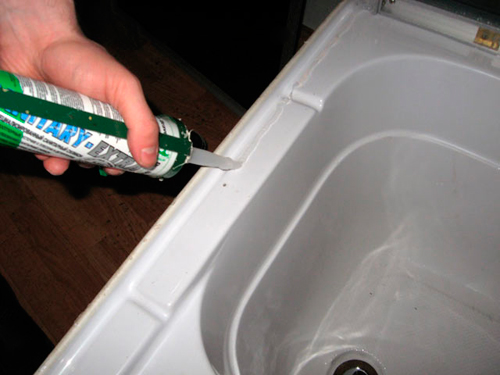
If the pallet is moving away from the wall, there are two ways to fix this problem:
- support it from below with bricks;
- a more effective method is to buy a so-called curb in a plumbing store - this is such a plastic part that is glued to the wall and closes the gap.
If large cracks appear on the acrylic pallet, it is still better to call the master.If they are small, then you can handle it yourself by following the following sequence of actions:
- sand the surface on which the crack appeared, on both sides (both internal and external);
- the second stage is washing, drying and degreasing;
- then you will need epoxy resin and a fiberglass patch - first they apply the first, then the second, then the first again, having received a kind of “sandwich”;
- the same actions are performed on the reverse side, you can additionally apply mounting foam from below so that the crack does not diverge further.
If the cuff in the sewer pipes ages, dries out and cracks, then it is simply replaced with a new one. I recommend using a sealant to make the joint more reliable.
The same sealant will help if there are cracks on the wall or door, or if the plastic elements come off.
And finally, the last problem is a water leak. Either replacing the gasket or reinstalling the system with the addition of a seal will help here. For all other damage (bursting part or pipe), the help of a plumber will be required.
As you can see, in most cases you can save money and fix the trouble yourself. The main thing is to correctly determine the cause.
Pallet installation
Horizontal pallet installation
Installing a pallet is a fairly simple process.
But often home craftsmen are faced with the problem that the shower is leaking.
And the reason for this may be improper installation of the pallet.
When starting installation work, pay attention to the following recommendations:
- The angle of the junction of the walls of the shower cabin should be equal to 90 degrees;
- It is necessary that the edges of the pallet fit snugly against the walls;
- The socket of the sewer drain must coincide with the drain of the pallet.
Pallet installation includes the following steps:
- the lower part of the pallet immediately joins the drain;
- adjustable legs are attached;
- the pallet is installed horizontally.
Pallet installation procedure
The angle at the installation site must be straight, so the walls must be leveled to the height of the pallet.
The pallet should be installed so that there is a tight fit of the edges of the pallet to the wall.
During installation, be careful not to scratch the surface.
There is a fact that the junctions of the pallet and walls are sealed with sealants, but the leak still takes place.
The reason for this may be the lack of stiffeners or a frame under the pallet, that is, under the weight of the pallet bends, and the sealant does not hold. Such a problem can be prevented even during the selection of the pallet.
Therefore, when buying, pay attention to the number of support points for the pallet
Shower Cabin Leaking Causes and Solutions
What to do if the shower is leaking? There are several ways to fix the problem, and all of them directly depend on why this leak actually arose.
Shower stall leaking from below
Leakage from below is usually the most common problem in such equipment.
So, pay attention to the bottom of the shower. It usually has one seal with a non-standard shape:
- the first "tongue" is needed so that drops of water flowing down the door do not fall into the very gap between the floor and the door;
- the second prevents water from flowing directly outside the equipment.
If the leak is minor, then most likely you just need to replace the seal with a new one, since yours, apparently, has already worn out.
In the event that this did not help, and the water goes beyond the cabin, then in this case it is necessary to install an additional threshold that will prevent water from flowing out. It is a special strip of metal or acrylic, which is attached to the floor.
This, of course, is good when the water does not flow outside the shower room, but the doors should also open easily and without hindrance.
Shower stall leaking through cracks
If the equipment leaks at the junction of the glass parts - the loop section, or at the junction of the glass to the wall, then in this case, the first thing to do is to replace the seals.It must be understood that all these rubber parts wear out over time and lose their elasticity, which leads to cabin depressurization. The optimal shelf life is 2 years. Next, it is better to purchase new items.
In some cases, you can simply walk through the leaks with silicone. But it also loses its properties over time, and therefore also requires periodic updating of the layer. When applying silicone, use only one that is designed for rooms with high humidity. It is strictly unacceptable to impose a new layer of silicone on the old one. All surfaces are carefully cleaned, degreased and only then sealed. The optimal thickness of the silicone layer is 2-4 mm.
Broken shower door
And this is, perhaps, a more serious problem. The first thing to do is to measure the lower and upper clearances. They usually need to be exactly the same. And if you get completely different values, then replacing the seals will not help you. You will have to align all the equipment, otherwise the leak will simply not stop.
For the convenience of users, some manufacturers equip their shower enclosures with convenient fasteners that can be adjusted to reduce gaps and thus align the walls in height.
So, you have learned how to fix a leak in the shower. Yes, it’s not easy and it will take a lot of time, but it’s better than having puddles in the bathtub, thanks to which you can just slip on the tiles and get significant injuries.