Step-by-step instructions for creating a pond with your own hands
After the project of the reservoir has been drawn up, the place for future construction has been selected and tools and materials have been prepared, you can begin to work. The instructions presented by us will help to perform the work in stages, which will save you from mistakes and the need to redo the object several times.
Using a rope and wooden stakes or pieces of metal fittings, mark the pond.
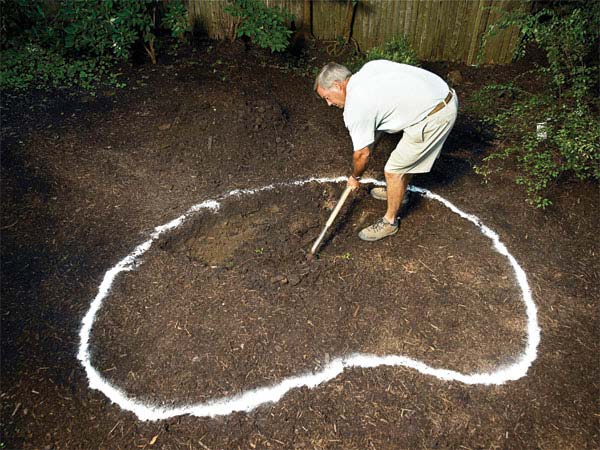
With any bulk material (sand, dry clay, screenings), draw the contour of the future pit on the ground and cut off the sod along its perimeter.
With a small structure, you can dig a hole by hand. Otherwise, it is better to hire special equipment.
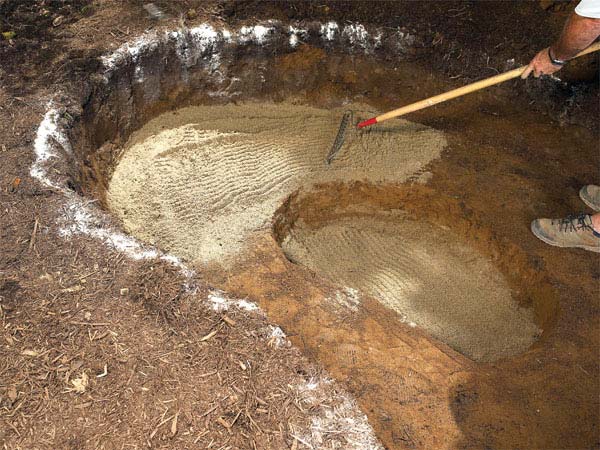
After the excavation is completed, the coastal slopes should be leveled. To do this, it is better to use a flexible water level, but you can use another similar tool (laser, magnetic or bubble). Remember - the slope of all banks should be in the same horizon.
Pay special attention to the slopes of the terraces - they should not have sharp level changes. Carefully inspect the bottom and walls of the pit
If necessary, remove sharp stones, roots and other protruding elements that could damage the film coating.
Carefully inspect the bottom and walls of the pit. If necessary, remove sharp stones, roots and other protruding elements that could damage the film coating.
On the entire surface of the bottom of the object, level and carefully compact a layer of sand with a thickness of 100 to 150 mm.
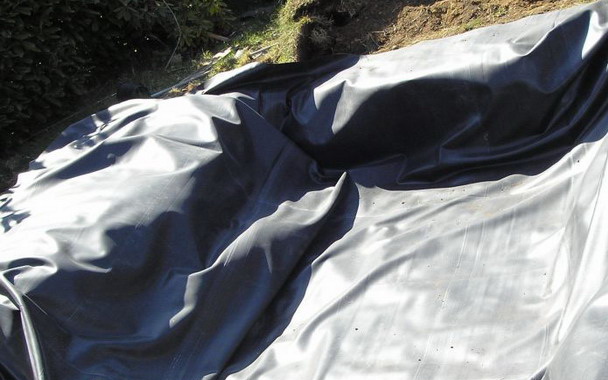
A layer of geotextile is laid on top of the sand cushion. This material will protect the PVC film from damage, so be sure to overlap the strips of material.
Spread the PVC coating, fixing its outer parts on the banks. For this, it is convenient to use bricks or stones. Please note that when filling the reservoir with water, the film will be pressed against the walls, and its outer edges will go under water. Therefore, do not rush to cut off the excess - it is better to do this work after the level reaches the upper value.
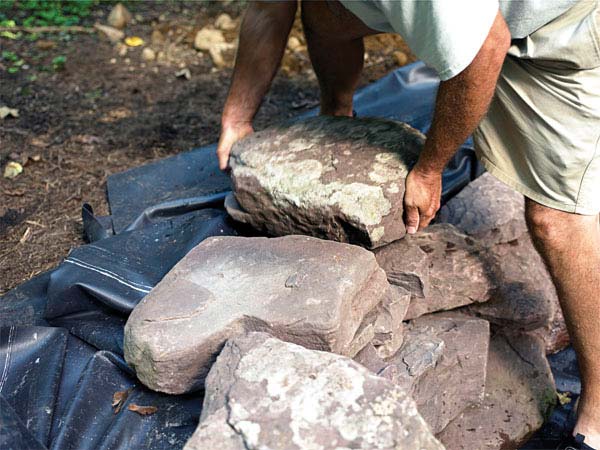
After waiting one or two days after filling the artificial reservoir, cut off the unaesthetically looking edges of the film and decorate the shore with stones, slabs and gravel.
Install a pump that will pump water to the filter. Then connect the pump to the supply and pressure pipes. By the way, the inlet and outlet lines are masked with the same stones as the PVC coating.
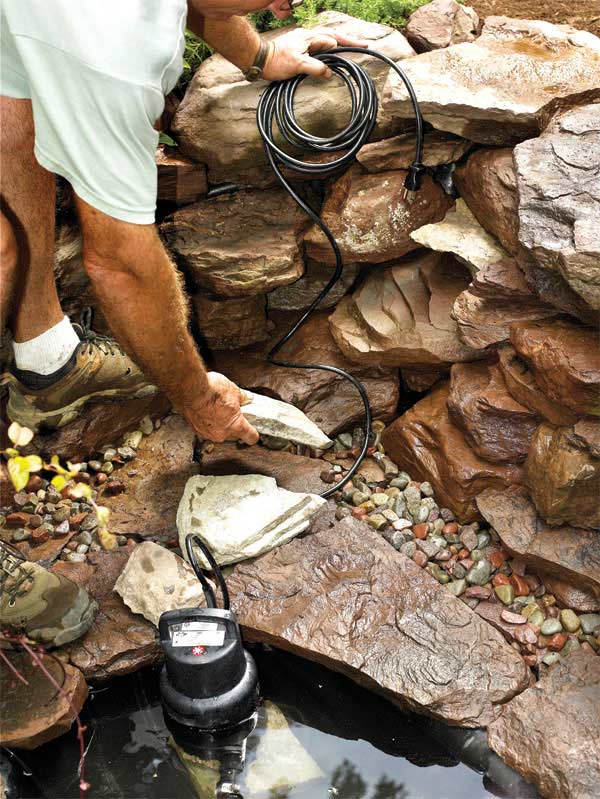
In a pre-prepared place on the shore, mount the filter system and connect it to the pump.
The release of purified water can be stylized as a small waterfall or fountain. The brook running down the stones into the lake also looks impressive.
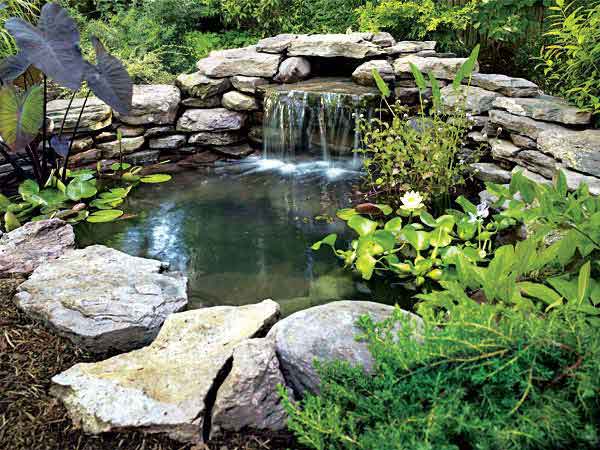
Plant aquatic plants on pre-prepared terraces. When choosing flora, do not forget about those of its representatives that actively saturate the water with oxygen - wild rosemary, hornwort, etc.
At this stage, you can consider the construction of a pond in the country with your own hands completed and you can start arranging benches, bridges and other decorative elements.
Basis of the reservoir
As we said earlier, a variety of materials can be used to build a garden pond.
Prefabricated plastic mold
Choosing a special industrial tank as the basis of a garden pond is the easiest way to equip a pond with your own hands. Manufacturers produce plastic molds of any size and configuration, so it will not be difficult to choose a product of the desired design. The only inconvenience is that the choice of overall models is limited - most tanks have an area of up to 8 square meters. m.The price of plastic molds is still high, but for your money you will get a durable tank that is not afraid of ultraviolet radiation, frost and perfectly resists mechanical stress.

PVC film
Unlike a ready-made plastic mold, PVC film provides an opportunity for creativity, since such waterproofing can be laid in a pit of any configuration. At the same time, as a bonus, you will get the opportunity to change the size and design of the reservoir during construction.
In the process of work you will need:
- PVC coating;
- bayonet and shovel;
- water level;
- red or silicate brick;
- granite screenings or fine gravel;
- sand.
In addition, you should stock up on “facing material” in advance - stones of various shapes, slabs of marble or granite, lumber.
Flower bed from the bath
Basic principles:
- it is recommended to prepare the soil for the flower bed in advance;
- always monitor drainage, fertilize plants with humus;
- the flower bed must be planted with plants with different flowering periods - so it will delight the eye for a whole season;
- place tall plants closer to the center, and lower ones at the edges;
- flowers should be selected according to the color of the buds and foliage.
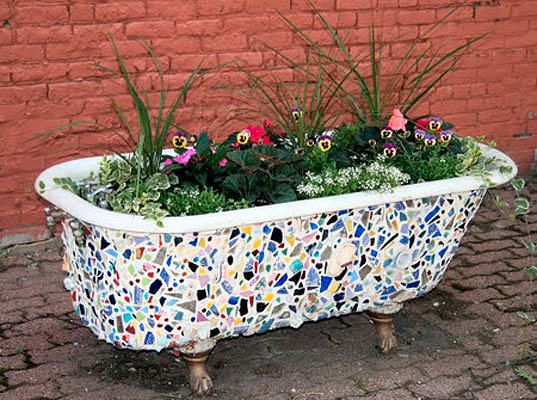
How to make a flower bed out of a bath?
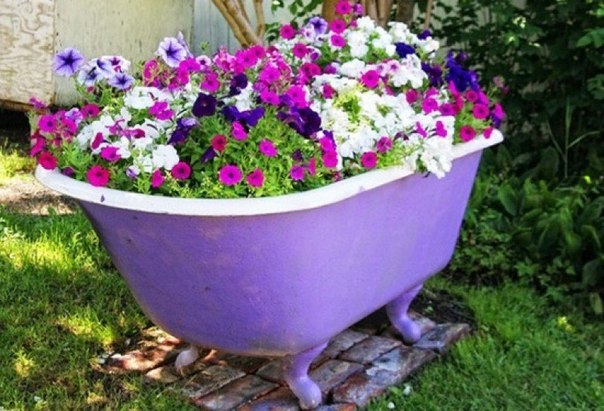
1. Paint your tub green, grey, black or any other bright color.
2. Fill it with fertile soil.
3. Plant plants (medium-sized or tall in the middle, curly at the edges).
Notes:
- if you bury the bath halfway, you get an original low flower bed;
- if it will stand on legs, decorate the facade with stones, pieces of tiles, apply a bright image.
Varieties of modern greenhouses
Today, three types of greenhouse structures can be distinguished. They differ in complexity of implementation and effectiveness.
Table. The main types of greenhouses.
| Design variation | Description, application |
|---|---|
|
Arches and film, without base, installation directly on the ridge. |
An unheated ridge with arcs installed on it and a stretched covering protective material. This is the simplest variety, which, however, is very helpful in growing a full-fledged crop of late-ripening peppers, eggplants, tomatoes and cabbage. It can protect not only seedlings in the spring, but also ensure the autumn ripening of the crop. Assembled in the spring, removed for the summer and, if necessary, re-installed in the fall. Can protect plants from frost damage down to minus two. |
|
Greenhouse with bioheating. The same arcs with a film or other heat-saving material, but on a heated bed. |
Fresh manure mixed with straw is buried in the soil at the site of the future greenhouse installation. Depth - 15-20 cm (depending on the composition of the soil, the depth is less on dense, and on loose manure it is buried deeper). Manure must be used fresh, not humus. The biomixture is covered with a layer of working soil. The greenhouse itself is characterized by a small frame height - most often, not higher than half a meter. This simple structure is used for growing early seedlings. A variant of a naturally heated structure is a buried greenhouse. |
|
Greenhouse type greenhouse. |
This is a simplified view of the greenhouse, the design of which is removable or collapsible. Can be made on a wooden frame as a base. The frame is also wooden or metal, and the protective material is film, spunbond, glass, polycarbonate. This greenhouse is made in the maximum size, but still not higher than 1.2 meters. That is, in order to work in it without bending, the shelter must be removed or opened. It is used both for seedlings and for ripening vegetables. It can have not only an arched frame, but also a gable, single-slope. |
All variations of greenhouses solve one problem - an early and good harvest.Depending on the capabilities and wishes of the owner of the site, as well as the materials available, the type of greenhouse is selected. After that, you can proceed to the step-by-step implementation of the project.
 Types of greenhouses in shape
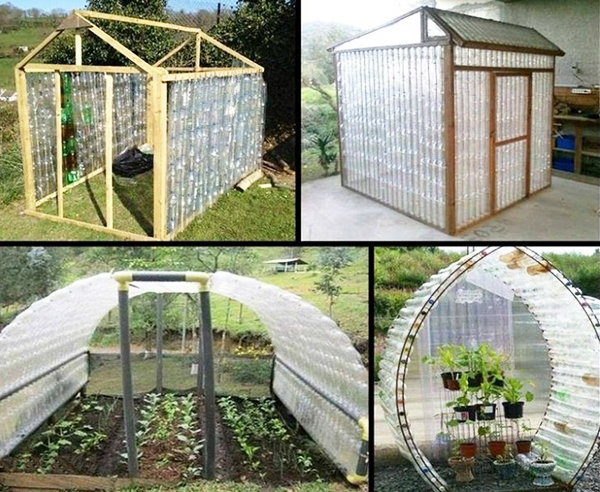 Greenhouse made of plastic bottles in the country
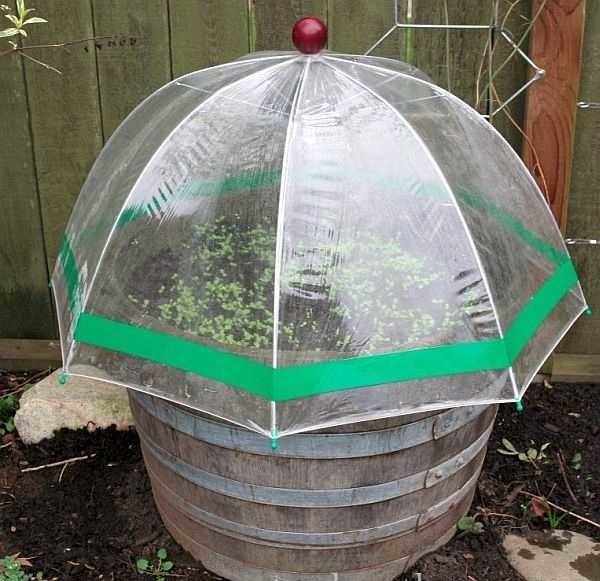 Greenhouse from an old barrel
Do-it-yourself pond in the country from a tire
A small decorative tire lake can be arranged anywhere in the garden or even on the balcony. Of course, for this you need to choose the right tire and follow our recommendations.
Do-it-yourself tire pond. Photo
Choosing a tire
The mention of a pond on a balcony or loggia is not a joke at all. For its construction, any tire from a car will do. If you want to install a mini-reservoir in the country, then you should choose larger wheels - from trucks and special equipment. An excellent option are tires from wheeled excavators, mining trucks and tractors, since their diameter allows you to get an "adult" pond.
In the found tire, one of the sides should be cut off. For these purposes, you can use a jigsaw, a hacksaw for metal or a sharp knife.
Instructions for making a pond from a tire
In accordance with the dimensions of the tire, we prepare a pit of the required diameter and depth. If the plans for the construction of the pond include elevations on the banks, then the pit is made smaller. The bottom is leveled and covered with a layer of clean sand, after which it is carefully compacted. If possible, the sand is covered with a protective material (geotextile, non-woven needle-punched roadway), after which the tire is laid.
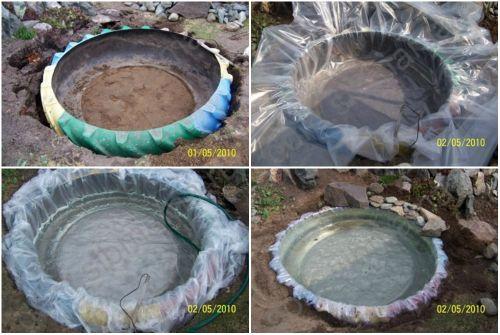
The entire surface of the wheel is covered with waterproofing. In its quality, it is best to use a special PVC film for waterproofing pools. Please note that the edge of the covering material should protrude beyond the lake by at least 50 cm. It is not recommended to use polyethylene - the sun's rays quickly render even a special heat-stabilized material for greenhouses unusable. As a rule, after 1-2 years of operation, the pond will leak and the film will have to be replaced. However, if it is not difficult for you to replace the waterproofing with the onset of warm days, then it is impossible to come up with a cheaper solution.
In order to well level the film on the walls of the reservoir, it is necessary to perform this work while filling the container with water. After that, the material is spread outside the tire and sprinkled with sand or gravel. This will make it possible to hide unpresentable details from the eyes and prevent the covering material from slipping into the pond. In addition, bulk materials will protect the film from the sharp edges of the stones that will decorate the shore.
Decorate the "coast" line with stones. Of course, the size of the cobblestones must be selected in accordance with the size of the tire. First, expressive stones of large dimensions are laid, gradually supplementing the overall picture with a medium-sized boot. After that, a pond built with your own hands from tires is ennobled with screenings, pebbles or small gravel. A separate case can be considered a pond from a Belaz tire, in which you can swim. It is necessary to decorate such a water body, taking into account the fact that you will have to approach it with bare feet, so it is best to choose stones of small size and rounded shape.
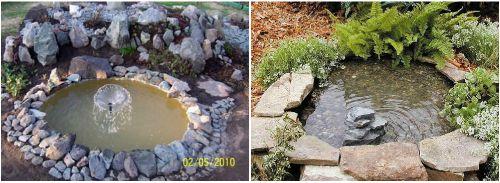
After the construction is completed, ornamental plants are planted along the line adjoining the tire to the shore, a submersible pump with a nozzle in the form of a fountain, lighting, etc. are installed. All this will ennoble the appearance of the reservoir, make it elegant and attractive.
Pond in the country from the bath
An artificial reservoir from an old cast-iron bath is a wonderful way to design a summer cottage. It brings a special harmony to the overall atmosphere, allows you to use the most unusual elements for decoration.
Peculiarities:
- a pond created from an old bathtub is quickly and easily installed;
- when designing it, you do not need to use expensive building materials;
- aquatic plants, stones, fish, etc. are used for decoration;
- the water in the tank does not change, but simply topped up as needed;
- in winter, the pond is left in the same form, not covered with a film.
Where to place:
- choose a dry area with solid soil;
- give preference to a place where there is shade and sunlight;
- The best area for a pond is near trees.
Installation of a bath in a summer cottage as a reservoir
1. The first thing to do is to dig a foundation pit. The depth of the pit should be slightly larger than the size of the container (about 30-40 cm).
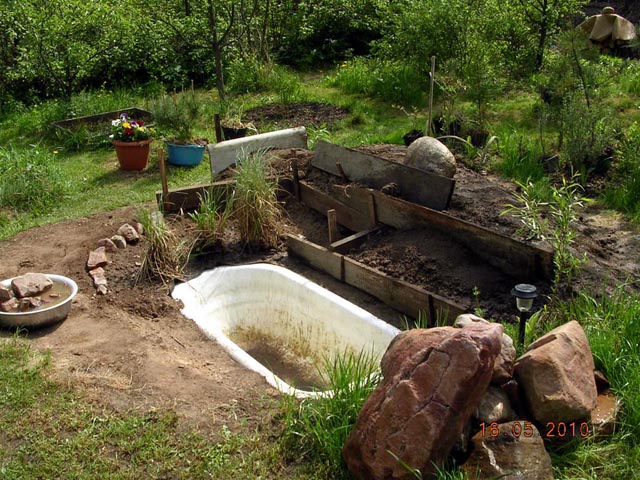
2. Then we remove the sod around the pit (for the same 30-40 cm). Soil removal width - 0.5 m.
5. We dilute the tile adhesive, process the inner surface of the bath with it. The solution can not be leveled - so the bottom of the pond will look more natural.
6. Leave the container to dry well for about a day.
7. We take the chain-link mesh and cut it into pieces. We close the upper perimeter of the bath, walls (by 1/3).
8. At the corners of the grid we fix the wire rings. They should protrude perpendicular to the walls of the bath.
9. We dilute the cement mortar, process the mesh with it. On top we place crushed stone or small stones.
10. We spread dry clay on the bottom of the bath with a layer of 5 cm. Pour water. The solution should turn into a semi-liquid (creamy) mass. We coat the walls of the bath with this composition.
11. Dry the clay for several hours. Then we proceed to the gulf of water (the jet should run in a small stream).
12. Dial a couple of buckets of water with silt from a natural reservoir and pour it into the bathroom.
13. Plant plants around the perimeter of the pond, place large stones.
Notes:
- the water in the pond does not change, but is only topped up as needed;
- before frost, place a couple of plastic bottles half-filled with water in the pond - they will not allow the pond to freeze and ruin the walls of the bath;
- if you don't want to bother, leave the tub in the garden or next to the patio. Decorate it with bright paint, fill it with water, plant pond plants on the bottom (they can be placed in containers).
Cucumbers in the bathroom
Some gardeners successfully grow cucumbers and other vegetables in old bathrooms.
In this case, it is more convenient to install the structure near the fence, so as not to worry about the support for the lashes. However, it is possible to provide for individual support or do without it altogether.
From the bottom side, it is desirable to drill additional drainage holes so that excess moisture does not accumulate. You need to install the structure in a sunny place.
Lay a layer of broken bricks, expanded clay, stones or any other suitable drainage at the bottom. Next, lay a layer of nutritious compost mixed with plant residues, and on top of it - fertile garden soil (do not forget to decontaminate the soil).
Seeds are planted on such a bed in early May. At first, until constant heat is established, it is advisable to cover the crops for the night.
The dark outer walls will attract the sun's heat, causing the organic compost layer to rot more actively and generate internal heat. Under such conditions, the first harvest can be obtained already a month after the appearance of the first shoots.
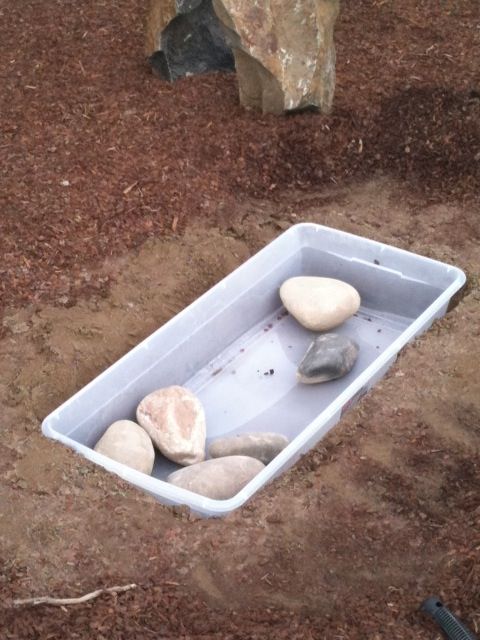
small pond
Remember, we used a plastic basin to create a small pond. Here the idea is the same, only now an old bathtub is used at the head of the composition. Be sure to properly seal all drain holes before doing this.
It is desirable to dig in a bath just below ground level. Thus, you can easily decorate the sides with grass, stones, moss, tiles, pebbles and other decorative elements.
After a while, the internal walls of the bath will begin to become covered with natural plaque, and your pond will look even more natural.
At the end of autumn, you can not even drain the water. It is enough just to immerse 2-3 plastic bottles half-filled with sand into it.
Differences between a greenhouse and a greenhouse
Designs that have the same functions have several significant differences.
- Greenhouses below 2 meters in height are usually not installed. Greenhouses are rarely built higher than 1.2 meters.
- Greenhouses are real "houses" for plants, stationary, with a fixed frame, walls, roof. The greenhouse is only a "temporary shelter" that has a removable portable structure.
- You can operate a greenhouse, especially a heated one, all year round. The greenhouse, on the other hand, is characterized by a short period of operation (usually early spring - by May there will be no trace left of greenhouses in the summer cottage).
Polycarbonate greenhouse
Conclusion
Do not rush to throw the old bathroom in the trash. It will serve faithfully at the dacha for many more years, causing surprise and delight among the neighbors about your resourcefulness and ingenuity.
Making a small pond with your own hands in a summer cottage from an old bath is not at all difficult. There have already been many instructive articles written about this. And of course, we will repeat in this note those simple steps that will help create it.
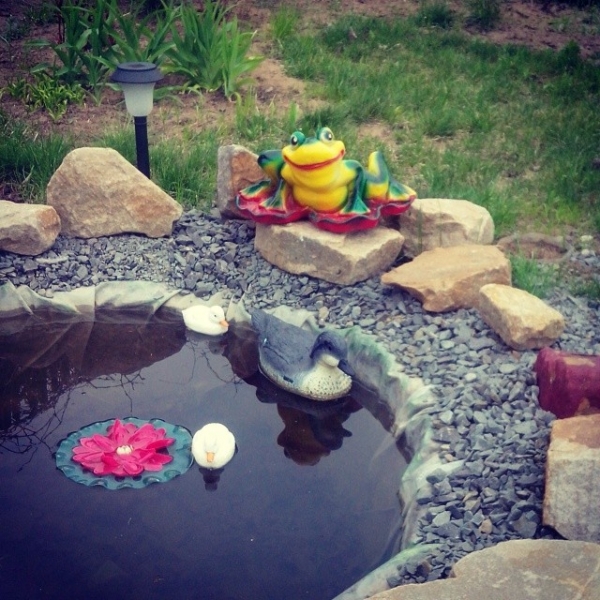
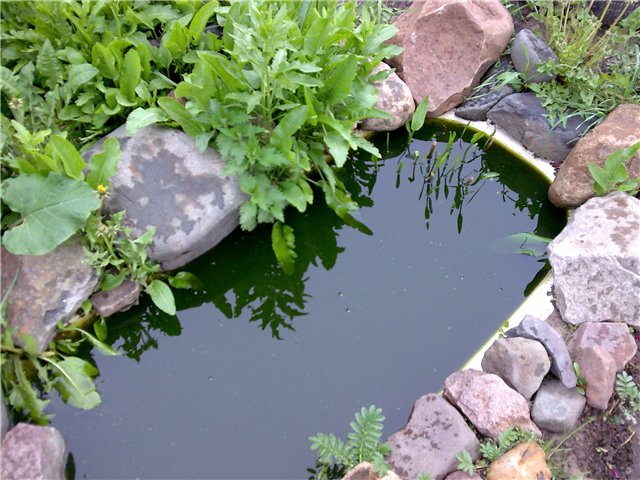
But in order for the reservoir to please the eye and fit into the environment as if it had always existed here, the main thing is to beat it correctly. This must be done in such a way that it really looks like a natural reservoir, to which a person only shaped, decorated, added a few strokes, and not like an old bathtub dug into the ground, which is often found on our sites.
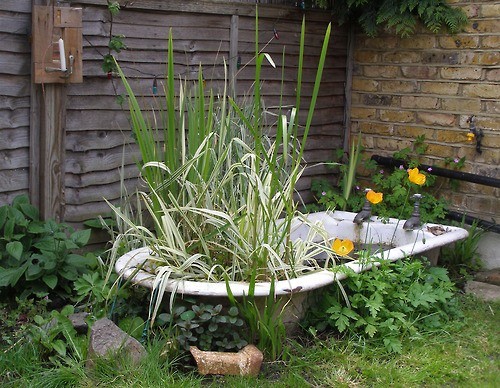
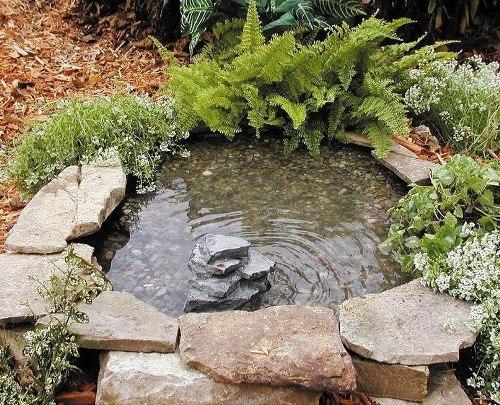
Compare here:
- these reservoirs:


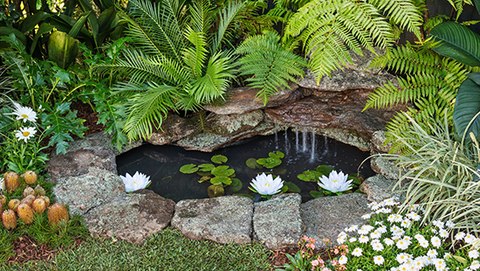
Feel the difference? In the first photos, white or yellowish edges of the bathtub stick out here and there and all the naturalness of the reservoir is immediately lost.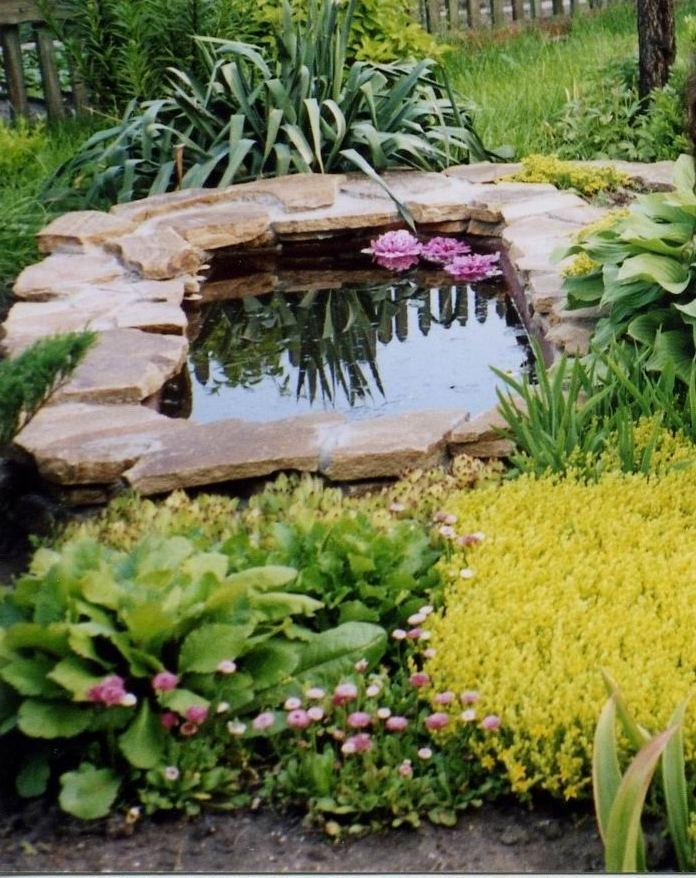
We draw conclusions: you need to carefully mask the bath, so that no one guesses that it is here.
The second thing you should pay attention to is the form. Nature rarely creates reservoirs with a clear rectangular or oval contour.
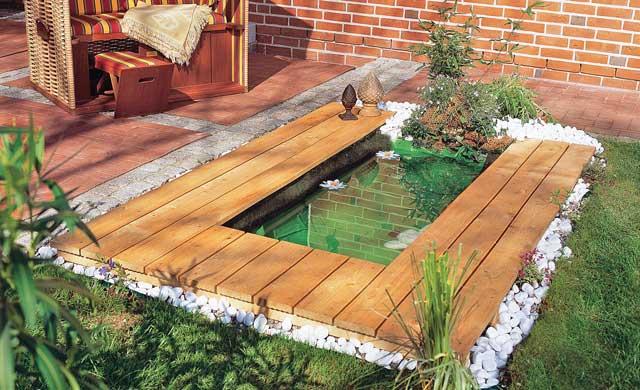
Therefore, it is worth either slightly changing (making it more asymmetric) the shape of the reservoir with the help of stones and plants, or, conversely, emphasizing interference in human natural affairs by creating a very clear outline, for example, using plates, as in our master class below.
The first method is used much more often. In our video, we have selected the most successful examples of how to beat a pond from a bath, making it a creation of nature:
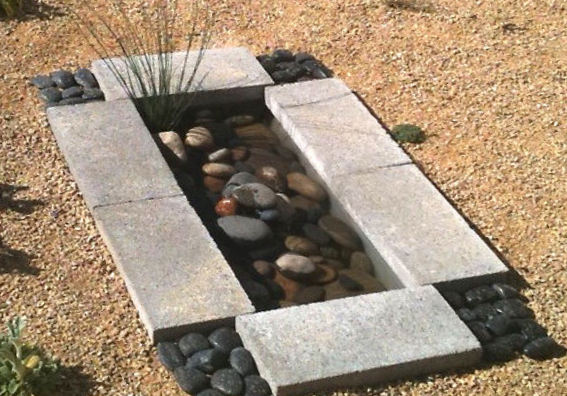
But for the master class, we decided to choose a very unusually beaten pond in a modern design. At the same time, we will repeat the steps of creating such highlights on our site.

Required Consumables:
- Flat concrete slabs suitable for the size of the bath - 6 pcs
- Sea and ordinary stones of different sizes and colors
- Aquatic plant of your choice
- And, of course, the bath itself.
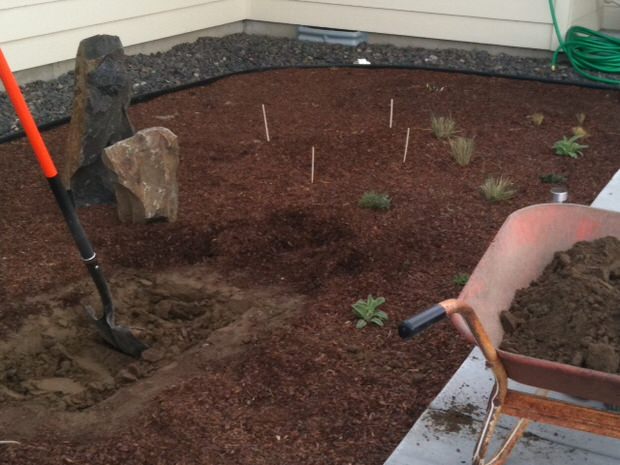
Step 1.
Decide on the location of the pond. Please note that if you plan to plant live plants next to it or directly in the water, you need to take care of their light preferences (most plants need a sufficient amount of sunlight). Also make sure that branches of nearby trees do not hang over the pond. They will not only create a shadow for the plants, but leaves will constantly fall from them into the water.
Prepare your bath. If there are drain holes in it (and they probably are), they must first be cemented and, after the solution has dried, treated with a sealant.
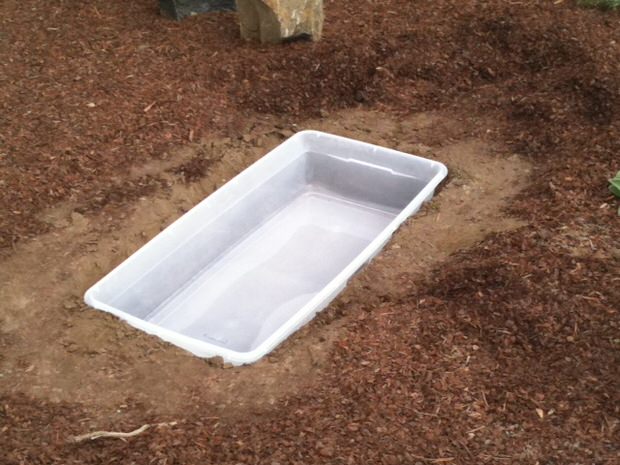
Step 2
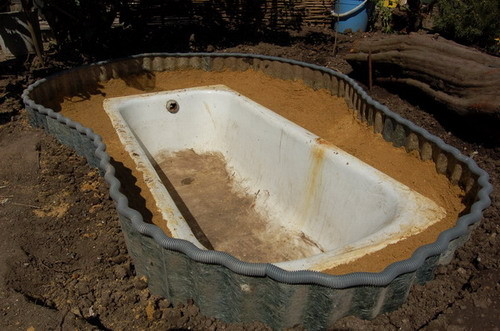
Put the bath in the chosen place, outline its outline. Set the bath aside and dig a hole of the desired size and depth (it should be such that the edges of the bath are flush with the ground). Install a bath.
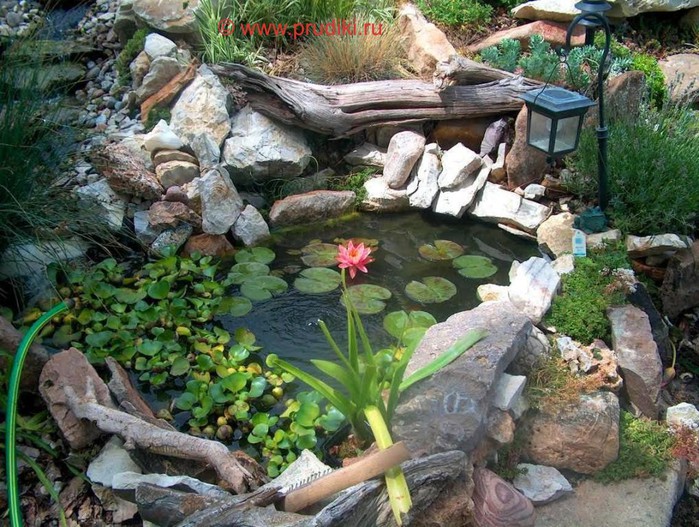
Step 3
Lay large stones on the bottom of the bath, and then smaller ones. At the edges, carefully place the concrete slabs so that they hang a couple of centimeters over the edge of the bath. Use flat sea pebbles to fill in the corners formed by the slabs.

Step 4
Set up a potted water plant. fill the pond with water.
By the way, to create a reservoir in modern design, you can use not only concrete slabs, but also, for example, wood (pre-treated).