IR film on the wall video What to see
…
3 years ago
…
2 years ago
A lot of discussions are found on the Internet on the question of whether it is possible to heat the room with infrared film ...
…
2 years ago
We bring to your attention a video about the various types of underfloor heating that are suitable for installation on…
…
2 years ago
You can often hear about mounting infrared film on the ceiling as the main heating. what does he think...
…
2 years ago
In this video, we decided to see what happens if you leave the film plugged in without a thermostat, ...
…
9 months ago
Operation of an infrared film during a year. I will tell and show how, what and how much ...
…
4 years ago
1.) Save energy, high efficiency. 2.) It is not the air and the ceiling that warms, but objects, like the sun. 3.) Convenient to place,…
…
3 years ago
Heating by infrared heating film placed on the ceiling and walls.
…
4 years ago
Tests of infrared heating films http://teplo-pol24.ru/video/ispytanie/
…
2 years ago
The infrared film from China performed well in a real test on the balcony, after about an hour of heating ...
…
2 years ago
In this video, I talk about the PLEN electric film heater, about all the positive and negative qualities ...
…
2 years ago
It’s more profitable on the wall than on the floor, 40 degrees heating, much more profitable than central heating, it only draws…
…
2 years ago
Advantages and disadvantages of warm walls. How to make warm walls. Detailed information + tools…
…
2 years ago
A little overheating test of Marpe Black Heat Self-Regulating Infrared Film. Comparison with standard...
…
1 years ago
An example of the installation of heating mats installed on the walls in a full space heating system. Additional…
…
4 years ago
Heating film VITEX www.vitex-carbon.ru Instruction No. 4: Installation of film for space heating. Fixing…
…
2 years ago
how to connect a simple infrared film without special devices, in a budgetary way, for ...
…
12 months ago
Underfloor heating Caleo: http://www.caleo.ru Building materials in Moscow and Moscow region: https://miramall.ru This video is about how to lay your own hands ...
…
6 years ago
Proper installation of infrared film.
Why film heater
Without exaggeration, an IR film-type heater can be considered an ideal option for heating a balcony or loggia. Other devices have significant disadvantages:
- installing a water heating radiator on the balcony and connecting it to a centralized system will require coordination and significant labor costs, in addition, the heater will take up space, which is not much on the balcony anyway;
- convection-type electric heaters that heat the air may turn out to be inefficient, especially if the balcony is not insulated or has single-layer glazing (without double-glazed windows);
- wall and floor IR heaters are also not always convenient, as they take up part of the usable space.
Comparison of different heating options
What are infrared heaters
These are heating devices that emit rays similar to those of the sun. That is, the air does not heat up from them, but objects quickly absorb energy and radiate it into space. This is the principle of their work. Therefore, the larger the coverage area of the heating element, the larger the heat transfer area. But consider some points related to the safety of ceiling IR heaters:
- The height of the ceiling on which they are installed must be at least 2.5 m.
- A person should not fall into the field of action of their rays. This radiation can cause skin burns.
These devices are divided by radiation temperature and wavelength:
- Low-temperature - household devices that emit a temperature in the range of 100-600C.They emit wavelengths of 5.6–100 µm.
- Medium temperature. Their temperature range is 600–1000C. The wavelength ranges from 2.5 to 5.6 µm.
- High temperature. The planes are heated above 1000C at a wavelength of 0.74–2.5 µm.
For each of the three heaters, a certain ceiling height is required in the room where it will be installed. The first is used for ceiling heights within 3 m, the second - 3-6 m, the third - over 8 m.
What is the difference between ceiling infrared heaters and other devices of this type? First of all, its design. In fact, these are films in which there is no case, like, say, tube IR heaters or tubular ones. The polymer film is only one micron thick. A carbon paste is applied to it, to which very thin carbon threads are attached. It is they who will emit infrared rays. An important element of the film heater is copper contacts made of foil. This is the weakest point of the device.
Therefore, when the question arises of installing the device with your own hands, you need to pay special attention to connecting the heater.
On both sides, the finished film is finished with laminated polyester. It is a protective material with high electrical insulating qualities. In addition, it refers to non-combustible materials. The heater itself has a power of up to 500 W, radiating temperatures from 30C to 110C degrees.
5. Masonry
Approximately 60% of buildings
built with stone walls, 3/4 volume
which are occupied by small-block masonry
from local building materials.
stone structures
made from natural or artificial
stones.
Depending on the
type of stone materials used
masonry is called:
- brick (solid
or lightweight)
- small-block (from
ceramic and concrete stones);
- rubble;
- rubble concrete.
stone walls
buildings perform simultaneously load-bearing,
heat and sound insulation functions,
Therefore, their thickness is taken depending on
strength, stability, heat and
soundproof properties.
In residential low-rise
buildings, the free length of the wall is usually
does not exceed 6 m, and the floor height is not more than
3 m, so according to the requirement of stability
wall thickness must be at least 250 mm.
Load bearing capacity
walls depends on the strength of the wall
products and masonry mortar. In low-rise
buildings where the loads on the walls are small,
wall thickness is usually taken as 380 mm.
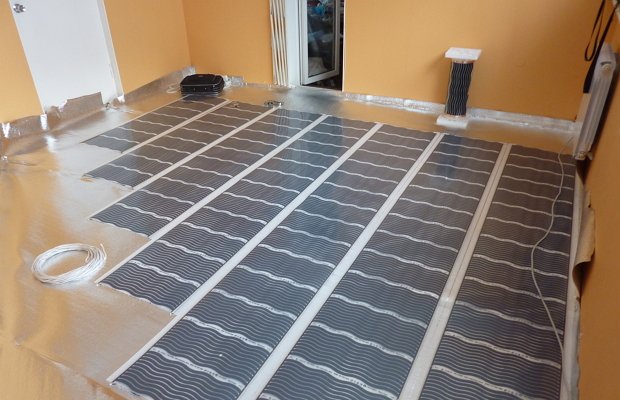
How to fix a film warm floor to the wall
Self-laying infrared floor heating on the ceiling or walls, although different from installing the film on the floor, requires only minimal technical skills.
The installation process is carried out taking into account the following recommendations:
- The strips are mounted vertically, not horizontally.
- The wire is connected on top of the film.
- The base must be pre-leveled and dry.
The rest of the work is carried out as follows:
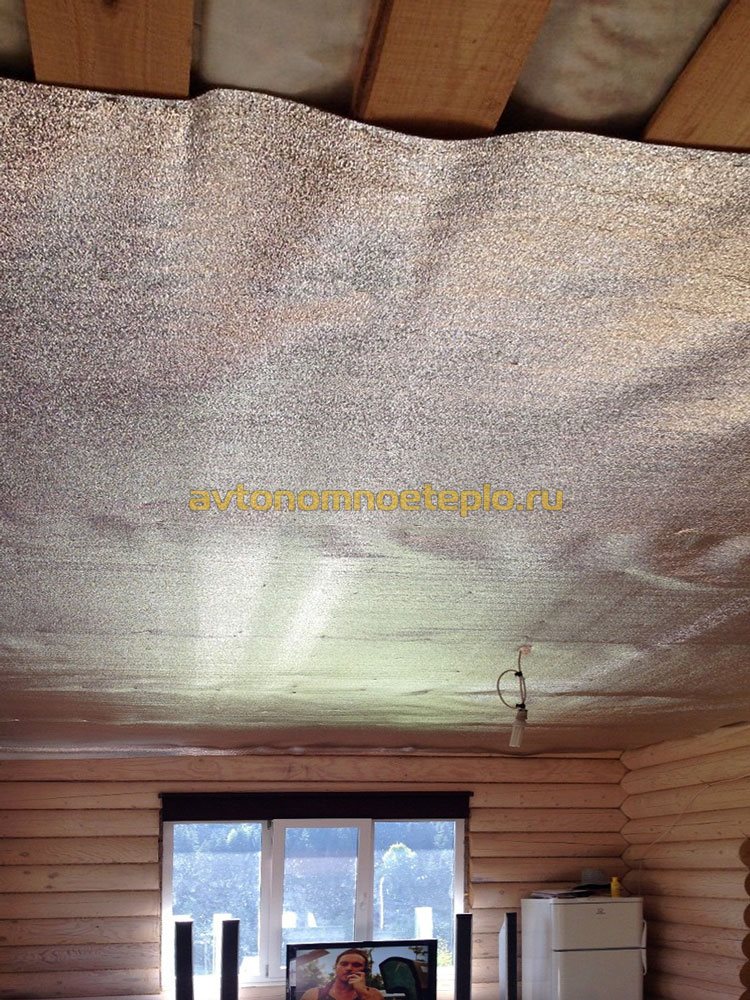
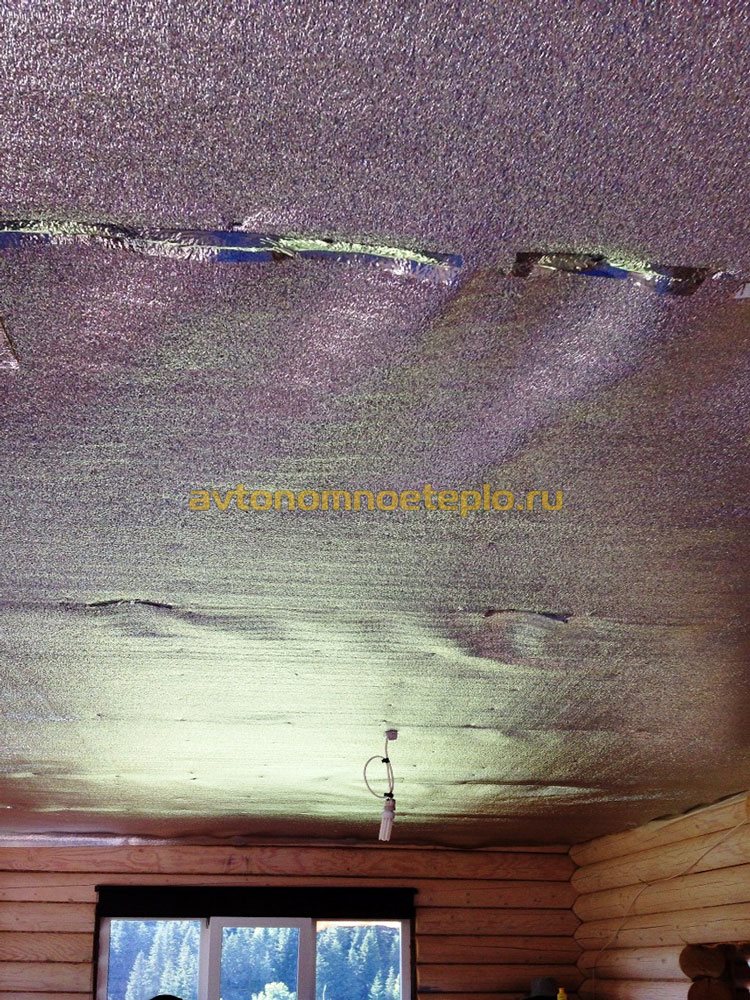
- A heat reflective coating is installed. The heat reflector is designed to direct the IR rays in a strict direction into the room and prevent heat from escaping. For this purpose, you can use any heat-insulating material, except for the one that has a foil layer.
- The future scheme is calculated, according to which it will be necessary to install the film. The following indicators are taken into account: at least 1-4 cm is indented from the edge of the wall. The width of the mat is 25 cm. It is strictly forbidden to overlap strips.
- Stripes are laid. They are attached to the wall with dowels in special places where there are no conductive elements. A gap of no more than 5 cm is left between the rows of the film. Since only the part of the wall where the mats are laid will heat up, this measure will ensure even distribution of heat in the room and prevent the appearance of cold zones.
- Power supply connection. All mats are connected in parallel. The operating instructions contain a connection diagram, which must be strictly followed. All electrically conductive areas are covered with bituminous film. Installation begins with the installation of a thermostat, then the power wires are scattered on mats.
- Check the performance of the wall heating system. Each individual mat must be evenly heated. With a lack of heating, the joints are pressed in or the film section is completely replaced.
- From above, the floors must be covered with decorative material. Gypsum-based non-flammable finishing materials are suitable for this purpose. You can use drywall or any plaster.


Criterias of choice
There is no single solution here - everything is based on operating conditions and the possibilities of performing installation work. Two options for wall heating are considered key examples - water and electric (film, rod, cable). For city apartments, electric versions should be considered, for owners of their own houses - water ones.
Film floors during heating emit negatively charged ions and infrared long-wave radiation. The system is powered through a thermostatic device that regulates the intensity of heating. All functional elements are soldered in polyester. The option is not bad, it has its own advantages. It is suitable for any finishing materials and coatings, it can simply be fixed under the carpet hanging on the wall. Installation of an infrared warm floor in a wall is difficult. First, the films are checked for performance, then they can be fixed to the wall, being careful not to damage them.
The cable system consists of wires and a thermostat. A special alloy converts electricity into thermal energy, the temperature sensor easily controls the set mode. Such a system is operated for a long time, in terms of electricity costs it is equivalent to the operation of household appliances in an average-level apartment. There are a couple of drawbacks - electromagnetic radiation awaits you, and significant financial costs for electricity are coming.
The rod floor system is called intelligent. The material is environmentally friendly, represented by carbon rods connected to a thermostat. With such a system, there is no need to carefully arrange furniture - the underfloor heating rods will not burn out. The cost of this type of heating is high, and fakes are often found on the market.
 Warm floor on the wall is not expensive
The water system is good for houses that have their own heating. It is only necessary to calculate whether there is a need to install a circulation pump so that the coolant moves faster. Installation work of such a system will be inexpensive, the cost of hot water compared to electricity also differs significantly.
But water leakage will be fraught with sad consequences, so it is recommended to use corrosion-resistant material for the circuit.
Where did it come from, and what is the principle of its action
The infrared film floor began its journey in 1991, when, as a result of experiments with nanoscale objects, a material was discovered based on a thin layer of polyester, carbon paste, silver and copper. The element that performs the heating function consists of a plurality of strips located at a distance of 15 mm from each other. Like other heated floors, this coating is powered by electricity, which is fed through a thermostat to the strips of copper-silver alloy. Getting on the strips of graphite, the current is converted into infrared radiation.
Infrared film underfloor heating
The difference with conventional heating is that it is not the air that becomes warm, but the objects themselves.What does it give? The fact is that the atmosphere of the room contains fresh air, which, when the temperature rises, does not tend to rise, but circulates naturally. The humidity level does not fluctuate, and the heating itself occurs evenly. Energy is saved as it is consumed minimally. And, finally, a coating of such a material does not contribute to an increase in allergic reactions, since in the absence of air movement (warm - up, cold - down), dust also stops moving.
Infrared film for underfloor heating
Everyone has long known that not all heating systems equally effectively cope with their main task - heating, so many buyers from the cities of Kiev, Odessa, Dnepropetrovsk and not only prefer infrared film for underfloor heating. The fact is that the length of the infrared rays is quite enough to ensure uniform heating of 90% of the volume of the room. Such an impressive figure can be achieved due to the fact that the infrared radiation of the underfloor heating film heats the surrounding objects, which are at a distance of up to 5 meters. At the same time, other heating systems heat only the air, which rises sharply, falling already cooled. It is logical that the heating is much more efficient, in which heat comes from all sides (as when using a film for underfloor heating). At the same time, the film heater can be used both individually and in tandem with heating radiators. Such an integrated approach - a combination of underfloor heating film with other heating devices - makes it possible to ensure a comfortable temperature in the house with minimal resources.
Technical characteristics of the film for infrared floor heating allow you to install it cheaply in almost any room. The simplicity of the manipulations necessary for this makes it possible for almost every user to independently perform them. In order to install infrared warm floors in the form of a film, there is an algorithm of actions:
Infrared film for heating price
In this category of goods, film warm floors of different manufacturers are presented. Film underfloor heating (infrared warm floor) can be used as primary or additional heating. It can be mounted under laminate, carpet, linoleum, tiles. At the moment, film underfloor heating is one of the cheapest and most productive ways of space heating. The influence of infrared floor heating on the health of a person and his beloved pets is only positive, not to mention the degree of comfort felt when using it. Our prices and quality of goods will certainly please you!
Way of laying a film infrared floor
The installation process is surprisingly fast and clean, which cannot be said, for example, about assembling a classic underfloor heating. There is no danger from using the infrared floor, and there is no talk of sparks at all: each sample has a special protection that prevents sparking. Nevertheless, it is necessary, albeit small, to prepare the surface on which the artificial canvas will be applied. By the way, it is absolutely not necessary to treat the entire surface, but heating will be most effective if at least 70% is allocated for the system.
Infrared floor installation
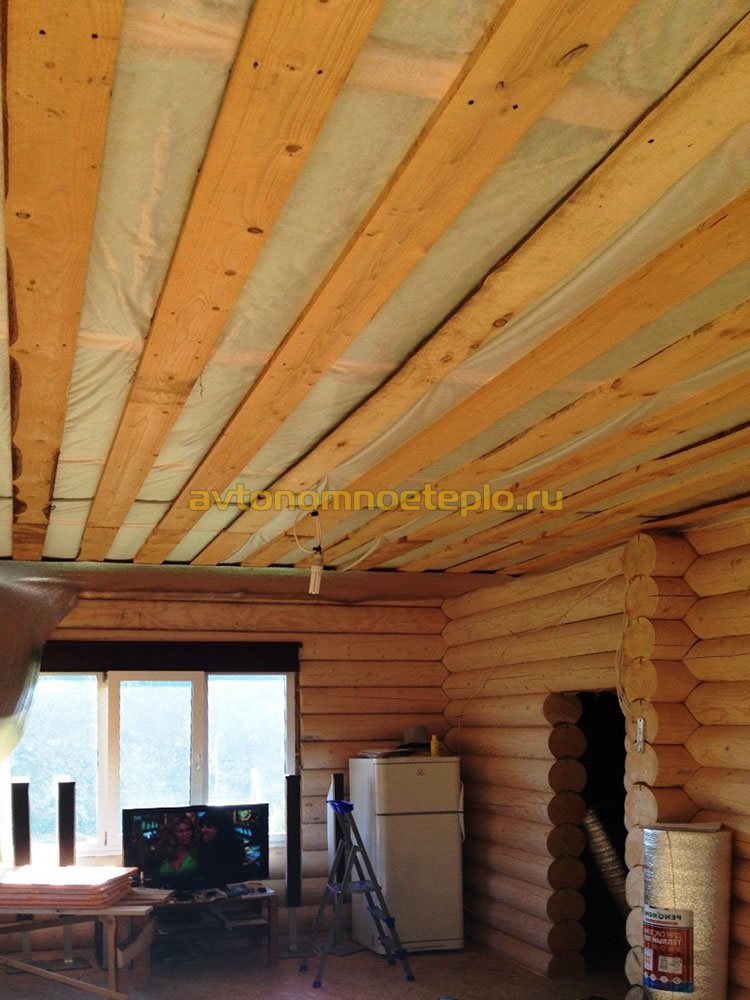
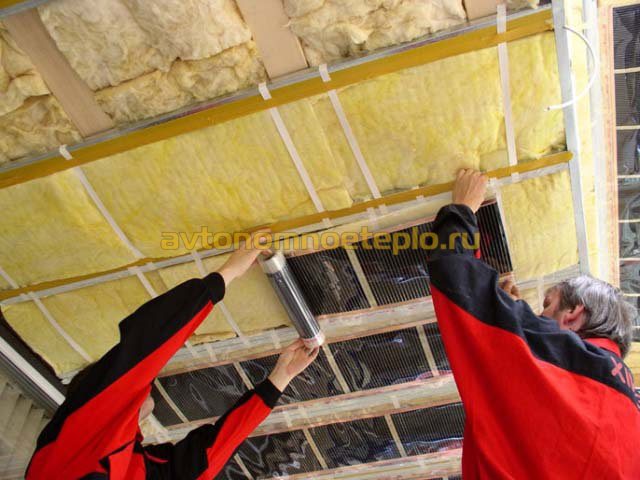
How to lay infrared thermal film on the ceiling
Metal profile systems are the ideal solution. It is optimal to use drywall, as well as reinforced plastic, Armstrong-type ceilings. Also, as practice shows, stretch ceilings are compatible with IR underfloor heating.
The film is fastened to the ceiling sequentially, starting with fixing from one edge and gradually unwinding the roll and fixing it in the place where there are no electrically conductive elements.
How can I cover the IR film on top
Laying on the wall and ceiling has one common difficulty. It is necessary to ensure the fire safety of the system and reduce possible heat losses. Therefore, the choice of finishing material should be approached very carefully.
 Gypsum building mixes and drywall constructions are best suited. Heating thermal films on floors and walls should be covered with a protective layer of non-combustible and heat-conducting material, with a minimum percentage of thermal energy loss.
Depending on the choice of finishing coating, it is necessary to choose the appropriate floor power. A film with a capacity that fully compensates for the loss of thermal energy should be installed on walls and ceilings.
Protection against overheating of the surface is provided by the installation of a thermostat. It is recommended to lay an additional layer of thermal insulation on top of the film layer. Temperature control will be provided automatically using installed sensors.
A feature of tracking the required temperature regime is the installation of controllers not in the room, but directly next to the heating element.

Which is better, infrared floor, wall or ceiling heating?
Film infrared energy-saving heating practically does not differ in efficiency due to the choice of the installation location of the heating system on the ceiling, floor or walls.
But when choosing a location, there are some points to consider:
- home heating efficiency. This indicator can be affected by the distance between the walls and the ceiling and the floor. So for a distance of more than 2.5 m, you will need a more powerful heating system.
- Ceiling or floor infrared heating should provide uniform heating of the room, the absence of cold zones. The expediency of choosing one or another option is provided by the technical characteristics and features of the building itself: area, possible heat losses, etc.

Film infrared floors, regardless of their location, provide stable heating of the room. But the choice of localization of the heating source is primarily influenced not only by this factor, but also by the cost and ease of installation of the heating system, as well as its efficiency. Some adjustments may be made to the technical features of the building.
We will learn the principle of operation of infrared film heaters and their advantages, as well as the savings from their use.
In this article, we will consider the principle of operation of infrared film heaters, the main advantages, types of equipment, and also calculate the savings from their use. Let's get acquainted with the general recommendations for proper installation of the system.
Who produces this floor
Let's list the manufacturers that produce IR film flooring specifically for the Russian market and have the appropriate quality certificates.
Nano Thermal
Especially a lot of positive feedback from consumers. A patent is used for the constituent elements - carbon nanotubes with increased strength. The maximum surface temperature during heating is 60°C, the power is 220 W/m2. The price of one roll is from 1000 rubles. (depending on configuration).
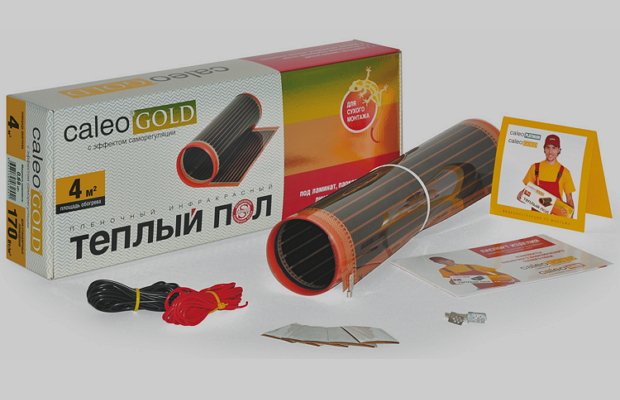
Caleo
A very well-known manufacturer not only in Russia, but also in the world. In the vastness of the Russian Federation and the CIS "reigns" for about 9 years, being engaged in the manufacture of various devices using the "warm floor" technology. The main difference: sale in sets with all the necessary equipment, which excludes the purchase of all materials and devices separately. For the convenience of customers, there are 4 different types of equipment:
- Gold - with automatic heating self-regulation;
- Platinum - improved self-regulation system, protection against overheating and short circuit, increased power consumption (maximum - 280 W / m2);
- Grid - equipped with a silver mesh that blocks the formation of sparks;
- Line is the optimal set for small spaces.
The cost of one unit is as follows: Gold - 1500 rubles, Platinum - 1700 rubles, Grid - 1300 rubles, Line - 1700 rubles.
IR coating "Caleo"
Q-Term
This floor is produced in South Korea, it differs from other similar products in its versatility of use in various rooms. In addition to floors, it can be installed as a heating element of ceilings and walls, very resistant to increased loads. It will cost only 400 rubles. per roll. But this is without additional equipment and kits.
heat plus
We can say that these are originals among the products of the same name. Heating, unlike others, occurs due to the reinforced base, on which carbon paste is applied. Thanks to this constructive solution, an impeccable uniformity of surface heating is achieved. True, such a coating consumes more power than the others - 450 W / m2, bringing the heating up to 70 ° C. A roll of such a floor in a construction market will cost 600 rubles.
Advantages
Such a heater has a number of advantages:
- It allows you to create a space heating scheme by zones or covering the entire space.
- Has a low price.
- Allows you to save up to 40% of energy compared to other heating systems.
- The film infrared heater located on the ceiling does not occupy usable space.
- It practically does not reduce the height of the ceilings.
- It features quiet operation and high efficiency, as well as instantly heats up.
Experts believe that an IR film heater is the most effective way to heat any premises with high quality today.
Mounting Features
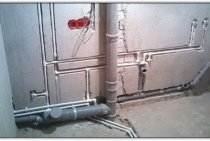
The contour of the water floor is attached to the walls according to the same principle as on the floor. If such a system is already installed in the floor, you can crash into it, otherwise the water supply will have to be carried out from the boiler. It is best to use metal-plastic pipes so that large mixing units are not created at the joints. The system can be closed with gypsum boards or plaster mortar. Without fail, a heat-insulating layer is arranged, for which isolon is used. After completing the installation, the system is checked under pressure, plaster is applied, not forgetting to install a temperature sensor and a reinforcing mesh that protects the walls from cracking.
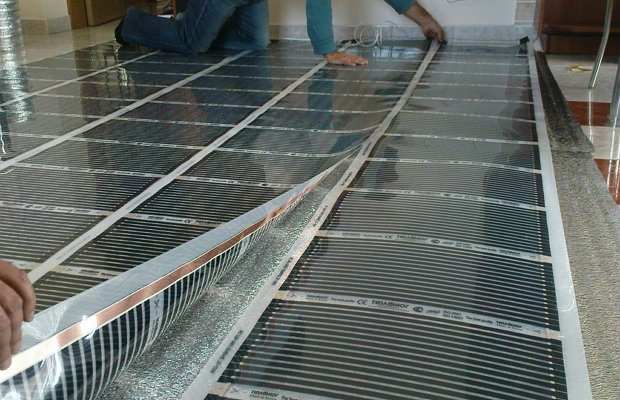
Film underfloor heating on the wall is installed in the following way. The panels are pre-assembled into a single network. If a large area is to be heated, rod elements should be installed instead of a film. The finished panel is glued to the insulation layer with a special temperature-resistant adhesive.
The entire assembled structure is fixed on the inside of the drywall sheet, which is attached to the wall in the usual way. To enhance the heat transfer, it is recommended to lay a film with a foil surface on the opposite side of the wall in front of the infrared panels. The efficiency of such heating systems can be improved by wallpapering the walls on a foamed polyethylene substrate.
Rod elements are mounted by analogy with film systems. Due to the fact that a higher temperature is created on the surface, adjacent rods should be installed in increments of ten to fifteen centimeters.
 Installing underfloor heating on the wall
The difference in the installation of IR film and rods is that the second version of the system sheets is more rigid. But it is possible to pass a large electric power through the rods, which will allow heating spacious rooms.
There are two points that should be taken into account when installing such heating - the power of the safety automation installed in the house, and the installation of a thermostat so that the system does not work all the time.
The easiest way is to arrange electric cable heating systems in the walls. Polyethylene with a foil coating is used as an insulating layer.The heating elements are attached to the reinforced fiberglass with glue.
The cable can be laid with a snake or a snail, a temperature sensor and a protective starting device are installed without fail. From above, the heating system can be covered with plasterboard material.
How to make an infrared film underfloor heating - a step by step diagram
Step 1: Finishing the surface of the base
You need to check how horizontal the surface is. A slope of more than 3 mm is undesirable, and therefore alignment is necessary. It would be best to make corrections using self-leveling floor. In addition, it would be useful to eliminate cracks, chips and flaws that can cause damage to the thermal layer.
Step 2: Preparing the material for laying
It is necessary to determine where the thermostat will be, and how the wires will pass. Then the material should be divided into strips, according to the markings on it, laid out on the floor, taking into account the location of the contacts near the thermostat, leaving the appropriate marks on the walls. From sources with strong heating (central heating batteries, fireplaces, stoves), an indent of about 1 m should be made. It is also not recommended to lay a film coating close to the walls: you will have to move away by about 10–15 cm.
Step 3: Installing the thermostat and wires
In accordance with the preliminary marking, it is necessary to cut the wall from the place where the IR film for the warm floor will lead the wires to the socket with the thermostat. At the end of the "dirty" work, you can immediately connect the power supply from the outlet located nearby
Just remember to be careful when working with the network!
Step 4: Thermal Insulation Flooring
Insulation is required, as otherwise heating of the neighbor's ceiling is also possible. The thickness of the material should be 3–5 mm. Sometimes it is advised to lay a 20-centimeter layer of vapor barrier, but this recommendation is more suitable for the use of film material in office and industrial premises. Imagine what kind of picture will be observed in small apartments with low ceilings!
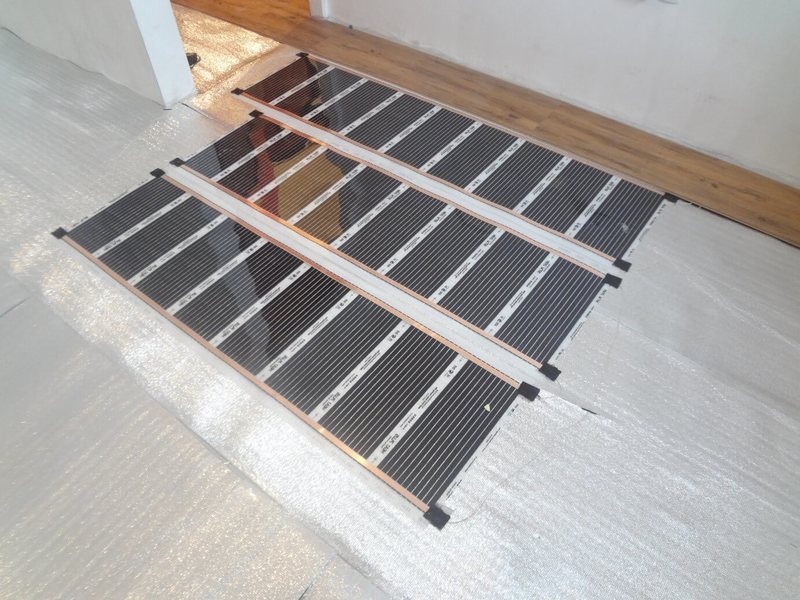
Step 5: Laying and connecting the film
After preparing the base and fixing it with mounting tape, the turn of the main installation comes. The cut strips of the film are laid from the wall where the thermostat is installed, with a copper layer down in accordance with the marks made. The edges of the strips are laid end-to-end without the formation of cracks, and then fastened with adhesive tape. A wiring diagram is mandatory attached to each sample of the film. After everything is connected, measures are taken to treat the joints with bituminous waterproofing.
Step 6: Functional Check
When everything is laid and connected, it is necessary to check how the heating occurs. The fact is that the presence of many contacts in this type of thermal coating has a drawback: it is enough to not process at least one of them properly, and there will be no desired heating effect. So testing is essential. It is advisable, of course, to check the uniformity of heating with a laser temperature sensor. During the test, there should be no sparks and strong heating at the junctions of the wires.
Step 7: Final Steps
If everything went well, you can proceed to complete the work. A layer of soundproofing material is laid on top of the infrared film, on which the flooring of the final layer (parquet, laminate, linoleum, carpet) is then made. By the way, a very significant advantage of this type of "warm floor" is that it does not have to be done under a "wet" screed. The design is removable, and it can be rearranged repeatedly, for example, if there is a move to a new apartment. It is also suitable for bulk coating.