We warm the floor
To do the work yourself, you will definitely need:
- insulation;
- vapor barrier material;
- mounting foam;
- antiseptic;
- dowel;
- wooden bars;
- set of tools.
Several technologies for carrying out insulation work are practiced, which may differ slightly depending on the type of material chosen and the characteristics of the room. The standard workflow is as follows:
- Thoroughly clean the floor surface from dust and debris, if necessary, level with cement mortar.
- Using mounting foam or sealant, close the connecting seams and cracks. Let dry well.
- Lay the waterproofing membrane, secure the seams with construction tape. It is necessary to ensure that the material fits snugly against the walls.
- Install a crate of wooden logs (choose logs depending on how much you are going to raise the floor), the distance between the bars should be about 50 cm, align the logs with each other by level, placing wedges.
- Lay sheets of insulation between the bars, fixing it on mounting glue.
- Spread an additional layer of penofol with the metallized side over the entire area of \u200b\u200bthe balcony.
- Install underfloor heating system. For effective operation, the cable must cover at least 70% of the balcony area. Do not forget that it is impossible to install radiators on the balcony, so it is recommended to take care of the additional heating system in advance. This is especially true if you plan to use a balcony or loggia as an additional living space.
- Lay fiberboard sheets on top or fill the screed with cement mortar.
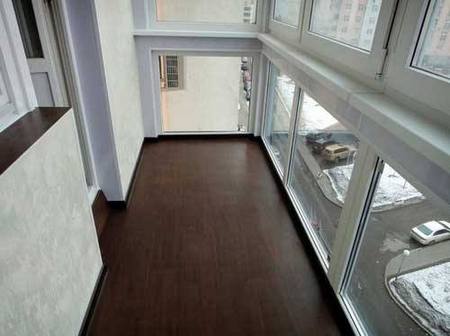
- Now you can lay a decorative coating - tiles, laminate or linoleum.
How to insulate the ceiling with mineral wool?
Sources
- http://sambalkon.ru/uteplenie/kak-uteplit-lodzhiyu-s-panoramnym-ostekleniem.html
- http://megadizajn.ru/panoramnyiy-balkon/
- https://ZnatokTepla.ru/utepliteli/panoramn-osteklenie.html
- http://vbalkone.ru/uteplenie/panoramnogo-balkona.html
- http://balkonsami.ru/osteklenie/vidyi/panoramnoe.html
- http://balkon4life.ru/osteklenie/okna/panoramnoe-osteklenie-balkona/.html
- https://dekoriko.ru/balkony/panoramnoe-osteklenie/
- https://uteplenieplus.ru/kak-uteplit/balkon/kak-uteplit-balkon-ili-lodzhiyu-s-panoramnym-ostekleniem/
- http://osteklim.msk.ru/osteklenie-balkonov/panoramnoe-osteklenie-balkona/
- http://balkonsami.ru/uteplenie/kak-uteplit-balkon-s-panoramnyim-ostekleniem.html
- http://balkon.expert/uteplenie/kak-uteplit-balkon-s-panoramnym-ostekleniem.html
- http://balkon4life.ru/uteplenie/iznutri/uteplenie-panoramnogo-balkona/.html
Balcony insulation materials
Now let's look at how the thermal insulation qualities of a room are improved, because there are enough options on the modern market. To insulate the "French" balcony, you should consider the number of layers and the thickness of the sheets
This is especially important if the glazing has already been completed. If the thermal insulation of the panoramic loggia is thicker than the width of the metal profile, problems with opening the doors are guaranteed
So, before insulating a panoramic balcony located in a new building or in an old house, you should consider using the following material options:
- Mineral wool. It is produced from melts of minerals of sedimentary or volcanic origin. Condensation often forms on balconies, so mineral wool is not the best choice. As a result, fungus and mold may appear. In addition, the use of mineral wool for insulation is a rather laborious and complex process.
- Styrofoam (expanded polystyrene). It is characterized by ease of installation, availability. It has an extended service life and low weight, which is very important when used in balconies.
- Penoplex, Technoplex (extruded polystyrene foam). Quite expensive materials with improved performance and thermal insulation properties. They are produced in the form of plates, which can have a different color. When working with them, you can not use acetone, gasoline and other organic solvents, as they negatively affect the structure of the insulation, destroy it. This is true for foam as well.
- Penofol.It is polyethylene foam and aluminum foil is used as a coating for it. This solution is characterized by increased thermal insulation performance. The material reflects heat. It is convenient to work with it: it is easy to cut and fasten. In this case, the material has a minimum thickness. It can be laid end to end or overlapped. Use with other heaters is allowed.
When choosing a material, it is worth evaluating the advantages and disadvantages of all options in order to choose the best one for use in specific living conditions.
Sources
- http://balkonsami.ru/uteplenie/kak-uteplit-balkon-s-panoramnyim-ostekleniem.html
- http://balkonsami.ru/osteklenie/vidyi/panoramnoe.html
- http://balkon.expert/uteplenie/kak-uteplit-balkon-s-panoramnym-ostekleniem.html
- https://uteplenieplus.ru/kak-uteplit/balkon/kak-uteplit-balkon-ili-lodzhiyu-s-panoramnym-ostekleniem/
- http://balkon4life.ru/uteplenie/iznutri/uteplenie-panoramnogo-balkona/.html
- https://dekoriko.ru/balkony/panoramnoe-osteklenie/
- http://osteklim.msk.ru/osteklenie-balkonov/panoramnoe-osteklenie-balkona/
- http://megadizajn.ru/panoramnyiy-balkon/
- http://balkon4life.ru/osteklenie/okna/panoramnoe-osteklenie-balkona/.html
- https://ZnatokTepla.ru/utepliteli/panoramn-osteklenie.html
How to legalize panoramic glazing of a balcony
In order for the panoramic windows on the balcony to please you and at the same time not cause problems with the law, we recommend that you adhere to the following rules.
An important factor is the location of the apartment in the house, since it is impossible to change the appearance of the facade of the building without the consent of certain organizations. And not the fact that you will receive such permission. In the case of unauthorized glazing of your balcony, you may be issued a court decision to demolish it and bring the facade of the house to its original state. Accordingly, no one will reimburse you for the costs incurred for materials, installation and dismantling.
Also, when glazing a balcony, it is necessary to take into account the type and type of execution of other balconies in the building. If buildings built in the 1970s-1980s are characterized by railings and fences made of metal, then in houses built in the 1980s and to this day, balcony fences made of concrete structures are typical. Given this, it should be understood that you will most likely not be allowed to dismantle the concrete elements of the building.

Another important factor is the design of panoramic glazing and the transmitted load on the ceiling. In theory, panoramic glazing of a balcony and a loggia in your apartment can be built independently, even if this is not initially a design decision when building a house. Examples of such solutions can be found in panel houses, when the concrete fence is dismantled from the floor to the window, the balcony grill is dismantled and a transparent one is installed, and the heater is transferred to the adjacent wall.
But in life, such solutions are of little use due to the complete violation of the integrity of the warm circuit, the violation of the hydraulic regime of the heating system and other factors that prevent the alteration from being officially legalized. Consequently, such an apartment, due to the carried out and illegal redevelopment, will not be sold in the future. In practice, a similar redevelopment can be formalized only if the loggia is attached to the main part of the apartment.
First stage
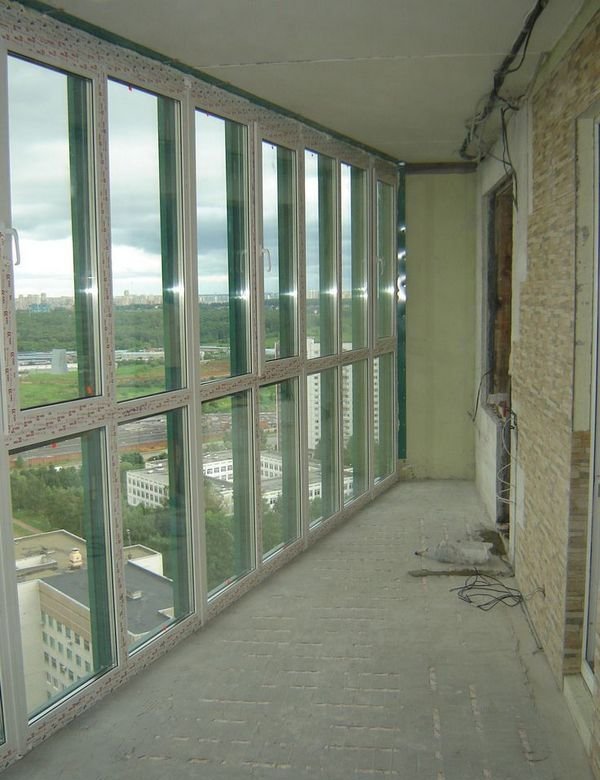
Since the balcony, in most cases, is a remote structure that protrudes beyond the facade, with the exception of loggias, although they do not protrude constructively beyond the perimeter of the facade, but, nevertheless, are also an external structural element that is not intended for heating, glazing of panoramic balconies is carried out taking into account these conditions and is carried out, in most cases, using an aluminum window profile and with a single glass of increased strength.
With such a glazing design, it is impossible to talk about the insulation of the balcony and the possibility of its use in the cold season. To do this, it will be necessary either to make significant changes to the glazing system, replace the aluminum profile with an energy-saving one, which has plastic gaskets in the frame structure that prevent metal freezing, and in parallel with this, replace all glazing with multi-chamber double-glazed windows, which to some extent will reduce heat loss through large by window area.This is an extremely costly job.
This is the case in houses that already have panoramic glazing, and if you decide to arrange a French window in an old project house, the balcony railing in which is made of metal or reinforced concrete slab, then obtaining such a permit will become doubly difficult, since you will have to dismantle the balcony railing. hardly anyone will.
Nevertheless, even with a redevelopment permit in hand, you will encounter a lot of problems, the solution of which is not only difficult from a technical point of view, but will require the involvement of specialists in various fields. Doing the whole complex of work with your own hands is simply not realistic. First, it concerns the installation of the glazing itself. Manufacturers of panoramic windows will start work only on the basis of the technical opinion of a licensed design organization, since the weight of the structure and the selected type of glazing may exceed the allowable load on the balcony slab. With your own hands, you can perform a set of works on floor insulation, underfloor heating and wall insulation on the loggia.
If, due to technical features, it is impossible to install a multi-chamber double-glazed window due to its large mass, then modern energy-saving technologies will have to be used. Although with a large area of glass, which is a good conductor of heat, neither IR film nor special brands of glass can significantly reduce heat loss.
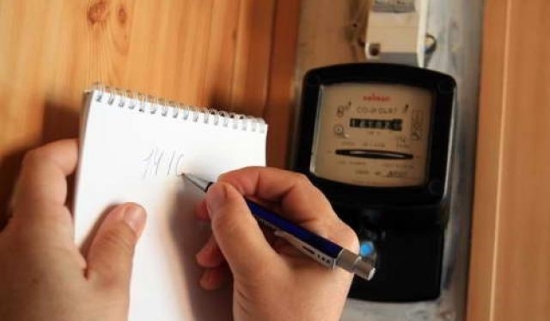
Also, initially you need to be aware that heating a panoramic balcony with French glazing in the cold season will consume a very significant amount of electricity and the cost of utilities for you can increase significantly.
If you arrange a second glazing circuit on the balcony, you must strive to ensure that the PVC or aluminum profile and glass are as thin as possible so as not to overload the balcony slab with excess weight. But in the case of installing panoramic glazing for the first time, as part of the redevelopment of the apartment, on the contrary, you should use a metal-plastic profile with a thickness of at least 70 mm, at least with double glazing.
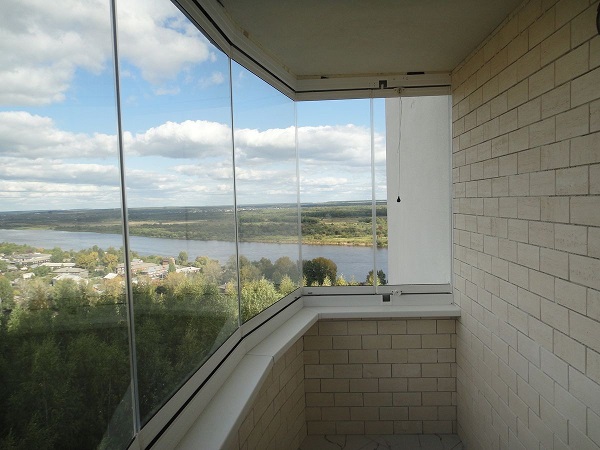
Panoramic windows on the balcony
Such loggias are usually made not only in multi-storey buildings. This feature can be used in different ways.

Typically, designers offer frameless glazing:
- creating a presentable view of the apartment;
- visual enlargement of the room.

In addition to the positive aspects, there are several disadvantages:
- cleanliness is much more difficult;
- if you live in a high-rise building, then you will have to call specialists to clean the glass from the outside;
- it is necessary to apply a tint film;
- you will have to take care of additional ventilation;
- in winter, so that the windows are not covered with frost, you need to install an additional convector.
An integrated approach to the insulation of panoramic balconies and loggias
The highest heat transfer resistance that an energy-saving double-glazed window can provide is 0.78 m² K/W (low-e glass and argon are used as chamber filling).
An ordinary single-chamber package is about 2 times colder - 0.35 m² K / W. In order to understand the conditions of work on insulation, one should compare the given indicators with the values \u200b\u200bcharacteristic of structural building materials and heat insulators. Thus, a load-bearing wall of two bricks has an indicator of 0.586 m² K / W, and extruded polystyrene foam with a thickness of 30 mm - 0.882 mm² K / W.
For non-insulated rooms with two-brick walls, the heating rate in winter is 100 W / m² (with a ceiling height of not more than 2.7 m). Using the similarity method, we can approximately calculate the necessary qualitative and quantitative measures for the insulation of rooms with panoramic structures.
Balconies
How to insulate a French balcony with panoramic windows? A typical case involves frame glazing along the front and sides for the entire height of the balcony. As a rule, limiting the load on the balcony slab does not allow the use of double-glazed windows. Therefore, using the usual single-chamber package glazing, provided that the floor and ceiling are well-insulated, we will get a zone with an approximate thermal resistance that is 0.586 / 0.35 (1.67 times) inferior to rooms with brick walls. Accordingly, to create a comfortable microclimate, it is necessary to exceed the specific heating power by 1.67 times in comparison with the base 100 W/m². We get 167 W / m², which corresponds to the average power of electric cable-type warm floors (150 - 200 W / m²).

French panoramic balcony
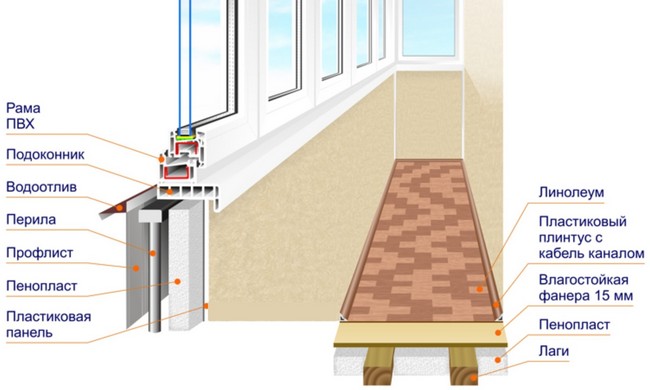
The use of single-chamber low-emission double-glazed windows (0.59 m² K / W) allows reducing the required heating power to 90 - 100 W / m² on the same balcony, which corresponds to electric mats mounted without a concrete screed. In this case, the floor design may look like this:
- concrete slab waterproofing
- polystyrene layer 5 cm thick
- vapor barrier
- moisture resistant plywood 10 mm
- laminate flooring.
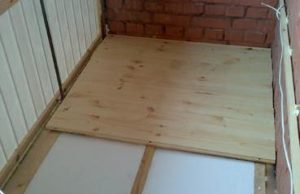
Floor insulation on the balcony with polystyrene foam
Thus, the absence of a concrete screed allows you to raise the floor by only 7 cm, creating high-quality insulation that matches the living space. In addition, the absence of a screed is no less important to prevent overloading the balcony slab.
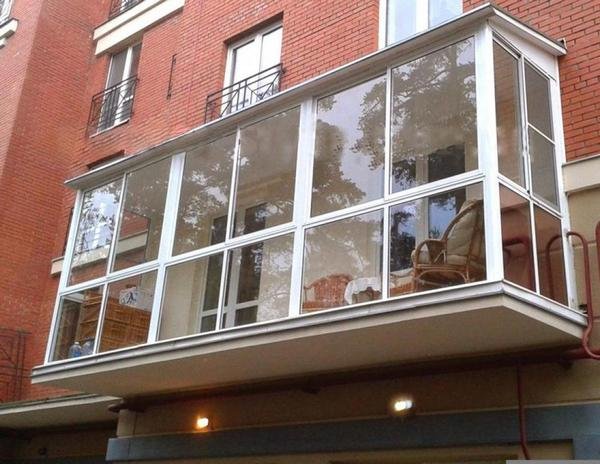
Loggias and transparent walls
The design of the loggias implies that only one plane can be glazed. The sides of these rooms are made of the same material as the load-bearing walls. The undoubted advantage of loggias in comparison with balconies is their large bearing capacity. By and large, we are not limited either in the choice of window construction or in the type of floor insulation.
How to insulate a wide loggia with package panoramic windows? With a ratio of its length to width of 3/1 - 2/1, heat losses correspond to those for a rectangular room with one translucent wall. Using low-emission double-glazed windows and insulating the sidewalls, floor and ceiling with expanded polystyrene (with a plate thickness of at least 5 cm for the floor and at least 3 cm for the sidewalls and ceiling), you can refuse to install electric underfloor heating under 2 conditions:
- Firstly, the loggia must be combined with a heated room.
- Secondly, the area of the loggia should be no more than 15% of the area of the room.
With a larger relative area, a loggia with panoramic glazing must be heated, regardless of the degree of its insulation. Of course, if you want to achieve a degree of comfort there that matches the living space. True, the use of low-emission packages eliminates the need to install cable heating. For a wide loggia, a supply of 70 - 80 W / m² is enough. On narrow (with a width of not more than 1.5 m) or with a length-to-width ratio of more than 4/1, it is sometimes enough to install a warm plinth along the glazing plane. The power of the heat exchanger built into such a plinth should be at least 70 W per square meter of loggia area.
The principle of operation of low-emission (energy-saving) double-glazed windows
An alternative to underfloor heating and skirting boards are floor convectors, which are heating radiators mounted flush with the floor plane along the panoramic glazing. Sometimes their heat is enough for a large room with one transparent wall.
The specific efficiency of floor convectors is greater than that of underfloor heating and wall-mounted radiators, because they play the role of a vertical thermal curtain.
The process of installing panoramic glazing on the balcony
If you decide to implement a plan for the reconstruction of your balcony, have collected all the necessary permits and have chosen the appropriate option, you can proceed with the construction work.
To begin with, it should be noted that the recommendations and advice given are for guidance only. Doing such work on your own is dangerous, especially without the necessary skills and experience. Therefore, it is better to entrust high-altitude work to professionals.
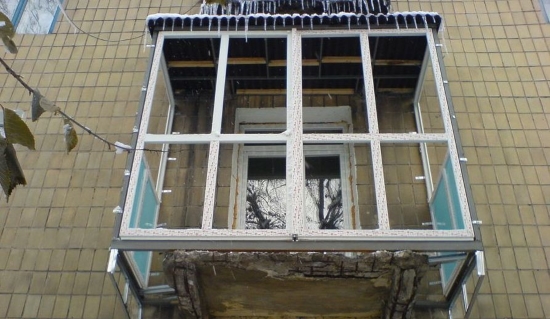
Balcony preparation
Before installing the glazing system, the balcony must be prepared, namely:
- remove all things from the balcony;
- remove old glazing and frames;
- clean the structures from dust and debris;
- reinforce the balcony slab.
The last point requires special attention, since the safety of the operation of the premises will depend on the quality of the work done.
So, in order to strengthen the balcony ceiling, you need:
With the help of steel corners, strengthen the perimeter of the slab on the floor above - this will allow it not to collapse under the influence of the gravity of the glazing;
Strengthen the parapet of the balcony with a welded metal structure
Particular attention should be paid to surfaces that will be in contact with the glazing structure;
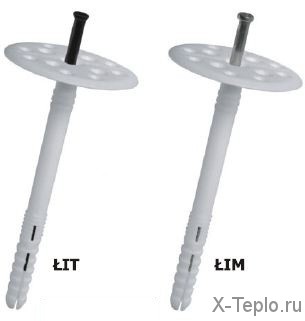
When expanding the area of the balcony, both the lower floor slab and the upper slab are pushed forward. We choose lattices for the balcony and loggia
Choosing grilles for balconies and loggias
After the work to strengthen the structure of the balcony, you can proceed to the implementation of panoramic glazing.
How to make panoramic glazing
When ordering a panoramic glazing design from any company, the owner of the balcony must provide all the "measurements" of the room. Usually this is trusted to the specialists of the company, but if you want to save money and have the necessary skills, you can do this work yourself.
The procedure for installing panoramic glazing will be as follows:
- With the help of a plumb line or spirit level, markings are made to place the window profile. You need to measure carefully, so that the glazing in the end turns out to be perfectly vertical;
- Then the already finished profile should be attached to the markup and once again make sure that it is correct;
- The upper profile is attached to the anchor bolts to the upper floor. Moreover, the length of the bolts directly depends on the thickness of the floor slab;
- The lower profile is attached in the same way - to the parapet, or the floor of the balcony;
- In the case of frame glazing, the frame structure, depending on the type, is attached to the profiles as well as to the side walls;
- After installing the profiles, it remains only to insert the sashes into them according to the instructions and check the operability of the structure - for frameless glazing;
- For frames - double-glazed windows are inserted into them;
- All seams and joints are sealed with mounting foam and special sealants.
Watch the installation process in our video:
Insulation work, if necessary, is carried out after the installation of glazing. To do this, you need to select high-quality materials for insulating the ceiling, floor and closed balcony wall.
Remember that if you decide to install the glazing structure yourself, the warranty will no longer apply to it. In this case, if the technology is violated or a manufacturing defect is detected after a while, it will be necessary to eliminate the malfunctions at your own expense.
Key subtleties
It is important to make a plan and adhere to an integrated approach to the insulation of a balcony or loggia
Factors to pay attention to:
- thermal insulation parameters of the window profile;
- selection of the optimal insulation, taking into account the type and characteristics;
- since the baseplate is essentially a suspended structure, care must be taken not to overload it with heavy building materials and not exceed the permissible load.

In a new building, in order for the insulation of the balcony to be done in good faith, it is important not to save on installing windows.Give preference to multi-chamber energy-saving double-glazed windows with low-emission glasses from well-known manufacturers - Rehau, Veka, KBE, Salamander, etc.
etc. They will keep your balcony from the penetration of noise and dust.
In panoramic glazing, two types can be distinguished:
Balconies with triple glazing;
Loggias with a glass facade.

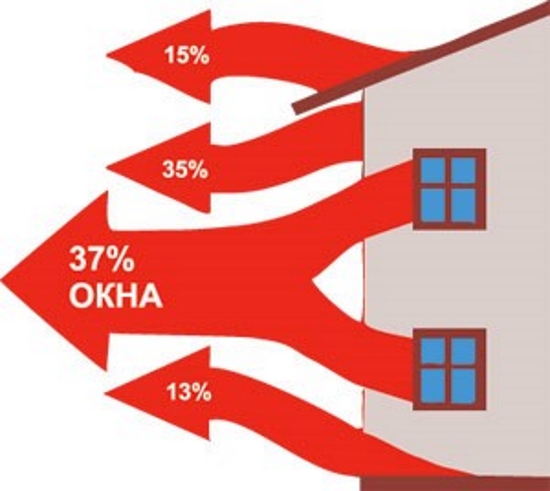
In the first case, it is not so easy to choose the right warming scheme for a cold panoramic balcony so that it is effective, especially if the windows occupy the entire surface to the floor. Heat losses will be large, because two-three-chamber double-glazed windows cannot be mounted on such a balcony because of their weight (limitation on the load on the base).
It is much easier to provide a warm and comfortable environment on the attached loggias with glazing only along the facade. Most often, you can choose any double-glazed windows and materials, since the carrier plate in such loggias is able to withstand a large load. If the area of the room is small, and the loggia is adjacent to the warm room of the apartment, then you can limit yourself to ordinary insulation on the floor, as on the walls and ceiling.
If work like installing double-glazed windows and installing a warm floor is best left to professionals, then it is quite possible to do the insulation of walls, floors and ceilings with your own hands, with a maximum of one assistant.
What is the feature of warm glazing
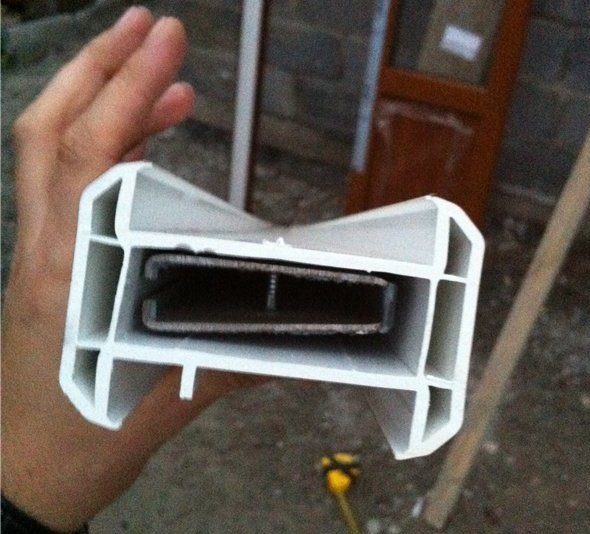
Thermal insulation of a panoramic balcony is carried out by glazing it with systems with a profile with a thickness of 70 mm or more. The most famous brands are REHAU, KBE, TROCAL, VEKA, SALAMANDER. As for fittings, give preference to such reputable manufacturers as ROTO, WINKHAUS, MACO, SIEGENIA-AUBI.
Multi-chamber double-glazed windows - why not?
It is not recommended to conduct insulation by equipping a large panoramic loggia with multi-chamber double-glazed windows. For comparison: the difference in the load that one- and two-chamber double-glazed windows create on the base plate of the loggia is about 10 kg per square meter, that is, up to 220 kg for the entire plate.
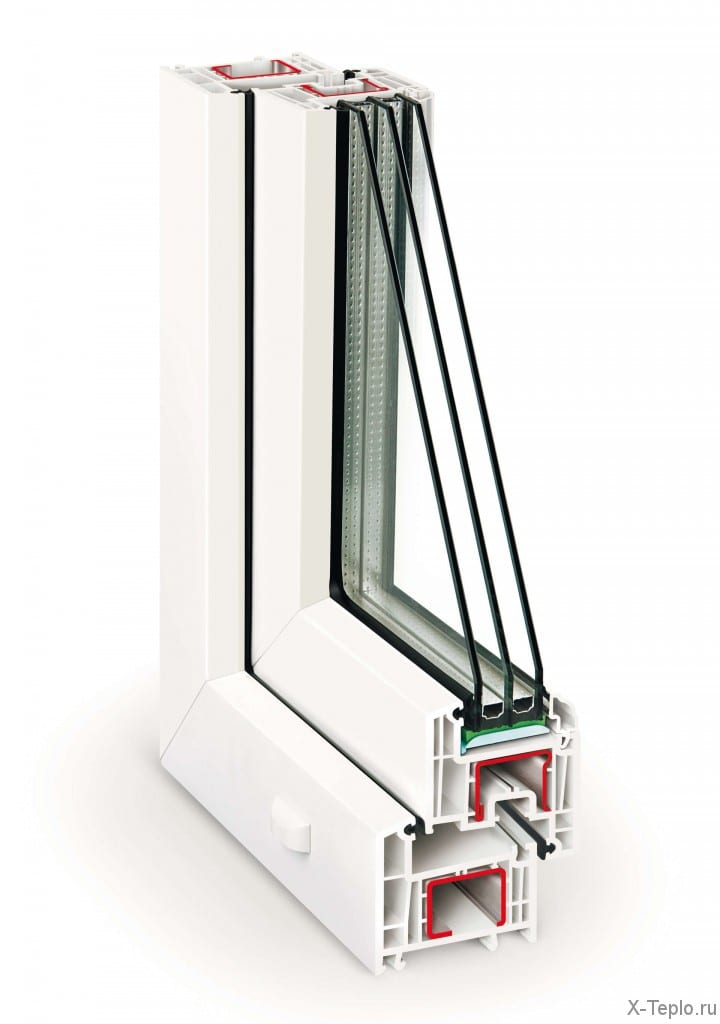
It is better to order single-chamber double-glazed windows, the glasses in which will be covered with an energy-saving film, connected by a “warm” frame, and the interior space is filled with argon gas.
Thermal compensators
If it is planned to insulate a long stained-glass balcony, then a temperature compensator is installed every 4 meters of glazing. It is necessary to protect window systems from thermal deformation. Thanks to a gap of 5 mm, the glazing can expand/contract slightly during operation, without losing tightness and attractive appearance.
 For colored PVC profiles, the installation step of temperature compensators is reduced to 2.5 meters.
Wall insulation
Foiled polystyrene foam has good heat-insulating properties, so we recommend using this particular material. In order to fix it, it is necessary to use polyurethane glue or special dowels, all joints must first be glued with metal tape.
Further, when installing the next layer, we use thick polystyrene foam. Note that for the thermal insulation of the internal and side walls of our premises, these two layers of material are sufficient, but the outer wall must be additionally insulated with a second layer of foil polystyrene foam.
Once again, we draw attention to the fact that all joints must be well sealed. Large gaps are best filled with mounting foam or other high-quality sealant, then treated with metal tape
To achieve the maximum thermal insulation effect, you can insulate the outer wall with expanded polystyrene. Finishing of external surfaces - at your discretion, for example, sheathe with wooden clapboard, install drywall sheets with further processing with a primer mixture and painting or wallpapering.
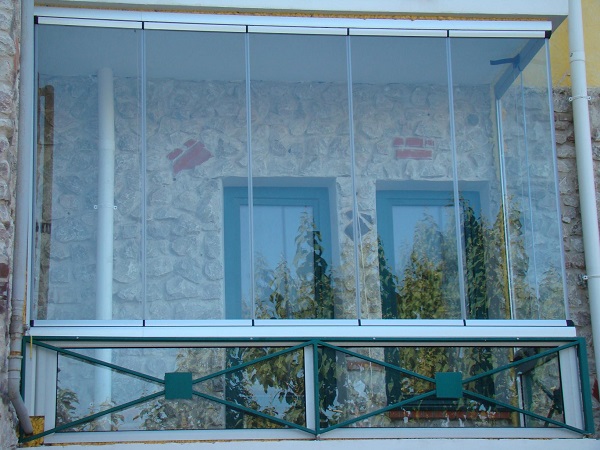
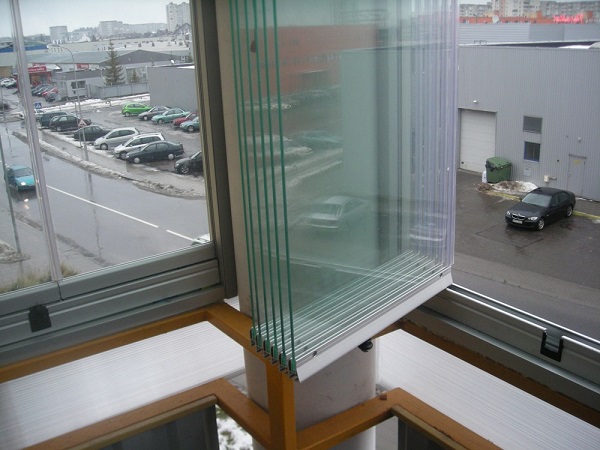
Types of panoramic balcony glazing
There are two ways to glaze a balcony with floor-to-ceiling windows. They differ externally, structurally and are suitable for different uses of a balcony room.
Frameless glazing
As you might guess from the name, this type of glazing does not imply the presence of frames. This design looks like a completely glass box - it gives the impression of a weightless balcony.
Special tempered glasses are mounted on roller guides from above and below, then fixed to each other and to the sides. The sashes open towards the inside of the balcony or move "accordion".
Advantages of frameless glazing:
- interesting design;
- ease of maintenance and operation;
- maximum illumination of the room;
- maximum overview.
He also has his downsides. For instance:
- poor isolation of such a balcony - it will not be possible to insulate and seal it;
- inability to install mosquito nets;
- danger of deformation of the structure due to strong gusts of wind, hail, falling branches, etc.
Features of stained glass glazing of balconies and loggias
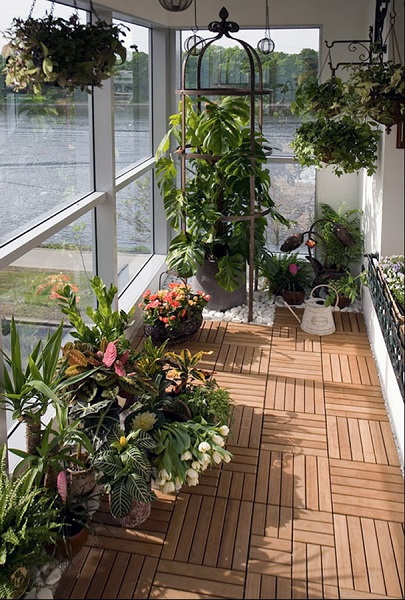
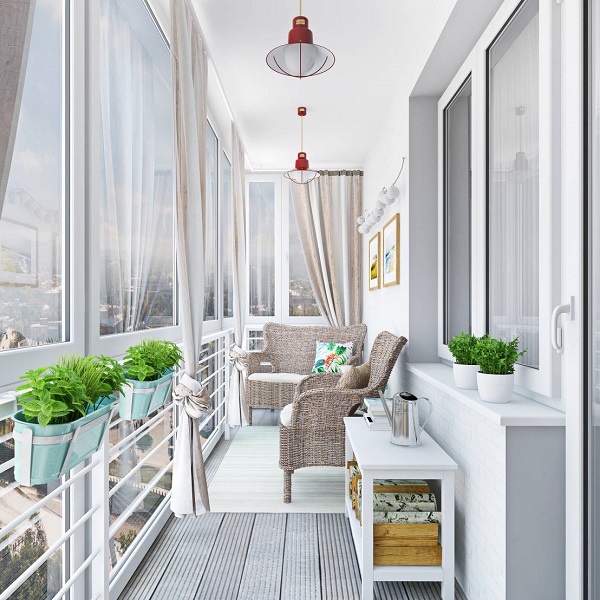
Basically, this type of glazing is chosen for the spectacular appearance of the balcony. With it, you can organize a recreation area, a small observation deck or an apartment garden.
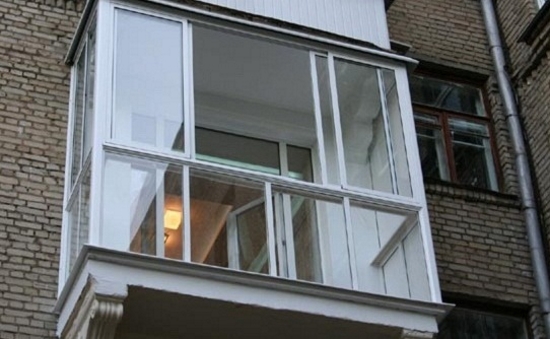
Frame glazing
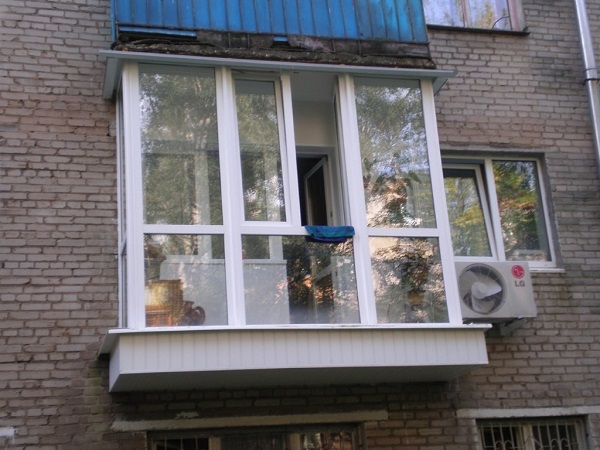
Glazing with a frame is a more reliable option. It is suitable for those cases when the balcony is on a high floor, and the house is in an open area. In this case, isolation is better, and there are technologies in which a panoramic balcony with such glazing can be used as a winter garden or even a living room.
There are several frame options:
- Plastic - perfect for warm glazing of the balcony. It is possible to install mosquito nets and choose different mechanisms for opening the shutters. Due to the heavy weight of the structure, it is necessary to reinforce the carrier plate of the balcony before glazing.
- Aluminum. Such a frame can be used for both warm and cold glazing. Due to the excellent quality and lightness of the material, aluminum frames have a long service life, and their installation and operation are safer. The only downside is they are more expensive.
- From glass composite. This latest window frame material combines excellent thermal insulation properties and resistance to mechanical damage. Naturally, the cost of fiberglass frames is rather big.
Which one to choose depends on the purpose for which the balcony will be used and what visual effect the owner wants to achieve.
Framed glazing has many advantages:
- operational safety;
- stronger construction;
- the possibility of warm glazing and soundproofing of the balcony;
- the ability to install nets against insects, hang any blinds and curtains.
In terms of safety, this type of glazing has a big advantage. You can safely lean on the window, and also not be afraid of strong gusts of wind.
There are also disadvantages:
- the design does not look as elegant as frameless;
- it is necessary to strengthen the floor slab.
In addition, there are several problematic nuances that relate to both options for glazing. For example, when placing furniture on the balcony, you will have to choose materials that do not fade in the sun or provide for curtains.
Technology of warm panoramic glazing
Before you insulate the balcony, you need to deal with the existing "cold" glazing. It is dismantled, the window opening is cleaned of old finishing materials and, if necessary, leveled. Next, they mount new "warm" frames and proceed to the installation of double-glazed windows.
The lower part of the double-glazed window must rest on the rubber profile, and the upper part must be inserted into the H-shaped guide. Next, the glass is attached to the vertical bars with the help of profile pieces about 20 cm long, and then finally mounted by laying rubber seals.
These rubber profiles are responsible not only for fixing glass, but also for effective insulation and reliable sealing of facade glazing.
Walls
Foiled polystyrene foam works well as a heat insulator. It is attached to the walls with polyurethane adhesive and “plate” dowels. The joints of expanded polystyrene plates, as well as the areas where the material adjoins the floor and elements of the window system, are glued with aluminum adhesive tape.
The next layer of the “thermal insulation cake” is thicker polystyrene foam.

The joints are also glued with metal tape. When the side and inner walls of the stained-glass balcony are insulated, you can limit yourself to these two layers (foil polystyrene foam and thick polystyrene foam). If we are talking about the outer wall, then a third layer is also needed - again foiled polystyrene foam.
The ideal option is to fill the gaps with mounting foam and finish with metal tape. Make sure the foam is completely dry before applying the tape, otherwise it may shrink under the adhesive tape.
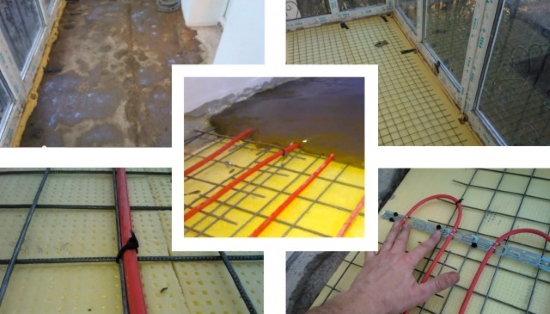
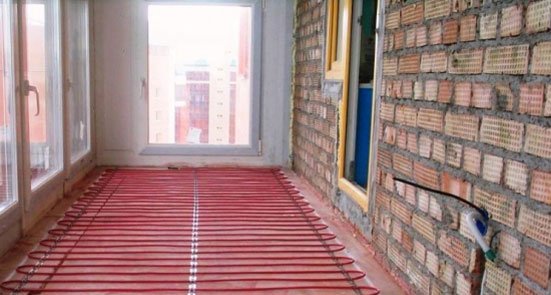
"Warm floor"
A conversation about how to insulate and improve a large glass balcony would be incomplete without an emphasis on installing a “warm floor”. We recommend using Hemstedt BR-IM heating cable for this purpose. Hemstedt DH, ALU-Z or DH-Z heating mats are not suitable as they are too thin. If you use a cable of another brand, then be guided by the fact that its power should vary in the range from 180 to 200 W / sq.m, but not higher! To ensure efficient heating, the cable must be laid over at least 70% of the floor area.
Before laying the cable, it is necessary to insulate the floor, which serves as the basis for stained glass glazing. We recommend laying foam plastic, and then pouring an intermediate screed 4-5 cm thick.
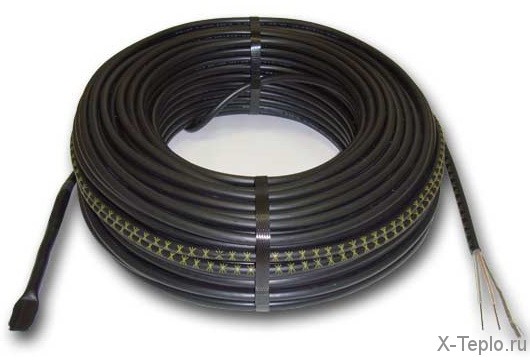
Another option is laying foil foam. It will slightly raise the floor - this is its advantage, but the thermal insulation characteristics of penofol are worse than those of penoplex.
Further, a mounting tape is laid out along the floor, on which a heating cable is located along a predetermined trajectory. In addition to it, they also mount a temperature sensor in a special corrugated tube, and “cold” wires, which are then led to the installation site of the thermostat. When laying out the cable, do not forget to leave an indent from the walls of about 5 cm.
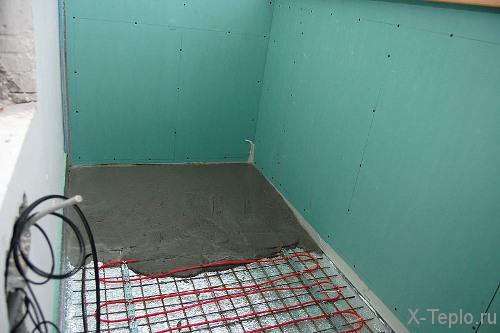
When all communications are laid, proceed to pouring the screed. Its thickness is 3-5 cm around the entire perimeter of the loggia. A damper tape 1 cm thick and 10 cm wide is mounted at the base of the wall.
When the screed is dry, check that all parameters of the "warm" floor comply with safety requirements using an ohmmeter (to determine the resistance of the heating cable). If everything is in order, you can complete the work on the insulation of the loggia and lay a fine floor covering.