Stretch ceilings two-level installation
1. Mount the second level frame. It is made of plywood, the required width. Cut the sheet and soak it well with water. After an hour, it will get wet and begin to bend.
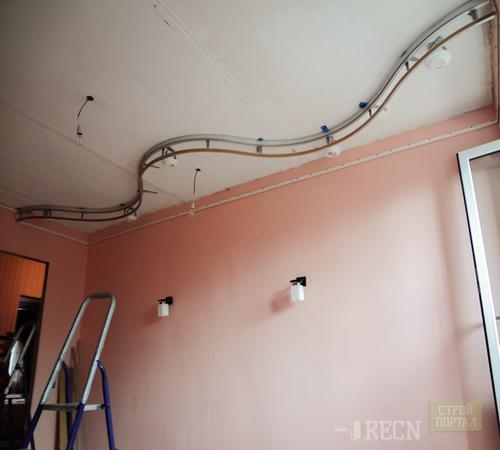
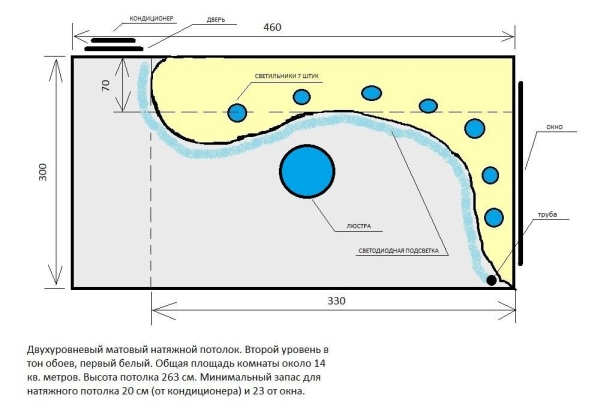
2. Drive the dowel into the concrete and tie a cord to it, at the end of which a pencil is fixed. Now you can draw the line that the second level will follow. Its shape depends on your imagination. It looks very nice wavy.
3. To mark the ceiling horizontally, use the laser level. Draw with it both levels of the ceiling with a paint chopping cord.
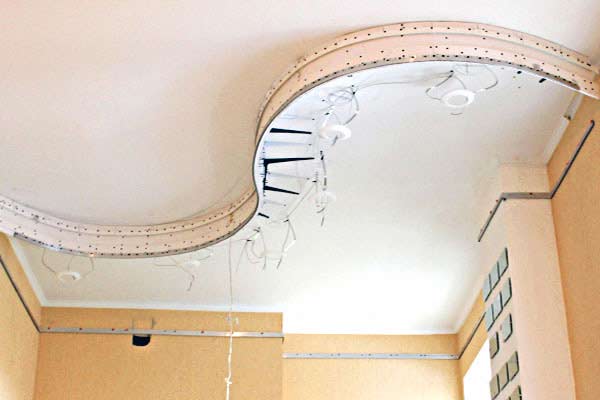
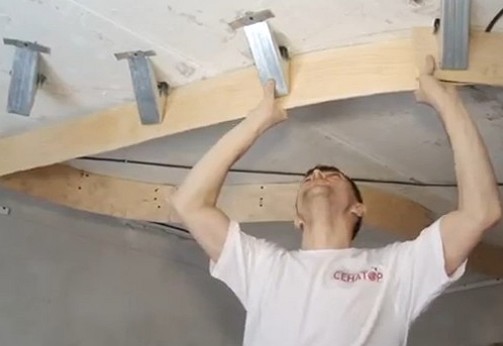
4. After the ceiling and walls are marked, begin to install the frame of the second level of the ceiling. To do this, take 60x100 mm pine beams and fix each with two dowels on the floor, along the marking line.
5. Attach a strip of plywood veneer to the bars in width equal to the gap between the ceiling and the installation level of the stretch ceiling. This distance is necessary in order to integrate fixtures without problems.

6. Moisten plywood veneer with water and fasten with 4 cm self-tapping screws no earlier than an hour later. If you do not resort to wetting, then it will be impossible to give the plywood the required shape, it will break.
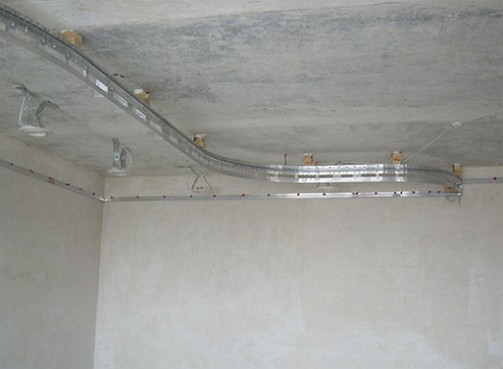
7. Attach the profile to both levels according to the markup. The first level should be located as close as possible to the concrete floor.
8. Departing 70 mm from the bottom edge, attach a clip-on wall baguette to the installed frame. If it is necessary to give it a curvilinear shape, cut it with a knife at an angle of 30-40 degrees, in several places. Also attach the baguette to the walls, at both levels.
9. Use dowels or self-tapping screws as fasteners, leaving a gap of 100-150 mm between them. Where there are profile joints, the pitch should not exceed 20 mm.
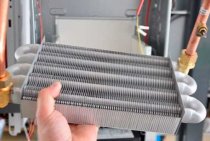
10. At the second level, attach spotlights to the concrete floor with dowels. Next, lay and connect the necessary wires. It is best to buy fixtures specifically for stretch ceilings. These devices are height adjustable.
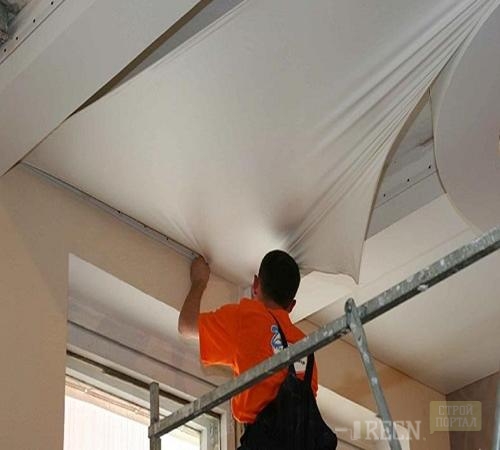
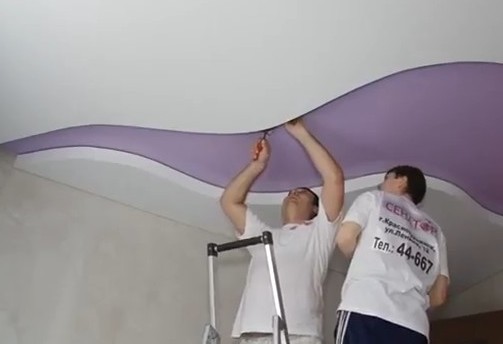
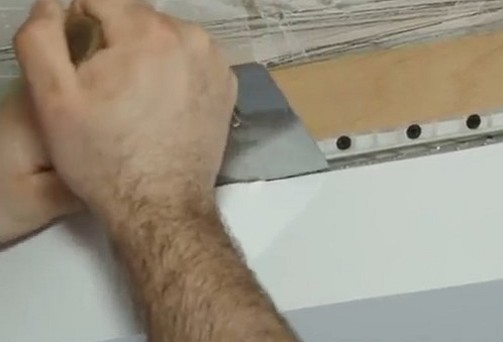
11. Unfold the panel intended for installation on the second level on the floor and then fill it with a spatula into the clip of the frame profiles. You need to cover the entire perimeter. Moreover, when stretching the ceiling, do not move sequentially, from wall to wall, but first fill the two sides located opposite each other, and then the remaining ones. If you have allowed the appearance of wrinkles on the surface, smooth them out by heating with a building hair dryer.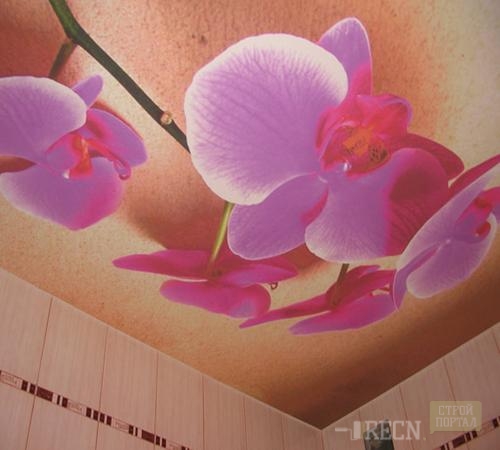
12. When the second level panel is fixed, stretch the first level ceiling, following the same principle.
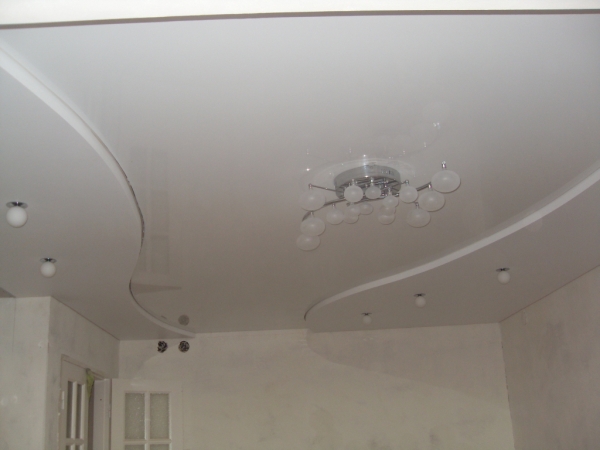
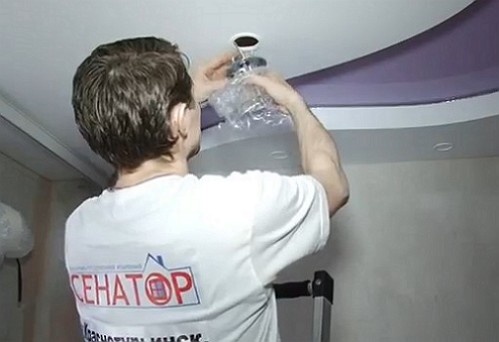
13. So that the canvases do not heat up from the lit lamps, feel for their cases and glue special plastic rings in these places. As an additional prevention of heating, purchase LED lamps that do not heat up to high temperatures.
14. After the time set for the glue to dry, cut out the canvas inside the ring with the tip of a knife and finish installing the fixtures.
Installation of two-level stretch ceilings - video:
https://youtube.com/watch?v=UmGSruZek4c
The main types of two-level ceilings
Depending on the material from which the ceiling will be made, there are several types. The most common of these are:
- two-level plasterboard ceiling;
- stretch ceiling combined with drywall.
The simplest option can be considered a plasterboard ceiling, the special structure of which allows you to take any desired shape. The facing part of the drywall is made of cardboard, and the inner part is made of gypsum. This material, combined with the right lighting, can make a multi-level ceiling unique.
Scheme of marking a suspended two-level ceiling.
It is much more difficult to install a stretch ceiling, any practical skills in its installation and special equipment will be very useful. However, due to the many advantages of the ceiling, it is worth trying. This design is practical, will hide all the irregularities and the necessary communications, does not require special care.
The design of a stretch multi-level ceiling significantly expands the boundaries of what is possible during its installation. Its installation will require more accuracy, care and concentration, but the result will exceed all expectations.
Ceiling installation
If the owner of the apartment for some reason does not want to contact specialists, then you can make a two-level stretch ceiling on your own.
To do this, you need to decide in advance what the ceiling should be in the end, which, in turn, depends on the room where the future frame will be located.
As a rule, the design of the ceilings for the bedroom is different, for example, from their appearance in the kitchen. After drawing the scheme of the future ceiling, you should proceed to the choice of materials from which the profile will be made.
For fabric stretch ceilings, a special fabric is used, which is covered with a protective layer of polyurethane.
If there is a desire to change the color, then such a ceiling can be painted with water-based paint or change the design using various decorative elements.
The advantages of the fabric base can be considered low price, ease of fastening and evenness of the texture, which resembles ordinary plaster.
Video:
https://youtube.com/watch?v=19IDY-Msq-g
PVC ceilings are made of elastic soft film. When heated with hot air, the film can be stretched into any shape. If the owner of the apartment is interested in how to make a two-level stretch ceiling of this type, then it is best to consult with specialists, since installation is somewhat more complicated compared to the fabric version.
PVC coating has such advantages as high heat resistance, hypoallergenicity, antistatic voltage, it does not collect condensate.
Ceilings of this type have a huge selection of colors and a higher cost.
To date, the most common 2 options for fastening structures of stretch ceilings:
- a harpoon system is only possible when choosing a PVC ceiling. The main value of such an installation is the ease of disassembly and subsequent return to its original position. In order for the film to become pliable for changing shape, it is necessary to heat the room to high temperatures. For heating, as a rule, a heat gun is used. The second step is to install the harpoon with a spatula and fix it. When the normal temperature returns, the film cools down, becomes even and fits snugly to the profile;
- the wedge system is quite difficult to install, but without the necessary skills, a person can also cope. The mount is universal, suitable for any type of stretch ceilings. For fastening, 3 elements are used: a fixing wedge, a fixing profile and a decorative plinth, which is necessary to give a complete look.
Preparatory work consists of cleaning the room from everything superfluous, it is best to free it completely.
If the furniture needs to be left, then it is covered with a heat-resistant film, and if a fabric ceiling is installed, it will not even be necessary to cover it.
First of all, you need to install a mounting profile around the entire perimeter of the ceiling, then use a gun to heat the canvas and clamp its edges with a wedge, then cut off all the bumps and cover the structure with a decorative plinth for a beautiful finished look.
To install the frame and profile, you will need the following tools: a spatula, a stepladder, a level for determining the baguette fastening line, a construction pencil for marking, a tape measure for measuring the distance between fasteners, construction knives, a miter box, a hacksaw for metal, screwdrivers for automating work, a heat gun with gas bottle.
For those who do the installation on their own for the first time, a detailed video or instruction with step-by-step photos of the process will be useful.
The choice of design 2-level ceilings
How to perform 2-level stretch ceilings, we will learn further.The first and most important thing to do before starting installation is to decide on the appearance, style and design of the future ceiling. Only after that it is possible to think over its constructive solution.
As you already understood, 2-level stretch ceilings consist of two structural elements:
- plasterboard box;
- stretch fabric.
Although it is not uncommon for a ceiling in which both levels are made of stretch fabric.
If we talk about the design of each of them, then the box can be of any shape:
- traditional rectangular;
- curved;
- round;
- mixed.
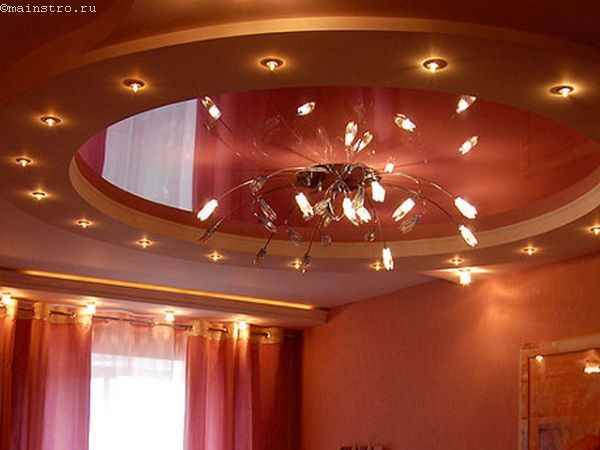
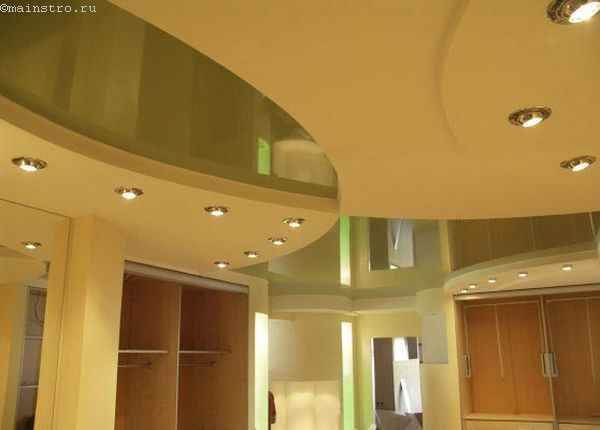
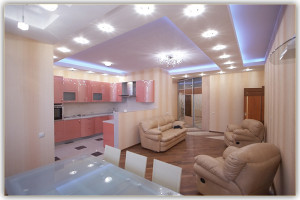
In the photo there are 2-level stretch ceilings in the office
In this case, the box can be with a niche for backlighting or without it. We'll talk more about backlighting later. As for the finishing of plasterboard structures, it can be any, the main thing is to maintain harmony between the tension surface and the finish of the box. In addition, it is worth considering the features of the room, if wet processes take place there, then it is better to use a moisture-resistant finish. So, as a box finish, they most often use:
- plaster with subsequent painting;
- wallpapering;
- sheathing with plastic panels.
Performing 2-level stretch ceilings (see photo), use the following fabric or film sheets:
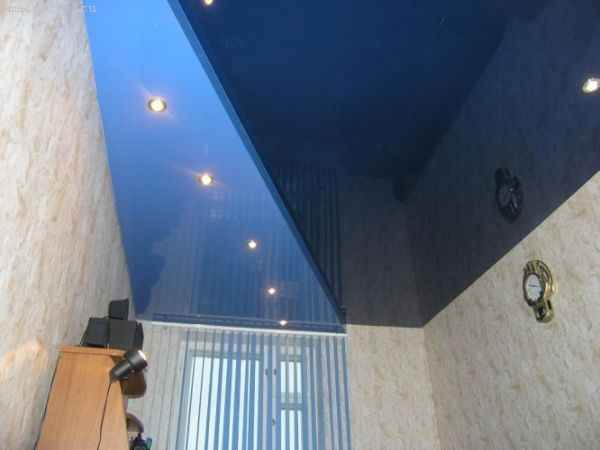
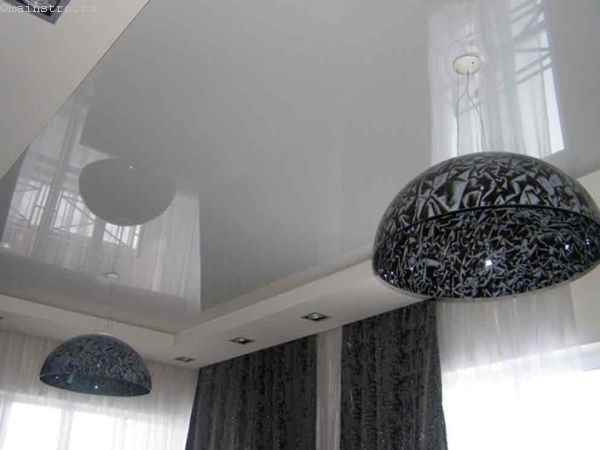
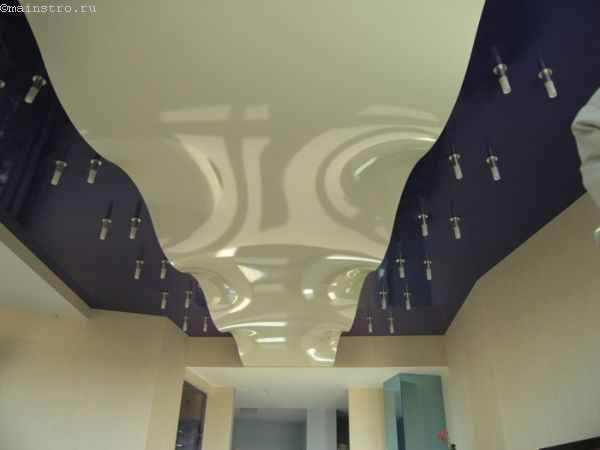
- Monochromatic glossy panels. They are distinguished by a rich assortment of colors. The mirror surface of glossy panels visually increases the height of the room, adds space to it, especially if the white color of the canvas is used. The use of two colors is carried out if they want to get a two-level ceiling with the possibility of zoning the room.
- Plain satin or matte canvases, such as Cerutti. Such ceilings are made using fabric panels. Their colors are not as varied and bright as those of gloss, but they are rich in textures. Leather, suede, velvet or stone ceilings - all this is the merit of fabric canvases.
- Ceilings with mother-of-pearl shades or the effect of a metal surface. Such unique ceilings are made using glossy panels, although if you take satin ceilings, they themselves have a slightly pearly hue that changes depending on the lighting.
- Ceilings "starry sky". Thanks to the use of special lighting, it is possible to obtain such wonderful 2-level stretch ceilings (see photo below). To obtain a star glow on the ceiling, different lighting devices can be used: LED strips, crystal lamps, fiber optic filaments. The glow can be one-color or multi-colored, adjustable using the control panel.
- 2-level stretch ceilings with photos or images printed on them. Thanks to large-format printing technologies and the use of special solvent inks, it is possible to apply any image on stretch ceilings. Special processing of images on the computer allows you to perform 3-D photo printing on the ceiling. A picture in the form of a three-dimensional image will enliven the ceiling, give the room space and depth.

As you can see, a wide range of colors, materials, textures and patterns allows you to create ceilings that are unique in their beauty. Thanks to this, you can create a 2-level stretch ceiling that suits your interior.
The design of two-level stretch ceilings
The classic single-level stretch ceiling is an ideal straight plane of the canvas, stretched according to the rules on the mounting profile and fixed accordingly.
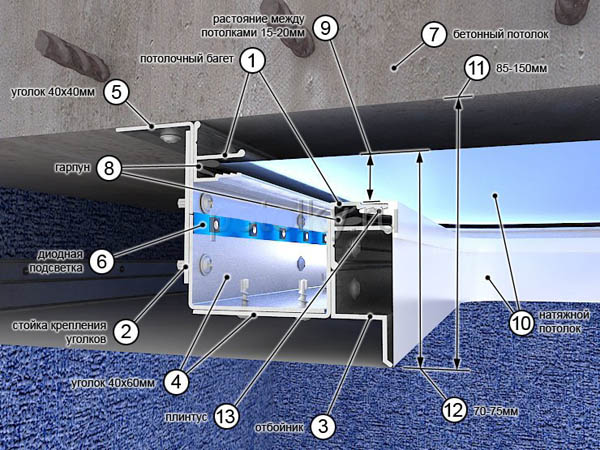
The two-level one has a more complex design, which includes a ceiling canvas and frame elements. The main design details include:
• delimiter
• corner
• chipper.
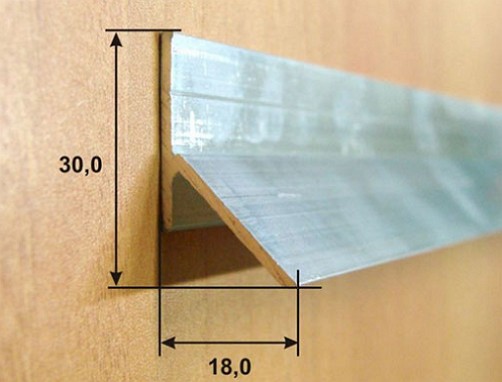
These elements are fixed on the base ceiling in a certain sequence.Initially, a mounting bracket is fixed on the base ceiling using an aluminum thin tire. Then a separator is attached to the corner. The level of the canvas is filled into the separator with the help of flat devices. When moving from one level to another, you will need a chipper.
The fender and attachment profile may have an internal or external curved radius. The percentage of bending is set at the marking stage for complex tension structures. The ease of use of the fender greatly simplifies the installation of the second level.
Having studied the design of a two-level stretch ceiling and choosing the necessary web material, you can safely proceed with the installation.
Pros and cons of two-level stretch ceilings
 Standard stretch ceilings have the appearance of a stretched film made of a film fixed on a frame. Such canvases are smooth, give perfectly flat surfaces, there are practically no joints and seams on them. Such ceilings are very easy to maintain and have a long service life.
The advantages of stretch ceilings are to get a smooth, as if polished surface, you can perform installation without much labor. If you level these differences with plaster, then over time it will begin to crack, crumble, but this does not happen with stretch ceilings. Such ceilings are aesthetically attractive, and their range is diverse. In the presence of stretch ceilings, you can not be afraid that the apartment was flooded.
The ceilings also have a number of disadvantages, for example, the canvas is easy to pierce or scratch with a sharp object, and if damaged, the entire panel will have to be changed. Such a ceiling cannot be stretched in the country, where there are large temperature differences in summer and winter. This is not the most budget option for finishing the ceiling. The price of stretch two-level ceilings is much higher than that of conventional finishes.
How to make a two-level stretch ceiling yourself instructions
A two-level stretch ceiling is a truly original and unique decorative design that can hide defects in the main ceiling surface, hide ugly pipes and other communications from prying eyes, and also make the interior of the room elegant and individual. It is quite possible to equip the stretch ceiling with lamps, as well as spot or LED lighting.
Stretch ceilings can be mounted on the basis of a couple of methods. The first technique assumes that structures that have a special configuration are attached to the ceiling in advance. It is between these structures that the tension of the film occurs. The second technique is not so complicated and is based on the preliminary fixation of the baguette, which allows you to subsequently stretch the canvas. The advantage of the second technique lies not only in its simplicity, but also in the fact that it does not imply a reduction in the volume of the room, which is an extremely important factor in a typical apartment of a multi-storey building.
The design and lighting of the stretch ceiling deserves separate words. If you wisely install spotlights and diffused light sources on the ceiling, you can achieve a visual increase in the volume of the room. In addition, the light helps to zonal division of the room. It will decorate a stretch ceiling with two levels in various ways. It is possible to combine color, material and even texture. As a rule, independent work on the installation of a stretch ceiling takes a maximum of two days.
Of course, it is necessary to take into account the fact that in a situation where you decide to install the ceiling on your own, the film manufacturer disclaims any responsibility for the result. The stages of work must be strictly observed, because otherwise it will be necessary to completely remove the structure and start work again, or reinforce the frame
For perfect tension, care must be taken to ensure that even the smallest detail of the ideal is fixed in place.
So, do-it-yourself installation of a two-level stretch ceiling should be carried out using the following tool:
- Perforator and screwdriver;
- Heat gun;
- Ladder;
- Building level;
- Special blades with which the canvas is fixed.
With the help of a perforator, the profile is securely fixed to the wall, and the heat gun makes it possible to heat the fabric sufficiently to ensure perfect tension.
In the process of self-assembly, you should pay special attention to the most dangerous moments, including taking measurements, cutting fabric or film, as well as working with a gas heat gun. The accuracy of taking measurements is necessary, because the slightest mistake will nullify the possibility of obtaining a perfectly flat surface.
At the first stage, it is necessary to take measurements and draw up a sketch, on the basis of which the work will be carried out. Measure the diagonal and perimeter of the room, calculate the area, and mark the points where the lighting fixtures will be installed.
The ceiling is fixed using a special profile. Before fixing the profile, it is necessary to outline the line along which it will pass. In the event that it is planned to install a bulky lamp on the ceiling (chandeliers, for example), then about 5 centimeters should be left from the main surface of the ceiling to the film. The fixation of the baguette profile is carried out by the “dowel-nail” system. This fastener is able to hold the film firmly for several years. After the baguette is installed, the wires are connected and the locations of the fixtures are determined, you can proceed to direct installation.
In the process of stretching, corner hangers should be used. After that, the heat gun is launched, the task of which is to heat the film to a 70-degree mark. The heated canvas becomes very elastic and pliable, due to which it is fixed without problems in the guide profile. When the canvas is stretched enough, holes can be made in it for installing lighting devices. The fastening of lamps and canvases is based on special latches. At the final stage of installation, two-level cornices are installed.
Installation of a two-level ceiling
Like any other business, the assembly of two-level stretch ceilings begins with preparatory work. You can take care of the tools and materials used at all stages of work. We will need:
- tape measure, ruler, pencil, marker, marking paper, calculator;
- building and hydraulic levels;
- choline;
- perforator;
- Bulgarian;
- hacksaw for metal;
- hammer;
- dowels, screws;
- heat gun;
- PVC film, baguette.
When purchasing a film, take into account the color and what the surface should be, matte or glossy.
markup
From markup can hang the entire result of future work
Therefore, we approach the point with special attention. What needs to be done:
- We measure the height of all corners of the room and find the lowest corner. We retreat from it about 5 cm and put a control mark. With a horizontal level, we transfer the label to all corners of the room and connect them together using a chocline. Create the perimeter of the upper level of the ceiling;
- then we apply the markup of the lower level in accordance with the draft. It is convenient to create a project on paper in a box;
- mark the transition line between the levels. All marked contours should be clearly distinguished. If everything has been provided, the markup is ready;
- we calculate the exact dimensions of the PVC sheet.
Frame installation
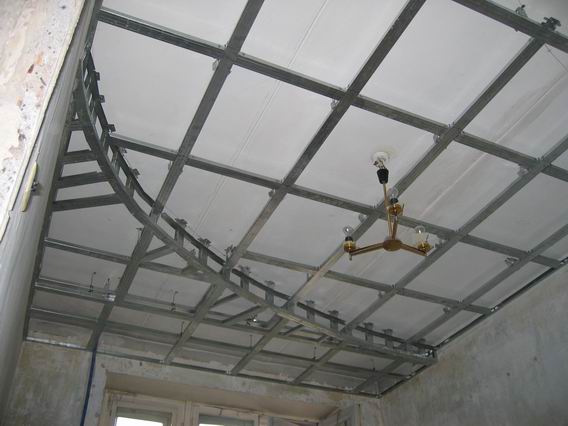
- Installation of the frame begins with the installation of a profile or baguette around the entire perimeter of both the upper and lower levels. The baguette is fastened to the walls with screws into the holes prepared in advance using a perforator.Thus, a rigid frame is formed around the entire perimeter of the ceiling, which will hold the PVC sheet.
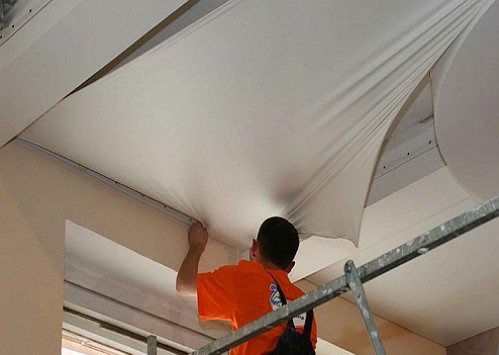
- The canvas is hung on ropes to the corners of the room and heated to 60-70 ℃. A heat gun is used for heating. At this temperature, the PVC film becomes elastic and soft.
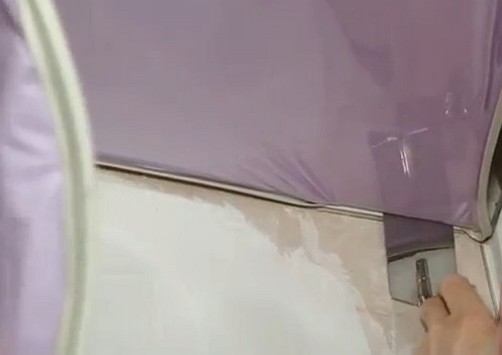
- At the next stage of installation, the PVC sheet is stretched along the perimeter of the ceiling. This will require the help of several people. The heated fabric stretches well. Using a construction spatula, the edges of the canvas are brought into a baguette and fixed in a certain way. Set the top level first. After careful laying of the canvas, the second one is mounted. The excess is removed. The room is allowed to cool to room temperature. Cooling down, the film acquires elastic properties and stretches.
Of course, a professional team will perform the installation and installation work quickly and efficiently. But as we understood, the description of the installation of 2-level stretch ceilings, accompanied by a video, will make this work quite a feasible task. You just need to acquire the necessary tool, the main and most expensive, of which is a heat gun. It also requires diligence, time and some building skills.
Installation of two-level structures
Before ordering a canvas, you need to consider the design of the future ceiling. On the sketch, all the details must be noted, including the transition of the level of the stretch ceiling, the location of the fixtures. After taking measurements, they place an order in a company engaged in the production of structures.
Installation begins with the creation of a frame, installation of baguettes for attaching the canvas. Drywall is attached to the frame in the right places, puttied and painted, and lamps are installed. Then they begin to stretch the canvas, preheating it with a heat gun to a temperature of 70 degrees. The heated film is fixed in the profile with spatulas. Devices are inserted into the holes prepared for the lamps, and the canvas is attached to them with special latches.

Even the simplest options for two-level stretch ceilings will cost a lot. The more complex the design, the more you will have to pay for it. Therefore, in order to save money, many people prefer to do this work on their own. There is a lot of information about installing ceilings on our website, therefore, if you have at least a little experience in carrying out repairs, you can cope with this task (more: ""). However, it is worth remembering that the canvases themselves are expensive, and besides, they can be easily damaged during installation. If there is at least a slight doubt in one's own abilities, it is better to entrust the installation of stretch ceilings to specialists.
Interest in stretch ceilings is growing every day. Today they are at the peak of their popularity. And this is no coincidence, because thanks to modern technologies, materials with new properties appear. Designers use them to create amazing designs. One such material is PVC film. The use of this material allows you to create a perfectly even, smooth, seamless surface of any size without using paint and putty. It, for example, can be beautiful matte or have the appearance of a mirror gloss. Polyvinyl chloride film is a very plastic material, which makes it possible to use it for mounting surfaces of any shape. A huge range of colors helps in solving any problems. Simple installation technology and good aesthetic properties make it possible for many to use PVC film on their own in personal projects. A strong constraint that prevents the independent implementation of the project is the lack of understanding of the technology of installation of two-level coatings. Therefore, let's carefully and step by step analyze how you can mount two-level stretch ceilings with your own hands.And how beautiful two-tier hinged surfaces can be can be seen in the video and photos presented below.
Installation and installation of the ceiling
The installation and installation process can be divided into the following steps:
marking the surface of walls and ceilings
mounting profile installation
wiring installation
installation and fixing of the base sheet
installation of the second level of the ceiling canvas
installation of lighting fixtures
installation of cornice strips and decorative elements.
preparation and marking of walls and ceilings
The preparatory stage for installing a two-level stretch ceiling will be to carefully measure the walls and ceiling of the room. In order to determine the height of the structure, it is necessary to determine the line of the baguette. In this case, it is necessary to take into account the location and height of the built-in lights. The distance from the base canvas to the second level is 5 cm.
installation of the main frame
For the main frame, you can use a U-profile, plastic 0.6 mm. The frame must be located strictly horizontally, therefore, accurate marking is necessary using a laser level and upholstery cord. A straight marking line will show the precise attachment points of the profile.
The following design is typical for the mounting frame of two-level stretch ceilings: the lower level is a plasterboard box, and the upper one is a ceiling sheet.

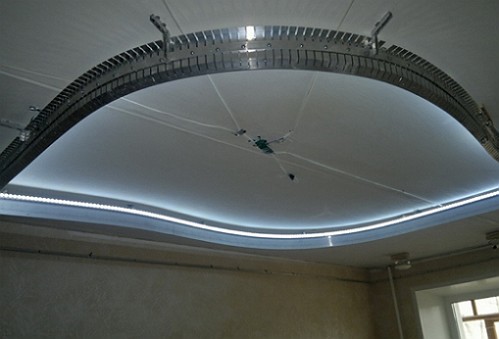
It is possible to install the second level of a stretch ceiling without the use of a plasterboard frame.
In this case, the Flext profile is used.
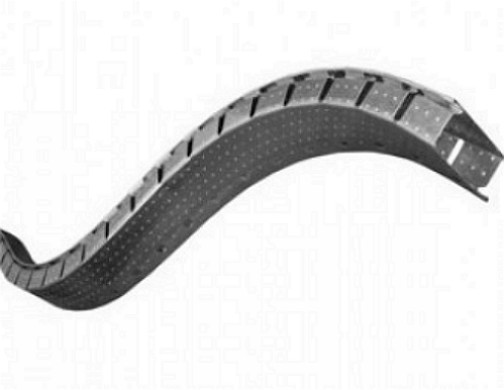
Step-by-step assembly and installation of a two-level ceiling using innovative technology using a flexible profile is presented in the video.
installation and installation of electrical wiring
At the stage of installation of electrical wiring, markings are made and the subsequent installation of built-in lamps. For this, the necessary fastening structures and holders are installed.
installation and fixing of the base sheet
The main point is the fixation and fixation of the stretch ceiling canvas in a baguette. The pre-prepared and cut canvas is straightened and fixed at the corners of the room. To do this, use special mounting latches.
After technological heating of the room, the film is stretched and filled with a special mounting device into a baguette. The film of the second level of the ceiling is installed in the same way.
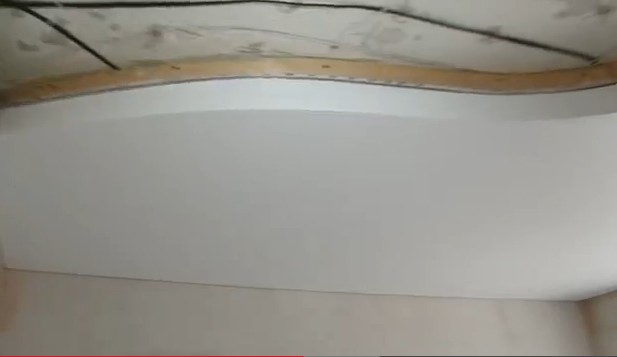
A distinctive characteristic of the form of a two-level stretch ceiling is a smooth transition from the base level to the second.
Tips from professional craftsmen for installing a two-level ceiling are shown in this video.