PECHKINA CLOTHES. FACING THE FURNACE WITH YOUR HANDS
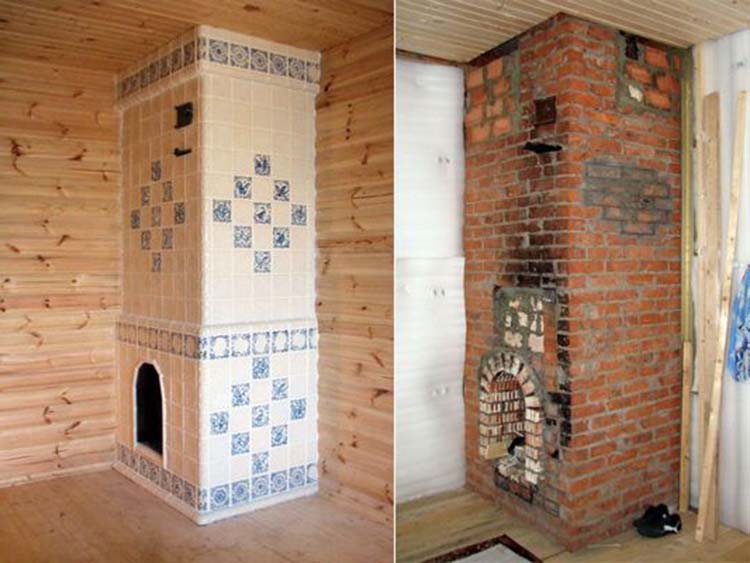
Surprisingly cozy and beautiful tiled stoves are still sometimes found in old houses. Alas, today tiles, like stove heating itself, are a thing of the past. And you can meet them only as piece exhibits at exhibitions of ceramic artists.
Is it possible, in the absence of tiles, to line your stoves with ceramic tiles? readers often ask us. - How to prepare mastic to stick tiles on the stove?
We are forced to disappoint the authors of these letters: unfortunately, there are no glues or mastics for this purpose, just as there are no secrets for sticking tiles on stoves. Such a cladding is impossible because when heated, the brick, tiles and mastic layer will have a different expansion, and the tiles will soon fall off.
But did the tiles or tiles somehow stick to the old stoves? Yes, but these were not tiles: from the back they were made in the form of a box and fastened with steel pins and soft wire, the ends of which were embedded in the seams between the bricks at the same time as the stove laying.
Therefore, we suggest simply plastering the oven using one of the following solutions. At the same time, we remind you that the weakest of them is clay, since it was prepared without the addition of any other binder.
Before plastering, the surface of the furnace must be well prepared, and before applying the solution to the furnace, it must be heated so that the solution is applied to the hot walls.
Furnace surface preparation. When the masonry is finished and the stove has stood for at least a month, you can begin the preparatory work. The oven is cleaned of clay mortar, the same is done with the seams, which are cleared to a depth of at least 1 cm. This is the simplest method that provides a fairly strong adhesion of the plaster to the masonry.
There is also a more reliable preparation for plastering. It consists in the fact that after jointing the seams and removing the solution from them, nails from 100 to 110 mm long are hammered here, preferably at a certain angle. They must be hammered in so that the caps protrude 5 mm above the surface and recede from each other at a distance of 15-18 cm; vertically - through 2-3 rows of masonry.
A wicker mesh with cells of no more than 20 × 20 mm is attached to the nails with soft furnace wire. Thus, an increased roughness is created, providing a more reliable fixation of the solution on the surface of the furnace.
If the mesh is too soft and closely adjacent to the surface of the furnace, a steel wire, 2.5-3 mm thick, is laid under it near the nails and also fastened to the nails.
Plastering solutions use several compositions, measuring the source materials in volumetric parts and adding asbestos or finely chopped slag or glass wool to reinforce the solution. All components of the solution must be thoroughly mixed.
Recipe 1. One part of clay, one part of lime dough, two parts of sand, one tenth of asbestos. All components are laid at the same time and mixed, adding water and bringing the solution to the desired density.
Recipe 2. One part of clay, two parts of sand, one part of cement grade not lower than 300 and one tenth of asbestos. First, clay and sand are mixed together and water is added in such quantity as to obtain a thick dough. Then asbestos and cement are introduced and everything is mixed again, water is added until a solution is obtained. The solution should be used within an hour, counting from the moment of preparation.
Advantages of a brick casing
Why is it worth making a casing around the furnace from bricks? If you still doubt the need for such an upgrade, we suggest that you familiarize yourself with the following advantages of brickwork:
- heated brick retains heat for a longer time than metal;
- for a steam room, a heated brick or stone is optimal, as it gives more humidified steam;
- a casing around the stove will protect you from burns if you accidentally touch its surface and is good for a house where children live;
- a brick-lined stove is much more economical, because less fuel is required to maintain heat;
- brick has more decoration options and looks more aesthetically pleasing in the room.
 Brick-lined oven - a guarantee of warmth and comfort
Combination of materials
Quite an interesting result can be obtained by combining various finishing materials. This technique allows not only to create a unique appearance, but also save on materials. You will be able to use cheaper finishes for parts of the stove that are subject to less wear.
A real stove is able to enliven any interior and give the room an indescribable comfort. But before this is achieved, you have to try a little. Namely, to decide how and with what material the lining of the furnace will occur. An important point is the correct preparation of the furnace, which precedes all subsequent work.
It must be remembered that the heat source is exposed to temperatures that vary in their level. That is why only compliance with all technologies will provide an increased level of comfort. It will also help to avoid various unforeseen consequences (destruction of the heat source, fires). This can be argued more confidently if everything is done by hand.

Cleaning masonry from mortar
The appearance of the masonry also matters, and to make it look neat, you should take care of it during the construction of the casing. To do this, every few rows, drops of mortar that have not yet solidified from the bricks must be cleaned off and wiped with a damp cloth.
If, nevertheless, in some places the streaks were not removed in a timely manner, then after completion of the work, you can walk along the surface of the casing with a grinder with a grinding nozzle or a stiff brush. Then, if the brick was not chosen decorative, plastering or whitewashing is performed. It is recommended to wait at least a day before starting work on finishing.
You should start heating the furnace no earlier than two weeks later, it is forbidden to try the stove earlier, otherwise insufficiently dried seams may crack, so all work should be carried out before the start of the planned operation.
As a first test, paper is burned in the furnace to test the draft.
Such a metal stove for a bath, lined with bricks in accordance with the rules described above, will give soft, uniform heat, delighting its owners for many years.
 Furnace plastering
How to choose the right material for your stove
An amateur master should immediately refuse to buy tiled tiles. This is an expensive material that not even every stove-maker knows about. The secrets of such cladding are available only to true professionals. The fact is that the laying of a tile should be carried out at the time of the construction of the furnace, and each part is attached to the masonry with the help of staples and wire.
Not suitable for facing works and tiles. The coefficient of expansion of this material differs significantly from that of the brick from which the stove is laid. In practice, this leads to the fact that during the operation of the heater, parts of the lining simply fall off.
Ceramic finishing materials for furnaces
 Rice. one
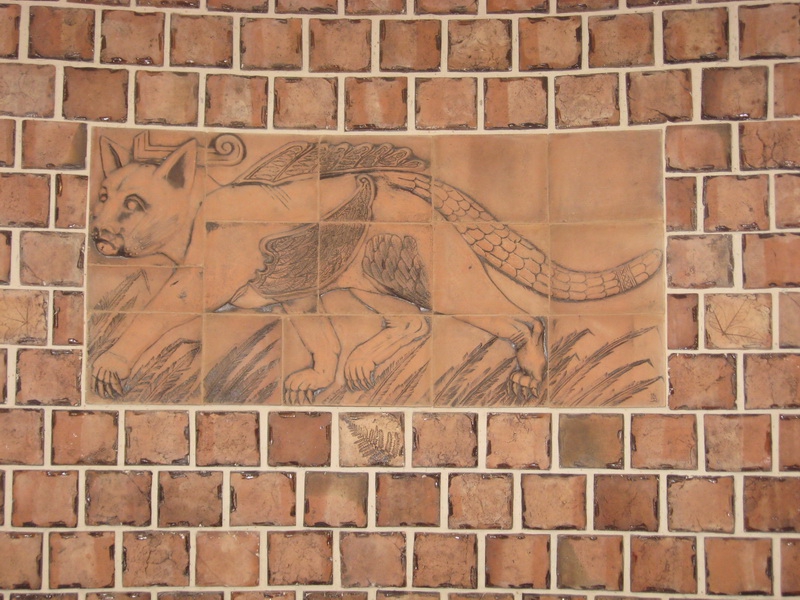
Tiled masonry can be imitated with various types of terracotta (Fig. 1) or majolica (Fig. 2). Glazed tiles with a convex pattern, flat tiles with or without painting will perfectly replace an expensive tile. The oven lined with them will look aesthetically pleasing, but such material costs much less.
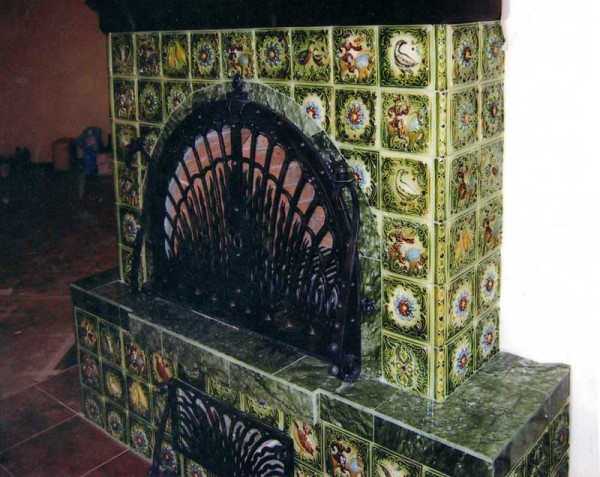 Rice. 2
A variety of building ceramics used in the decoration of brick stoves is clinker (Fig. 3).This is a special heat-resistant tile, most often it imitates the same brickwork. The color range of clinker is very diverse: from white to shades of baked clay (terracotta, brown, chocolate, etc.).
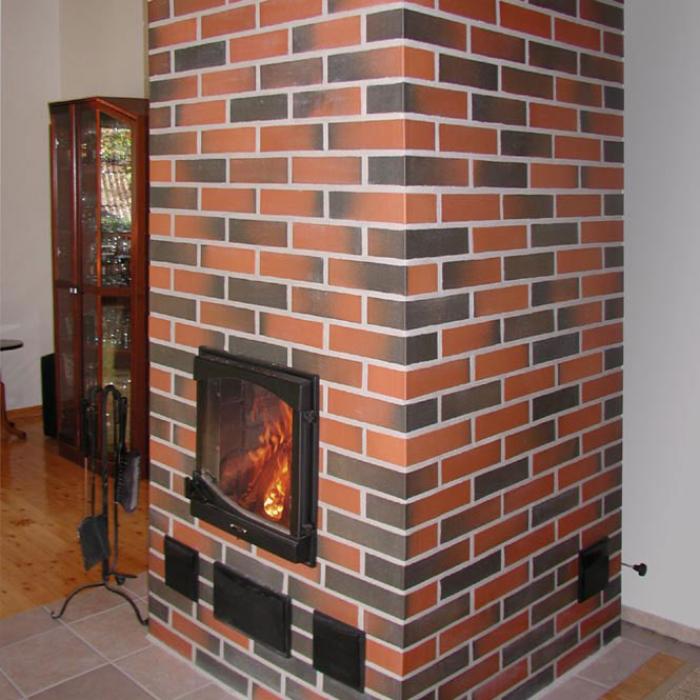 Rice. 3
Modern material - porcelain stoneware - is also ceramics. Its slabs can be similar to valuable types of natural stone, terracotta and clinker. Low porosity makes porcelain stoneware resistant to high temperatures.
When choosing ceramics in order to finish the stove in the house, you need to pay attention to the reverse side of the tiles. It is better to purchase such a cladding in specialized departments of hardware stores.
It is better to purchase such a cladding in specialized departments of hardware stores.
Natural and artificial stone
If stone is preferable as something to decorate a brick oven in a country house or in a country mansion (for interiors in the style of a castle, chalet or hunting lodge), then in stores you can pick up a variety of finishes of this type.
 Rice. 4
Decorative stone (Fig. 4) is molded tiles obtained by cold pressing a mixture of filler (sand, stone chips) and various binders. To make the wall laid out by him seem finished with natural stone, manufacturers include in the kit several types of surface patterns that repeat the appearance of the imitated mineral (shale, sandstone, etc.). The special coating makes the tile moisture resistant and makes it easy to care for: you just need to wipe the contaminated surface with a damp cloth. Thin cladding plates are very light, which can be considered an indisputable advantage over natural stone.
Fragments of real rock can be bought at quarries, crushed stone factories or construction companies.
When using them to finish a brick stove, it is important to remember that this heavy material must be properly fixed to the wall. To preserve the natural beauty of the material and facilitate the care of the stone, it is best to varnish the finished veneer.
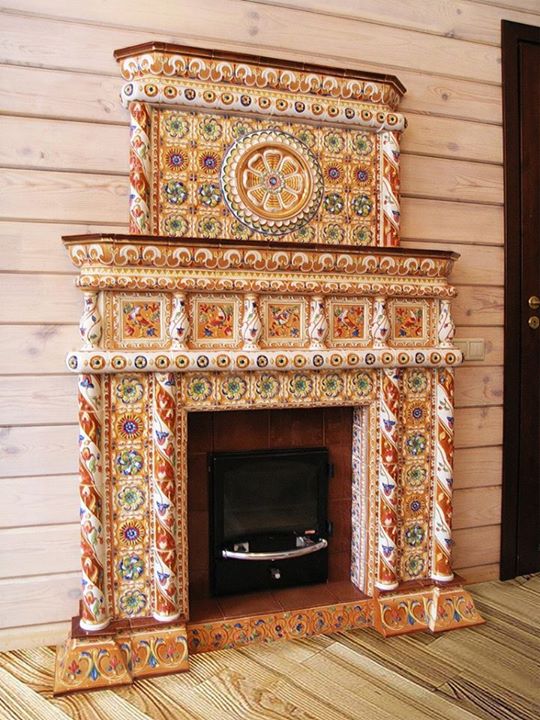
Tiles
For the first time, this material was invented by the ancient Babylonians, who also decorated stoves with it. Each tile is made piece by piece from ceramics, and then glazed with a pre-selected pattern. As a result, you can get a very beautiful and original stove that will look elegant. It is believed that tiles produce the most environmentally friendly heat.
Tiling the stove with tiles is very expensive and difficult, so you need to call for this special craftsmen, who are not so easy to find. But it's worth it, because the tiles have the highest heat transfer - 0.3 kW more than other materials.
The disadvantage of the material is also that you need to wait about a month until the mortar is completely dry and the oven is ready for use. Thus, tiles are the choice only for those who want to stand out, create a unique interior.
Masonry mortar
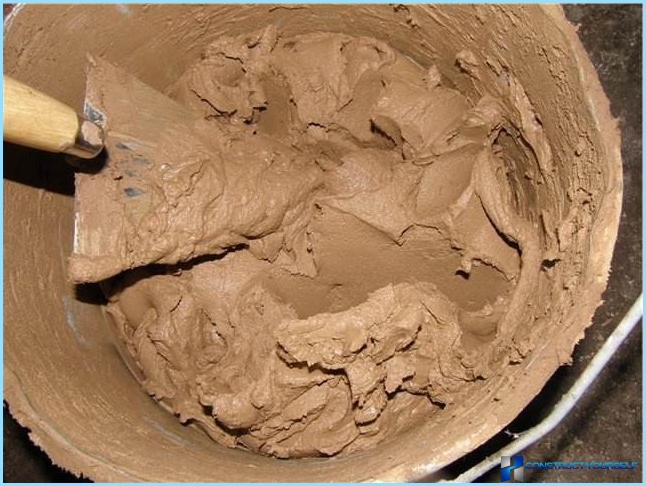
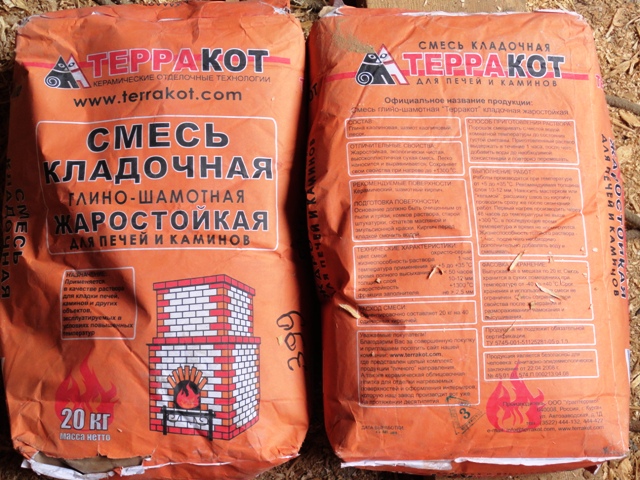
The preparation of the solution is one of the most critical stages of work, since not every mixture can withstand high temperatures. The easiest option is to use a ready-made heat-resistant mixture, which already contains all the necessary components. In this case, the preparation process will consist in diluting it with water in the required proportions in accordance with the instructions and thoroughly mixing.
For a solution, it is better to use a special mixture
There is another way, more laborious, but economical. The solution can be mixed from equal proportions of sand and fireclay clay. Also, salt should be added to the composition of the mixture at the rate of 100 g per bucket. After adding water and mixing, the solution is allowed to brew for at least three days, then it is checked for suitability. When finished, it should easily fall off the trowel.
What kind of brick to cover
Choosing the right material for work is already half the battle.It happens that tight-fisted owners try to save money and overlay the stove with what is left of the last construction site. Halves and quarters of a brick are used. The end result is unlikely to please with its appearance, so it is still better to use a whole new brick, specially purchased for this purpose.
There are several main options here:
- silicate brick;
- fireclay or refractory bricks;
- hollow red;
- red ceramic full-bodied;
- facing.
Silicate brick is very good for cladding buildings from the outside, but it is not suitable as a cladding for a metal furnace. It is made on the basis of slaked lime, which does not withstand strong temperature changes. In addition, if the furnace is located in a bath, the high humidity and temperature will destroy the silicate material very quickly.
Refractory brick is very good as a heat shield, there are two significant drawbacks - the higher cost of the brick itself and the appearance. Its rough and crumbling surface is unlikely to please anyone. You will have to finish the surface a second time - with porcelain stoneware, tiles or other suitable material. As a result, it is not advisable to buy fireclay bricks for cladding - ceramic will cost less.
As for the hollow red brick, this is not the worst material to work with. Of course, a solid one is better, as it keeps heat longer, but for lack of such, a hollow one will do.
The facing brick undoubtedly possesses the increased esthetic properties. But, like hollow bricks, it retains heat worse, so it is not recommended to use hollow facing bricks for lining the stove in the house. Full-bodied facing brick is quite acceptable.
Choice of solution
There are no special requirements for cladding mortar. At least they are not as strict as in the full-fledged construction of a brick stove. However, it is better not to experiment and use a proven solution of clay and sand.
Sand must be sifted, and then mixed with clay in a ratio of 1: 1. Then you can gradually add water, constantly stirring the solution. The final consistency is quite thick, there is no excess water, the solution slides freely from the trowel. If desired, you can add about a quarter of cement grade 400 or 500. The brick will not heat up very much and the cement will not damage the mortar, but will only strengthen the masonry.
If clay is not at hand, you can buy it in a specialized store; you don’t need much for masonry.
Laying rows of bricks
Having prepared the solution and tools, you can proceed to laying the rows. Consider the sequence of work on the example of a bath stove. It must be borne in mind that the structure will be heavy, which means it needs a solid foundation. Therefore, if the base is weak, then before bricking the sauna stove, it will be necessary to install a columnar or solid foundation about 30-40 cm high under the brickwork.
To do this, a pit is dug, which is filled by a third with sand and construction debris (not wooden elements!), Then a concrete screed is organized, which must be allowed to dry well. To the level of the floor, the foundation is adjusted with a row of bricks.
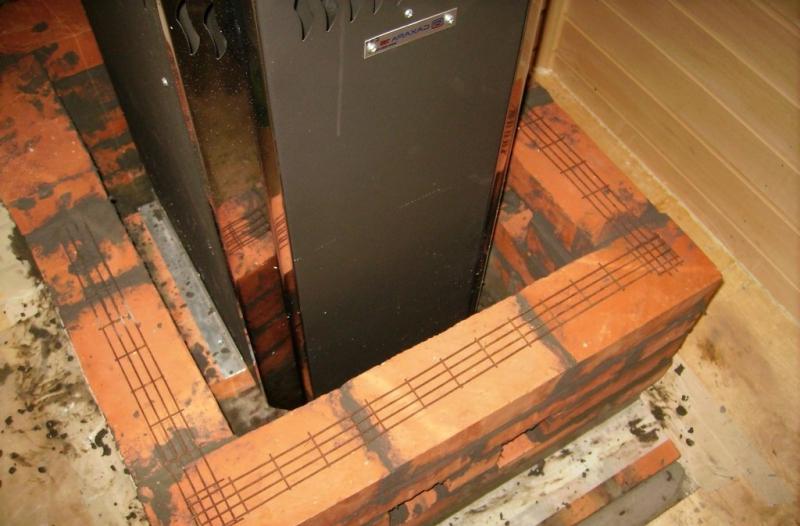 Brickwork with reinforcement
If you decide to do without an additional foundation (the floor is concrete and strong), then the masonry must be supplied with a reinforcing mesh, which is laid over the bricks in each row. The distance from the walls of the furnace to the brick rows should be 5 cm. With a closer approach, the metal will overheat, and if the distance is too large, then the heating of the masonry will take a long time and require additional fuel consumption. Warm air will circulate in the gap between the brick and the metal, which will contribute to a better heat capacity of the metal stove.
The sequence of lining the furnace and its features:
- Using the ordering (a special tool that allows you to control the evenness of the masonry), we begin to lay out the bricks. In this case, the width of the horizontal seams between them should be 8-10 mm, and vertical - 5-7 mm.
- For proper circulation of heat and air Do not forget about ventilation
starting from the second row, it is very important to make ventilation holes in the masonry - 2-3 on each side through one row
Thus, the masonry is raised to the level of the ash pan and the firebox. Laying bricks in the places of holes for the doors should be given special attention, not forgetting to check whether they open during the work. Along the edges of the windows for additional strength, trimmings from metal corners are installed.
Further, the height of the casing is increased to the level of the plate, although, if desired, the chimney can also be laid over. However, in the second option, it must be borne in mind that the design of the chimney must be very reliable, since after the installation is completed, access to it for possible repairs will be difficult.
When lining the furnace, pay attention to the fact that the seams are completely filled with mortar, then your construction will turn out to be really strong.
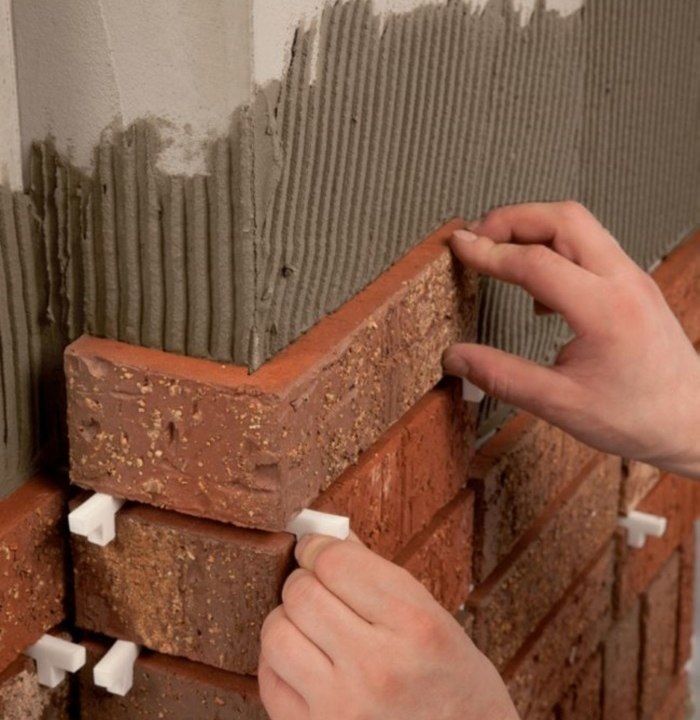
Brick-like clinker tiles
If you want the stove to be decorated with a facing brick pattern, but you cannot afford it because of its high cost or the lack of a foundation under the foundation structure, you can use special ceramic clinker tiles. It is especially popular in Northern and Western Europe.
This product is made from a mixture of different clays and fireclay with the addition of the necessary dyes. Next, the solution is pressed into molds and subjected to high-temperature firing. Thanks to this, a beautiful low-porous facing tile is formed, the thickness of which is 9–12 mm. For your oven, you can choose different types in shape and color, as the range of products is huge. Laying is done in the same way as for simple ceramic tiles.
Step by step cladding technology
- Brick for laying is soaked in water for about 40 minutes.
- If the walls of the furnace after laying will be visible, then before starting work, it is advisable to wrap the stove with a filmso that you do not have to clean it from the remnants of the solution later.
- If the stove was sold with a convection casing, it must be dismantled, since the cladding will now play its role.
- For marking, a fishing line or cord is pulled vertically at the corners of the masonry of the future masonry. If the floor is wooden, two vertical bars can be nailed to it on both sides of the stove. They are fixed with wooden struts.
- Mix the solution. You don’t need to do much - half a bucket is enough.
- Brick laying begins from any convenient angle. For this, only the whole material is used, which is carefully, focusing on the cord or fishing line, laid flat - “in half a brick”. Each brick is carefully leveled. The excess solution is removed immediately, until it dries up, the outer side of the masonry is wiped with a rag, burlap is well suited for this purpose.
- The seams should not contain voids and be of the same thickness (5 - 7 mm).
- It is desirable to reinforce the second row with a mesh. It is cut into strips of the desired size and laid on a brick, a solution comes on top. The mesh should not stick out of the seams. The corners are reinforced with pieces of wire to tie the entire row into one. The second row should be started from the same angle, but take not a whole brick, but a half, so that the seams are offset in half a brick - this is necessary for dressing and strengthening the structure.
- In the third or fourth row, you need to leave several holes for hot air - usually they make two or three on two opposite sides of the half-brick masonry.
- The next 5 - 6 rows are made solid, ligation of the seams is required. Do not forget to check each row with a building level for the horizon and vertical, so as not to “fill up” the masonry. Constantly monitor the thickness of the seam.
- At the locations of the firebox and ash pan, the brick should not prevent the doors from opening. The brick must first be laid without mortar, accurately determine their location, if necessary, cut to the desired size with a grinder.
- The row above the door is covered with two segments of a steel strip or corner - on the outer and inner sides of the masonry. Laying is carried out on it.
- In the penultimate row, two more holes should be made for air circulation - as described above. Thus, it will be possible to achieve proper circulation - at the bottom, cold air will flow under the heat shield and exit from above already heated.
- Work is usually completed when the masonry reaches the top level of the kiln. Sometimes a brick is laid up to the ceiling, completely closing the chimney.
- Wait at least 48 hours for the mortar to dry completely.
- After drying, the brick can be given a more beautiful and rich appearance. To do this, rub it with a stiff brush, which is moistened with a solution of laundry soap. After that, the masonry surface is rinsed with clean water.
If the furnace is very powerful, it is lined with a special lattice method, leaving gaps between the elements of 10 cm.
For a round stove and masonry is round. The technology is not much different from the standard, although it is a little more difficult to arrange the brick in a circle. Holes for air circulation are made symmetrically on both sides of the masonry. In the process of work, the main thing is to maintain the same distance between the walls of the stove and the inside of the brick over the entire area.
On our website, we have repeatedly talked about various types of metal stoves: buleryan, potbelly stove, simple sauna stove and others. Some owners of private houses and summer cottages buy ready-made metal stoves, some build them with their own hands, but the convenience of using them is always obvious, since they are compact, heat up quickly, but, unfortunately, cool down just as quickly. For a large house of several floors, a metal stove is definitely not suitable due to its low heat capacity.
Casing around the home oven
A metal stove is a smart solution for heating a small house, outbuilding or bathhouse. But it has one significant drawback that makes it unable to compare with stone aggregates: the inability to retain heat for as long as a brick stove.
Those who wish to increase the duration of heat transfer and the productivity of heating a room should create a casing around the structure, that is, overlay a metal furnace with a brick. Doing it yourself is quite simple, but before starting work, you need to carefully plan your actions and choose the right materials and tools. Our article will help you to cope with this task.
Conclusion
Furnace finishing is an important undertaking that must be taken seriously. A lot depends on the correct execution of all moments.
The lined surface gives not only a beautiful appearance, but also protects the structure from any destruction. It is important to understand that you can do almost all the work with your own hands, but you need to do everything slowly and following all the rules. Then the house will be cozy, comfortable and safe.
How can you line a brick oven, photos, videos, tips.
Everyone wants their home to be warm, cozy and beautiful. What is needed for warmth? This does not mean spiritual warmth, but material, in the form of heating.
If you do not have natural gas, then you need a solid fuel boiler, fireplace or stove to supply heat. You can lay out a stove or fireplace in the house yourself if you have instructions at hand.
But, besides the fact that the stove gives heat, it is desirable that it fits into the interior, be beautiful. That is, I want to make an ornament, a candy out of the oven.
Then, naturally, the question arises - how can you put a stove in the house?