How to connect a faucet to a pipe
It is much easier to put a plastic or rubber bushing, which began to appear on sale, although they have a shorter service life than brass ones. In the absence of suitable bushings, it is possible to get by with replacing the flat rubber gasket with a conical one, but this does not solve the problem, because the gully remains and will increase over time.
A stem with a worn (or, as they say, “eaten”) thread cannot press the valve tightly enough to the seat, no matter how hard the flywheel is turned, reaching a certain position, it breaks. In this case, you have to install a new stem or change the entire valve head (which is quite expensive and not always possible due to the lack of heads on sale). If there is no serviceable stem or a new head, a temporary repair can be made: put a gasket 6-8 mm thick in order to use another suitable section of the stem thread. In the absence of such a gasket, it will be enough to put a few metal washers under the usual gasket in the valve seat. For the same purpose, the valve itself can be extended by “lengthening” its shank due to a short aluminum or brass rod inserted into the socket for the shank, or by putting metal washers on the shank. If it is necessary to temporarily shut off the water with a valve with a faulty stem, turn the stem to the possible limit and in this position screw the handwheel to the valve body.
If water oozes through the stem (which is highly undesirable, since under the valves, unlike water taps, there is no sink or sink), then there is only one reason for this: the gland packing has been rubbed or dried up. The method of sealing the stuffing box depends on the design of the head. In heads with a stuffing box, it is often enough to re-tighten the stuffing box. If the sleeve is tightened to the limit, and the water continues to ooze, you have to add or completely change the packing. To do this, completely screw in the stem of the valve being repaired and make sure that the water in the pipe is blocked. If this is not done, then the water entering the pipes under pressure can squeeze out the stuffing box and flood the room. After making sure that the valve is securely closed, unscrew and remove the gland sleeve, remove the old packing with an awl or a narrow screwdriver and put a new one in its place, tamping each layer with a screwdriver. After stuffing the stuffing box, the bushing must be twisted by at least 2-3 turns of the thread, otherwise the water pressure on the stuffing box with the valve open may break the bushing. In valve heads with a union nut, it is possible, after closing the valve, to unscrew the union nut and, without removing it from the stem, wind fluffed string around it over the stuffing box bushing, and then screw the nut into place. Such a seal is less durable than winding the same twine under the gland bushing.
To eliminate leakage through the threaded connections of the valve with pipes, it is necessary either to screw the pipe more tightly into the valve body, or to disassemble and reassemble the defective connection by winding up more sealant. Sometimes, as a temporary measure, it is possible to cover the joint (previously dried and cleaned of dust and other contaminants) several times with oil paint. However, at the first opportunity, it is better to eliminate the connection defect by one of the indicated methods.
In any residential area, several valves are installed to enable emergency shutdown of supplies. Valves are present on plumbing, heating and gas systems. Replacement of the valve of any system is carried out independently or with the help of specialists. How to do the work yourself, read on.
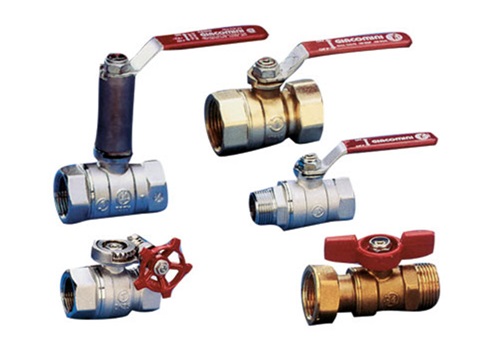
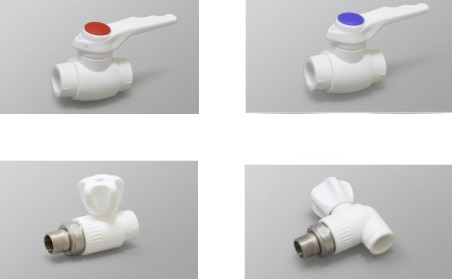
Fittings for various pipelines
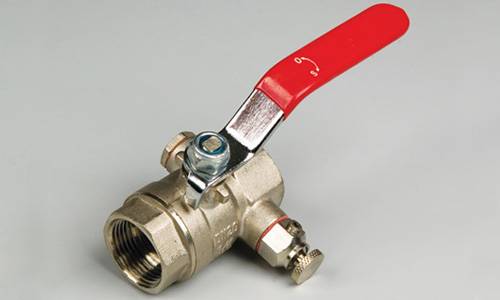
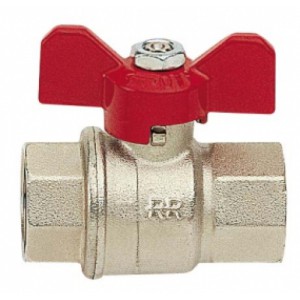
If the ball valve is broken
A ball valve has a more complex structure and differs from a two-valve one. Most often, such products break due to dirt accumulated inside the case.It is she who disrupts the operation of the mixer. If water flows from the tap, then it must be disassembled, cleaned well and reassembled. This requires:
Unscrew the screw securing the lever with a screwdriver with the appropriate tip.
Carefully remove the lever and unscrew the threaded screw with a screwdriver.
Then it is worth removing the plastic seal and the dome of the mixer.
The gasket should be carefully inspected and then cleaned of plaque. If there is obvious damage, then it is worth replacing it.
Now you can take out the ball and inspect it
If a part is damaged, then it should be replaced. You can buy a ball at any plumbing store.
Using a thin screwdriver, you need to very carefully pry off the seal that fixes the ball. If necessary, the sealing gasket should be replaced.
All seals before assembling the valve should be treated with a special compound recommended by the manufacturers.
In conclusion, it remains to assemble the crane, acting in the reverse order.
What to look out for
The nuances of choosing ball valves:
Paramount is the fact that the diameter of the polypropylene pipes at the attachment point must match the diameter of the ball valves. On sale you can find products with couplings from 20 to 63 millimeters. This range of diameters includes all possible sizes of plumbing systems, so there will be no problems with the choice.
Ball valves have several forms of handles: valves, heads, levers, and so on. For each section of the water supply, you need to choose the right product
For example, in some situations, the valve valve will be impossible to turn due to limited access to it, so it is better to take a lever and so on.
We must not forget about the aesthetic component of ball valves if they are installed on an open section of the pipeline
The shape of the product should fit into the interior of the room, which is also important.
In addition, it is worth taking into account what material the product is made of. Plastic faucets are cheaper than metal faucets
But significant savings will not come out if it is planned to install a small number of locking and ball mechanisms.
In this case, it makes sense to buy faucets made of metal.
Replacing a valve on a gas pipeline
Replacement scheme
Replacing valves in an apartment on a gas supply pipe is carried out in the following way:
- preparation of materials. To carry out the work you will need:
- a new valve, selected in all respects;
- two wrenches;
- means for sealing joints (linen thread and graphite grease);
- plug (required if the work is performed by one person);
- before replacing, it is necessary to shut off the gas supply to the room. To do this, the old valve must be transferred to the “closed” position, that is, perpendicular to the pipe. Then you need to remove the remaining gas from the pipeline (for example, burn it with a stove burner);
- dismantling of the old valve:
- if the valve is installed on the thread, then the fixing elements are unscrewed;
- if the valve is installed by welding, then the device is cut out of the gas pipeline;
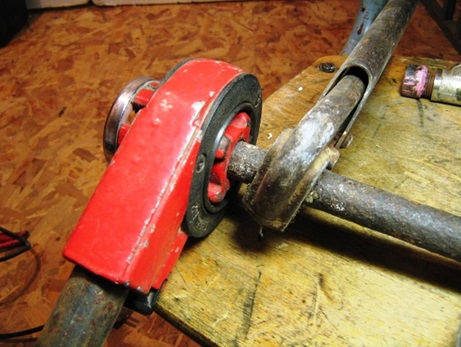
How to cut a thread on a pipe yourself
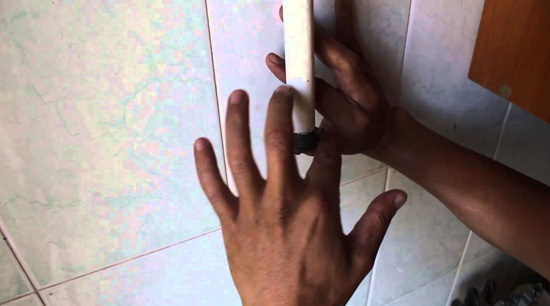
- a plug is installed at the end of the pipeline. If the work is done together, then the pipe can be drowned out with a finger;
- the thread is treated with sealing materials. For the strength of the connection and the smooth running of the valve, graphite grease is applied over the linen thread;
Threading with graphite lubricant
- new faucet installed.
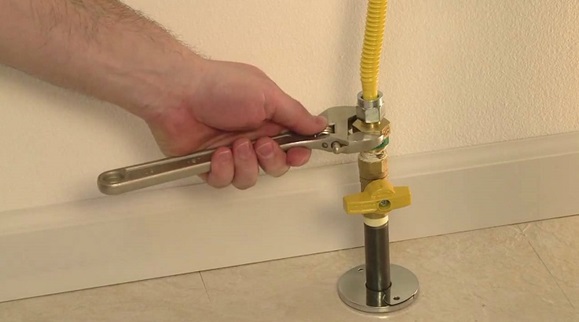
Installing a new valve on a gas pipe
Leak test
After installing the valve on the gas pipe, it is necessary to check the tightness of the connections obtained and the device itself. You can determine the presence of a gas leak as follows:
- a saturated soapy solution is introduced. To do this, the maximum amount of any soap must be diluted in water;
- with the resulting solution, with the help of a sponge, the joints and the valve are coated.
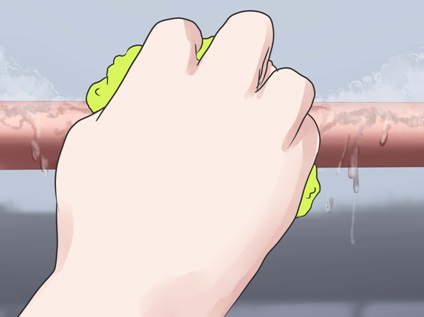
Using Soap Solution to Detect Gas Leaks
If the junction of the valve with the pipes is not tight, soap bubbles will form.
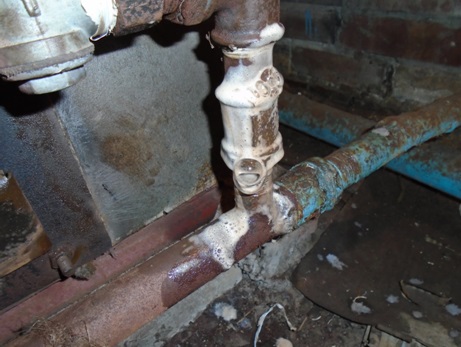
The formation of a bubble indicates a violation of tightness
If a leak is detected, it is recommended to perform all work again and increase the sealing.
You can replace all the valves in the living room yourself. To carry out the work requires minimal knowledge and a small set of tools.
Nowadays, very often PVC (polyvinyl chloride) and HDPE (low pressure polyethylene) plastic pipes are used for laying pipelines and heating systems. This greatly simplifies the installation process and makes it accessible to the hands of a person who does not have professional skills. There is no need to be a welder, use a grinder for cutting, etc.
Brazed Plastic Ball Valve
But if there have been no issues with pipes for a long time, then questions for stop valves still exist. How to mount taps in a system of plastic pipes and, most importantly, which taps to use? This is what will be discussed in our article.
The procedure for soldering polypropylene elements
When all the necessary tools and materials are prepared, you can proceed to the task. It is divided into two stages: preparatory and directly soldering fittings for polypropylene pipelines. First of all, you need to prepare a place to work.
In the set of the apparatus for welding there is a special clamp. It is used to fix the machine, for example, to the table. This mount is very reliable, the device will not stagger. Therefore, it will be convenient to work with him. But in some situations, soldering is not performed at the desktop, but directly next to the water supply. In such a case, the machine has a handle to hold on weight.
Two-valve faucet gasket replacement
Why is the faucet leaking? Most often, these accessories wear out the liner or gasket. To replace it, you need:
- Unscrew the valve body. To do this, the part must be rotated counterclockwise.
- Now you can remove the damaged gasket.
- From a piece of thick leather or rubber, a new part should be made. For a sample, take a worn gasket.
- The new part must be carefully installed in place of the old one.
- It is worth wrapping a little sealing tape on the persistent edge. Linen can be used.
- In conclusion, it is worth installing the valve body in its original place. To do this, the part must be rotated clockwise.
- The installed valve must be well tightened. You can use a wrench for this.
If the faucet has been leaking for a long time and a quick replacement is required, a new gasket can be purchased from a specialized store. This will save time. As for a homemade part, it is more suitable for short-term troubleshooting.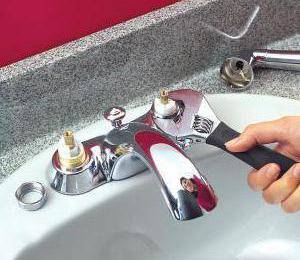
Types of valves for PVC and HDPE pipes
Although both of these pipe modifications are made of plastic, each of them has its own characteristics. And this applies not only to the material itself, but also to the scope, diameters, installation method, etc. Therefore, we will consider the types of cranes for PVC and HDPE plastic pipes separately.
For PVC pipes
These locking mechanisms can be installed on any plastic pipe, both non-reinforced and reinforced. The ball mechanism of such a valve is made of stainless steel, which is also not subject to corrosion and clogging.
Such taps are used for the installation of plumbing and heating systems. You can mount the locking mechanism into the system in the same way as the rest of the elements, using a special soldering iron for PVC pipes.
Types of shut-off ball valves for PVC pipes for soldering (straight and angled)
When buying a crane, you need to pay attention to the following:
- the valve must be made of the same material as the rest of the pipeline elements;
- the diameter of the locking device must correspond to the diameter of the pipes;
- the characteristics of temperature, pressure and the external environment must correspond to the actual parameters in which it will be operated.
Stop valves for PVC pipes are manufactured in the following modifications:
- Double-sided - plastic ends for soldering into the pipeline system are brought out on both sides of the valve. It is used to block the flow of hot or cold water in plumbing or heating systems. Mounted on a pipe in a vertical or horizontal position.
- One-sided - on one side there is plastic for soldering, and on the other - a thread. One-way valves are used in cases where it is necessary to connect a PVC pipeline with elements from a different material. For example, when installing heating, connect the battery to the pipes.
- A plastic valve is used in heating and plumbing systems that carry hot or cold water to restrict flow. This device differs from the ball mechanism in that it allows you to adjust the pressure, and not just open or close it.
For HDPE pipes
Locking mechanisms for the HDPE pipe are usually classified, first of all, according to the method of installation. There are three types here:
- Collet. The main feature of such cranes is the simplicity of their installation, which is easy to do with your own hands without additional equipment and any installation skills. However, it should be noted that they are used mainly for domestic purposes, on pipelines with a diameter of 20 to 110 mm.
Push-in valves are not designed for high pressure (above 15 bar) and hot water (above 45 ºC) systems.
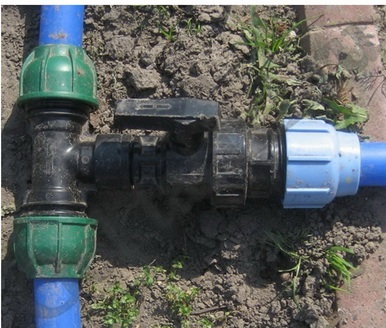
Collapsible plastic valve on the HDPE pipeline
It is very easy to mount such a product in the pipeline. To do this, you need to cut two pipes that will be connected by shutoff valves so that the cuts are even and strictly perpendicular to the flow of the fluid. Put control nuts on both pipes. Then insert the ends of the pipes into the grooves of the coupling and tighten with nuts. Crane installed.
- Flanged. This type of valves is used for pipelines of larger diameter (up to 315 mm). The installation of the crane into the general system is carried out using bolts with which the flanges are screwed.
Unlike collet, flange products are designed for high pressure. Due to chemical resistance, such mechanisms are often used in the chemical industry.
- Welded. This type of faucet speaks for itself. For their installation in the pipeline, a heating element is used, which seasons one element with another. This connection method is able to withstand greater pressure and ensure guaranteed tightness.
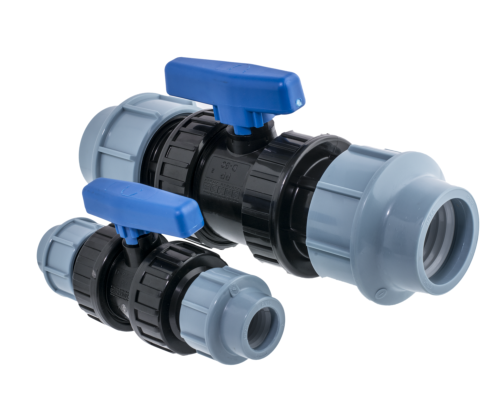
Compression ball valves for HDPE plastic pipes
Installation work in this case looks a little more complicated.
They can be produced:
- end-to-end, when the edges of the joined elements are melted with a special soldering iron, and then connected under pressure;
- electrofusion method. In this case, a special sleeve is used, inside which a heating coil passes. The ends of the connecting elements are placed inside the coupling, melted and solidified. This method of connection is able to ensure the solidity of the pipeline.
What is required for repair
After the preparatory work, you can begin to troubleshoot the mixer. If a closed faucet is leaking, then special tools will be required to fix it. They need to be prepared in advance. Troubleshooting will require:
- Wrench.
- Flat screwdriver.
- Wrench.
- Crosshead screwdriver.
- Part to be replaced.
- Sealing tape or linen.
- Soft material.
- Dry rags.
- deep capacity.
This simple set of tools is usually enough to fix the leak. If there is no time to run for new gaskets, then they can be made from leather or rubber. Usually the faucet leaks due to wear of this part. Soft material is required to protect the sink from damage. After all, the tool can slip out of your hands.As a result, ceramic products can break, and enamel will crack on metal ones.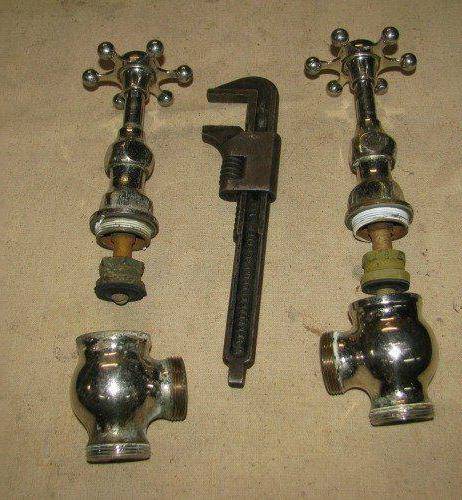
How to replace a shower hose gasket
Often a leak appears in the place where the shower hose and faucet are connected. The main reason for such a breakdown is the wear of the ring gasket. This part can be easily replaced. For this it is worth:
- Disconnect the shower hose from the faucet using a wrench. Everything must be done very carefully so as not to damage the thread. Otherwise, the hose itself will need to be replaced.
- Now you can remove the worn part.
- Replace the old O-ring with a new one.
- Finally, it remains to screw the shower hose into place, acting carefully and without pinching it.
To eliminate such a leak, experts recommend using a silicone ring gasket. Parts made of rubber are short-lived and wear out quickly.
If, when switching the water flow to the shower hose, the faucet flows smoothly, then the locking element needs to be replaced. This part is called "crane box". The locking element is located in the mixer handle. You can buy a crane box in a specialized store.
News of Sevastopol
Sevastopol newspaper
x
- news
- Incidents
- Money
- Health
- A life
-
- Army and Navy
- culture
- Education
- Weather
- Sport
- Technologies
- Ecology
- Blog
- Photo galleries
- home
- >
Is the valve in the apartment ours or not?
November 30, 2016, 11:36 am
All responsibility for the maintenance of the valve lies not with the owner of the dwelling, but with the management company (UK).
All responsibility for the maintenance of the valve lies not with the owner of the dwelling, but with the management company (UK).
After the publication of “Sevastopolskaya Gazeta” “In Search of Dialogue with Management Companies”, the editorial office received a question from a reader: “If everything that is up to the meters in the apartment or to the intra-apartment valves refers to common house equipment (property), and after that - to the property of the owner apartments, then whose valve?
For an answer, the newspaper turned to the head of the Main Department of State Housing Supervision Galina Chagina:
“The valve, as a type of in-house shut-off valve, belongs to the property of the apartment owner, that is, all responsibility for the maintenance of the valve lies with the owner of the dwelling,” she said, explaining that “engineering networks are common to the house until the first shut-off and control valves, because common house property is considered if it serves more than one apartment. A valve serves one apartment.
However, after the publication of G. Chagina's answer on the Sevastopolskaya Gazeta portal, our reader from Samara, who recently faced the situation of replacing a stopcock in his apartment, contacted the editorial office. After some struggle with the management company, the young man succeeded in replacing the stopcocks on the intra-apartment water supply networks at the expense of the management company (or rather, at the expense of the funds that the management company collects from the owners under the “maintenance and repair of housing” column). However, he did not have to pay anything extra.
- Our management companies do not argue about the ownership of stopcocks and shut-off devices. Here another problem is more evident: in the Criminal Code they tell you that there are no taps, they say, buy it - we will change it, but all this is just extortion, - says a resident of Samara.
Indeed, federal regulations enshrined a detailed description of common property. And regarding valves, there are such lines: “The common property includes in-house engineering systems of cold and hot water supply and gas supply, consisting of risers, branches from risers to the first disconnecting device located on branches from risers, indicated disconnecting devices, collective (common house) metering devices for cold and hot water, the first shut-off and control valves on the outlets of the intra-apartment wiring from the risers, as well as mechanical, electrical, sanitary and other equipment located on these networks.
In other words, in paragraph 5 of article 1 of the Decree of the Government of the Russian Federation of August 13, 2006 No. 491 (ed.dated 07/09/2016) “On approval of the Rules for the maintenance of common property in an apartment building and the rules for changing the amount of payment for the maintenance and repair of residential premises in the event of the provision of services and performance of work on the management, maintenance and repair of common property in an apartment building of inadequate quality and (or) with interruptions exceeding the established duration” it is expressly stated that the first shut-off and control valves (valves) on the outlets of the intra-apartment wiring from the risers belong to common house property, which means that they are the responsibility of the Criminal Code.
The editors of Sevastopolskaya Gazeta decided to clarify this nuance at the Ministry of Construction, Housing and Communal Services of the Russian Federation. The answer that came from the press service completely refutes the version of G. Chagina: “According to the position indicated in clause 5 of Decree No. 491, the first stopcocks that turn off devices (valves) belong to common property.”
More in the section "Sevastopol"
Other news:
-
November 29, 2019, 16:54
-
Ecology
|
November 29, 2019, 15:05 -
Army and Navy
|
November 29, 2019, 14:41 -
Money > Business
|
November 29, 2019, 14:26
-
Incidents > Crime
|
November 29, 2019, 14:00 -
Incidents
|
November 29, 2019, 13:45 -
Incidents > Crime
|
November 29, 2019, 13:25 -
Money > Budget
|
November 29, 2019, 12:11
The main causes of failure of a single-lever ball valve
If the tap is leaking, then the problem must be fixed quickly and efficiently. Otherwise, water can cause more damage and permanently ruin the plumbing. Single-lever ball-type products may become unusable:
- Due to wear of the gasket.
- Chips and cracks on the body, which arose as a result of mechanical damage.
- Rusted aerator.
- Large accumulations of dirt.
- Blockage between ball and seats.
The defect on the body can be repaired by applying cold welding or sealant. However, this is only a temporary measure. After some time, a complete replacement of the structure will be required.
If the cause lies in a rusted aerator, then it should be removed and then cleaned. You can do this with an old toothbrush. It is worth noting that after cleaning the water pressure will become stronger.
Installation of valves for polypropylene pipes from product selection to installation
One of them is inserted into the other in full accordance with the markup. When performing a task, accuracy and speed are paramount. In no case should the pipe be twisted in the coupling when they are combined, this will lead to a design defect.
This completes the welding of polypropylene pipes. It remains to wipe the metal elements of the apparatus from the remnants of the molten material. In this case, the soldering iron will not require cleaning for further use.
You can determine the quality of the soldering visually; at the junction of the pipe with the locking element, a small edge of molten polypropylene should form. The connection itself, in case of successful welding, will be completely smooth, without any deformation.
It is possible to finally determine the reliability of the connection of the water supply elements after the water has been supplied. If the task is completed in full accordance with the requirements put forward, recommendations and instructions for the soldering machine, then the joint between the polypropylene pipe and the shut-off ball valve will be reliable and tight. Such a connection will last the maximum period, most likely, without any problems or leaks.
But you need to check not only the tightness of the soldering. It is also worth making sure that the locking mechanism works correctly. Ball valves for polypropylene pipes should completely close and open without much effort even when the water supply is functioning.

HomeEquipment and repairHome Improvement How to repair a valve
Replacing a faucet on a riser with water shut off
Which crane to put on the riser? You can purchase an old-style valve, or you can install a ball valve.
one.In conventional rod taps, an elastic band is screwed at the bottom. The rod presses it, due to which the water is blocked.
2. A ball valve on a riser looks more attractive than a stock valve.
The water is blocked by a ball-sphere. But if the water contains a lot of salts, then the faucet quickly clogs and stops working. To prevent this from happening, periodically you need to twist and unscrew the valve.
Ball valve selection rules:
- the diameter of the tap must correspond to the diameter of the riser on which it will be installed;
- the direction of the arrow on the marking of the ball valve must coincide with the movement of the medium;
- the model must have a suitable thread.
Thread types on valve flanges:
- external on both sides;
- internal on both sides;
- on the one hand - external or American, on the other - internal.
Work order:
1. Shut off the water supply of the riser, drain the water from the pipeline system (as agreed with the management company).
2. Wrap a fum-tape or linen with a sealant on the thread of the tap. You need to wind in the direction of winding the tap onto the pipe.
3. Screw the product onto the pipe. If the twist goes without effort, you need to add more fum tapes. You should not lean too much, because. the product will break. The twist of the crane should go with some effort.
What you need to know about replacing ball valves on a riser
Before proceeding, the specialist assesses the situation. Replacing a ball valve on a riser requires a professional approach. StroyGarantiya specialists have all the necessary skills and can easily determine the nuances that ordinary tenants do not even know about. This includes:
- Information about the properties of the materials from which the pipes in the apartment are made;
- Rules and features of the replacement of certain components of various designs;
- A strict procedure for carrying out repairs, without which they are doomed to failure.
The first problem that the owner of the apartment faces is the need to shut off the water in the riser. You can't do this on your own. you need to contact the utilities or management company
. Pipes can only be closed during a certain period of time. This can only be done on weekdays from 10 to 13. If the repair of the crane is delayed, this will cause dissatisfaction with the neighbors.
Products are copper, brass, cast iron - each of these materials requires proper handling during installation and dismantling. Otherwise, unforeseen complications are possible: you can break the thread, violate the integrity of the gasket, and so on.
The mere theoretical possession of information about the procedure for performing work will not help to replace the crane on the risers. In most cases, such attempts later have to pay double the price. Often, after self-intervention, additional costs for materials may be required.

How to change a faucet
The riser is a common property, therefore, the replacement of the valve must be carried out at the expense of the management company, by its forces. The only point: you need to carefully read the contract. It will indicate which part of the riser will be common property, and which will be your personal property. Perhaps a shut-off valve placed directly next to the battery will be yours. Then all the problems with its replacement will have to be solved independently.
How to replace the tap on the riser yourself?
1. Close the riser.
You contact the managing organization, write a statement of the established form (there are examples on the information board), pay for disconnection / connection. Specialists come, block the riser, drain the water from the system.
2. Wind sealing material around the thread.
This is necessary so that the faucet on the riser does not subsequently flow. You can use fum tape, classic linen, impregnated with some kind of reinforcing compound.
Winding is carried out in the direction of winding the tap.
3. Screw the shut-off valve onto the pipe.
If the reinforcement goes easily (it twists without effort), then you need to add sealing material. But you don’t need to press too hard: it will crack.
Everything. Installation of cranes on the riser is completed. It remains only to fill the system with water. But this will be done by the specialists of the management company.
By the way. At the height of the heating season, it is unlikely that someone will drain the water from the heating riser. This option is only available in the event of an emergency.