How to plaster extruded polystyrene foam technology
If the insulation boards are installed on the walls of the building, it is necessary to close them with a finish as quickly as possible. Professionals recommend doing this immediately after the glue on which the material was fixed dries.
Carrying out calculations
It is better to buy material for plastering with a margin. I would not want to run for an additional bag in the midst of work. But how do you know how much material you need? To do this, carry out a simple calculation:
- calculate the area of the treated walls without taking into account window and door openings;
- on the packaging of the indication, the approximate consumption of the mixture per square meter. For different compositions, it ranges from 4–6 kg;
- multiply the specified value by the cultivated area and get the required amount of the mixture;
- add another 10% to the resulting value - this will be the final amount.
Preparation of plaster mixture
Usually the manufacturer provides instructions for preparing the solution, so be sure to read the packaging and recommendations. If you are plastering Styrofoam for the first time, do a little kneading first to get used to the mortar and the execution process.
- Pour the dry mixture into the container.
- Water is added in small portions.
- You can mix by hand, use a hammer drill with a nozzle or a construction mixer.
- When the consistency is completely satisfied, leave the solution for 5 minutes to ripen and mix again.
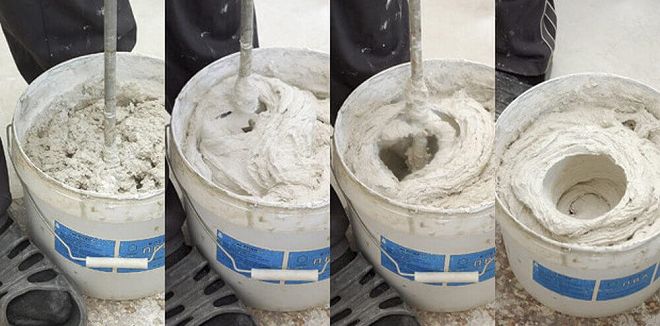
In some cases, it is necessary to make the solution a little thinner than indicated in the instructions.
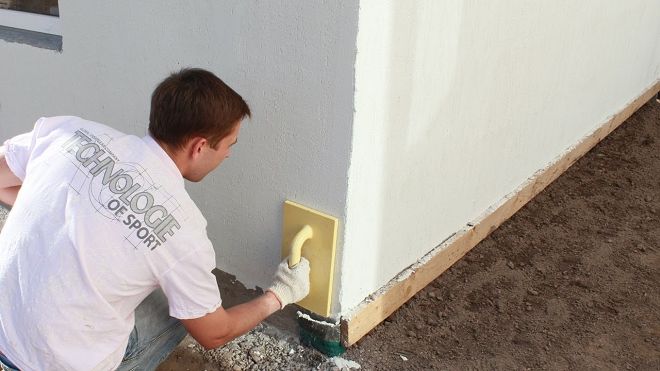
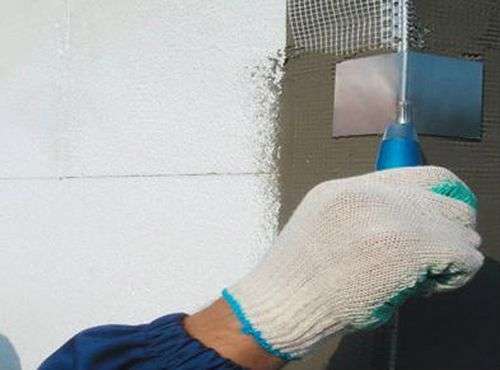
Pasting with reinforcing mesh
First of all, corners and slopes are processed. To do this, cut the reinforcing mesh into strips so that both sides of the corner have 10-15 cm of material.
- a thin layer of mortar is applied on both sides of the corner;
- apply a mesh and smooth from the corner so that the material is completely deep into the solution;
- if the length of the piece was not enough, make an overlap of 10 cm, it is impossible to glue it into the joint.
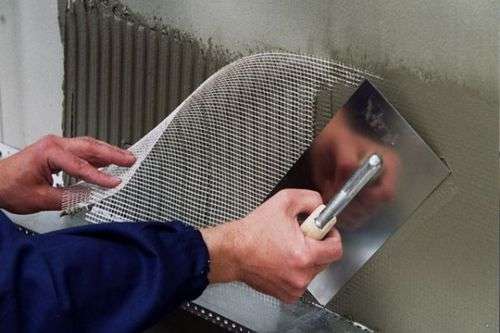
Next, proceed to the total wall area. They work in the same order:
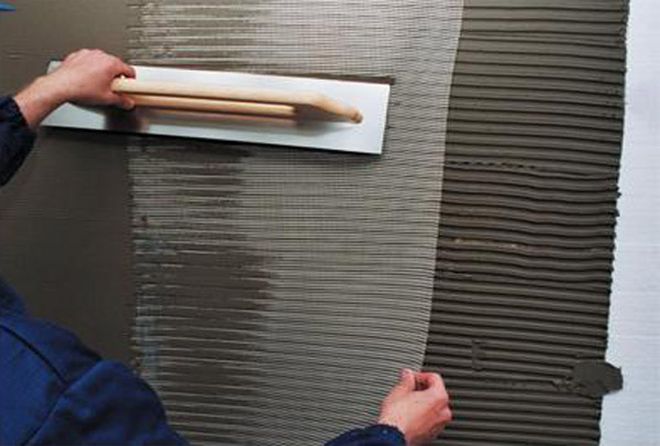
- The wall is covered with mortar.
- The width of the strip slightly exceeds the size of the reinforcing mesh.
- Apply the material and smooth with a wide spatula or trowel.
- The next layer of the mesh overlaps the previous one by 10–15 cm.
Grouting plaster mesh
The first layer must dry completely. After that, with a grater with sandpaper, with light circular movements, the surface is treated. This will remove small bumps and help you use less leveling mortar.
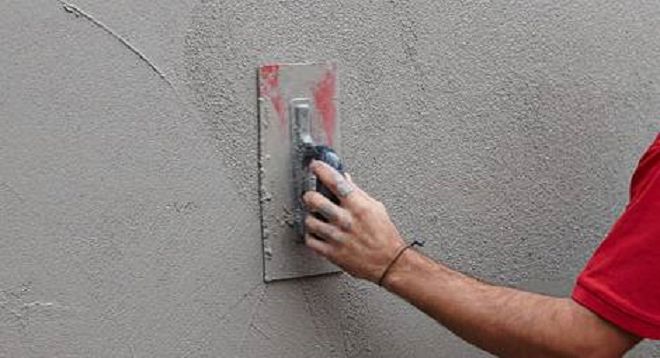
Surface leveling
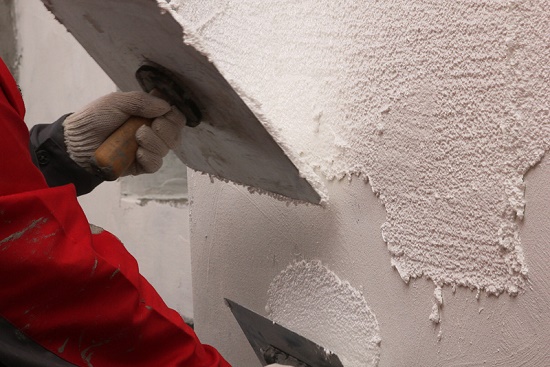
We are preparing a new solution and proceed to leveling the plastered polystyrene foam. Now work with a wide spatula:
- a small amount of solution is collected on a wide spatula;
- arc movements from top to bottom are applied to the wall;
- layer thickness no more than 3 mm.
Make sure the surface is as flat as possible.
Grouting the second layer
Start grouting only after the layer is completely dry. They work with the same grater with sandpaper. Only be sure to pick up fine grain to remove small flaws. Otherwise, you can just spoil the whole work.
Primer
This step should not be neglected. If you do not cover the base with a primer, then the decorative layer will either be applied poorly or quickly lose its attractiveness. The composition of the primer depends on the method of finishing:
- Further decorative plastering - a composition is used in which there is quartz sand, it helps to increase adhesion.
- Coloring - composition without sand, makes the base even smoother.
Finishing
Having chosen one or another method of finishing, they act strictly according to the plan provided by the manufacturer. Both painting and decorative plaster have their own nuances and methods of applying the material. Therefore, you will have to study a few more articles to figure out how to do everything right.
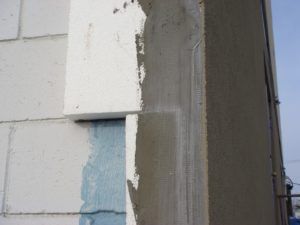
Installation of styrofoam boards
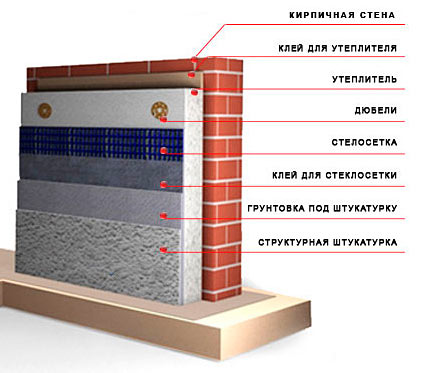
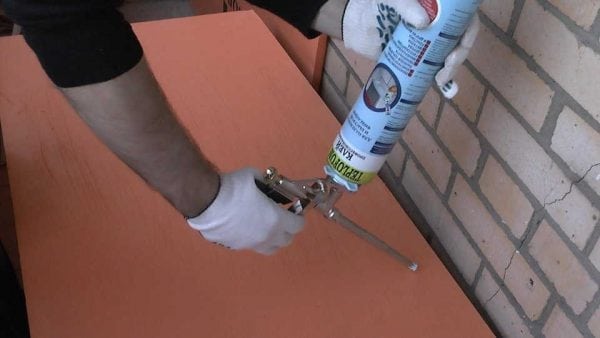
As mentioned above, Ceresit glue is used for fixing polystyrene foam boards. If the walls have irregularities from 3 to 15 millimeters, then the composition is applied with a trowel along the contour of the slab. In this case, the adhesive strip should be equal to 4 centimeters wide. Beacons are applied in the central part of the insulation. The number of such spots on one canvas should be 8. Their diameter is 10 centimeters. A strip of glue along the contour should be applied with breaks, which will prevent the formation of air bubbles. The height of such strips should be equal to 20 millimeters.
When the irregularities are up to 3 millimeters in size, the adhesive is applied in a continuous layer, while the indentation should be three centimeters from the edge. In this case, you need to use a notched trowel. Choose a tool whose tooth dimensions are 12 millimeters. As soon as the plaster-adhesive mixture has been applied, the plate is applied to the surface and pressed with float blows. The area of adhesive contact after pressing the web should be 40 centimeters from the area of the bonded surfaces.
The plates are fixed in one plane so that the dressing of the seams has a T-shape
It is important to ensure that the gap between the plates is not more than 2 millimeters. Larger joints can be filled with polyurethane foam or Styrofoam scraps.
Glue "Ceresit" will dry completely after three days, only then you can proceed with additional fixation, if necessary. For this, the masters advise using facade dowels. After this period, the master can form a reinforced layer.
Prices for services for finishing facades with expanded polystyrene
Alptekhnologii specialists carry out facade work using various materials. Finishing works with the use of a layer of insulation, decorative elements and foam panels, we carry out with the help of aerial platforms, lifts, scaffolding, as well as the industrial alpinism method.
To accurately determine the cost of facing works and inspect the facade of the building, our employee visits the client free of charge.
Departure of a specialist can be ordered by phone. +7 (495) 940-76-95 or by sending an application to info@alptech.ru
The cost of installing a heat-insulating layer depends on the thickness of the expanded polystyrene. The type of decoration affects the price of decor installation. More accurate prices for the facade decoration with foam plastic can be seen here.
Benefits of Styrofoam Finishing
Expanded polystyrene has replaced fragile gypsum and massive concrete. Practical and almost weightless foam plastic allows you to decorate any building without creating additional load on the building envelope and foundation. In addition to the versatility of use, expanded polystyrene is distinguished by:
- low cost;
- variety of architectural elements;
- simple installation on the facade;
- light weight;
- resistance to mold and decay;
- incombustibility;
- moisture resistance.
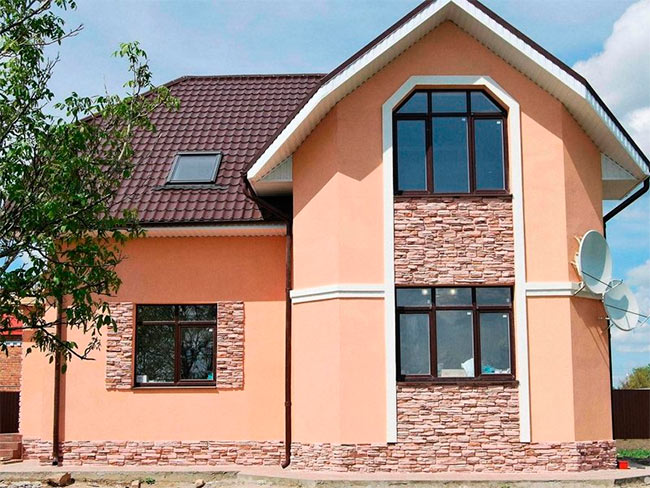
Decorative elements can be made in any shape and size. They can be selected from standard models or ordered individually.
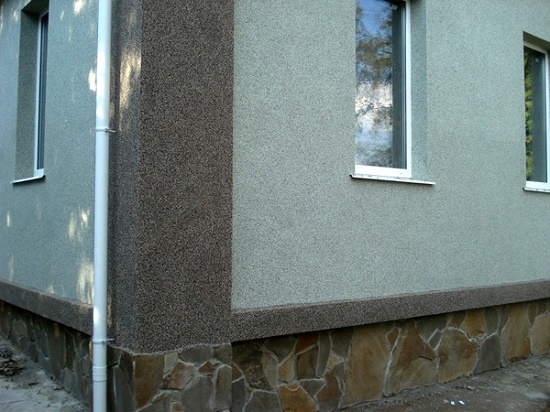
In addition to decorative facade elements, manufacturers offer effective hard-coated polystyrene foam panels (thermal siding or thermal siding), which provide facade decoration and thermal insulation.
Expanded polystyrene thermal siding is a high-tech material with an even protective layer of quartz sand, which is easy and convenient to install on the facade. Such panels do not allow freezing of walls and provide significant savings in heating costs.Styrofoam boards are easy to cut. The material is mounted on the facade using adhesive solutions. Thermal siding provides sound insulation and protects the building from precipitation.
Styrofoam decor
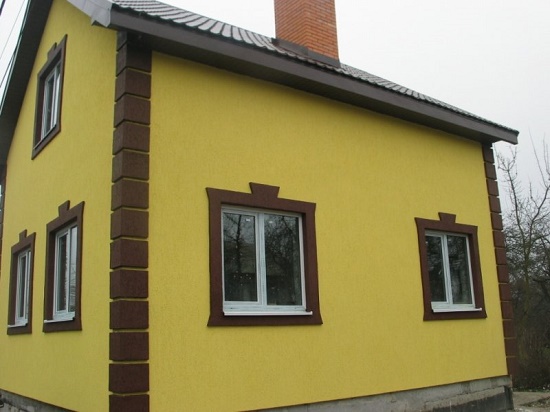
You can decorate the building, giving it style and individuality, with the help of moldings, cornices, platbands, balconies, columns, pilasters and other decorative foam elements.
It should be noted right away that all these elements decorate the facade and provide sealing of individual sections, but they do not carry any supporting loads. This is decor in its purest form. The most commonly used products are molding, cornices, window sills, platbands and pilasters.
Molding is an overhead convex plank that is used to decorate walls, door and window openings. With the help of molding, you can mask facade defects and poor finishes. A reinforcing layer of a protective shock-resistant coating is applied on top of the decor.
Decorative cornices are special ledges on the wall that are used at different levels of the building to protect the facade from precipitation. Cornices are crowning (main) and intermediate. The main ones are installed on top of the facade with a significant cornice overhang. Intermediate ones are mounted on the wall in places of interfloor ceilings.
Pilasters are flat vertical protrusions on the surface of the facade. I install them to give the building more impressive forms and stylistic originality.
Natalya Kolesnikova
Process Technology
Apply two coats of plaster
Styrofoam plaster is carried out in two layers: 1st - creates a reinforcing mesh coating, 2nd - levels the surface. The work is carried out in several successive stages:
- to increase the degree of adhesion between materials, notches are made on the surface of the insulation boards (using a hacksaw or a needle roller in increments of about 5 cm);
- from the beginning, the door and window openings of the building, its corners are reinforced with a fiberglass mesh;
- full mortar coverage of the reinforced wall;
- mashing the first layer;
- applying a second plaster layer;
- final (final) grout;
-
primer for finishing. For more information about plastering, see this video:
 The solution layer should be 2 - 3 mm
At the second stage, for corners and openings, the mesh is cut into strips of the required length (up to 1.5 m on average) and a width of about 30 cm. They are bent in half and tried on at the corner (opening).
For the grid, following the instructions on the package, one bucket of solution is made (in order to have time to work out before drying begins). It is applied with a spatula on both sides of the corner (10 cm on each side of the corner). The remaining 5 cm untreated is needed to overlap the next strips.
The solution is applied in a layer of 2-3 mm. The prepared mesh is pressed into it with a spatula from top to bottom. For corners, a ready-made mesh profile is also used.
Then the entire wall is reinforced: the mesh is pressed into the solution, covered with a layer of plaster. Work quickly so that the mortar sets. Grid joints should not coincide with the joints of insulation sheets.
When the plastered surface dries (it will take about 2 hours), then it is rubbed with a special grater using circular movements, which must be periodically moistened with water. Slight roughness should be left for better adhesion to the second layer. For more information about the finishing of expanded polystyrene, see this video:
 The final layer is applied the next day, followed by more thorough grouting. The surface is primed with a short pile roller (does not leave smudges) for decorative finishing. Works are carried out in warm (above 5 degrees) calm weather.
You can do the work yourself. The main condition for obtaining a quality result is the use of suitable compositions and compliance with the technology of work.
Plastering technology
Materials and tools that will be needed for plastering polystyrene foam boards:
- primer for PPS;
- brush or roller;
- adhesive plaster mixture for PPS;
- cement-sand mortar;
- decorative plaster for PPS or paint;
- fiberglass reinforcing mesh with a density of 145-160 g/m2;
- plaster perforated corner;
- spatulas large and small (width 10 mm and 450 mm);
- construction grater or sandpaper;
- hacksaw or needle roller;
- solution container;
- mixer.
Work order:
- Clean the styrofoam boards from dust and dirt
- Apply a primer for PPS with a roller or brush.
- With a hacksaw or a needle roller, make notches diagonally on the plates - “comb out” the insulation. This is necessary for better adhesion of materials.
- Cut the reinforcing mesh into strips the length of the entire height of the wall (for one-story houses). If a multi-storey building is being plastered, then the length of the mesh is chosen based on the convenience of working with it.
- Prepare the adhesive mixture in a volume of not more than one bucket. The solution must always be fresh.
- Glue the plaster perforated corner on the corner. Instead, you can use a segment of the grid, bent in half.
- Apply a layer of mortar 2-3 mm thick on the wall to fix the mesh. Its strips are overlapped. Therefore, the width of the adhesive mixture should be 10 cm less than the width of the mesh segment.
- Press the mesh into the solution with a spatula. Move up and down and to the side. The grid must be completely covered with plaster mixture.
- Apply a strip of adhesive solution under the next piece of mesh.
- Glue the mesh segment in the same way as the previous one. Thus, cover the entire surface of the walls with a reinforcing mesh.
Make sure that the mesh joints do not fall into the joints of the polystyrene boards.
- After the first adhesive layer applied to the mesh has dried, rub it with a damp construction grater in a circular motion. Strive for perfect smoothness is not necessary. This will impair adhesion to the next layer of plaster mixture.
- The walls are again treated with a deep penetration primer. Suitable Ceresit CT 17 or Knauf Isogrund.
- After the soil has dried, they begin to plaster with a cement-sand mortar. I use the same tools - a large and a small spatula. The thickness of the second layer is 3-5 mm.
- After the base layer has dried, rub the surface of the walls again with a moistened grater or sandpaper. If there are traces of circular movements, then you can rub straight a second time. Performing the last grout, you need to achieve the perfect result. This makes it easier to apply decorative trim.
- Apply another layer of primer under the finishing layer of the polystyrene boards.
- Paint dry plaster or cover with decorative plaster mixture.
Plastering of polystyrene boards is the best way to protect them from adverse weather conditions and create an attractive appearance of the walls of the building. The technology for applying plaster on polystyrene foam is quite simple, you just need to remember the main rule: you need to use a reinforcing mesh and attach it to the foam board using special adhesive mixtures. This will ensure the strength of the entire facade finish and create a base for a decorative coating.
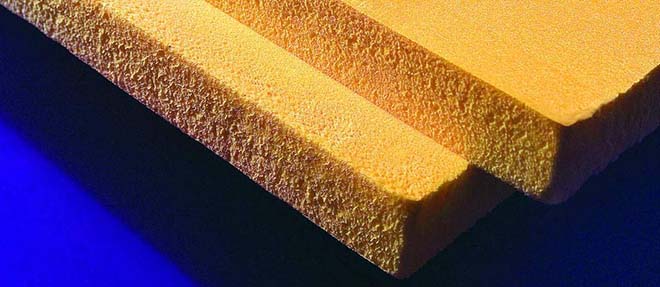
Plaster and adhesive mixture Ceresit Ceresit CT85 for expanded polystyrene, 25kg
Among the significant advantages of a dry mortar, it makes sense to single out durability, reliability and high adhesive performance.
The basic rule, which must be strictly followed before applying such an adhesive solution, is to check the supporting base (wall, ceiling) for the absence of dust and other contaminants. If there are any irregularities or remnants of the old putty / plaster coating on the surface, then they should definitely be disposed of.
For the best adhesion, it is highly recommended to coat the underside of the foam sheets with a primer. A mass of not too liquid consistency can be applied in different ways - either in the form of continuous (solid) lines, or in the form of dots, or in the form of a dotted line - at the discretion of the user.
Scope of use
Ceresit CT 85 has a fairly wide scope, it is for this reason that consumers acquire this composition, refusing alternative solutions. This adhesive can be used to fix boards that are made of expanded polystyrene. Their fixation is very effective. The mixture is suitable for the manufacture of a reinforcing layer on such slabs when the facade is formed using a "wet" technology. This mixture can be used for insulation of new buildings or thermal protection of old buildings. When warming the facades of buildings in a "wet" way using mineral wool boards, this glue is also used.
Other bonding methods
Some craftsmen are trying to use "home" methods of fixing polystyrene plates by other methods. It's not always reasonable.
Mounting foam
With the help of foam fasten any surface, including XPS. The cost of foam is often cheaper than similar glue in cylinders. But the disadvantages of this method are obvious:
- slow setting with the base - plates lying vertically will constantly slide;
- the adhesive contains special adhesion-improving additives, which makes it more tear-resistant than foam;
- mounting foam tends to grow in volume, and when installing polystyrene foam, this can play a bad role;
- foam peels off the wall faster than glue.
The advantage of foam is the ability to fill the seams between the plates, so it can also be useful in installation.
hot melt adhesive
Thermoplastic adhesives include special substances based on polyamide, ethylene vinyl acetate, which become liquid during heating. As they cool, they harden. Such products are suitable for working with extruded polystyrene foam, but their cost per 1 kg can be up to 1500 rubles. The price of the work, therefore, will not be the lowest. It is more expedient to buy a suitable specialized adhesive and carry out repairs economically, efficiently and reliably.
Choosing an Adhesive for Extruded Styrofoam
How to glue polystyrene foam? For fixing the plates, you can use different means that have different components. But there is a specific application of mixtures. So, for gluing to a concrete base, it is better to use one, for attaching to a brick wall - others, for winter work - still others. There are adhesives that combine the properties of fastening material and insulation, have low thermal conductivity.
Before buying, it is important to clarify that the composition of the product does not contain substances that corrode polystyrene foam. This:
- acetone;
- alcohol substitutes;
- toluene;
- ethers;
- other solvents.
The ideal option is to purchase specialized formulations, because their manufacturers have already taken into account all the important points. There are three main types of products that are suitable for bonding material. This is a plaster-adhesive mixture of different brands, polymer adhesives and bituminous glue (mastic).
The people often use “liquid nails” in a cylinder, silicone sealants, frost-resistant tile adhesives, drywall products, and tiles to glue the material. Is it possible to use them? Experts say that the use of such adhesives is possible, especially if additional fixing of the structure with dowels is planned. But the cost of work can turn out to be much higher, so it is better to buy funds intended for XPS.
Applied tools and materials
To plaster polystyrene foam surfaces, you need to use a certain set of tools. The necessary tools and their purpose are described in the table.
| № | Instrument name | Purpose |
|---|---|---|
| 1 | construction mixer | designed to stir the solution to the desired consistency; |
| 2 | set of spatulas | used to apply the mixed composition to the work surface; |
| 3 | construction grater | removal of minor irregularities, grinding; |
| 4 | set of containers | under water, for solution; |
| 5 | construction knife, hacksaw | cutting boards and fiberglass mesh, notching; |
For finishing work, special plaster (facade) on expanded polystyrene is required.
Its most common types with a brief description are presented in the following table.
| № | Type of mixture (by composition) | Specifications |
|---|---|---|
| 1 | mineral compositions | are sand-cement mixtures with the addition of various fillers; very low cost; the quality is much lower than that of analogues; now |
| 2 | acrylic plaster materials | the main components are acrylic resins, chemical additives; excellent quality (they were created specifically for finishing insulated facades); extruded foam plastic does not need to be prepared for plastering; it fits well on the treated surface; allow you to create decor elements, textured images on the facade |
 Choose fire resistant mixtures
This is not a complete list. Modern manufacturers offer a large selection. Some samples may differ in only one or two of their constituent components.
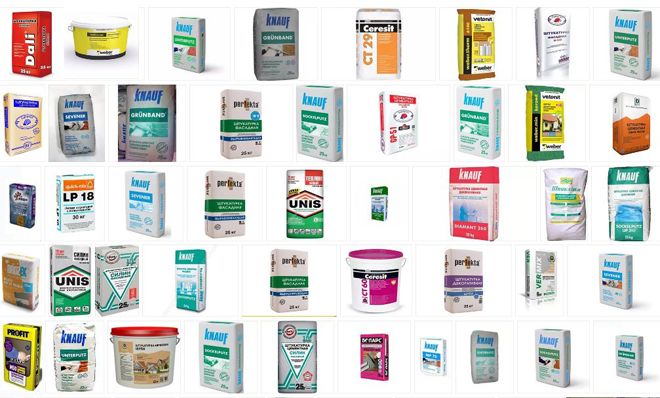
The mixtures of the companies Knauf, Ceresit, Polyrem, Kreisel (for example, the brands of universal adhesives CeresitCT-85№, Coral SP-141, PoliminP-19) gained particular popularity.
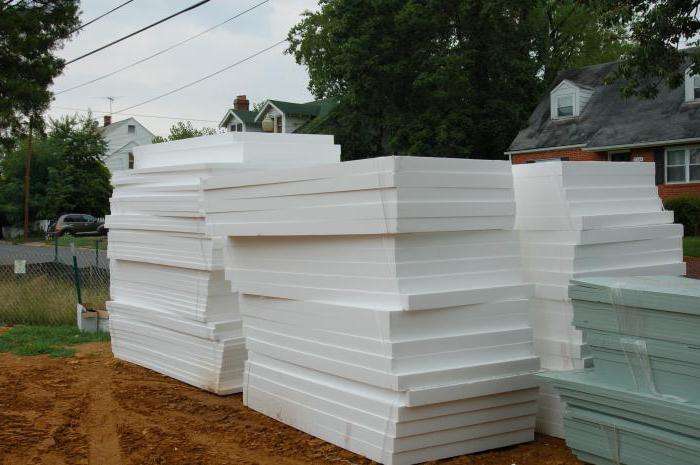
When choosing, you should pay attention to the refractory properties of the compositions, because for the most part polystyrene foams have an average degree of flammability, it is recommended to use plaster materials that are more resistant to fire. Plaster is produced for sale (mainly) in bags from 15 to 25 kg of weight
The plaster is produced for sale (mainly) in bags from 15 to 25 kg in weight.
It is not recommended to perform plaster work with a solution of cement and sand. Such surfaces will not last long.
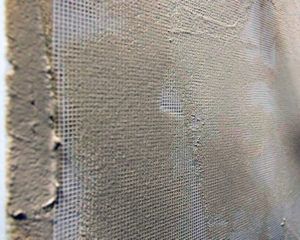 The mesh will strengthen the mixture on the wall
You will also need water and fiberglass mesh (prevents cracking, holds plaster).
You can easily calculate the amount of material needed for work on your own:
- according to the consumption data indicated on the packaging per 1 sq. m. of the treated surface;
- purchase (approximately) mixtures for one wall;
- after plastering, calculate the practical consumption and buy in addition to the desired area.
Additional Preparation Tips
Ceresit CT 85 Styrofoam Adhesive is applied to a wall that is completely devoid of areas exposed to fungus, algae or moss. Such surfaces are cleaned with brushes and treated with the fungicidal preparation CT 99.
Those walls that have not been plastered and have been in use for some time should be dedusted by washing with water under pressure. The walls are left to dry completely. Sometimes you have to work with highly absorbent substrates. This should include surfaces made of aerated concrete or silicate blocks. They are treated with a primer and dried for 4 hours.
How to choose plaster
In order to protect the insulation material, manufacturers suggest using special formulations designed for application to foam.
There are only two types of them - these are acrylic and cement-sand. Which is better the first or second facade plaster on expanded polystyrene, we will now figure it out.
Cement-sand
If we talk about the price, then cement-sand mixtures are much cheaper. And, of course, the most popular. But an attractive price does not give a long result.
Such a coating will last only 2-3 years and then the integrity of the layer will begin to collapse, as a result of which the insulation will suffer from the external environment.
In order not to have to re-install the heat-insulating layer, it is necessary to re-plaster it beforehand, removing the unsuitable coating. It must also be said that cement-sand mixtures are gray. To give a more presentable appearance to the coating, you need to use staining.
Acrylic
Acrylic mixes are much more expensive, but they will last much longer. In addition, they fit well on the base, you can choose already painted mixtures and at the same time you can make not only a smooth coating, but give it an interesting texture, for example, bark beetle, lamb or rain.
Apart from the high cost, the only drawback of acrylic mixtures can be considered color instability. Bright colors fade quickly when exposed to sunlight.
Given all the advantages and disadvantages of plaster mixtures, it should be said that it is better to choose acrylic as a decorative finish. They will last much longer and look much more attractive.
Styrofoam facade plastering
Below are the options for facade plasters on polystyrene foam and the technology for finishing work.
Mineral mixtures
Most often, for finishing facades insulated with foam plastic, mineral plasters based on Portland cement and slaked lime, with sand and stone chips fillers are used. These are all kinds of "bark beetles", "lambs" and "fur coats". They differ from each other only in texture, which is achieved due to the type of fractions of crushed stone in the filler. The main advantages of mineral compositions for applying facades on foam plastic:
- Resistance to atmospheric manifestations - temperature extremes, humidity, ultraviolet.
- Good adhesion.
- High vapor permeability.
- Environmental friendliness - even with strong heating does not emit toxic fumes.
There are also varieties of mineral-polymer mixtures for exterior plaster on foam. Here, in addition to the cement binder base, a certain amount of polymer resins is added. This slightly increases the cost of the composition, but at the same time, elasticity indicators are improved over the service life.
Facade plaster on polyurethane foam boards can be done with mineral and acrylic mixtures
Please note: purely mineral foam plaster facade has a rather low elasticity, due to which cracks may appear on the surface. This also affects the service life - on average it is about 10 years.
Therefore, it is better to use mineral-polymer compounds.
Acrylic mixes
The filler for acrylic plasters is the same as for mineral plasters - sand and stone chips. But the binder is different, these are acrylic resins. Additionally, improving components are introduced into the compositions - modifiers and plasticizers. Acrylic mix has the following qualities:
- High, in contrast to mineral finishes, elasticity of the finished surface.
- Good resistance to abrasion, impact.
- Insensitivity to atmospheric manifestations.
- The minimum service life is 15 years, the maximum is 25 years.
- Good adhesion of facade plaster on foam.
- High aesthetic qualities. This is especially true for mosaic varieties, as in the photo below.
Styrofoam mosaic plaster
For your information: the dyes used in acrylic plasters are not very resistant to ultraviolet light, so the color will fade over time. Another drawback of these compounds is the high price, from 1500 rubles. for a 25 kg bucket.
Preparing for foam finishing
Do-it-yourself plastering of walls on polystyrene foam requires preliminary preparation of the walls - gluing a reinforcing mesh. We will need:
- adhesive composition.
- Fine-mesh plastic or fiberglass plaster mesh.
- Wide trowel + helper spatula.
We apply adhesive to the wall section, level it.From above we apply a mesh cloth and with a trowel we begin to smooth it, slightly pressing it. The glue will protrude through the cells, the mesh will gradually “drown” in it. Actually, everything, it remains only to wait for the complete solidification of the reinforcing layer.
An example of how plaster is applied on foam plastic with your own hands: the video shows the process of installing a reinforcing mesh.
Please note: there are a couple of mandatory points that need to be considered. First - first we apply the adhesive composition and already a grid on it, and never vice versa
The second is that the mesh sheets should be laid on the wall with a 10 cm overlap.
Styrofoam plaster: application technology
Prepared walls must be primed before finishing. The composition for this we take hydrophobic, biostable. If necessary, then painted. See the packaging for the number of layers and drying time. Next we work:
- We dilute the dry mixture with water or mix the finished mixture with a mixer.
- With a wide trowel, we apply the plaster composition to the walls and level it. In order not to bend down to the bucket every now and then, large portions of the working mass can be applied to the falcon and already picked up with a trowel from it.
- We bring the coating to the desired texture, if necessary.
If we finish the walls with “bark beetle”, then we try to work in as large areas as possible. For other types of plasters on polystyrene, this point is not critical.
Applying a decorative finish
Reinforcement of the surface of the facade and walls
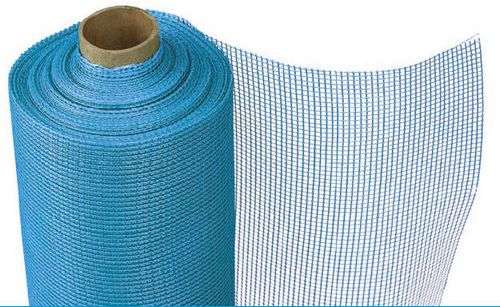
Alkaline mesh for reinforcing the surface of the facade with a density of 160 g/sq.m.
The plaster reinforcing mesh is necessary so that the applied mixture is fixed on the heat insulator.
For materials such as polystyrene foam and polystyrene foam, it is recommended to use an alkaline mesh. It has a higher cost, but it certainly will not cause the plaster to collapse before the time allotted to it.
In the case of facade works, the mesh is usually applied with a density of 140 to 160 g/sq.m. You can also choose a higher density, in which case the plaster layer will only turn out smoother. There is only one limitation in this case - a dense mesh is inconvenient for pasting corners.
If on the planes the grid sticker does not raise questions, then when working on the corners, everything is a little more complicated. In addition, you should start from the corners.
For reinforcing corners, you can use metal corners
First of all, you need to separate the strip with a long side of a meter and a wide side of 0.3 m. In the center, this strip is bent - after bending, there should still be a residual rib on its surface.
Then, using a suitable spatula, the plaster mortar is applied to the corners of the building - the thickness of the application layer (excluding the mesh) should be about two to three millimeters. As the described process is completed, a mesh is attached to our wall, which is pressed with a spatula, and then carefully smoothed out with gestures down, to the left and to the right of the corner being processed.
After gluing the corners, they move to the planes of the walls. The mesh roll is cut into 1 meter pieces - this size is due to the fact that larger pieces are simply not very easy to glue - the plaster can dry out before you finish spreading it.
A 35 cm spatula should be used to apply the façade plaster mix. The thickness (excluding dried layers) of the plaster is 3 mm, the width of the strip is 90 cm, the length is 1 m. At the edges, gaps of five centimeters should be left for gluing the borders.
When applying a mesh to foam or polystyrene foam, it is most convenient to use a wide spatula
After the above steps, the mesh is applied and smoothed from top to bottom, starting from the central part
It is important that the mesh is pressed into the solution, and not superimposed on top. To do this, you can use a little additional mixture
After they have completed with one vertically oriented strip, without waiting for drying, they proceed to the next one, mounting the mesh elements with an overlap. Otherwise, the joints may not be glued. Near the corners, the joints are also glued one on top of the other.
After that, as the grid is completely glued, it is necessary to wipe it in an undeniable order. A similar method is also used in the technology of a wet facade on foam plastic, when the reinforcing mesh is rubbed with building mixtures and plaster.
This process is done using sandpaper and a plastic grater. And do not forget that the grout is done on already dried material. Grouting is done in a circular motion with a slight pressure on the surface. The direction of movement is counterclockwise.