Laying of thermal elements
There are a wide variety of floor coverings. For each of them, a method of laying a warm floor is provided. We will not divide the electrical part into a separate cable, mats, or infrared film. The principle of building installation is not fundamentally different.
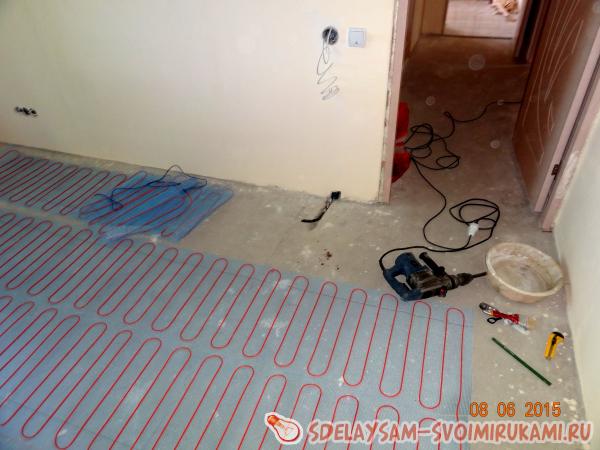
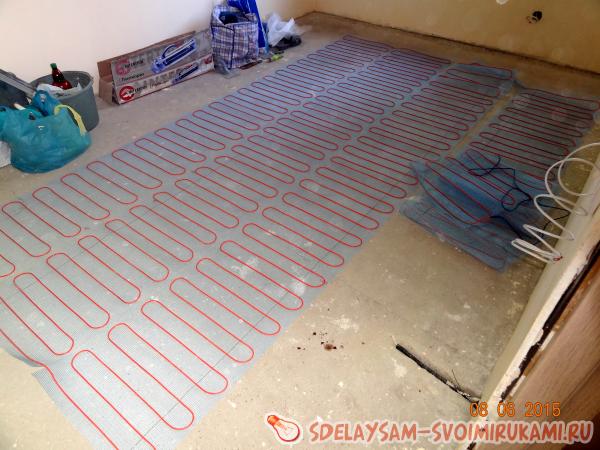
Laying in a coupler. Not only a hydrobarrier is placed on the subfloor, but also thermal insulation. Otherwise, you will be a sponsor of good weather from the neighbors below. Then the mounting grid (when working with a linear cable), on which the heater "snake" is laid. Infrared sheets or heating mats are mounted in the same way. A screed with a thickness of at least 30 mm is poured on top.
How to lay an electric underfloor heating on a screed? The technology is similar, only instead of the second screed, the adhesive composition of the building mixture is applied. The thickness can be 10mm over the heating elements, this is not a power coating.
Installation under tiles is the same as on a screed. Do not forget to provide a minimum thickness over the wires.
Laying under laminate or carpet. If you lay the top coat on the screed, see the options above in the text. And for cases when there is already a screed, and you need to mount a warm pier, a variety of mounting substrates are provided.
The cable is mounted in regular grooves, and sound insulation and laminate are placed on top. For linoleum and carpet you will need a thin rigid base.
Wooden house, floors on logs. Do you think laying a warm floor is impossible? On the contrary, it is easier to do this than in a concrete panel house. Thermal insulation is laid between the lags (reflector up), and a heating cable is attached to it. The only limitation is more stringent fire-fighting requirements
When buying a cable, you should pay attention to this.
Separately, infrared plates can be noted. Their installation requires virtually no preparation. Just a flat floor, thermal insulation, and laying directly under the finish coat.
Laying tiles on underfloor heating
The technology of laying tiles on a warm floor is carried out in the same way as on a conventional prepared base. The only feature is that you need to buy a special adhesive mixture designed for laying on a warm base. Typically, such tile mixtures are labeled as "warm floor" or operating temperature range.
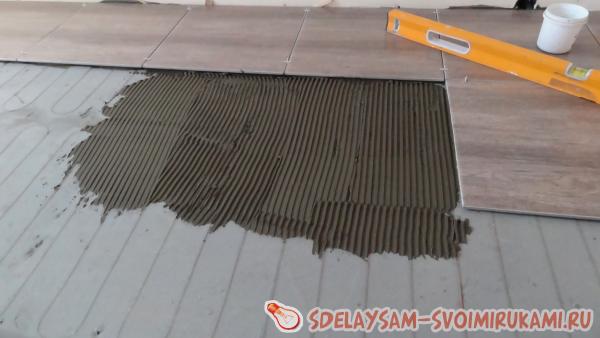
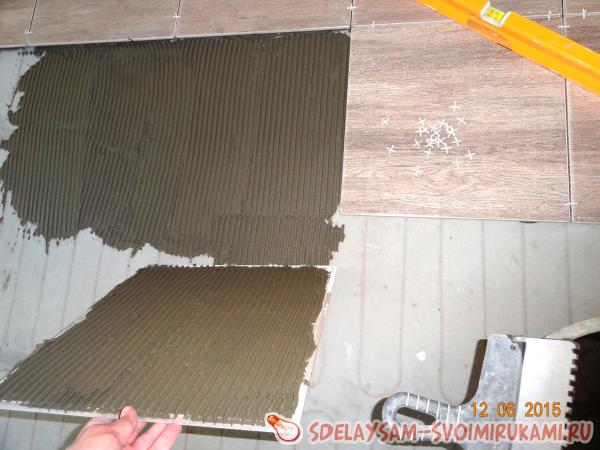
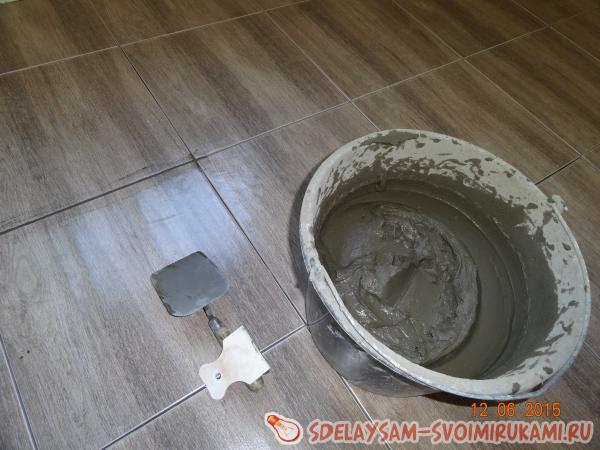
When applying the solution directly onto the heating mat, care must be taken not to leave voids, as these are "air pockets" that can lead to overheating of the cable
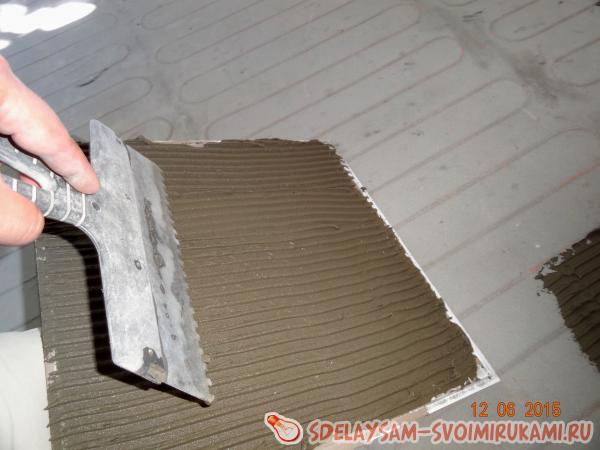
Glue is applied to the mat with a special spatula with extreme care so as not to provoke mechanical damage to the system. You can move around the floor and apply grouting in a day, and operate the system only after the adhesive layer has completely dried, which will eliminate the appearance of cracks due to uneven drying under the influence of temperature
 Laying tiles on underfloor heating
Information in the form of step-by-step instructions indicates the main steps on how to make a warm electric floor under a tile on your own. The right choice of components and compliance with the rules for connecting elements guarantees the result - a reliable heated tile floor in a private house or apartment.
Warm ceramic foam tiles for the floor manufacturing technology, pluses
Until now, the concept of a warm tile did not exist, since the surface of the tile, due to the properties of the raw materials used, always remained cold. More recently, Japanese developers have received a new product that has become innovative in the production of ceramics.The company has spent a lot of time creating tiles with an increased level of resistance to dirt, antibacterial effect and pleasant to the touch when walking. The introduction of a unique technology has not yet been appreciated by the broad masses of consumers, but the high performance captivated the participants of the exhibition, where new products were presented.
Features of the manufacturing technology of ceramic foam
The effect of a warm floor is obtained thanks to an innovative technology that provides for filling the working ceramic mass with air bubbles. The result is a heat-insulating layer, which does not give a feeling of cold when walking. When finishing with such tiles of a bathroom or kitchen, there will be no need for rugs and installation of a warm floor system.
Thanks to the adjustment of the phase composition, a wide range of ceramic foam products is produced, differing in technical characteristics and performance properties. The structure of the tile is foamy, consisting of air bubbles and their surrounding shells. It is thanks to the air gap that the material has a low thermal conductivity.
The properties of warm ceramics depend on the structure of the material, the number and parameters of bubbles, and the features of their placement in the tile. For flooring, a technology is used that provides for the creation of a durable shell that increases the resistance of the surface to mechanical stress.
Advantages of warm tiles
• the porous structure gives the material heat-insulating properties, when in contact with the tiles you do not feel cold, • thanks to innovative technology, the floor covering is sufficiently resistant to mechanical stress, • a special protective coating has an antibacterial effect, • ceramics do not contain toxic components that are hazardous to the health of households,
It is still difficult to assess the shortcomings of the new product, because it has not yet passed the main test - the test of consumers. But already now we can testify to the high price, which starts from $100 per square meter.
Warm ceramics are ideal for arranging a warm floor in combination with an electric or water-type heating system. Its thermal conductivity indicators will help to minimize energy consumption, while providing a fairly good heating of the floor surface. Experts recommend giving preference to ceramic tiles.
Porcelain stoneware has laying features, in addition, the installation technology provides for seamless docking. However, during the heating process, the material expands, which provokes the formation of cracks.
The quality of installation is also affected by the adhesive mixture, therefore, when choosing an adhesive, it is worth paying attention to the information on the packaging regarding temperature fluctuation cycles. In most cases, craftsmen prefer epoxy resin.
Types of electric floors
To understand how to install an electric underfloor heating with your own hands, we will briefly review the technologies:
- The heating cable is a conductive core with a certain resistance. When voltage is applied, the cable heats up. It can be single-core or have two conductors in one sheath. A two-core heater is easier to install, but when laying over large areas, an electric field may occur. Single-core wire is cheaper, so it is used on the street and in industrial premises. A mono-conductor has no problems with a magnetic field over a large area. The connection of an electric floor heating with two conductors is carried out on one side of the cable. It is more convenient, besides it is easier to organize control.
- Heating mats: this is the same cable, only fixed on a substrate (a grid of synthetic materials). It can also be one or two-core. The difference is only in the way of connection and control.Rolls of electrical mats are slightly more expensive than a coil of cable (per unit area). In this case, there is no need to buy mounting hardware - you just roll the roll onto the floor. Calculations of the area and length of the cable are also not required: the wavy laying of the cable on the mounting grid is made strictly according to the technical operating conditions.
- Infrared heating film. This is an innovative technology, so the cost of materials is somewhat higher. The fundamental difference from other technologies: heating occurs not due to the convection of warm air from the bottom up, but due to the transfer of thermal radiation in the infrared range. Objects are heated directly, by analogy with UFO heaters. Advantages: cost-effectiveness, small thickness (several millimeters), ease of installation, absolute fire safety and harmlessness.
What you need to know about the warm field
Water and electric, diverse in terms of action and energy consumption, a warm floor requires special handling during installation, laying finishing materials such as tiles or laminate on it, as well as its subsequent operation.
Failure to comply with the precautions and installation technology will entail not only the destruction of the surface, whether it be a detached tile or a cracked self-leveling coating, such as expensive 3D, but also the absolute inoperability of the heating elements
Nevertheless, having familiarized yourself with all the rules for installing equipment and its subsequent finishing, you can do without outside help and do everything yourself.
The most common areas for laying underfloor heating are the bathroom and kitchen. For decoration, tile is most often used here, it does not absorb moisture and is easy to clean, in addition, less laminate and parquet are subject to mechanical damage. Also popular installation areas are swimming pools, garages and home parking lots. The use of a water floor for the latter eliminates glaciation and snow drifts in winter, which means it saves time and effort of the owner of the premises.
Putting tiles on a warm floor
Laying tiles on a warm floor with your own hands is within the power of any man who knows how to hold a hammer and a spatula in his hands. By and large, laying tiles on a warm floor is no different from ordinary tile laying.
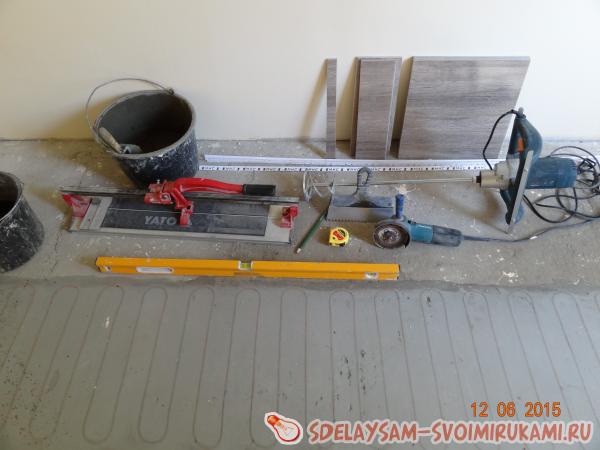
Required tool
For work we need:
- Rubber spatula;
- notched trowel;
- Rubber mallet;
- Level (water or laser);
- A set of crosses of the desired size;
- A skein of twine.
Laying tiles on an electric floor
It must be said right away that a warm floor can be made under ceramics based on a heating mat and a heating section.
In this case, the location of the materials will be as follows:
- Concrete screed;
- Thermal insulation (may not be);
- heating elements;
- Concrete screed (about 3-5 cm);
- tile adhesive;
- Ceramic tile.
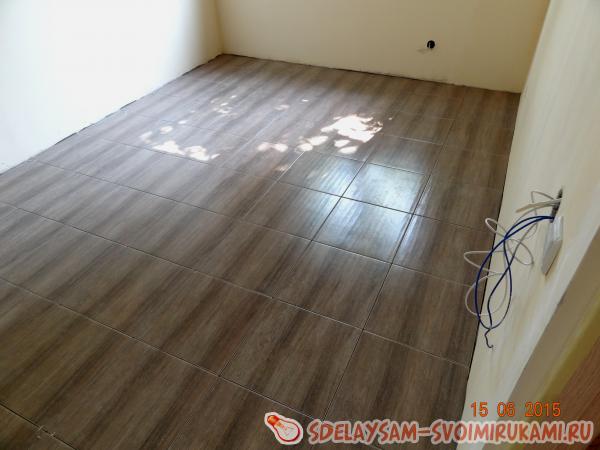
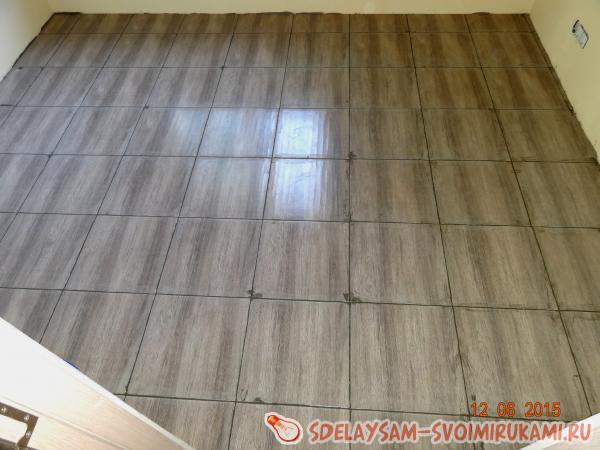
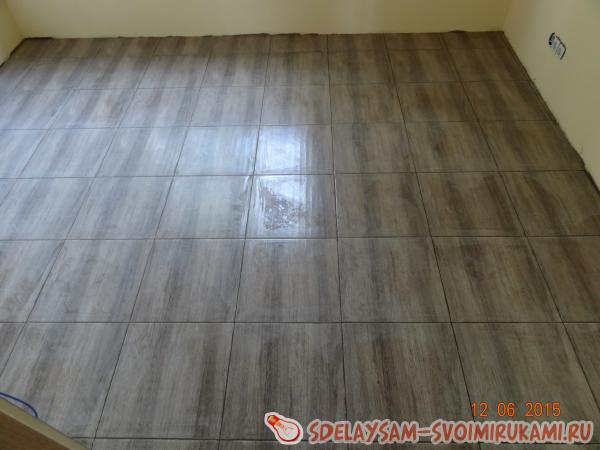
Sample image of the floor
Advice! Many people are not satisfied with the second screed. However, it's better to do it. It perfectly protects the heating elements from mechanical damage due to uneven load.
It must be said that it is best to level the floors with the first screed, and lay the heating elements on an already flat surface.
As already mentioned, there may not be a layer of insulation either. However, professionals recommend taking care of him. XPS boards can be used as insulation. In this case, it is better to take a material that has a density above 35 kg / cubic meters.
A foil tape should be placed on top of such a heater. The seams between its individual parts are recommended to be glued with adhesive tape. The price for it is not particularly high, but the effectiveness is on the face.
Foil, the seams of which are taped
Next, a tape of underfloor heating or pipes is laid.
A layer of concrete is poured over them.It, like the first layer, is recommended to be laid using beacons. They will help to make the screed equal in height at all its points.
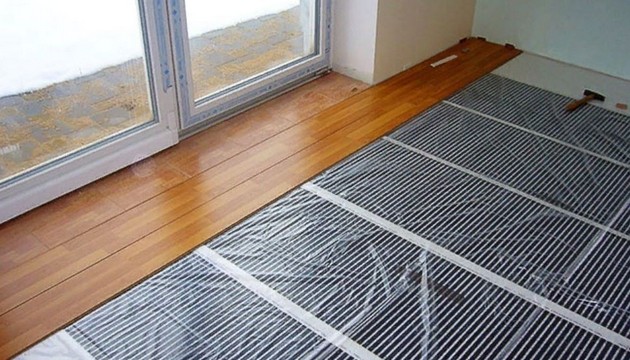
Foil underfloor heating
After the concrete screed dries sufficiently, which occurs approximately on the fifth day with a thickness of not more than 50 mm, you can proceed to the direct laying of ceramics.
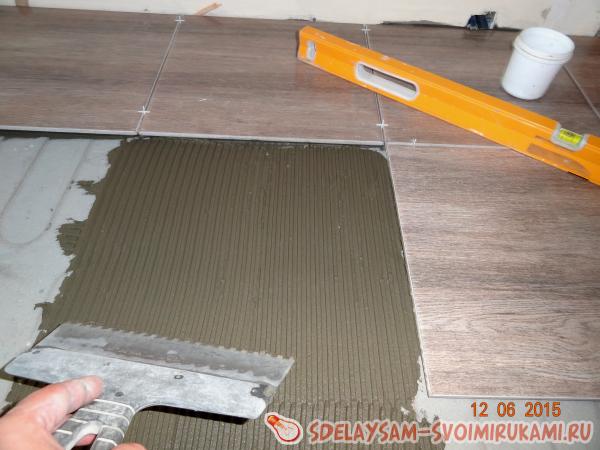
The instruction is very simple. The adhesive is applied to the screed using a special notched trowel. The corner element is laid first. It is aligned with the walls and level.
Advice! Often the walls themselves are slightly uneven. In this case, the tiles must be laid on them, that is, also unevenly. Otherwise, it will seem that it is laid obliquely.
If there is such a situation as described above, then the ceramics are laid parallel to the longer wall, that is, along the room. On a perpendicular wall, a mark is made or a rail is nailed. Both the mark and the rail should be located strictly at right angles to the longer wall.
In this case, at the end of the small wall, there will be a gap between the tile and the wall, the size of which depends on the degree of unevenness of the walls. This gap can easily be hidden under the floor plinth. If the size of the gap is large, then pieces of tiles cut to size can be laid on it.
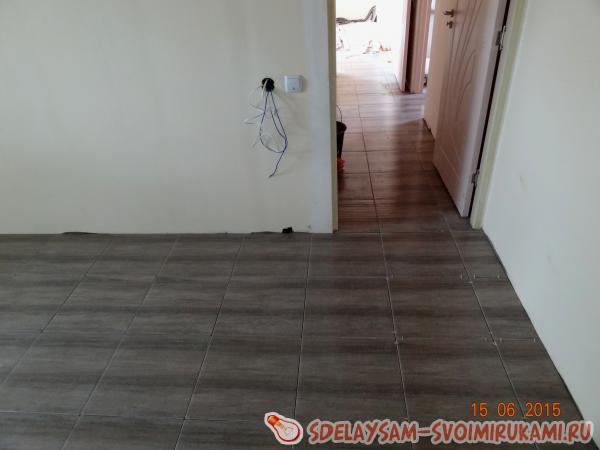
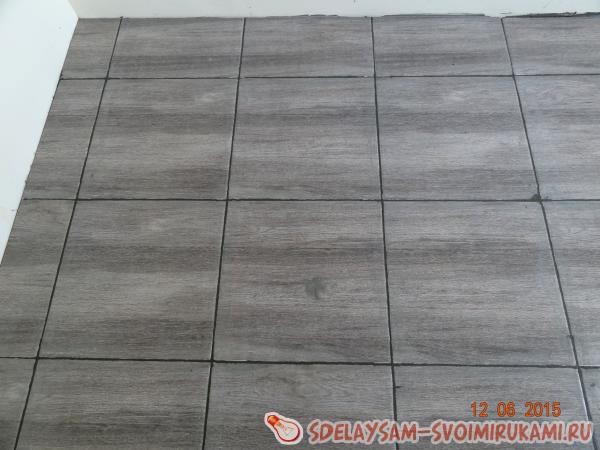
The photo shows how the gap increases already on the second element (leftmost row)
Between each two adjacent tiles it is recommended to put plastic crosses - seam formers. They will help to make all the seams the same thickness. A cross is placed on each corner.
It is worth noting that the glue is applied not only to the screed, but also to the ceramic itself. To make it lie flat, you need to use the level. It can be pressed by hand. If you need very minor changes, then you can knock on the surface of the tile with a trowel handle or a rubber mallet.
Laying tiles on underfloor heating
The sequence of work is as follows:
- Surface preparation, i.e. removal of the old floor and so on;
- Leveling concrete screed device;
- The device of a heat-insulating layer;
- Pipe installation. At the same time, all equipment connections and system checks are made immediately. If necessary, troubleshooting;
- Filling the entire floor with a layer of concrete (unlike the previous case, here the second screed is simply required, since the pipes are thick enough and it is simply unprofitable to hide them under a layer of adhesive);
- Laying ceramics or tiles.
I must say that the tile is laid according to the same principles as in the previous case.
As you can see, the laying of tiles is carried out in the same way in all cases. The differences are only in the preparatory processes associated with the installation of the warmest floor. The video in this article will help you get visual subtleties in this matter!
Warm floor tiles selection criteria
In order to solve the problem of cold coating, and reduce heat loss, warm floor tiles have been increasingly used recently. Therefore, the selection criteria for this material are extremely important. And since such products have appeared on the market, it is necessary to be able to distinguish them.
Technology features
Ceramic foam, on the basis of which tiles are made, is an innovative product that is safe to use and, moreover, inexpensive. Due to the fact that the substances included in it do not react with cement, concrete and plaster, it can be used as a filler for ceramic products, artificial stone. Its structure consists of cells and therefore retains heat well, and the performance of the coating is high.
The raw materials for the manufacture are ceramic and slag waste, shale, river silt, waste rock. As a result of firing, closed pores are formed, evenly spaced throughout the entire structure of the material. This is due to the thermal insulation properties of the product.
Granular ceramic foam is an analogue of expanded clay and similar backfill materials. Natural origin eliminates the release of toxic substances into the environment. Raw materials - minerals determine the main properties.
Against the background of other coatings, this is an affordable option for the floor, consisting of mineral and diamite elements (deep sea silt). Its cost mainly depends on the complexity of production.
Advantages
The advantages of warm tiles are undeniable, since the technology provides for the creation of a reliable mantle that protects the surface from significant mechanical stress.
Main qualities:
- high parameters of compressive strength, tensile strength and pressure,
- moisture repellency,
- good sound absorbing properties,
- safety due to natural ingredients,
- pollution resistance,
- fire resistance and antistatic,
- dielectric strength,
- wear resistance in any aggressive environment, when exposed to ultraviolet rays, high and low temperatures, household chemicals.
Ceramic tiles are available in different colors, have different formats, which makes it possible to choose the most suitable product for all requirements for any room and style.
This coating can be used independently without heating and for underfloor heating in combination with heating systems of water and electric type. Due to thermal conductivity, heating costs can be advantageously minimized.
How to choose?
You need to select the material taking into account other elements of decor, features of furniture, wall cladding, in the bathroom - the specifics of plumbing fixtures. According to these criteria, it is easy to choose the size, color, pattern of the flooring.
It is necessary to coordinate this decision with the lighting of the room, as it is of no small importance and can make it visually more spacious and bright with small area parameters.
Particular attention is paid to such an indicator as porosity. The lower it is, the more thorough the strength, performance, including cold resistance and moisture resistance.
Thermal insulation and absorption of extraneous sounds also depend on this criterion.
Other important points:
- If the permeability in the room is high enough, it is necessary to choose a coating with a high abrasion class, a margin of safety. Therefore, a product with low porosity is needed.
- The friction parameter is also relevant. If the tile is glossy and, accordingly, unstable, it is necessary to make its surface rougher. To do this, you will need to apply a special composition to it, which makes the texture more embossed.
Any material for flooring is best purchased from trusted manufacturers. For such products there is a certificate and other documentation confirming the quality.
Alternatives
Floor insulation can also be made using other facing products. Ordinary tiles made of ceramics or porcelain stoneware are quite suitable for this purpose, because they have all the properties necessary for this - durability, reliability, strength.
Most products of this type are suitable for installation on heating systems. With the exception of rectified porcelain stoneware, it expands when heated, and the laying is usually carried out closely, with virtually no seams.
Since the material will have to be “planted” on glue, this issue will also need to be paid attention to - only a special composition is used that is able to maintain a normal surface and protect it from cracking. Such products have a place in the construction market, and the packaging contains all the necessary information about the purpose and application.
Laying tiles on electric underfloor heating
Laying the flooring is one of the final stages of repair work.Specifically, there is no clear framework in what sequence the construction process should be carried out, and whether the laying of the flooring will be the final stage or not. But, nevertheless, this moment is very important and responsible, especially if ceramic tiles act as a floor covering.
It is worth paying special attention if it is placed on an electric underfloor heating, a qualified specialist is required to perform this work. Laying tiles on cable electric underfloor heating includes a number of important steps: 1) First, you need to use a special tile adhesive for underfloor heating, which would withstand temperatures of at least 50-60 degrees. Since when you first turn on the heating element, the temperature on the thermostat is set to the maximum, and it can be 40-50 degrees
You need to be sure that the glue will withstand it.
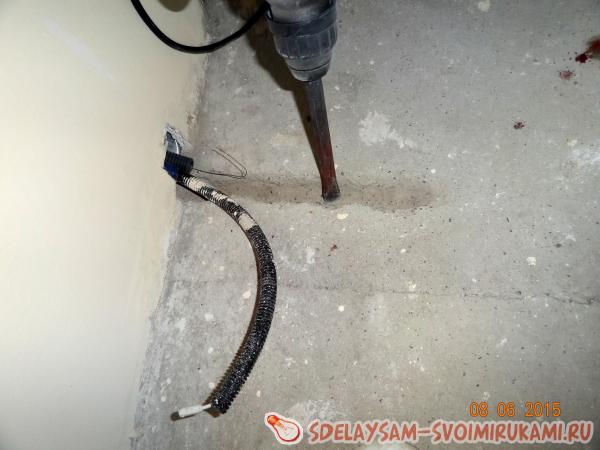
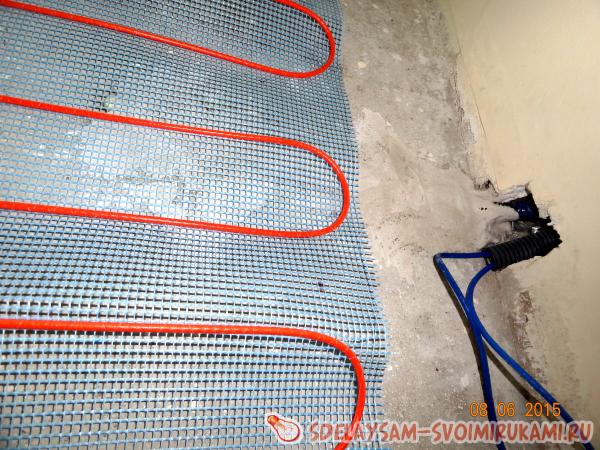
2) Secondly, the floor sensor from the thermostat must be in the corrugation. A canvas is cut under the corrugation, which is smeared with glue in such a way that the level of the heating cable is the same everywhere.
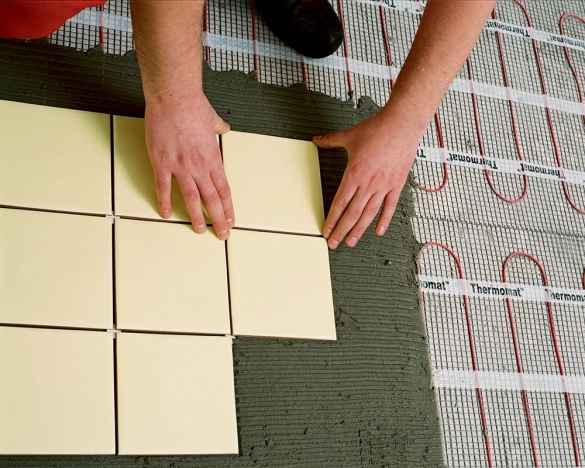
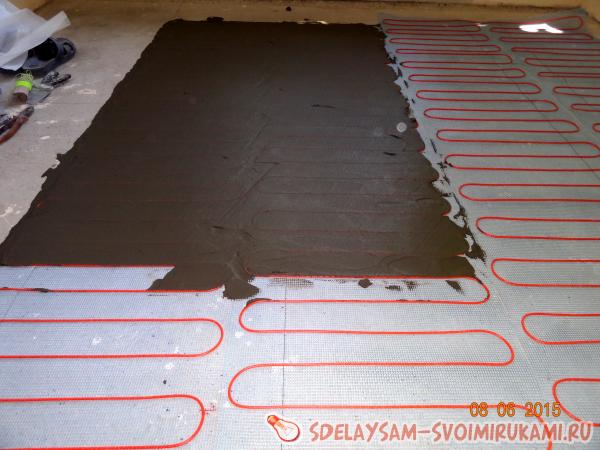
3) Thirdly, if a heating mat is used as a warm floor, many experts recommend pre-tightening it with a thin layer of tile adhesive. This is done so that during the tiling process you do not accidentally damage the heating cable, otherwise the entire floor will completely fail. And only after complete drying, you can proceed to the next stage of work.
4) Before you start working with tiles, you should calculate where to start. If there is a drawing, then it is necessary to build on it (it should be in the central part of the room), if the tile passes from one room to another, then the transition and trimming of the tile in the area of the doorway should not be visible. It is recommended to calculate in such a way that there is as little trimming as possible, and it is located in the most inconspicuous places. 5) Glue with a comb of 7-8 mm is applied to the work surface, as well as to the tile. Its inner side is pre-wiped with a damp cloth, if necessary, in order to remove dust (otherwise, it is likely that the tile can quickly move away due to lack of proper adhesion). In this case, you always need to monitor the level of the floor, removing excess glue if necessary, and also use crosses to maintain the same distance between the tiles, which in turn have a different size.
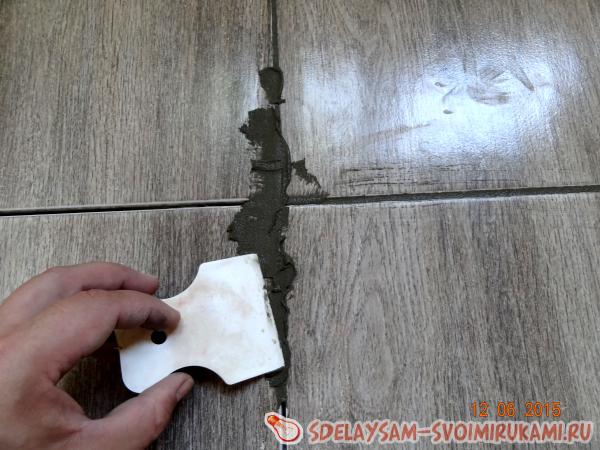
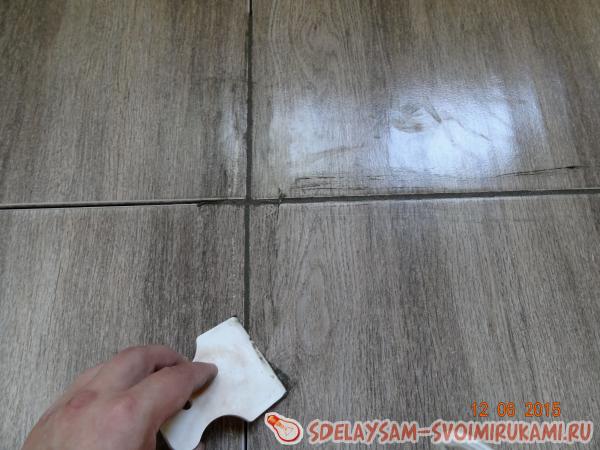
6) After the glue has dried, you can start sealing the seams. For this, special putties are used, of different colors. If this is a production facility and beauty is not so important, or there is a financial constraint, the same tile adhesive can be used as a putty. All seams are preliminarily cleaned of dust with a knife, if necessary, an industrial vacuum cleaner is used. The adhesive is applied using a special flexible (rubber) spatula. After 10-20 minutes (depending on the air temperature in the room), all excess is wiped off with a damp sponge (rag). After that, walking on the tiles is prohibited until the joints are completely dry, at least a couple of hours.

Another important point is that under no circumstances should underfloor heating be turned on until the tile adhesive has completely dried. If, when laying the tiles, the rough screed was completely dry, then the underfloor heating system can be put into operation no earlier than after 14-16 days. If before this the screed was insulated and poured, then the drying time increases to a month. When you turn on the underfloor heating earlier than the specified dates, in most cases the tile may move away from the base.
«Do it yourself - do it yourself "- a site of interesting homemade products made from improvised materials and items at home.Step-by-step master classes with photos and descriptions, technologies, examples of work - everything a real master or just a craftsman needs for needlework. Crafts of any complexity, a large selection of directions and ideas for creativity.
Features of laying infrared floor heating
When installing an infrared floor under a tile, it is recommended to use additional material - plasterboard or glass-magnesite sheets.
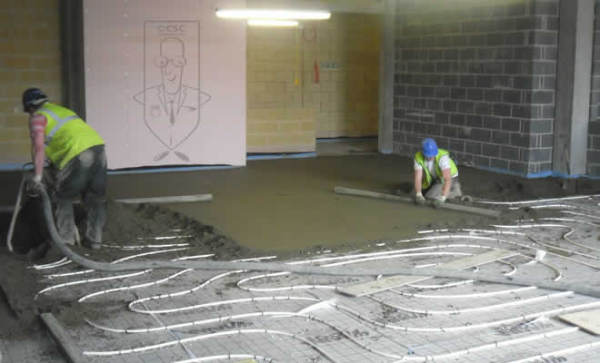
Figure 2. Ease and short installation time is the main advantage of heating mats.
Laying an infrared floor under a tile consists of the following steps (see Fig. 3):
- cleaning the base and laying heat-insulating material with metallized lavsan (for example, Infraflex or Poliform);
- laying thermal film, which should be cut into the longest webs in order to minimize the number of connection points;
- isolation of all outputs of copper strips;
- fixing the film panels with masking adhesive tape without overlaps;
- connection of the thermostat in a convenient place;
- supply and connection of connecting wires to the thermostat;
- connection of a temperature sensor located under the tile;
- isolation of all connections with a thermo-silicone gun;
- connecting the thermostat to the electrical network;
- checking the performance of a warm floor;
- laying of polyethylene film;
- laying plasterboard or glass-magnesite sheets;
- laying floor tiles.
Do not use foil as a heat insulator and do not lay metal mesh when laying tiles. For floor heating to be effective, you need to place an infrared film on at least 80% of its surface.
How to lay ceramic tiles on underfloor heating
To cover such special equipment, the tile laying scheme does not differ much from the usual work with this type of flooring. Here is a step by step guide for this process:
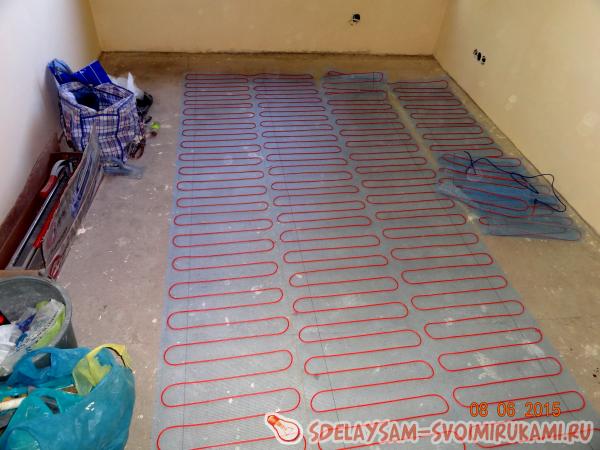
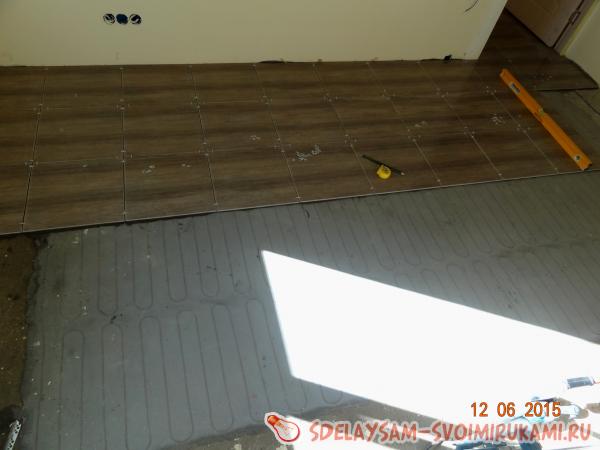
- check the reliability of fixing the elements of the heating structure and the absence of cavities. So, at a wired underfloor heating, tape should be cut, with three help of which it is attached to a polymer mesh, otherwise this will lead to the appearance of air pockets, which will negatively affect the quality of work. You can fix the structure with tile glue, smearing it on top;
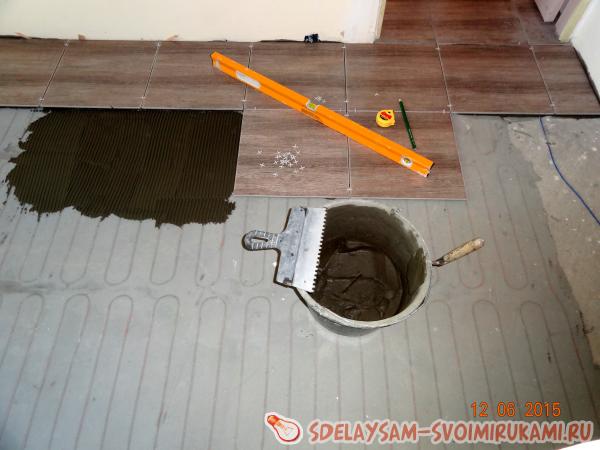
Pouring screed on a warm base
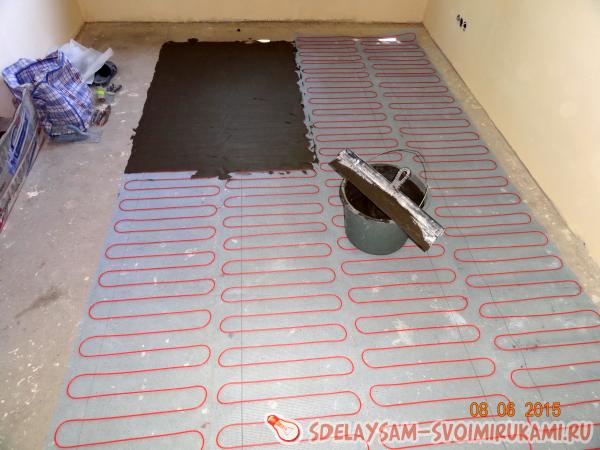
pour the screed with a sand-cement mixture or use tile adhesive on a warm floor - you will have to decide on your own, but if the layer is small and the area of \u200b\u200bthe room allows, it is quite possible to use the second option. A screed filled with tile adhesive will be stronger and less prone to damage. Careful consideration should be given to the distribution of material. Structural elements must be securely cast to avoid air pockets and subsequent cracking of the web. In the form of a screed, a self-leveling floor will also serve perfectly. Particular attention should be paid to the evenness of the coating in terms of level, because. its mismatch in different corners of the room, differences in the future will lead to a poor-quality arrangement of the tile. The level and the rule will help in the work. In no case should you forget about the overall measured level. The screed, depending on the material, dries from three to five days, despite the fact that complete drying can occur on the 21-25th day. But the tiles can be laid out already on the fifth day;
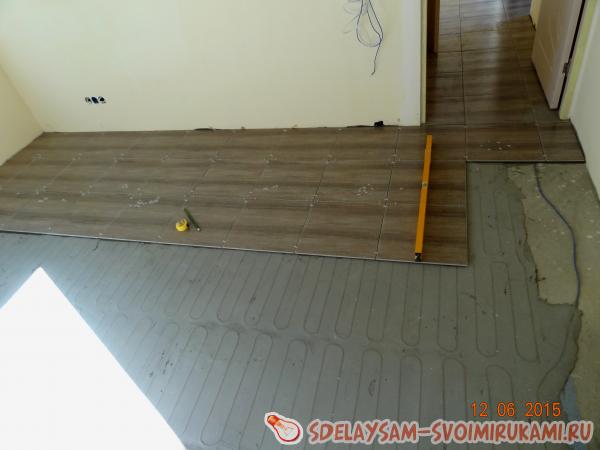
tile laying also begins with measuring the area. In addition, it is important to decide on the pattern. The layout usually starts from a flat surface, an adjacent room, a wall, etc. A layer of fixing tile adhesive, approximately 50 millimeters, is applied with a notched trowel, after which the tile is fixed on the screed, pressed or tapped with a hammer, leveled. After that, crosses are placed at the corners of the elements, butt-to-butt to which the next tile is adjusted and beyond. Having reached the corner, leave a gap. The final part, consisting of cut off parts, is displayed last.Each level is measured, in case of a mismatch, the element is removed and reinstalled, removing the excess or adding the missing layer of tile adhesive. However, with a fairly even initial screed, this happens extremely rarely. It should also be remembered that walking on a freshly laid surface is prohibited. This will lead to deformation of the coating and possibly a complete alteration of the work done;
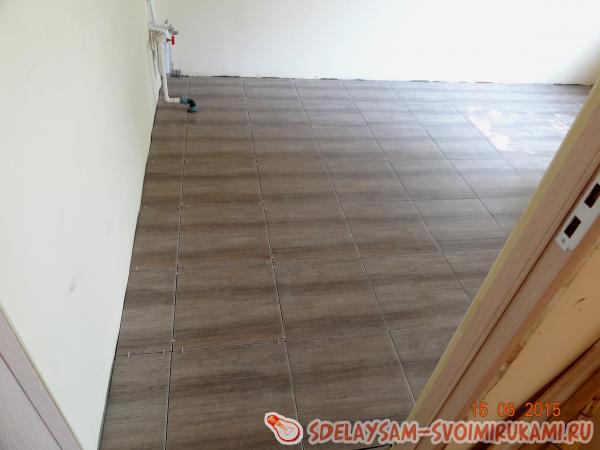
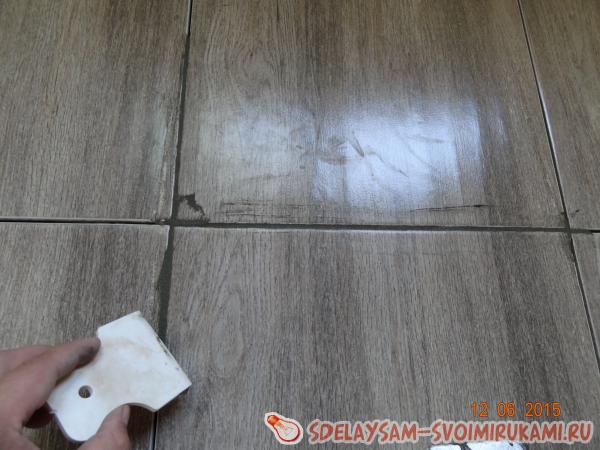
Grouting floor tiles
the drying time of the tiles is 3 - 5 days. Only after this time can you begin to grout it. Grout is needed not only for aesthetic reasons, but also to protect against chips, mold in the seams and stubborn dirt. At this stage, the crosses are removed. The adjoining surface of the wall and decorative elements, if any, are glued with paint glue, if this is not done, after the grout dries, it will be very problematic to clean it from them. Do not wait for the grout to dry completely to clean non-grout tile elements. Already after two hours it should be washed, carefully bypassing the seams, because. after the grout has completely set, it will be much more difficult to wash it off.
But the question of when you can turn on the warm floor after laying the tiles requires detailed consideration. The total drying time of tile adhesive and screed is 21-25 days, only after the final drying of these materials can the equipment be started. Premature switching on will lead to the formation of air bubbles in the coating, which will lead to brittleness, or overheating and, as a result, burnout of the cable structure. Therefore, no matter how much you want to check the result of your own work in action, you will have to wait, this is provided for by the technology of work.
Typical installation errors
- Do not turn on the heating until the screed or adhesive floor is completely dry.
- Before filling the electric floor with a screed, primer treatment is required. Otherwise, voids may form around the wire.
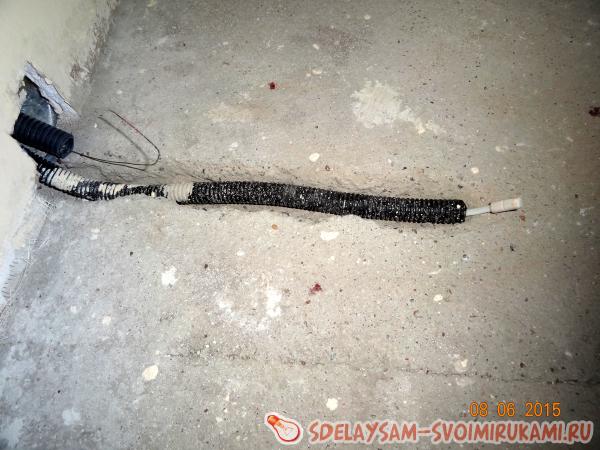
- Service equipment (for example, a temperature sensor) must be placed in a tube (corrugated can be used). Then it can be removed for prevention or replacement.
- It is not allowed to cut a cable fixed industrially on a thermal mat. You can cut the backing and turn the halves to the desired angle.
- Be sure to fix the "map of the area", that is, the layout of the heating elements. This will come in handy when rearranging furniture.
How to install infrared floor
The installation technology of this system is quite simple, so you can carry out all the work yourself. You just need to be very careful when connecting the film to the power supply. So, laying an electric floor heating of this type provides for the following sequence of actions:
- Base leveling.
- Installation of a heat-insulating substrate. It spreads over the entire surface of the base. It is best to choose a substrate that is equipped with a foil layer. It will reflect infrared rays in the right direction.
- Layout of the film on the surface of the subfloor. If the thermal mats are only cut in the required places, then the infrared film is cut completely along the intended line. In this case, you need to be very careful not to damage the heating elements.
Step-by-step technology for laying IR film
- Insulation of copper conductive strips. It is applied only on one side, because power wires will be connected to the other. When laying the canvases, you do not need to observe the step between them, but it is forbidden to cross them.
- The connection of the canvases with each other. In this case, a parallel connection method is used. It is desirable to insulate all connections with a special tape.
- Checking the system and installing the finishing cladding. You can lay tiles or laminate directly on the infrared film. After the glue has dried, you can once again check the effectiveness and performance of the system.
As you can see, the technology for installing an electric heating system is not very complicated. The main thing is to connect everything correctly, observe the laying step, insulate the contacts and connect to the power supply. Leave your additions and opinions!
Thermal insulation for electric underfloor heating under tiles
This step may precede or follow the next. It all depends on the type of thermal insulation material used. The choice of insulation thickness depends on the condition of the floor slabs and the installation location:
it is advisable to make a thick heat-insulating layer above the basement, ground or unheated room, as well as on a balcony or loggia. Styrofoam or expanded polystyrene is suitable for these purposes. It is wiser to lay thick material before leveling the floor. Layer thickness - from 20 to 100 mm;
a thin thermal insulation layer is laid on the prepared floor. Usually, for this purpose, foil penofol is used, which is laid with a reflective surface up. Such a substrate will orient heat into the room.
Insulation is placed at a distance from the wall. The thicker the insulation, the greater the distance. So for expanded polystyrene it will be 100 mm, for penofol - 50 mm. The junction of the insulation to the wall is glued with a damper tape. It is designed to compensate for the thermal expansion of the material.
Preparing a floor heating project
Design is an important component, in this case, a good design allows you to reduce the cost of purchasing materials and avoid local overheating of the cable.
When developing a project, it should be remembered that the cable does not fit under furniture and heavy household appliances (for example, a washing machine, refrigerator). This creates an additional load on the system (the heated air will not rise up, but return back to the heat source), which can be avoided. For the same reason, it is recommended to purchase a bed with legs. In addition, the cable (or mat) should be placed at a distance of 150-200 mm from the wall. The distance between adjacent turns is at least 100 mm.
The project determines the installation location of the heat regulator. Usually it is mounted at a height of 900-1000 mm from the floor surface. This location will be optimal, since the regulator will be convenient to use and it will not be necessary to ditch a large section of the wall to lay the wire connecting the regulator and the cable.