How to install a grid on a battery
Of course, radiators or other heating structures are present in every home, so in some cases it will be more profitable to install such a structure on your own. Given that cast iron is used as the material of the main system, the battery masking process can be quite neat and simple.
It should also be noted that a do-it-yourself battery grill made of wood will be the best option, since it is quite simple to purchase and process, and there is no need to purchase special equipment for installation. How to make a grid on the battery, look at the video:
The whole process is as follows:
- .First you need to measure the battery, including its width and length, the distance between the bottom of the battery and the floor, and between the front edge and the wall. Then you should determine the size of the allowance that will be required when installing the parts of the screen itself for the radiator. You should also mark at least two points for attaching the screen to the floor and wall.
- The next step is to decide on the material. If the do-it-yourself battery grill is made of wood, then wood is used for the frame, but the mesh is made of fabric ribbons.
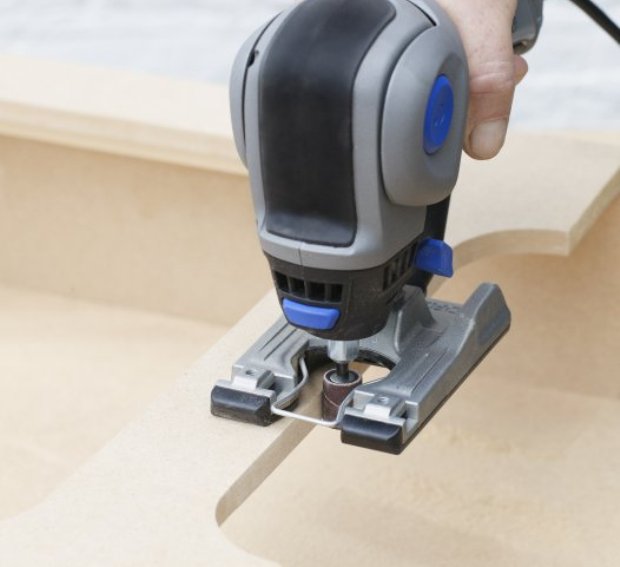
- Then, we proceed to cutting out the parts of the required size, and we also process them well to minimize the destruction of the rock.
- We assemble the frame from metal rails, which are fastened with self-tapping screws.
- Then we fix the created frame structure in place.
Alternatively, a plastic mesh can be stretched so that the front is solid and wallpaper can be hung on it.
Benefits of using decorative elements
Similar decorative elements are used for batteries for several reasons:
- Improving the aesthetic properties of the premises. For example, creating a beautiful accent in a room.
- Protective function against touching a hot battery. This is especially true if there are small children.
- Simplifies maintenance of radiators.
A multifunctional screen can be made in several versions:
- Flat - protects the battery located in a niche.
- A closed box is used when it is necessary to close the entire radiator.
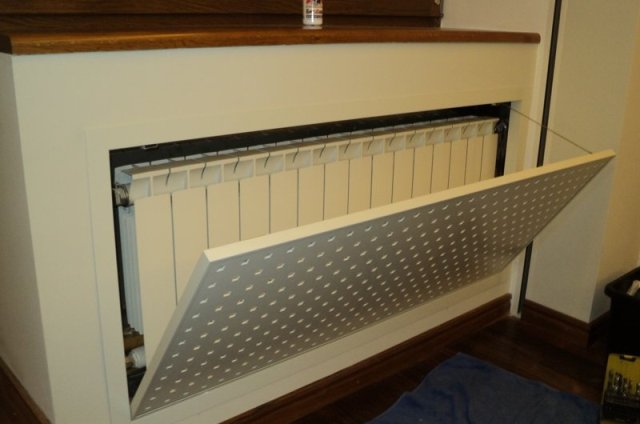
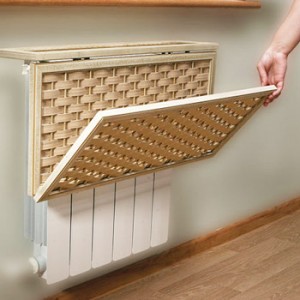
- The hinged cover is designed to cover the radiator protruding from the windowsill.
A little about heat engineering and grids for batteries
Even if you need grilles for radiators for decoration, do not forget that batteries should heat the room. Any screen reduces heat transfer, even the most openwork and thin. Another question is that one will reduce the amount of heat transferred by 10-15%, and the other by all 60% or even more. It is unlikely that you will want to sit in a beautiful, but cold room, so when choosing a decorative lattice, you must also consider how heat will spread.

The principle of heat transfer from a heating radiator without a grill is shown in the figure. The main idea is that air should come from below, pass along the battery, heat up, go up. This is how our heating works. When choosing a grille or screen, you need to keep this in mind. For normal air circulation, it is necessary that there is a gap at the bottom, and there is no cover at the top. As a last resort, the lid should have a large perforated area.
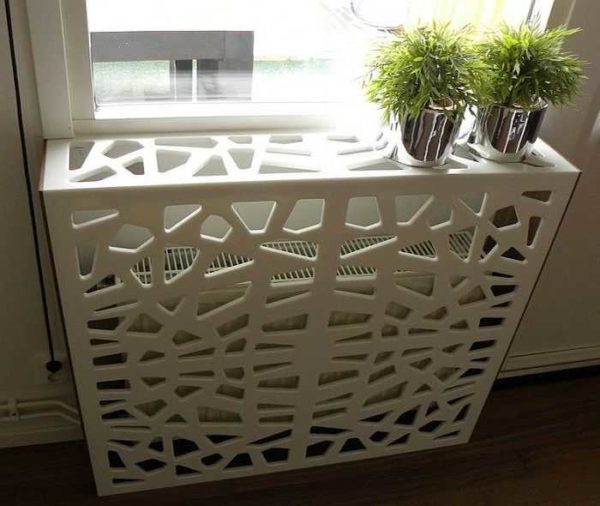
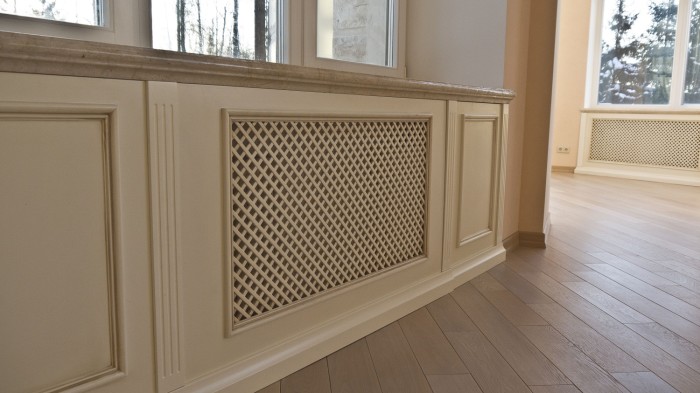
Not a bad option - large holes allow air to move freely
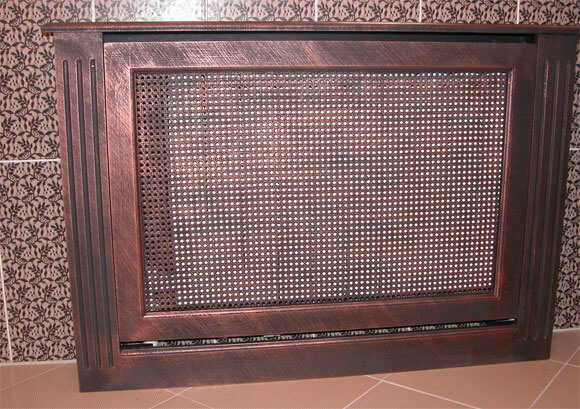
But if you look at many of the decorative grilles, you can immediately tell that the room will be cold. This is especially affected by grilles for heating radiators in the form of a box, which have walls on all sides. If they are very openwork, as in the photo above, there is not much trouble, but if they are made of solid wood (as in the photo below), with almost no perforation or with minimal holes, be prepared for heating inefficiency.
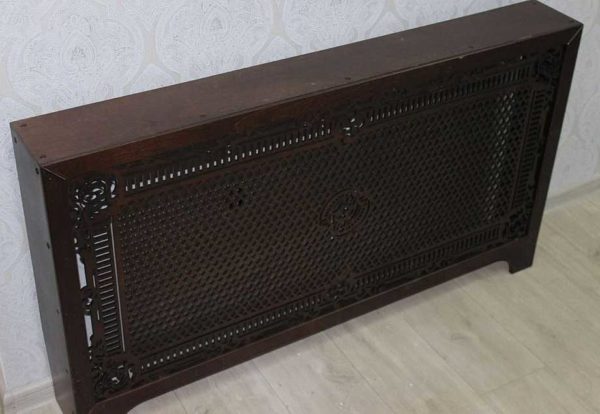
From above, the battery is covered with a solid layer of wood without holes.
Wood, of course, is an aesthetic material, but it has a high heat capacity. Until the wood heats up, the room will be cold. And since the array is located above the radiator and there are no holes for circulation, the radiator under such a grill will be hot, but the room will be cold.
Manufacturing technology
Before proceeding with the manufacture of a battery fence, you should choose a suitable design: hinged or resting on the floor in the room.
Then a drawing is made, and tools with materials are selected.
Materials and tools
For manufacturing, you will need the following materials and tools:
- Chipboard sheet.
- Special edge for finishing with adhesive thermal layer on the back.
- Screws and corners made of metal.
- Stapler with staples or small nails with a hammer.
- Iron.
- Knife.
- Sandpaper.
Marking and measurements
First you need to mark the location on the wall and the necessary measurements. We mark the attachment points for placing the panel. We make a simple schematic drawing with important dimensions.
From chipboard we make four walls for the frame. You can buy already made parts. We connect the walls with each other using metal corners.
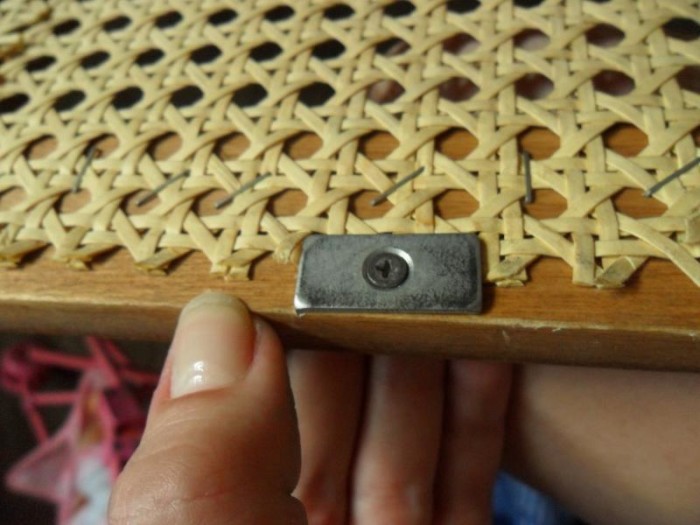
We make a lattice from the edge and fix its parts on the frame with the help of small nails and a furniture stapler. The length of the edging material is calculated by the formula L(edge length)=(a (product length)*b(width)*1.3)/c(edge width).
The holes on the grate must be of the same size, for this you need to make preliminary markings on the frame or a special template. On the front side, the grate must be heated with an iron at a high temperature. As a result of this procedure, the heated glue will connect the elements of the lattice at the intersections and give it greater rigidity.
The same edge must be used to finish the end parts of the frame. We apply the edge to the butt and smooth it with an iron. With a knife, cut off the protruding edges of the edge. The edges that stand out are polished with sandpaper.
Anchoring
If the screen is supposed to be located close to the wall, then we simply insert it. If a suspended version is planned, then a few more manipulations must be performed.
- In the frame, we make recesses at the points of docking with heating pipes. Then the decorative fence is put on the pipes with the help of special grooves.
- In the marked places you need to attach metal corners.
- Then we bend the edges of the corners 10 mm up and hang the panel made on the hooks obtained.
The enclosing screen is a great solution for various heating devices. If you do everything right and choose high-quality material, then you can create a wonderful element of decor yourself.
How to make a protective mesh on the grill with your own hands
Ready-made protective nets can be made of materials such as:
- aluminum;
- steel;
- carbon;
- plastic.
Aluminum is a lightweight but strong metal that does a great job of protecting the cooling system. Steel meshes are no less effective. Carbon meshes are commonly used to protect the radiators of sports and racing cars, but they are expensive.
The most popular material for self-made mesh is ordinary plastic. It is easy to work with, and its cost allows you to make some mistakes.
Materials and tools for tuning
To work, you will first need the mesh itself, which can be purchased at almost any hardware store. For these purposes, the chain-link mesh is excellent, although other options are also acceptable. The material, whether plastic, aluminium, steel or even carbon, is up to you.
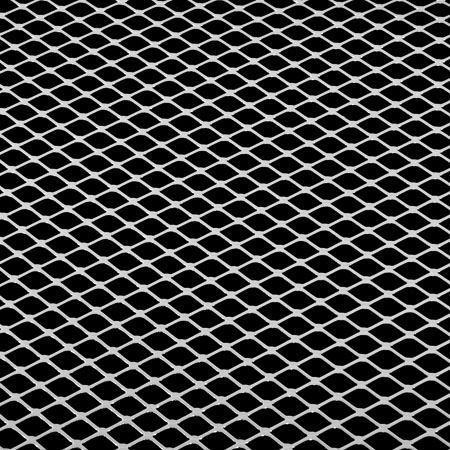 Mesh Rabitsa is well suited as a base
So, to work on the grid you will need:
- the grid itself;
- paper;
- ordinary scissors and metal tools;
- metal cutters;
- pencil and marker.
DIY creation
All your further actions depend on the shape of the grille. If it is fairly even, with relatively straight angles and clear lines, you just need to measure the length and width of the grid, and then cut the grid in accordance with these parameters.However, manufacturing becomes much more complicated if the part has a complex shape with a large number of bends or sharp corners.
In order to make a pattern, you will need to do the following:
- Attach a sheet of paper (or glued sheets) to the radiator grille. Press firmly so that you can clearly see its shape, and then trace around the outline.
- Cut out the resulting shape from paper.
- Attach the pattern to the grid and cut it. If you are going to install the mesh on the outside of the grate, then be sure to leave allowances of about 0.5 cm on all sides.
- Remove all excess with pliers.
The process of making a protective mesh in the photo
- Cut out a piece of paper that matches the shape and size of the radiator grill
- Cut out the mesh
- Cut off all unnecessary and your mesh is ready.
If the mesh is too fine and soft, you can use a second mesh with larger meshes as a frame. Cut out the desired shape in the same way, and then connect both parts.
Your mesh is ready. Now it remains to paint it and install it on the grill.
Metal grids for batteries
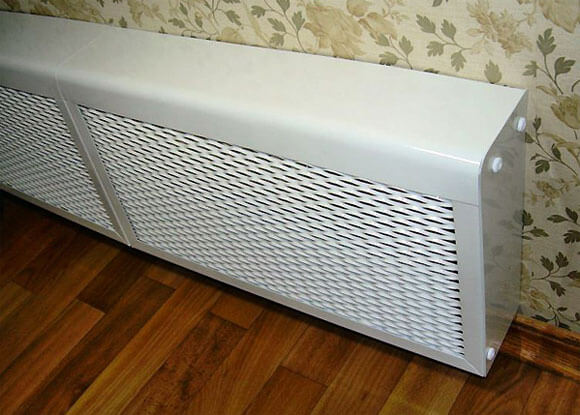
As for the main advantages of this type of grids, here we can note those that even a wooden grid for a battery cannot boast of:
- good moisture resistance, which is especially important in case of strong condensation of adjacent floors;
- the ability to be easily repainted in a variety of colors and textures, even a plinth-type battery can be closed;
- unhindered and accessible care process;
- is toxically harmless even in the case of a high degree of heating;
- absolutely does not depend on the type of microclimate in the room;
- high strength and resistance to deformation.
DIY screen for a heating battery
 Today, few people can be surprised by design solutions for the design of heating radiators. Much less common are ordinary, unadorned and undecorated radiators. The main techniques for decorative design are creative coloring or a screen - an aesthetic coating that does not interfere with the movement of warm air. And if you learned about painting radiators and choosing odorless paint in our previous article, then here we will talk about how to make a screen for a heating battery with your own hands, with detailed photo and video instructions. How? Read on.
In addition to the fact that the screen performs a decorative function, it is impossible not to mention the rich functionality. On the one hand, it prevents the accumulation of dust in the sections of the radiator, where it is very difficult to get it. On the other hand, it protects children from injuries and burns. Some craftsmen manage to turn ordinary screens into transforming tables that recline if necessary. Often, small hooks are installed on such screens, which allows you to dry clothes in winter.
Important! A properly made screen does not prevent the movement of warm air from the radiator. It is noteworthy that such a decorative element can cover any type of radiators.
Although some of them, for example, design radiators, are exclusive in themselves, so they do not need additional decor. You can find out about such radiators in our article "Steel heating radiators"
It is noteworthy that such a decorative element can cover any kind of radiators. Although some of them, for example, design radiators, are exclusive in themselves, so they do not need additional decor. You can find out about such radiators in our article "Steel Heating Radiators".