Network connection
For independent connection to propylene pipes, you need to have a special soldering iron.
There are two connection options:
1. If the radiator valve is made of propylene, then its plastic pipe is connected by soldering directly to the inlet. Then, the “American” metal end cap is unscrewed from the tap and screwed into the radiator fitting, using linen winding with paste or FUM tape to seal the connection. After that, the “American” is again assembled and the union nut is tightened with a wrench.

2. If the radiator valve is metal, then a combined detachable coupling with an internal thread is used to connect to a plastic piping. Such a coupling, according to the principle of connection, is similar to a metal “American”, but the union nut is located on a plastic end cap for soldering. The plastic part of the coupling is soldered to the supply pipe through the connecting fitting. The coupling is disassembled, the mating metal part is wound with winding onto the valve body and then assembled again, tightening the union nut with a wrench.
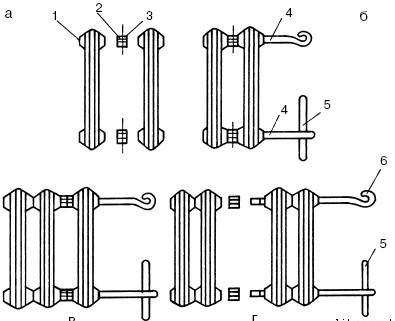
 1 - "American"; 2 - ball valve; 3 - combined split coupling; 4 - polypropylene coupling; 5 - polypropylene eyeliner
When connecting to a metal connection, you must also first connect a ball valve or thermostat to the pipe. Possession of welding skills is not necessary - the connection of valves to the pipe can be done using a threaded connection. To do this, it is necessary to cut a thread on the cut off part of the eyeliner. They do it with the help of a klupp. A set of sockets and mandrels with one or two handles is quite expensive, but you can buy only one die head of a specific size, and use a regular gas wrench as a mandrel with a handle. The sequence of work will look like this:
- the supply pipes are cut with a grinder to the desired size, trying to ensure that the cut plane is perpendicular to the axis of the pipe;
- they clean the end of the pipe from rust and use a file to make a small chamfer;
- grease is applied to the working section of the pipe and the cutters of the klupp;
- put the head on the chamfer;
- center it relative to the axis of the pipe;
- holding the head with your hand, with the help of a gas key, they begin to turn it clockwise.

As a result, you need to get a section with a thread with a size approximately equal to the long part of the standard drive (for example, for a 3/4 pipe - 45 mm).
Then a lock nut is screwed onto this section (for Dy 3/4 its thickness is 9 mm) and a coupling (for Dy 3/4 its length is 36 mm). The inlet of the ball valve is combined with the inlet and the coupling is distilled from the inlet to the thread of the valve body (of course, using flax winding or FUM tape). Then, a winding is wound onto the thread next to the coupling and the lock nut is distilled.
 1 - "American"; 2 - valve; 3 - clutch; 4 - locknut; 5 - threaded liner
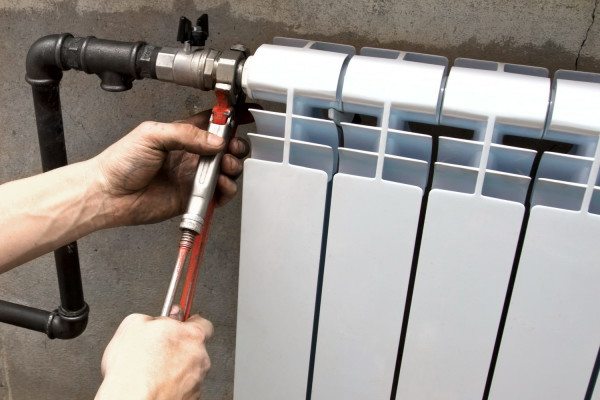
Important! The faucet handle should be up or away from the wall for ease of use. After the stopcock (or thermostat) is firmly and hermetically connected to the piping, it is connected through the "American" to the radiator futorka
After the stopcock (or thermostat) is firmly and hermetically connected to the piping, it is connected through the "American" to the radiator futorka.
Hello, dear forum users! I have this question for you: - how to determine on radiators where is the left and where is the right thread? How do they differ from each other? And is it possible to determine this on batteries when the cork on the cast-iron radiator is already twisted?
Joint repair
To carry out the repair you will need:
- special radiator key;
- gas key No. 2 or No. 3.
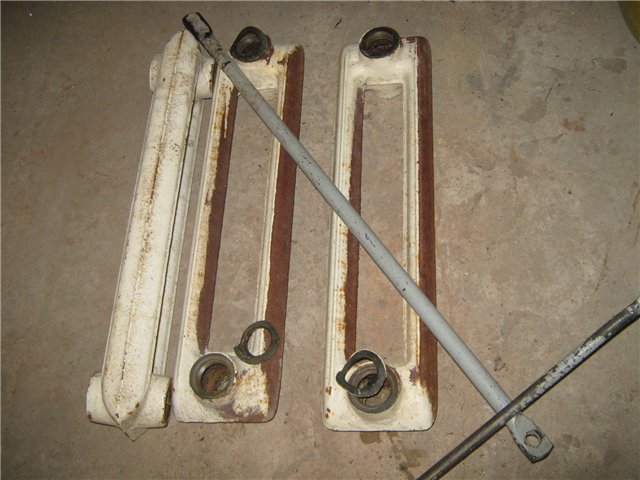
We will assume that the radiator is removed. It must be placed on a flat surface.After that, the plugs and fittings (plugs with holes for pipes) are removed using a gas wrench.
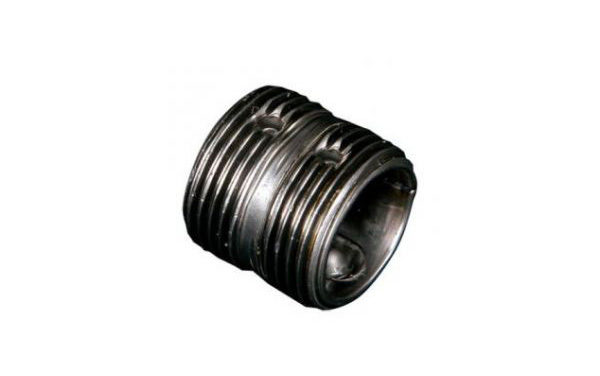
Radiator sections are interconnected by nipples. This is a short pipe made of cast iron with an external pipe thread (half right, half left) and an internal hole in which there are two protrusions.
It is these protrusions that are the place where the edges of the radiator key will rest. In fact, these are stops.
At this stage, you will need an assistant who will fix the heating device in a fixed position. The key is inserted into the hole in the section so that the edges of the tool rest against the protrusions of the nipple. Now you need to forcefully turn the key at least a quarter of a turn.
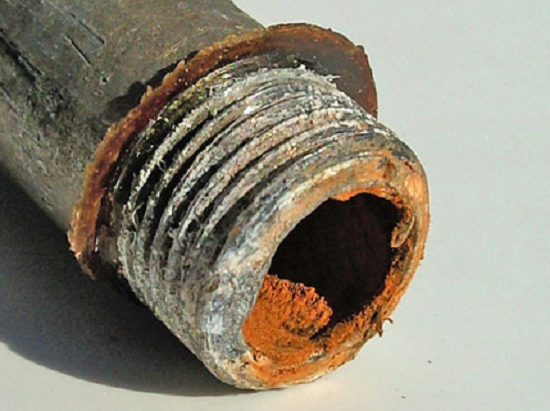
The thing is that the long-term operation of cast-iron batteries, where a high-temperature coolant is used, creates conditions under which the nipple and the device section are soldered together. The result is a monolith.
Therefore, great efforts will have to be made to break these ties. As soon as the nipple moves off the dead center a little, go to the second parallel element. It is impossible to unwind the sections only on one side, a distortion will occur, which will complicate subsequent operations.
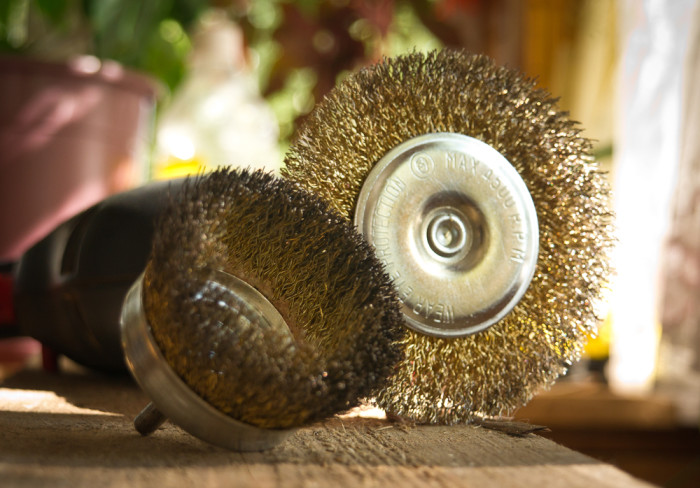
Thus, all sections are parsed. Now you need to clean the joint surfaces with an iron brush and sandpaper. Just need to remove the rust.
Be sure to inspect the nipples, if their condition is in doubt, it is better to replace them with new ones.
Focus on carving
At this stage, it is best to flush the battery sections. A hose jet and a pin (wooden or metal) will do the job perfectly.
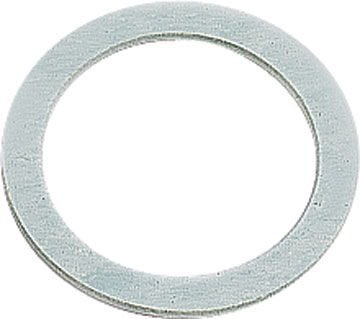
After that, you can proceed to the assembly, having previously prepared the gaskets. They can be made independently from heat-resistant paranite or rubber 1 mm thick. Currently, craftsmen suggest using a silicone sealant that can withstand high temperatures.

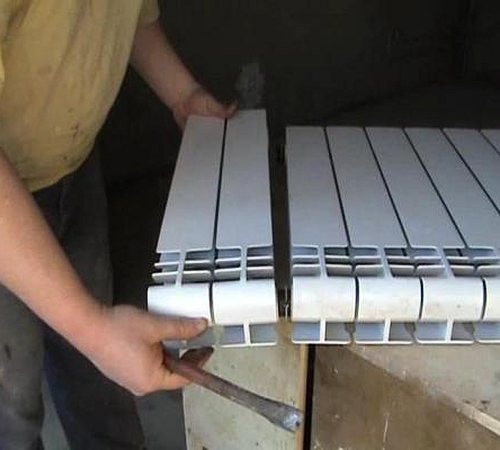
The battery is assembled in the reverse order. Be careful when screwing the nipples
Here it is important not to twist, so as not to squeeze the gasket to a critical rate. She just might break
As with disassembly, the two nipples must be screwed in alternately.
Often there are situations when the stops inside the nipple become rusty under the influence of long contact with the coolant. And with pressure from the side of the radiator key, these stops are cut off. What to do in this case, because the sections simply cannot be promoted. Option one is to break the section on which the fistula appeared.
This can be done in two ways:
- Just smash the battery section with a sledgehammer. Do this carefully so as not to break good elements.
- Can be cut with a grinder. But the junction will still have to be broken with a hammer.
Dismantling cast iron radiators
To dismantle such heating devices with your own hands, you will need the following tool:
Cast iron battery dimensions.
- Pipe wrench number 3, for unscrewing the locknut and nut.
- Pipe cutter for cutting pipes or grinder.
- Hacksaw for metal.
- Chisel.
- Hammer and sledgehammer.
- Rust removal brush.
Work on the dismantling of such heaters is usually carried out in the summer, when the heating system is turned off. Before starting dismantling work, it is necessary to drain the water from the heating pipelines.
Then, with a pipe wrench, the lock nuts on the water supply pipes are unscrewed, the fittings are unscrewed and the radiator is removed from the brackets.
If it is impossible to unscrew the lock nuts, the pipes supplying the coolant are cut off and the device is dismantled.
Preparation for disassembly
At this stage, you need to prepare all the necessary tools and dismantle the battery from the attachment point. For work, depending on the type and condition of the radiator, you may need the following tools:
- radiator (nipple) key;
- adjustable wrench or a set of wrenches with different head sizes;
- autogen or grinder;
- building hair dryer;
- hammer, sledgehammer;
- chisel.

Tools for disassembling radiators
A nipple wrench is an iron rod with a spade-shaped head at one end and a hole or bent "ear" at the other. The tool purchased in the store has serifs, the distance between which is equal to the width of the sections of the heating radiator. They will help you find the location of the desired nipple nut.

After preparing the tools, it is necessary to equip a place for disassembling the radiator. A floor or a sturdy table will do. It must be taken into account that dirty water will flow from the battery, and do not forget to lay a waterproof cloth under it.
Features of mounting radiators
The most demanding fasteners and bases for strength are cast iron radiators. In addition to the weight of the product itself, the internal volume of the section also plays a certain role. If the popular series of cast-iron radiators MS-140 has a volume of almost 1.5 liters, then for an aluminum radiator it is no more than 0.5 liters, and even less for bimetallic radiators.
When calculating the number of brackets, they are guided by the provisions of clause 3.25 of SNiP 3.05.01–85 - one bracket per 1 sq. m of the heating area of the cast-iron battery (but there must be at least three of them in total). The heating area of one section depends on its type. For example, for the M-140 it is 0.254 square meters. m, and for a battery of 12 sections, four brackets are already needed.

If the battery is mounted on three brackets, the mounting scheme looks like this: two points at the bottom, one in the middle at the top. Four brackets are installed in pairs one above the other. And the bend of the bracket should wrap around the neck of the radiator (the junction of two adjacent sections).
The fastening of bimetallic and aluminum radiators occurs in the same way as cast iron ones. And the reason is no longer the weight of the battery and the coolant, but the thin walls of the steel liners of bimetallic products, the low resistance to mechanical stress of aluminum and the weak strength of the threaded connections of individual sections of both types of radiators. Therefore, they also need at least three points of support.

Cast iron radiators are mounted on brackets with dowels fixed in concrete and brick walls. For bimetal and aluminum radiators, brackets can also be attached to wooden walls.
In other cases, for installation it is necessary to use two floor stands with fixation to the wall of the upper part of the radiator. If the number of sections is more than ten, then three stands are needed.

Step-by-step description of dismantling works
A few words about when you may need to disassemble the heating battery:
- In the case of replacing the old radiator with a new one that has better performance and better appearance.
- If you need to add additional sections for the battery.
- If it is necessary to replace a separate section or gasket that has leaked.
The instruction begins with the preparation of the necessary tools:
Step #1: Preparing the Tools
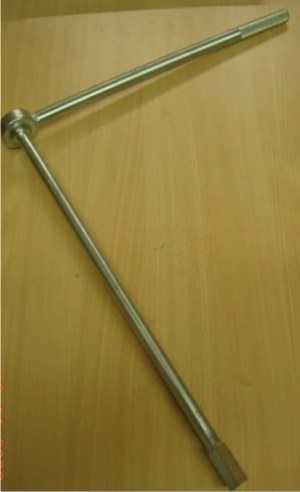
Photo of a nipple wrench
Sample gas key
Tip: taking into account the fact that it is very rarely needed on the farm, and its price is not the lowest, it is recommended not to buy, but to rent it. This will save the family budget.
Step #2: Disconnecting the Battery
Before disassembling an aluminum or cast iron radiator, it must be disconnected from the heating system. To do this, it is imperative to turn off the heating and drain the water from the riser, otherwise you will simply flood the room and get burned.
Tip: it is recommended to cover the floor under the battery with a film, rags, or at least newspapers before starting dismantling, in order to avoid getting any residual liquid on it, which may be in the circuit even after draining the riser.
Further, depending on the complexity, three situations can be distinguished:
- Polypropylene pipes. In this case, the coupling connection, as a rule, is twisted with bare hands, without causing any difficulties.
- Steel new.With some effort, you will most likely be able to spin the battery inlet and outlet horns with a gas wrench.
Disconnection of new steel pipes
- Old steel or cast iron pipes. First, we try by removing the paint from the docking place with a blowtorch and a metal brush, we try to unwind the connection as described in the previous version. But in systems that have worked for a long time, most often this does not give a result, and then we simply cut off the drive with a “grinder” or autogenous.
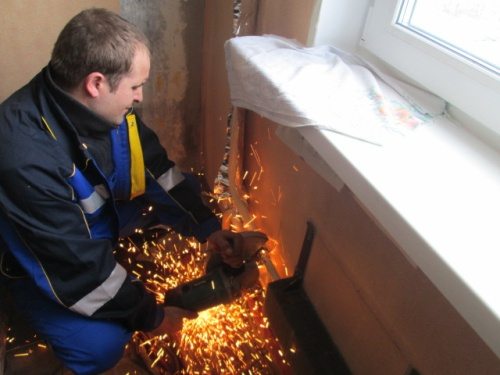
Cutting old sgons using a grinder
After disconnecting the battery from the pipes, we remove it from the hooks and lay it on a flat plane.
Step 3: Radiator Disassembly
Battery section disconnect diagram
Pipe section or crowbar
The battery can be cast iron, aluminum or bimetallic.
The most difficult option for parsing is the first of the listed ones, and we will start with it:
- How to disassemble a cast-iron heating radiator on your own:
Carefully, we check the threading on the fittings or plugs, which can be either left or right. Insert the nipple wrench inside, increase its torque with a piece of pipe or crowbar
We tear off the thread by scrolling the tool a quarter of a turn, first at the top, and then at the bottom. Then we also alternately continue to unscrew the nipples so that the radiator does not warp. The main problem with old batteries is that the futors can get stuck in the course of many years of operation and not give in to the key. In this case, the junction must be heated in a circular motion with a blowtorch, and then again try to unscrew the nipple. The procedure is repeated until the thread yields. If it still doesn’t work out, then you have to cut it with an autogenous.

Dismantled old cast-iron radiator
- Let's find out how to disassemble a bimetallic or aluminum radiator? The procedure is almost the same as the one described above, but it has several differences:
- A smaller nipple wrench is used.
- So much effort is not required when unscrewing the nipples.
- Plugs and futurok are marked with the direction of the thread in the form of the letters S and D, where the first indicates the left stroke, and the second - the right.
- The metal spacers located between the sections are wiped, polished and stored until the next assembly of the battery.

Disassembly of the aluminum battery
After completing the described tasks, you can replace the leaking part, add a section, or even install a new radiator in place of the old one.
Marking for fastening
The standard location for the radiator is considered to be a partition under the window opening. According to SNiP 3.05.01–85 (clause 3.23), the battery on the side of the riser should not go beyond the border of the window opening, and the coincidence of their axes is not necessary. But in order for the battery to look harmonious in the interior, it must be located symmetrically about the vertical axis of the opening. Therefore, first, this axis is beaten off by level.
The second step is to mark the horizontal level of the battery position and ensure alignment when connecting the leads to the futors.

But there is one feature here - the horizontal channels of the radiator must be oriented strictly according to the level, and the pipes for the direct and return supply must have a slight slope relative to the flow of the coolant. These angles are needed to reduce the flow resistance force and to reduce the risk of airing the battery. The slope value is very small - 5–10 mm for a liner length of more than 50 cm (SNiP 3.05.01–85 p. 3.18), and steel liner pipes less than 1.5 m long are not attached to the wall. And if the battery is being replaced with reference to an existing wiring, then, for example, for a single-pipe system with a riser, moving the position up (or down) can level the slope of the forward (or reverse) supply.

The very position of the radiators must ensure that the following conditions are met:
- distance from the floor - more than 6 cm;
- distance from the window sill - more than 5 cm;
- distance from the wall - more than 2.5 cm.
Overview of the futorka radiator connection kit
Good afternoon, dear readers. Today we will look at a fairly easy, but no less important topic: "Aluminum radiator connection kit (futorka) overview"
I won’t write anything in the introduction, and it’s better to get straight to the point.
Before us is almost a complete connection (except for taps).
- fixing radiators with dowels
- 4 futorok connection kit, air vent (Maevsky tap), plug, key for air vent
Radiator fixing with dowel.
The metal mount is covered with white paint, which will allow you not to stand out against the background of the radiator. First, we drill a hole in the wall, hammer in the dowel, twist the mount into the dowel. A radiator is placed in the mounting recess. To mount the radiator for better fixation, you will need 4 pcs. mounts.
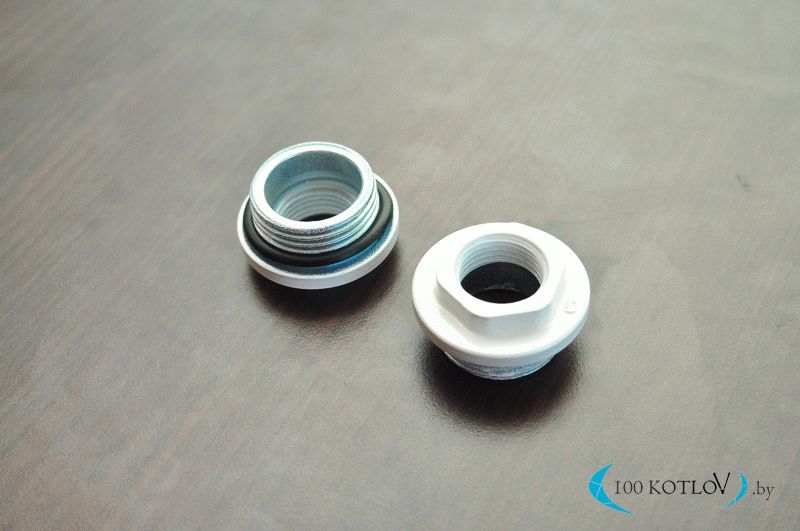
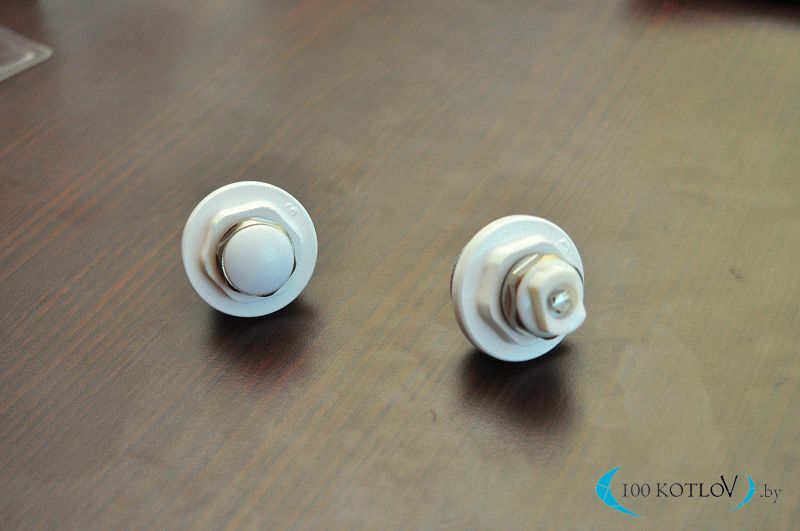
Futorka (right)
The set comes with 2 pcs. linings with gaskets. They are also painted white so as not to stand out. They screw onto the radiator without much difficulty. If you look closely, you can see the letter “D” on the futorka - this means from which side the futorka is screwed. in this case "to the right".

Futorka (left)
Everything is the same with coating and application as the previous one, only here the letter “S” is already there and, accordingly, the connection is “on the left”.

Stub
The plug is screwed into the futorka just to shut it off if there is no connection on this side. The plug is screwed into absolutely all futorka, whether it is left or right futorka. Cap color is white, complete with gasket.

Air vent or Mayevsky crane
The function of the air vent is to remove the air that has formed in the heating system, or rather in the radiator. The air vent is mounted so that the drain (small thin hole) is down. When all the air is bled from the radiator, you need to drain a couple more liters of water and, accordingly, so that the water does not splash in all directions, but strictly down, the direction should be down
Pay attention to this mounting trifle, like the direction of the air hole. Air vent color white, gasket included

Key for ventilator
You can open the air vent with a special key for this. If there is no key or you have lost it, you can use an ordinary flat screwdriver, just do not go specifically for it to construction markets. There were such cases when this key was sold)))
Futorka with plug assembly (left), futorka with vent assembly (right)
This is how the assembled futorka looks like, whether it is a plug or an air vent, or there is a continuation of the pipe suitable for the radiator.
Connection of an aluminum or bimetallic radiator.
Here is a schematic diagram of how the radiator (battery) is connected. I think it's too much to explain. Everything is beautifully shown. We connect either a ball valve with a continuation with a pipe, or a plug, or an air vent to the futor. But in any case, we will have a supply pipe to the radiator, a return pipe from the radiator, an air vent (always placed at the top of the radiator, a plug.
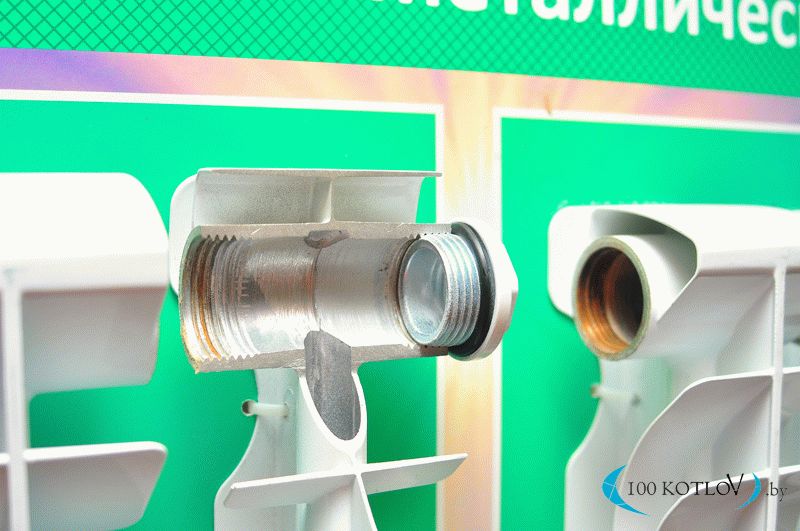
Upper part of aluminum radiator in section with futorka
This is how the screwed futorka into the radiator looks like. As you can see, the futorka is screwed into the radiator quite well and deeply, which is quite reliable.
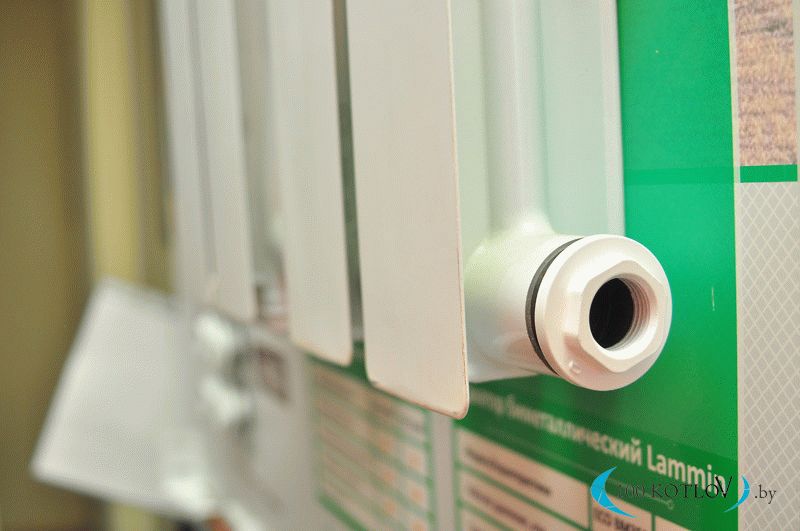
Futorka is screwed into the radiator (connection from below)
Here we have screwed a futorka ("D" - right) into a solid aluminum radiator. to show how it looks from this side.
Futorki at first glance are very simple and insignificant, but choose even these parts wisely. And remember, it is always better to entrust the matter to professionals, both in terms of sales and installation.
Thank you for your attention, we will soon prepare more necessary and interesting articles for you
Dismantling of bimetallic and aluminum sectional products
To disconnect the radiator from the system and remove it from its mounting location, you must do the following:
- Stop water circulation and relieve pressure.
- If the heating battery is hot, you need to wait until it cools down, and then disconnect it from the system. To do this, unscrew the couplings at the inlet and outlet.
- Move the coupling away from the radiator along the pipe and remove the device from the brackets.
- Drain the remaining water and place the product face up in the disassembly area.
- Pull out and rinse the filter immediately so that the dirt on it does not dry out.
Dismantling of bimetallic and aluminum sectional products
At the next stage, the radiator is disassembled into separate sections. To avoid damage during operation, you need to figure out which way to turn the nipple nut. This element is an annular nut with external threads and grooves inside on both sides. At the same time, one nut has both right and left threads. If you unscrew it, then the adjacent sections of the battery will be evenly moved apart, and when twisted, they will be pulled together.
Usually, manufacturers make marks on the front of the plugs and futors, which indicate the direction of the thread. The "D" mark indicates a right-hand thread, "S" - a left-hand thread. To accurately determine the direction of movement, it is recommended to take a free nipple nut and try to screw it onto the threads in the radiator. Having decided in which direction it twists, it will become clear where to turn the key to separate the sections.
Important! If you turn the nipple-nut in the wrong direction, you can easily break the threads on it and on the radiator

Having decided on the direction of the thread, insert the nipple wrench into the radiator and advance to the desired nut. Notches on the tool will help to do this. When it is in the grooves, insert the lever into the hole on the other side of it. It will take some force to move the nut out of place. Call an assistant to fix the radiator in one place.
Repair of bimetallic radiators
When the nut has advanced half a turn, go to the other side to unscrew the second one and do the same. After making sure that both nuts rotate without applying great physical force, gradually unscrew one side or the other, moving 5-7 mm.
Gasket between radiator sections
After separation, take away the metal spacers that were between the sections. If they are in good condition, then they can be installed back during assembly, if in poor condition, then use them as a reference for buying new ones. Silicone gaskets need to be replaced.
Battery assembly
In principle, having the necessary tools at hand, even a beginner can assemble or disassemble an aluminum radiator with his own hands.
To install a heater from an aluminum radiator with your own hands, you must:
Place the battery on a flat surface. This is necessary in order to inspect the device before installing it and check all joints for possible cracks or chips.
Before connecting the heater elements, the threads at the joints are cleaned not only of debris, but also of factory paint. This is done using sandpaper with a fine grained coating.
This is important, as the paint layer may crack later, leading to a leak. For the sake of presentation, manufacturers paint not only sections of radiators, but also their joints
When cleaning the battery from paint, you need to make sure that the sandpaper does not leave scratches on it, which can also cause leaks in the future.
All gaskets should be washed in soapy water. and if antifreeze is supposed to be used in the heating system, then they need to be degreased, since this carrier is able to penetrate into any, even the most insignificant, irregularities.
Before connecting the sections, it is advisable to study the drawing of the key for assembling an aluminum radiator in order to know how to use it.This metal is very soft, so any too much force can damage the threads and then you will have to buy a new section.
A paronite seal is put on the nipple nut on both sides. The key is placed on top and easily rotated a couple of times, the same is done with the bottom hole. Only after the joints have been tacked can you tighten them more tightly with a lever.
The hole that will not be used is closed with a plug, and a Mayevsky crane is attached to the other and the assembly of the aluminum radiator is ready.
After all sections of the radiator are assembled, it can be connected to the heating system and checked for possible leaks. Since aluminum batteries are quite light, it is quite possible to connect them with your own hands, even if you do not have the appropriate skills for this.