Do-it-yourself wall decoration with a cork backing
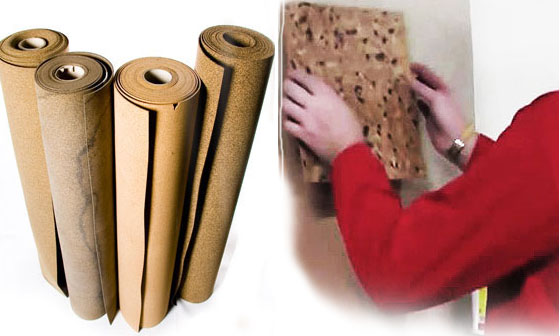
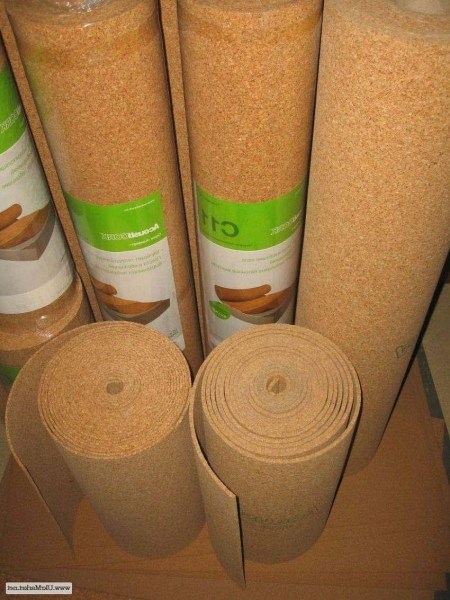
The underlay is supplied in rolls, so it should be cut into panels of the desired length. The cut pieces are laid out on a flat surface. Some kind of load is placed on top so that the material does not curl.
Attention! It is not recommended to use a 2 mm thick substrate for wall decoration. Sheets of this thickness are not strong enough and can break during installation.

Wall decoration with cork begins with careful surface preparation. The base is leveled, cleaned of dirt and strengthened with a primer.
Then the wall is marked, determining in what order the cork will be laid on the glue. Masking tape is placed next to the marking lines. This technique will make it easy to get rid of excess glue protruding from under the sheets.
How to stick cork on a wall
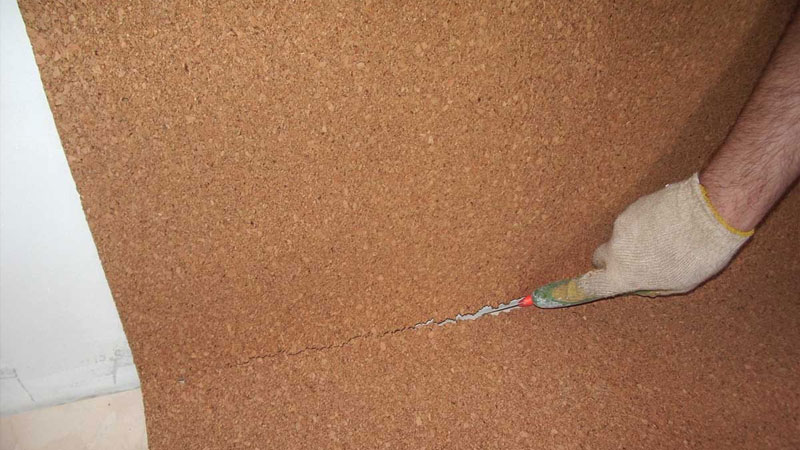
For finishing work use a spatula with fine teeth. The glue is applied directly to the base, trying to distribute it as carefully and evenly as possible and not go beyond the borders of the masking tape.
Since the operating time of cork glue is only 10-20 minutes, an area the size of one sheet is covered with the composition at a time.
Mounting cork on the wall is no different from sticking wallpaper. The sheets are applied to the surface treated with glue, pressed and smoothed, squeezing out all the air and leveling the lumps of glue. For this purpose, you can use a special rubber roller, which is used to process wallpaper joints, or a large-diameter construction roller with a short pile. If there are no tools, then it is enough to walk on the surface of the coating with a dry, clean cloth with pressure.
The masking tape is then removed while simultaneously pressing the cork backing sheet against the wall. Excess glue is removed with a spatula or a sharp knife. Uncured composition can be removed with a damp sponge.
The coating must dry within 24 hours. After this period, the surface can be varnished. The varnish is applied with a wide brush in two layers.
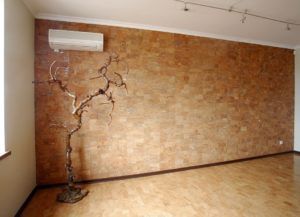
Wall decoration with a cork backing is an excellent choice for those who want to get a beautiful and expensive interior for a reasonable amount.
How to pre-prepare a cork backing for wallpaper
Cork is a natural product and, like wood, it can undergo some expansion during periods of high humidity and contract during periods of low humidity, usually during the heating season. In this regard, in order to ensure proper installation, it is advisable to acclimatize the cork underlay indoors for 48-72 hours before starting work, without removing the packaging from it. A cork backing is produced in the form of rolls and tiles with dimensions of 30x30 cm or 30x60 cm, wallpaper should be glued at a room temperature of at least +10 degrees.
Steps for properly gluing a cork backing under wallpaper:
Wall surface preparation. Initially, you need to check the surface of the walls where the cork substrate will be glued, it can be cement, smooth plywood or drywall. If the drywall is new, then it should be treated with a primer first: this will help prevent the glue from soaking the drywall. Do not glue cork backing over old wallpaper or any paint, existing wallpaper, old glue and paint must be removed, primed on the wall and carefully leveled its surface.
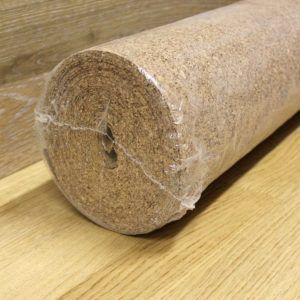
Prepare cork lining. If a substrate produced in rolls is used, then it should be unwound, all the strips should be folded into a pile and a load should be placed on it. During the day, the cork substrate will become straight along the entire length and it will be much easier to stick it. You can optionally cut the roll into tiles of the desired size, this will facilitate the gluing process.All markings should be done on the outside, the outside is outside the roll
Although both sides of the roll look the same, it is best to use the outside surface of the cork to facilitate installation. If cork backing is to be used with tiles, it should be checked for uniformity of tone across different packages, this is especially important if cork backing tiles are to be used on the wall instead of wallpaper.
To make markings on the wall for a roll substrate, it is enough to mark strictly vertical lines; for a tile, you need to designate either a simple grid or a checkerboard pattern.
Apply glue with a roller on the wall and on the surface of the cork backing, wait a little while the glue is absorbed and stick the backing to the wall. On the surface of the glued substrate, walk with a roller and tap with a wooden or rubber mallet.
When gluing cork backing tiles, the start should be in the center of the wall
From the main vertical line, markings are made to the sides and up, which will help to correctly install the cork tile. Start gluing tiles should also be from the central axis and then lay in all directions. Press the tile firmly using a roller and a rubber (wooden) hammer. Continue gluing the tiles in rows until all intact pieces are pasted.
If tiles need to be cut along the edge of the wall, you can do this with a knife, having previously made markings, for this you can also use a carpet cutter.
Cork backing instead of wallpaper
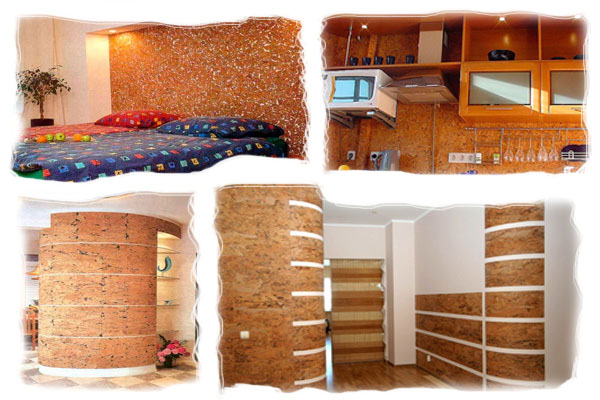
The cork backing can be successfully used instead of wallpaper: the warm natural tone of the cork will give the room an atmosphere of coziness and comfort. Covering the cork surface with furniture varnish can improve wear resistance in operation. Lacquer coating should be done in 2 layers, the second layer should be applied after the first has completely dried. Instead of wallpaper, a cork backing will look great in the living room, bedroom, and children's room. When pinning children's drawings to the wall with needles, you don't have to worry about spoiling the appearance of the wall: the attachment points of the needles will remain invisible. Such wallpapers made of natural material will retain their color and fresh look for a long time.
 Having familiarized yourself in detail with such material for apartment renovation as a cork underlay for wallpaper, one cannot but give preference to it, especially since the cork underlay is very economically profitable: it is 5-6 times cheaper than cork wallpaper.
Articles on the site that may be of interest to you:
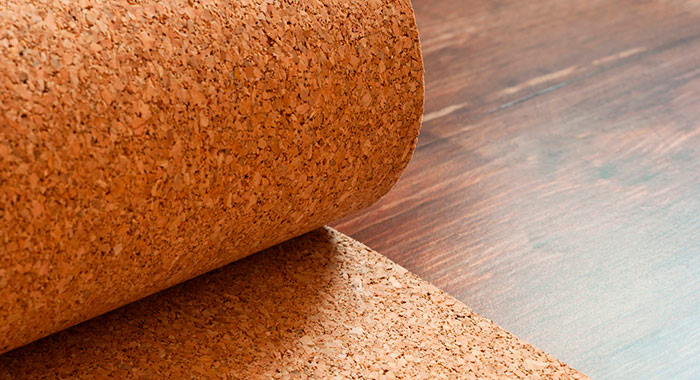
 Cork is obtained from the bark of a certain type of oak. Trees of this type grow mainly in Africa. Since ancient times, cork has been used in various spheres of human activity. The building materials industry produces material such as cork backing.
The main purpose of the substrate is to be a lining under flooring structures (laminate, parquet, linoleum, carpet and vinyl)
However, people have long noticed that a pasted cork backing on the wall can perfectly serve as wallpaper.
Is it possible to put a cork backing on the walls
The material successfully imitates cork wallpaper and it is advantageous to use it for decorative wall decoration for economic reasons. But it was created for other purposes, so it is natural to ask the question: is cork backing on the wall suitable for technical characteristics instead of wallpaper?
The coating has the following properties:
environmental cleanliness and safety (90% consists of a natural product of secondary processing and does not contain chemicals harmful to human health);
good soundproofing and heat-insulating characteristics;
high degree of compression;
moisture resistance;
fire resistance (without emission of toxic gases);
absence of static electricity.

Cork is a durable material that retains its attractive appearance for many years.The elastic structure of the coating allows it to successfully withstand mechanical stress.
After analyzing the performance of the cork substrate, we see that it is suitable for decorative purposes and is a good choice for wall cladding in both residential and public buildings.
Advantages of cork
First of all, it is worth noting the unique structure of the cork material, which is a natural polymer. The honeycomb structure breathes, and in doing so, sound is blocked. Other cork properties include:
- Elasticity and elasticity.
- Heat retention.
- Suitable for gluing rooms with a high level of humidity. For example, for baths or saunas.
- It can be used both as the main material and as decorative inserts when facing rooms.
- Durability, so the wallpaper and coating can be used for a long time.
- Anti-static properties - the cork does not attract dirt and dust.
- Non-toxic and non-flammable material.
- Cork does not absorb foreign odors.
- The coating is resistant to mechanical stress, ultraviolet rays.
- The cork is easy to maintain and operate.
Thus, the use of cork wall covering is suitable not only for soundproofing an apartment, but also for its insulation. This allows you to create coziness and comfort in the living room. The level of thermal conductivity of the material is an order of magnitude higher than that of felt made of wool and mineral wool.
Cons of cork coating
With a large number of pluses, cork for walls and ceilings has some disadvantages. Firstly, the price of the material is higher than that of other wallpaper substrates. Secondly, if furniture or decor items are pressed on the cork for a long time, then dents will form on the surface.
Wallpaper cork self-adhesive
Self-adhesive cork wallpaper is an innovation in renovation. What is their charm - they are fixed on the wall in the same way as the more familiar self-adhesive film.
Imagine: the walls for gluing are smooth, clean, even. You measured them, and proceed to cutting sheets. By the width of the wallpaper, you need to separate the protective layer, three centimeters. The open part of the wallpaper is glued to the wall, and the protective film is removed from the entire canvas, the sheet is glued completely.
The self-adhesive type of cork wallpaper has a particularly thin structure, which makes it more versatile: it can be used to cover walls, doors, decorate furniture, decorate panels, etc.
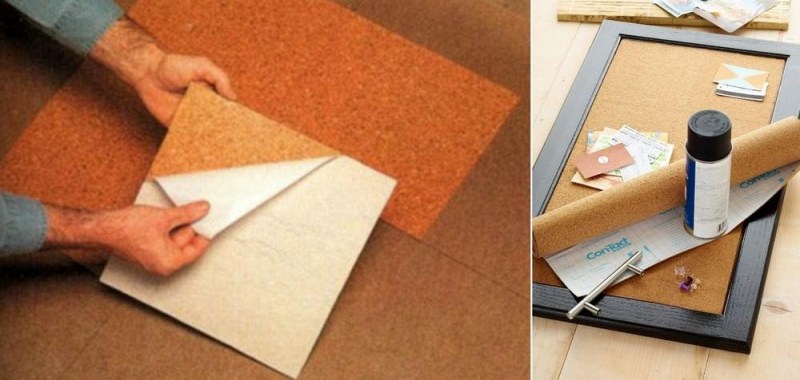
How to glue a cork backing
The gluing process is similar to wallpapering. If the cork is purchased in a roll, convenient segments should be separated from it for alternate gluing. The optimal size for manipulation is a canvas 1 by 1.5 meters. If the material is presented in the form of panels or plates, it is even easier to mount it.

How to stick a cork backing on the wall instead of wallpaper, the photo above demonstrates clearly.
Important! Before gluing a cork rolled into a roll, it must first be leveled. To do this, it is necessary to deploy the material on a solid surface and put oppression on top.
After a day, the cork will be ready for cutting.
To draw straight marking lines, it is convenient to use a metal ruler or a large square. Cut the fabric with a knife.
The steps for attaching the cork to the wall are as follows:
- Apply a homogeneous adhesive to the wall with a notched trowel. The layer should be thin (no more than 1.5 mm).
- Tape the edges of adjoining surfaces with masking tape to avoid staining.
- Glue cork sheets, starting from the top corner on one side.
- Using a rag, immediately remove excess glue at the joints of the material sheets.
- After gluing large sheets of cork, fill the remaining space of the wall with small segments.
To better adjoin the borders of the canvases, especially at the corners, they can be fixed with masking tape until the entire wall dries.
After pasting the entire wall or the planned area, remove the masking tape.
The final stage is the application of varnish to the cork surface. Usually no more than two coats are needed.
How to stick a cork backing on the wall
It is possible to securely and efficiently fix the cork coating only with the help of a properly selected adhesive composition.
Henkel has developed a special composition - contact adhesive Moment Cork. The preparation is quick-setting and has a high initial bonding strength, therefore it is suitable for mounting the coating on both horizontal and vertical surfaces. It can be used to fix floor and wall cork coverings: sheet and roll substrates, as well as cork moldings.
The composition fits perfectly on metal, plastic, rubber, leather, wood and even felt bases. After drying, it forms an adhesive seam that is resistant to moisture, low temperatures, as well as weak acids and alkalis. Suitable for use not only indoors, but and on the glazed balcony.
Glue Moment Cork is non-toxic and does not contain toxic solvents.
Required tools and materials
 As in any type of activity, before starting work, they prepare and check the availability of the necessary tools and materials:
- pencil or felt-tip pen;
- metal ruler 2 m long;
- square;
- roulette;
- rags;
- spatula with fine teeth;
- solvent;
- masking tape;
- sharp construction knife;
- gloves;
- cork glue.
Preparatory work
Before proceeding directly to the wall decoration with cork, it is necessary to perform a number of preparatory operations.
- The walls are checked for evenness. Dents and cracks are sealed with putty.
- All surfaces for pasting are treated with primer.
- Marking the location of the substrate segments is applied to the walls.
- Since the substrate rolls are 1 m wide, it is most convenient to cut the main sections of the wallpaper 1.5 m long. That is, each main fragment of the coating will cover the wall area of 1.5 m 2.
- When the number of main sections of the substrate is determined, then the markup will show the dimensions of additional fragments.
- If all work is carried out in the same room where the pasting will be done, then to cut the substrate rolls, a sheet of fiberboard or other dense material is laid on the floor.
- Rolls of the substrate are unfolded and laid on the floor. To make the material look like a horizontal plane, large heavy planes are laid on the cork. For example, on unrolled wallpaper rolls, a dining table is placed with the table top down. In general, the main goal is to withstand the cork under load for 12 hours, and even better - a day.
- Then go directly to cutting the substrate. Do this with a metal ruler, a square and a knife.
Wall cladding with cork
The work on gluing cork on the walls consists of several stages:
- Open the container with ready-to-use glue. The glue is thoroughly mixed until a homogeneous mass is obtained. You can do this with any clean rod.
- A layer of adhesive is applied to the wall using a notched trowel. The viscous mass is leveled with a spatula so that the thickness of the adhesive is about 1.5 mm.
- Pasting starts from one of the upper corners of the wall.
- Masking tape is glued along the perimeter of the marking of the first piece of wallpaper. They do this so that when leveling the cork on the wall, excess glue does not stain the adjacent surfaces.
- A piece of wallpaper is glued to the fenced area.
- After that, they proceed to glue the adjacent section of the wall with glue. At the junction of the two segments, remove the masking tape.
- When joining adjacent sheets of cork, the adhesive that has come out is immediately removed with a rag.
- It is desirable that the vertical seams of adjacent rows of wallpaper segments be spaced apart.
- After the main large fragments are glued, they proceed to pasting small finishing pieces of the substrate. For information on how to properly stick a cork on the wall, see this video:
Cork backing for wallpaper
What is a wallpaper substrate - this is a canvas that is used as a middle layer. The middle layer means a material whose task is to level and increase the adhesion (adhesion) between the wall surface and the finishing coating.
Why do you need such a layer:
- It perfectly compensates for all defects in the base;
- Serves as a material for additional adhesion;
- Helps quickly prepare the wall for gluing.
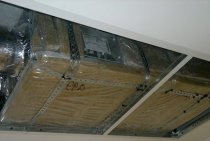
In addition to all the above qualities, the cork substrate is also an excellent insulation, as well as a sound insulator.
A cork underlay is not used only if the relief of the wall protrudes strongly forward.
There are ordinary substrates, without additional properties. But there are also substrates that “can” dampen vibrations and are sound insulators.
Cork wallpaper in the interior
For eco-style fans, cork wallpapers are just a real find. Ecostyle stands for natural colors and materials in the interior, and cork wallpapers are two in one. If you look at the photo, you can see how incredible they look.
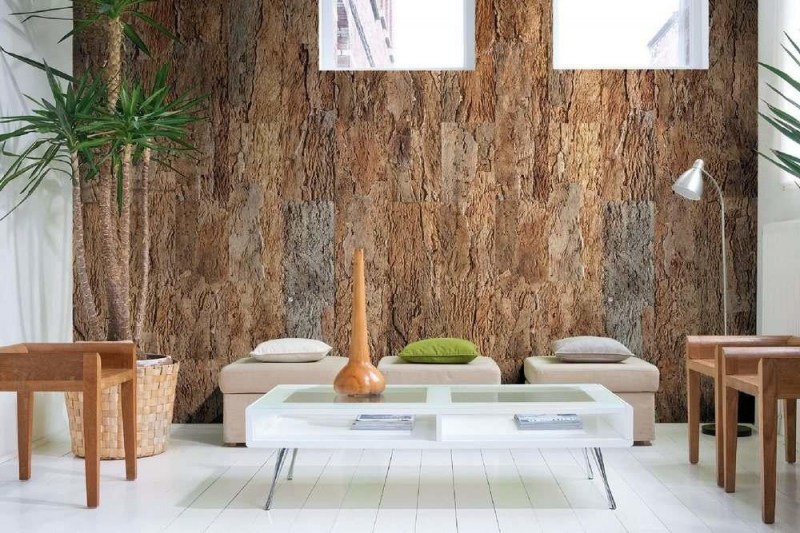
Cork wallpaper is very warm, wear-resistant and not afraid of moisture. The mass of positive qualities makes it possible to use them in any room
Rooms where cork wallpaper can be used:
-
Cork wallpaper in the interior of the kitchen
. If you use furniture in natural shades, such wallpapers will be very harmonious. If your kitchen is small, then you can take wallpaper in the form of tiles for pasting the walls, the fit will be optimal. If the wallpaper is not impregnated with wax, they are also not suitable for the kitchen - the smells of oil and food will be absorbed. -
Cork wallpaper in the interior of the hall
. The walls in the hall or hallway are finished only with materials that can be easily washed and cleaned. Since cork wallpapers are antistatic, dust will not stick to them. So, such wallpaper can be washed. -
Cork wallpaper in the interior of the living room
. Typically, designers agree that the central wall can be pasted over with contrasting wallpaper, and the other three with cork. Cork is not always suitable for all four walls, but in this combination it looks great. The color of contrasting walls can be, for example, chocolate. -
Cork wallpaper in the bathroom
. For those who are tired of cold tiles. Cork creates the illusion of warmth, which is often lacking in the bathroom. Rest assured that cork is resistant to fungus, mold and other side effects of high humidity.
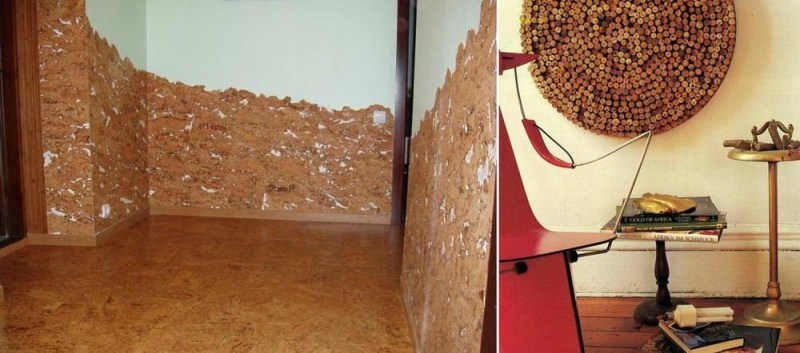
Cork flooring in the interior can be used as a decorative panel or fully functional wall panels.
In general, it can be noted that cork is a fairly versatile material, which, due to its naturalness, looks great in any room. On any of the walls, they can be organic to other elements of the interior.