Plastering the ceiling is a rather complicated matter, which not every novice master will decide on. Here you need not only to know the technological side of the work well, but also to be able to use specific tools, and not in the most convenient position. Therefore, for beginners who are determined to plaster the ceiling in the apartment on their own, it is recommended that you first try your hand at the walls and do not forget about strict adherence to the process technology.

How to clean the surface of old plaster
Before starting any repair work, it is necessary to free the ceiling from the old plaster. This stage can be skipped only by those masters who make repairs in a new building. They can immediately begin to level its surface or putty, if leveling is not required.
Some masters believe that if the plaster is still holding up well, then there is no need to beat it off. Other experts insist on its removal, even if it requires considerable effort, since it has already served its purpose and after a while it will still begin to collapse.
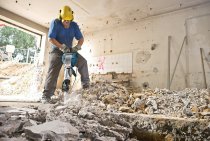
- Old plaster can be beaten off with a hammer, spatula, grinder or perforator, clean off the remnants with a metal brush.
- After releasing the surface from the old coating, it is necessary to carefully examine it for defects. If there are cracks on it, then they should be embroidered and repaired.

Tip: for large defects, you need to additionally lay a special serpentine tape on top of the putty layer. It is also recommended to use it for processing joints between floor slabs.
Wet leveling method - plastering the ceiling
Let us consider in detail how to level the ceiling with plaster - it is this leveling method that causes particular difficulties.
Preparatory work:
- Before starting the main work, you need to walk on the surface with a primer on concrete, which will provide good adhesion and strengthen the base.
- Using the level, you need to determine the lowest and highest points of the ceiling. If the detected difference is more than 5 cm, you will have to apply plaster in several layers. In this case, it is advisable to use a reinforcing mesh, which will act as a frame and is attached to the surface with ordinary glue.
- Before plastering the ceiling, it is necessary to correctly mark its surface. For this, beacons (plaster profiles or wooden blocks) are used, the number of which depends on the width of the room. On average, two beacons are located at three meters, the extreme ones should be at a distance of 60 cm from the walls.

How to plaster the ceiling
Do-it-yourself ceiling plastering involves the use of the same technology as for walls. Apply the mortar to the surface using one of the following tools:
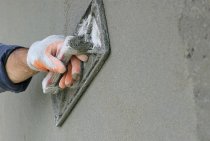
- steel trowel - suitable for applying plaster for the ceiling in a thin layer: a small amount of the mixture is applied to the tool, and then transferred to the ceiling with quick movements with little pressure;
- spatula - used when the layer thickness is more than one and a half centimeters.

Tip: the plaster solution should not be made too thick, otherwise it will be inconvenient to apply. In addition, the plaster may fall off the surface under its own weight.
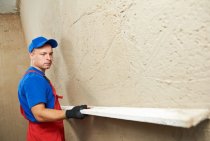
The plastering of the ceiling along the lighthouses is carried out in a certain sequence: first the middle part is processed, and only then the side strips, it is recommended to start the process in the direction from the center to the wall.
You need to work standing with your back to the light. To remove the excess solution, you need to hold the rule towards you. The finishing movement is made, on the contrary, from oneself.Thanks to this, the master will be able to see the gaps in the plaster layer and correct the identified defects, the absence of which is especially important during subsequent painting.

How to prevent bubbles from forming
Improper application of the mortar is fraught with the formation of air bubbles, which appear where the plaster has not adhered to the surface and, as a result, has sagged under its own weight. That is why beginners, taught by bitter experience, are interested in how to properly plaster the ceiling.
Professional craftsmen advise applying plaster in two layers, the first of which is very thin. After it dries, you can apply a second layer. The secret of this approach lies in the fact that the two layers of mortar adhere well to each other and, as a result, no voids appear on the ceiling.
Tip: in order to remove bubbles that have already formed, you must wait for the solution to dry completely, and then use a spatula to clean it off the ceiling in the places where the defect appears. Affected areas will have to be plastered again.
Ceiling preparation for finishing
The use of one plaster for the ceiling does not make it possible to make its surface perfectly even - it will have to be additionally puttied before painting. First, a primer must be applied to the ceiling, and only after that can the putty mixture be used. Then a well-dried surface is recommended to be treated with sandpaper or a polymer grout.

The nuances of plastering a plasterboard ceiling
The surface of drywall is not perfectly smooth: it shows the joints of individual sheets, as well as the heads of self-tapping screws. Since full alignment is not required in this case, do-it-yourself plastering of the ceiling is needed to eliminate all minor surface defects, as well as additional protection of the GKL.
Ceiling treatment before wallpapering
- First of all, a layer of penetrating primer must be applied to drywall: it will make its surface more durable, reduce absorbency, and also improve adhesion to the selected coating. In addition, much less expensive materials will have to be spent on subsequent painting.
- All seams and irregularities must be filled with gypsum plaster or special putty for joints.
- To apply the general layer, you will need a finishing compound and a narrow spatula ten centimeters wide. Leveling is best done with a tool that is at least three times as wide. At the corners of the ceiling, it is desirable to additionally glue the sickle mesh.
- After the putty layer has dried, the seams must be treated with a special paint mesh and the primer must be reapplied. After that, you can glue the selected wallpaper to the ceiling.

Sanding before painting
If you plan to apply paint to the surface, then before plastering the plasterboard ceiling, you need to carry out a more thorough treatment:
- First of all, to apply a primer to the seams and various irregularities, you need to use not a roller, but a brush. It is this tool that will make it possible to carefully process any surface defects.
- In the future, it is desirable to glue not only the corners, but also the seams with a mesh.

The process of plastering or puttying will be as follows:
- Plaster or starting putty is applied over the mesh until a smooth surface is obtained. Also, the mixture fills all the recesses and holes from the screws.
- After the surface has dried, the ceiling is re-primed and bandaged: applying paper tape to the seams and corners, which is fixed with ordinary glue. It is thanks to the use of paper that it is possible to achieve an ideal surface in the most problematic places.
- Final puttying with a finishing composition is recommended to be done in several passes.To apply a thin and even layer, you need to use a fairly wide spatula.
- After that, the surface of the ceiling is polished with sandpaper, at the final stage, paint is applied to it.