Residents of small apartments usually have one problem - how to save precious square meters. This applies not only to living quarters, but also to bathrooms. As a rule, a bathtub in an average apartment does not differ in large sizes. But in addition to the mandatory plumbing, it is also necessary to place a washing machine. The best option is to install a washing machine under the sink. It's easy enough to do, you don't even have to call a plumber. The main thing is to follow the basic rules.

Choice of sink and washing machine
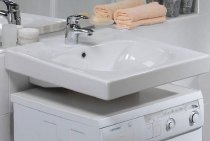
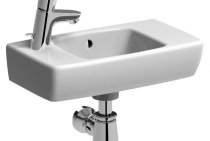
The process of combining a sink with a washing machine usually begins with a trip to the plumbing store. There you need to purchase a suitable sink. For your purposes, the so-called water lilies are most suitable. These are shallow, flat plumbing products made in the form of a countertop.

It is recommended to pay attention to the sink drain scheme. The drain is usually horizontal or vertical. From the point of view of practicality, a vertical drain is much more convenient - in a straight pipe, blockages form less often. But if you install the sink above the washing machine, then it is better to give preference to models with a horizontal drain system. The fact is that the drain must necessarily be taken out of the “washer”. This is required by elementary fire safety rules. In this regard, products with a horizontal drain are much more convenient.

Optimal dimensions
The width of the purchased plumbing must match the dimensions of the washing machine.
If the household already has a washing machine, then the choice is rather limited and you will have to work with what you have. If the purchase of this household appliance is yet to be, then you should opt for compact models. The optimal dimensions of the washing machine are as follows: height no more than 60 centimeters, depth within 35 -45. Width does not play a special role here, so be guided by your taste.
 In both cases, the following nuance must be taken into account. The height of the finished structure (sink + washing machine) should not exceed 75-80 centimeters. This is considered the best option. Using a water lily that is set above or below the recommended level will be very problematic. At the same time, a small gap should remain between plumbing and household appliances. You can calculate at what height the bowl will be using the following formula: the height of household appliances + the depth of the bowl + 10-15 centimeters of stock.
There is also a third option, to purchase a ready-made bathroom kit. It includes a washing machine and made specifically for it sink. The only drawback of such designs is that these products are mainly produced abroad, and therefore their price is appropriate. Not every family can afford to spend almost the entire monthly budget to purchase this pleasure.
Installation
The installation process begins with the preparation of the workplace and tools. For work, you may need wrenches and gas wrenches, a drill, a tape measure. Just in case, stock up fittings and flexible hose. After that, it is necessary to turn off the water and dismantle the old sink.
Advice! The brackets on which the plumbing was attached are best left in place if possible. They sit securely in the wall, and there will be less work.
Further actions are performed in the following order:
- The product is removed from the package and tried on at the place of installation. If one faucet is used for the bathroom and sink, make sure that the spout freely reaches both plumbing fixtures.
- If you decide to dismantle the old fasteners, you must install new brackets.Usually they and the fastener come with the sink. This is done as follows: with the help of a tape measure and a corner, markings are applied to the wall for installing fasteners. After that, holes are drilled, and installation is carried out. All actions are intuitive, but just in case, you can read the installation instructions. It is usually attached. It is better not to tighten the fixing bolts to the end. It is recommended to leave about 5 millimeters of thread. This is done to make it easier to level the sink. In the gaps left, you can wind an insulating tape or put a piece of electrical cable folded several times.
- After that, the "water lily" must be attached to the wall. For this, a special hook is provided. One end is inserted into the hole of the bowl, the other is attached to the wall with a self-tapping screw. After making sure that the "water lily" is leveled in a horizontal plane and securely fastened, you can tighten the fixing bolts left unscrewed to the end. The gap between the wall and the sink must be covered with silicone. This will eliminate the possibility of leaks.
- Then install a siphon. This device prevents the penetration of unpleasant odors from common house pipes and facilitates the procedure for removing blockages. The siphon is installed between the sewer pipe and the sink. Important! The installation of the siphon is carried out only after fixing the sink! Otherwise, there is a risk of dropping and breaking the bowl. A flexible hose designed to drain the water of the washing machine is attached to the siphon pipe. To do this, you can use a fitting connection or a crimp collar. The main thing is to securely tighten all connections, otherwise you risk flooding your neighbors from below.
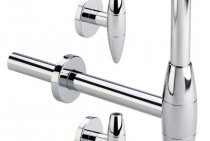
- If a faucet is provided above the sink, then it is installed at this stage. To do this, you will need an adjustable (gas) wrench. When tightening threaded connections, be very careful. Most faucets sold in markets and stores are made of silumin. This is a very fragile material and excessive force can damage it. For greater tightness, it is recommended to wind a fum-tape or linen thread between the teeth of the thread.
- A washing machine is being installed. It is recommended to carry out a control wash immediately. This will identify leaks and, if necessary, re-draw the fittings and clamps.
As you can see, installing such a design is not so difficult. If you have certain skills, the installation process will take no more than two hours. But the result is a fairly ergonomic design. If you show a little imagination, you can even decorate the design of the bathroom in this way.