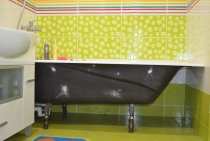
Shower cabins confidently replace the usual baths. There is a logical explanation for this: installing a shower cabin saves free space. In addition, such designs have a lot of useful features, such as hydromassage, sauna effect and other options. At first glance, assembling a shower cabin seems complicated, so buyers involve third-party specialists for installation. This is not true. Installing a shower is quite feasible on your own. In order to properly install the shower cabin with your own hands, the main thing is to follow the instructions and be guided by the attached diagram. Consider the main stages of installation.

Where to begin?
Assembling a shower cabin begins with the choice of equipment. All commercially available products can be divided into three categories. Models of each group differ in terms of comfort, functionality and cost. Accordingly, the installation of shower cabins will also have its own characteristics. Let's look at each category.
- Economy These are elementary models that include a deep tray and a mixer. Side windows and walls are often absent - they are replaced by curtains. Before installing such products, it is necessary to complete the renovation in the bathroom, in particular, to complete the finishing. Economy class cabins do not have decorative elements, and attract buyers with their low price.
- Middle class. Models from this category are distinguished by extended functionality. There are walls, a deep pan, glass and a roof. Most booths are regularly equipped with a radio station, lighting, and a hydromassage function. Note that absolutely all products have forced ventilation. The booths can be installed without completing the wall cladding, but the electronic filling will require electrical outlet installation.

- Premium. Here there are steam room functions, various shower spout options, an electronic panel with touch controls. Such products are difficult to install on their own - this should be done by professionals.

Criterias of choice
Installing a shower involves meeting certain requirements. For example, if the cabin will be mounted in place of the bath, no permits are required to carry out work. It is more difficult when the booth will complement the bath, being an additional point of water intake. In this case, the increased load on the water supply system can reduce the water pressure in the apartments of other residents. Such works fall under the definition of redevelopment, and require prior approval.
We recommend checking the ratio of the dimensions of the shower cabin to the free space of the bathroom. Here you need to take into account the height of the ceilings, and the side space: booths are rarely installed close to the walls.
Pay attention to the operating pressure of the shower cabin. This parameter must correspond to the pressure of water in the water supply. For example, in order to use the steam room function or hydromassage, the pressure in the water supply must exceed 1.5 bar.
Equipment
To assemble a shower cabin with your own hands, you need to check the scope of delivery. All elements must not have visible chips and damage, in addition, instructions in Russian must be attached to the product. The mid-range shower enclosure (this is the most popular product) comes in several boxes. The following elements must be present here:
- Deep tray. This part is sometimes standardly equipped with a shower drain and a protective screen.
- Frame. Aluminum profile, which is needed to install the main elements.
- Roof. Usually this part is already equipped with ventilation and lighting.
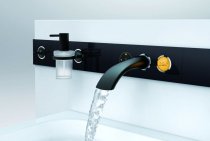
- Back wall.A control panel and a mixer are usually installed here.
- Glass. Depending on the shape of the cabin, glass doors are rectangular or spherical. Please note that experts do not recommend removing glass elements and laying them on the floor. Glass can break under its own weight.
- Fasteners and batteries. Each part is usually marked, so there are usually no problems with mounting the equipment.
After checking every detail, you can begin the installation process.
Assembly order
How to install a shower cabin? Experts recommend pre-assembly. To do this, you need to choose a free place in the apartment, and mount all the elements without using sealant. The procedure will help to better imagine the entire structure, once again make sure the integrity of the parts, check the presence of the necessary technological holes. After that, you can proceed to the final installation. We will divide the installation into several stages.
- Installing a deep pan. This element is best installed on a flat surface, although small deviations can be leveled with adjustable legs. Ideally, if the drain hole is located above the sewer. If this does not happen, you can use a spigot and flexible hose to connect the cabin drain to the sewer system. Please note that sealant must be used for all butt joints.

- Walls. Please note that glass partitions are difficult to install on your own, given that there is usually little room for maneuver in the bathroom. Therefore, we recommend that you involve a friend in the installation or use the help of your family. First, we assemble the aluminum frame. Side racks should be perfectly level, in addition, for some models they are attached directly to the bathroom wall. To do this, drill holes, hammer dowels and fasten the structure with screws. Note that before a thorough tightening of the fasteners, a sealant is applied between the wall and the rack. When the frame is firmly fixed, the side panels are installed.

- Doors. This part of the structure is movable, so rollers are required. Please note that the rollers should slide freely in the grooves, without any effort being applied. To achieve this, we make the necessary adjustments. Usually advice on installing and adjusting rollers contains instructions. Then we fix the handles and isolate all the existing seams. To do this, we again use a sealant.

Please note that the installation and connection of different models of shower cabins may vary.
We connect the product
When installing a shower with your own hands, do not forget that you will need to connect not only to the sewerage system, but also to the water supply and home electrical network. Connecting to the water supply is not particularly difficult: it uses flexible hoses that are installed in special connectors. The main thing is to achieve the tightness of the connections. Here the sealant will no longer help - a special sealant will be required. Usually, when connecting hoses to the water supply, linen or fum tape is used. After completion of work, it is recommended to check the booth by opening the water supply. If moisture appears at the joints, it is necessary to eliminate the problem by replacing the seal or tightening the tube more tightly.
Only after making sure that the shower cabin has no leaks, you can connect to the mains. In order for the electronic filling of the shower cabin to work, you will need to install a separate outlet in the bathroom, which in turn is connected to a separate automatic electrical panel. Please note that the machine must comply with the rated electricity consumption. For example, if the cabin consumes 5 kW, we install a 25 A machine. Do not forget about installation RCD (residual current device), which is installed in front of the machine.
Conclusion
Installing a shower with your own hands is not so difficult. However, do not forget about the safety of other people living in the apartment. Without certain skills and knowledge, you can independently assemble the structure and even connect the product to the water supply and sewerage. But all work related to the connection of electricity should be performed only by a qualified specialist.