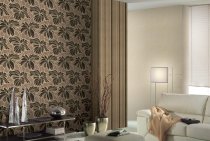
Wall murals began to win more and more fans among apartment owners. The idea of using them is not new, but modern technologies and design ideas make it possible to create unique, practical and beautiful interiors using this material. A qualitative result depends not only on the correct choice of material, the image on it. The most important thing is to avoid mistakes when gluing photo wallpapers on the wall. Let's take a closer look at how to glue vinyl-coated paper-based wallpaper, as well as ordinary paper wallpapers.

A feature of photo wallpapers is their division into small fragments, which can be simply glued to the wall separately, creating a common image.
Features of working with paper-based photo wallpapers
Wall murals can only be made of paper or have a paper backing on which a vinyl layer is applied.
- The paper material can be single-ply or more durable two-ply, have different densities, but in any case requires very delicate handling.
- It is much easier to work with paper-based vinyl wallpapers, since their outer layer is much stronger than paper.

Despite the serious differences in the performance characteristics of paper wallpapers and vinyl sheets on a paper backing, the principle of their gluing is the same.
Wall murals paper has its own nuances:
- It is important to stick each fragment very carefully, since it will no longer be possible to replace it individually - you will have to buy a new set of photo wallpapers.
- Paper is a thin material that is easy to tear or wrinkle, especially when glue is applied to a piece of wallpaper and the canvas gets wet.
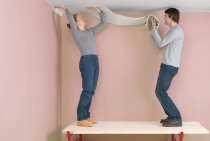
- It is necessary to glue paper photo wallpapers only on a perfectly flat surface. This applies not only to walls, but also to the ceiling, because this option is also found in the interiors of apartments. Any irregularities and defects will affect the final result. That is why the opinion that photo wallpapers most often just hide the flaws of the walls is erroneous.
- Paper murals on the wall of a bathroom or toilet will not work, as they do not tolerate high humidity. This also applies to vinyl wallpaper with a bottom paper layer.

Preparatory activities
Preparatory work before sticking paper-based photo wallpapers on the wall will include the following steps:
- Preparation of materials and tools. It is important to immediately prepare all the necessary tools and materials. You will have to work at a fairly fast pace, there will be no time to run for the missing components.

Important! For photo wallpapers of any type, a special adhesive composition is used, which comes with the finishing material, or ordinary wallpaper glue, corresponding to their type and density.
- Wall surface preparation. Before sticking photo wallpapers on the wall, it is necessary to carefully level the surface. This will require remove old coating (wallpaper, paint, etc.), if necessary, level the walls with plaster, and then putty, apply a primer. If the wall was originally perfectly flat, it just needs to be cleaned of dirt and dust, and then primed.
If the wallpaper will be glued to a painted wall, the paint on which holds very well, it can not be removed. The surface is washed with a detergent, a very smooth base is processed with sandpaper to improve adhesion.
- Applying markup. The evenness of the final image on the wall will depend on this stage. Marking is applied using a level or plumb line. It is necessary to apply so many lines to get a markup for fixing each piece of wallpaper with a photo image.

Gluing methods
Let's deal with the basic recommendations and tips on how to properly glue paper-based wallpaper on the wall.
Wallpaper can be glued in two ways:
- Overlap, when the edge of one piece is pasted over the edge of the previous piece. This is possible due to the presence of a technological strip on the edges of the fragments, which is available on all types of wallpaper.
- Butt to butt, when this strip is simply cut off.

We glue the wallpaper correctly
- In order to correctly carry out the overlapping of photo wallpapers, first lay them out on the floor and check the location of the technological strips. If they are on all sides of the fragments, it is necessary to cut off those stripes that are located on the left. It is most convenient to stick fragments along the right edge.
- With a wide brush, glue is applied to the wall. If the paper for photo wallpaper is thick enough, the adhesive composition should be applied to the fragments in turn, soaking them for 2-3 minutes (depending on the manufacturer's recommendations). Thin photo wallpapers should be glued to the wall immediately after applying the glue, otherwise they will get wet and spread.
Important! For thin wallpapers, the glue should be more liquid than for thick and dense ones.
- The first fragment is applied to the wall, starting from the top, then leveled along the vertical markings. Bubbles and wrinkles are expelled from under the paper with gentle movements of the roller from the center to the edges of the fragment. When ironing the wallpaper with a roller or spatula, excess glue is squeezed out from under them and then erased with a soft sponge.

It is very important that the first part of the photo wallpaper is glued perfectly evenly, since the first fragments will serve as a guide for placing all other parts of the image.
If the fragments are overlapped, care must be taken to ensure that the technological strip does not show through at the joints. At the same time, it is important to carefully combine the pattern at the junction of the edges of the photo wallpaper, since after drying such a defect can no longer be corrected. First of all, the image is combined, and only after that the fragment is smoothed. It is necessary to act very carefully, but at the same time quickly enough so that the fragment does not have time to get wet from the glue.

While the fragments of the drawing made on paper dry out, bumps form again on their surface, and the image is slightly deformed - this is a natural process, you should not be scared and try to fix something at this stage. If the wall murals were glued to the wall correctly, then their surface will level out again after complete drying, and the pattern will take on the correct shape.
A few important points
When gluing photo wallpapers made of paper or paper-based, you need to remember some important nuances:
- Paper tends to stretch and tear when wet, so you should be very careful when bringing fragments to the wall.
- If the wallpaper with photo printing on a paper basis gets very wet, they increase in size. The consequence of this is the appearance of bubbles, folds and displacement of the pattern on the edges of the fragments.
- It is important not to accidentally crush the fragment - this will leave clearly visible creases and folds.
- So that the glue does not spoil the already glued areas, you need to start working from the top of the image.
- The optimum temperature in the room where wallpaper with a photographic image is pasted is 20–25 °C.
- Another condition for obtaining an ideal result when sticking any wallpaper is the absence of drafts in the room. All windows and doors must be closed.

If you want to visually see how to glue paper-based wallpaper, various videos on this topic will help you.
In any case, before you start gluing, carefully read the instructions for your photo wallpaper.Often the process is simplified and accelerated precisely due to the exact following of the recommendations provided by the manufacturer.