A well-known saying says: "repairs cannot be completed, they can only be stopped." Therefore, once having survived the complete decoration of the apartment, the next time you want to get by with minimal cosmetic work. An excellent opportunity to update the interior in the future, without immersion in a full-fledged repair, is provided by pasting the walls and ceiling with wallpaper for painting. Also, this type of coating is indispensable in solving the problem of "wall painting" of young artists. At the same time, it remains possible to embody a variety of interesting design ideas. We will find out how to glue wallpapers intended for painting, as well as how, with what and when they can be painted.

What you need to know before gluing wallpaper for painting?
Getting started with modern coatings for multiple staining, it is worth considering some important points:
- Wallpaper glue for paintings for painting should be highly specialized, suitable for “its own” type of substrate for each type of coating. Universal adhesive composition will not hold heavy, two-layer paintable wallpaper.
- The degree of dilution of the adhesive solution depends on the thickness and weight of the material: the heavier and denser the canvas, the thicker the glue.
- When working with paper sheets or paper-based vinyl, both prepared sheets and wall / ceiling surfaces are smeared with glue.
- Non-woven or vinyl wallpapers with a non-woven backing do not need to be soaked, therefore they are applied dry to a working surface treated with an adhesive composition.
- When sticking fiberglass wallpaper, the solution is in most cases applied to the walls. But sometimes there are varieties of canvases that require coating with an adhesive mass of the sheets themselves. Information on the method of gluing specific wallpapers is necessarily contained in the instructions.

How to prepare the surface?
The final result directly depends on the quality of the work surface, which must be even, dry and clean. Prepare the wall as follows:
- The room is de-energized and freed from sockets, switches, wires are isolated.
- If possible, the previous coating is completely removed or washed off. How to quickly remove different types of old finishes is described in this article. A special antibacterial composition is applied to the "suspicious" areas.
- Irregularities are puttied, after drying they are rubbed with fine-grained sandpaper.

- The joints of the walls and ceiling, as well as the corners of the room, are displayed at 90 °, otherwise it will be problematic to combine heavy canvases.
Advice! If the height differences or the curvature of the corners are too great, it is better to use drywall when leveling.
- To increase adhesion, the working surface is treated with a primer.
- After the walls or ceiling have completely dried (about how long the primer dries, it is written here) you can start gluing wallpaper.
Marking and cutting
In order for the gluing process to go quickly and without unpleasant surprises, the working surface should first be marked out, and the wallpaper should be cut.
- From the corner chosen as the starting point, a distance equal to the width of the roll minus 2–3 cm is laid off (allowance for the corner). With the help of a plumb line, a vertical line is drawn, which will serve as a further guide.
- Next, the surface is marked by the width of the wallpaper.
- The required number of solid canvases is cut with a height margin of 10 cm, if a ceiling molding was used, the allowance is 2–3 cm.

Important! It often happens that the glass fiber crumbles during cutting, so you need to act carefully with a sharpened tool (scissors or a breadboard knife).When working with such material, it is worth using a respirator or bandage, gloves and closed clothing.

Note! If you need to adjust the pattern / relief, you need to carry it out at the stage of cutting the wallpaper sheets.
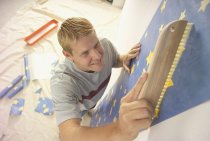
We glue paper and vinyl wallpapers on a paper backing
Wallpaper for painting differs from ordinary paper-based canvases in density and thickness, which brings its own specifics to the gluing process.
- Prepared canvases are laid out on a flat, clean surface.
- Using a brush, the sheet is evenly covered with adhesive. Pay special attention to corners and edges.
Advice! It is important not to leave unsmeared areas on the paper, which, after the wallpaper dries, will turn into air bubbles. It is convenient to use glue with an indicator. A special dye added to the composition, most often blue or pink, helps control the uniformity of application. After drying, the glue becomes transparent. The brands Metilan, Kleo, Pufas have such compositions.

- Then the strip is folded in half or accordion to improve impregnation.
- At this time, a thin layer of glue is applied to the work surface, slightly extending beyond the marking lines.
- Then, carefully, without stretching, the canvas is applied to the wall, aligned simultaneously along the top edge and the marking line.
- With a plastic roller or rag, the material is smoothed and pressed tightly from top to bottom from the center to the edges. Excess glue is removed immediately, without waiting for drying.
Wallpaper for painting is glued end-to-end, so each subsequent canvas is attached as tightly as possible, since the paper shrinks slightly when it dries.
- After complete drying, the excess edges are carefully trimmed.

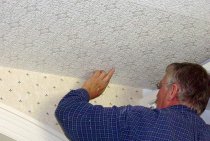
We glue wallpaper on non-woven fabric and glass
It is easier to work with non-woven and glass wallpapers than with paper ones. Such canvases do not tear, do not stretch and do not need to be smeared with glue.
- With a paint roller or brush, glue is applied to the work surface, capturing the marking line.
- A dry canvas is immediately applied, aligned horizontally and vertically at the same time.
- The sheet is pressed tightly in the center and smoothed from top to bottom to the edges, the protruding glue is removed with a sponge or rag.

- The resulting seams and joints are additionally tightly rolled with a plastic roller. After drying, the excess parts of the wallpaper are trimmed.
Note! Drafts should be avoided while wallpapering and drying (at least 24 hours) indoors.
Gluing in corners and near openings
We will figure out how to properly glue wallpaper in difficult areas - in the corners, near door and window openings.
Regardless of the coating material and the type of corner (internal or external), the wallpaper in these places is glued with an overlap.
- On each side, a part of a strip 5–7 cm wide is wound around the corner and glued.
- Then the resulting overlap is carefully cut in the middle, excess strips of wallpaper are removed.
- The resulting edges are rolled with a plastic roller with strong pressure.
After drying, a neat invisible seam is obtained.

For gluing the openings, fragments of the desired shape are cut with a margin of 5 cm from the side of the slopes. The resulting elements are glued to the wall in the usual way, after complete drying with a sharp wallpaper knife, the excess parts are carefully cut off flush with the opening.
How, when and how to paint wallpaper for painting?
The answer to the question of when it is possible to paint the wallpaper is unambiguous: at least 24 hours must pass between gluing the canvases and painting them, i.e. the coating must be dry.
Note! Glass fiber, unlike other types, has a finely porous structure and strongly absorbs paint. To avoid this, the surface is primed with a thin layer. As a primer, wallpaper paste diluted in a ratio of 50 g per 5 liters of water is suitable.
Wallpaper can be painted with water-based, acrylic or latex compositions.

Note! Water-based paint is available in white, to obtain the desired shade it will have to be tinted. It is necessary to dilute the composition once for the entire volume of the room, since it is very difficult to re-obtain the same tone.
Painting wallpaper for painting is no more difficult than other surfaces, subject to certain conditions:
- work comfortably with paint rollers of different sizes;
- it is necessary to paint the entire room at once, otherwise noticeable transitions of shades will appear;
- first, joints and hard-to-reach places are painted over, then the entire surface is rolled from top to bottom;
- each next layer is applied only after the previous one has completely dried.
The technology of working with wallpaper for painting is not complicated; to obtain the desired result, it is enough to strictly follow the sequence of actions.