Having successfully overcome the complex and labor-intensive work on wall repair, ceiling and floor, you can exhale with relief and go to choose skirting boards. Because the long-awaited end of a grandiose project, whose name is repair, is approaching. The last spurt remains - the installation of a plastic plinth, and you will fully enjoy the fruits of your labors.

Plinth is not just a decorative element of decoration. In addition to its design properties, it perfectly performs quite practical tasks: it hides small errors in the floor covering, joins the floor with the wall, hides cables and wires.
Advantages of plastic skirting boards
A worthy competitor to wooden, veneered or ceramic skirting boards are plastic products. Their advantages:
- Moisture and detergent resistant.
- Flexibility. Smooth curves and semi-circular solutions in the design of the room - a task that soft and semi-soft plastic products (even with a cable channel inside) do an excellent job. To do this, you need to cut off the stiffeners and heat the bar with a building hair dryer, giving it the desired shape.
- Ease of installation. Do-it-yourself plastic skirting boards can be installed not only by the owner of the apartment, but also by her hostess.
- Wide range of models. The color palette and richness of textures will satisfy the most demanding requests.
- Fire safety.
- Durability.
- Low price.

Disadvantages of plastic products
- Use of auxiliary elements: plugs, corners, fasteners and connections. It is impossible to see all this in the finished design. In addition, after do-it-yourself installation, these parts often disappear during operation. The problem is small, but it contributes.
- Imitation of natural materials. To appear to be something that you are not is always not very good, even if you are a baseboard. Not always worthy, not always of high quality. Although this very disadvantage can serve as an advantage for someone: like a tree, but pay less.
- Often cable channels do not contain all the wires that need to be hidden. But this is not only a disadvantage of plastic slats.

Types of plastic skirting boards
Models of plastic skirting boards for the floor can be divided into groups depending on their characteristics.
Varieties of products by type of application
- Universal plinth. It has the appearance of a solid straight plank and is suitable for decorating a floor with a coating in the form of linoleum, carpet, laminate or tiles.
- Plinth under carpet. It has an "L"-shaped base, which has an adhesive tape on which a strip of carpet is glued. In this case, the product will merge in color with the floor.

Types of skirting boards by type of base
- Plastic semi-rigid. They are made of PVC, in which the molecular structure was changed under pressure. Due to this, semi-rigid products are flexible and can be used in the design of curved surfaces.
- Made from rigid PVC. Used in areas with a straight surface.
- Made from foamed PVC. They are similar in appearance to rigid PVC products, but have a lower density, are more porous and therefore have good thermal insulation properties.

Types by the presence of a cable channel
- Plank with cable channel. On the inside, it has a technical groove in which cables and wires can be hidden along the wall.
- Product without cable channel. This is a solid or composite profile that does not provide for the possibility of locating communications in it.

Calculation of the number of skirting boards and accessories
The components of products that form the joints of walls and floors include:
- external and internal corners;
- plugs;
- connecting elements.
To calculate the number of slats required for installation with your own hands, you need:
- measure room perimeter excluding doorways;
- divide the resulting value by the length of the standard bar - 2.5 m (or other);
- round up.
To find out the number of additional elements, you need to rely on the following calculation rules:
- the number of internal and external corners corresponds to the number of corners in the room;
- the number of side plugs is determined by the number of doorways or niches;
- the number of connecting elements is calculated based on the perimeter of the room: knowing the length of the walls and the number of planks per wall, we calculate the necessary connections for each wall.

Tip: when buying material, it is necessary to add 5 cm per bar (for cutting) to the calculated number of planks.
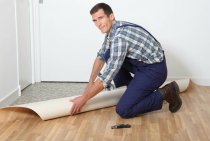
Installation of plastic skirting boards
Depending on the type of products and the type of flooring, the methods of their installation also differ. But in any case, installing skirting boards with your own hands will not be difficult.
Installation with clips
This method of installing a skirting board with or without a cable channel involves attaching a carrier bar using special clips. Then a shaped rail is hung on the bar.
How to install:
- Fasten clips to the wall every 50 cm using dowel-nails.
- Place the skirting board on the clips.
This hidden method allows you to get a solid plank without traces of self-tapping screws.

Important! Do-it-yourself mounting option for skirting boards on clips is suitable only for flat walls. If there are errors on the wall, the clips will not hold the bar.
Self-tapping installation
Fastening with self-tapping screws ensures a tighter fit of the planks to the wall, even if it is not very flat.
Sequencing:
- Mark the attachment points. Stepping back 5-7 cm from the corner of the wall, make the first mark, then continue in increments of 30-40 cm.
- Drill holes with a puncher according to the marks made.
- Drive dowels into holes.
- Attach the bar to the wall and in the marked places where there are already dowels, gently pierce it with an awl.
- Insert a self-tapping screw into the hole and put it on the dowel.
- Connect the next bar to the previous one with the help of connecting elements.
- Having reached the corner, saw off an extra piece of the plank and close it with a corner.
- Pull the necessary wires and cables into the cable channel.
- Close with an external decorative profile.

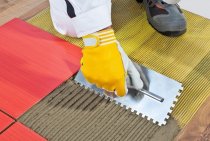
Installation with glue
Attaching skirting boards to glue with your own hands is easy and not laborious. But this installation has an important drawback: when dismantling the glued plastic strips, their appearance inevitably deteriorates. Therefore, this method is suitable for you if you plan not to disturb the installed skirting boards for a long time.
How to stick:
- put a corner on one end of the plastic strip of the plinth;
- smear the inside with glue;
- put the plinth against the wall and press;
- put on the connecting element;
- do this with all the planks.
The most popular way to fix plastic skirting boards with your own hands is to install using self-tapping screws. And yet - the choice is yours. It is only important to correctly correlate all the parameters and not to miss the details.