Modern window frames made of aluminum alloy are gaining more and more popularity. They are reliable, durable and aesthetic, meet the most stringent sanitary standards. Most often, their installation is trusted by professionals, but self-assembly is not so complicated. Let's look at how to properly assemble aluminum sliding windows with your own hands.
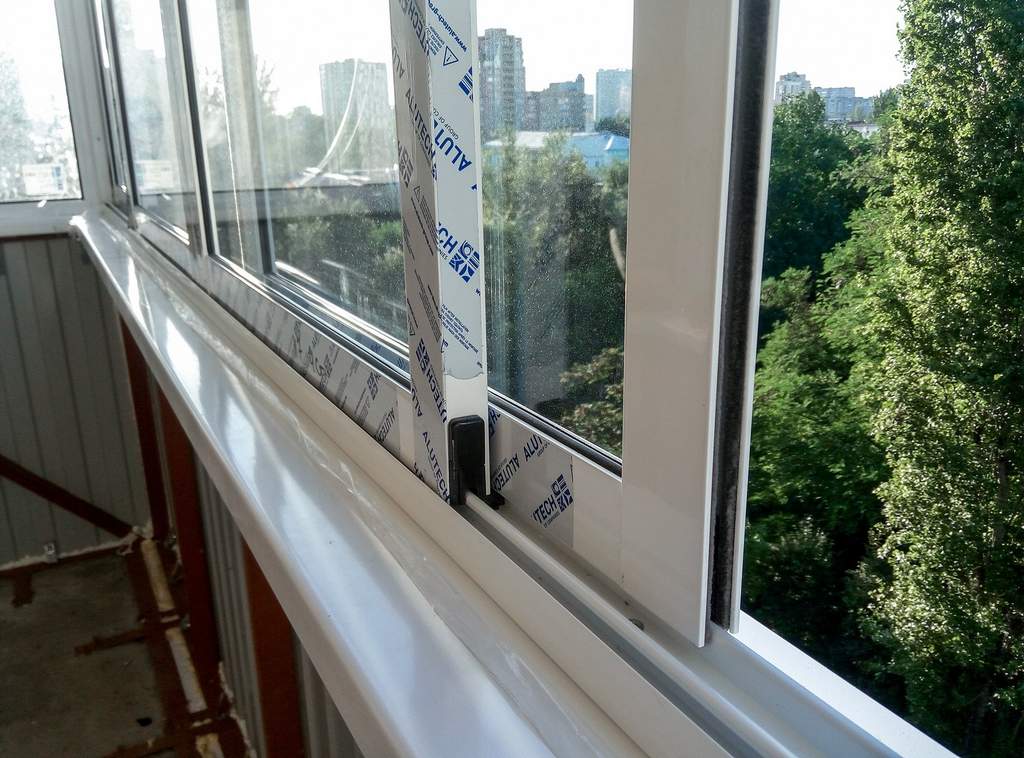
Sliding structures are used in conditions of limited space. This is the best model for installation on balconies or loggias. The frame opens according to the “compartment” principle, which is very convenient for these premises.
In apartments, a “warm” type of aluminum profile is used, equipped inside with inserts made of heat-insulating material.
Working principle and advantages of sliding windows
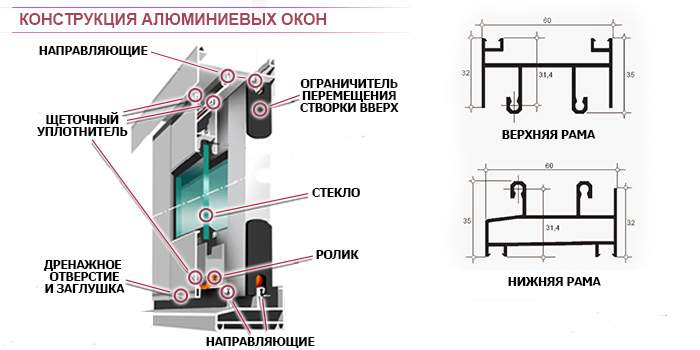
Such systems are sometimes called sliding windows. Their opening is carried out by moving the shutters on rollers along the guides. On one profile, several guides can be placed at once, which makes it possible to install up to 5 sashes.
When choosing such a window, close attention should be paid to the mechanism of the rollers: the most durable ones are equipped with a sheath made of polymeric materials.
The sliding window system has a number of advantages:
- Due to the use of aluminum, from which the frames are made, the design weighs little.
- The strength of the material makes it possible to make window sashes narrow, so they let in more light.
- Double-glazed windows and hollow profiles improve the heat and sound insulation of the window.
- The resistance of aluminum to the external environment makes the window durable.
- The roller system does not require the presence of free space in the room for the full functioning of the window. At the same time, the joint use of deaf and opening window openings becomes possible.
- A special coating makes the appearance of the window aesthetic and attractive.
- The simple design is convenient to use and easy to repair.
- When using shut-off valves, such as bolts, latches or even locks, such windows will ensure the safety of the home.

Dismantling the old frame, preparing the opening
Before installing the window, you need to remove the old frame and prepare the window opening.
Wooden frames are sawn in several places. To do this, it is most convenient to use an electric jigsaw, but a regular carpentry hacksaw will do. Frame elements are removed with a small crowbar. Using a chisel and hammer, remove the sill plate.
The opening must be cleaned of concrete fragments, old fasteners. If it is severely damaged or skewed, leveling with cement mortar will be required. You can proceed to the next step only after the leveling mixture has completely hardened.
Before installation, carefully check the completeness of the product and carefully read the attached instructions. In most cases, frames, double-glazed windows and fittings are separately included in the scope of delivery.
Frame installation process
The scheme for installing sliding windows is as follows:
- If the windows are already assembled, double-glazed windows are taken out of them, the sashes are removed.
- In order to further attach the frame to the wall, holes are drilled into which screws are screwed. It is recommended to mark the removed glazing beads. This will help to install them back and not mix them up.

- In the window opening, with the help of wedges, the frame is leveled. Adjustment of its position and preliminary fixation is carried out using wedges. In this case, bending of the frame structure should not be allowed.
- Having fixed the anchor plates on the wall with dowels, they screw the frame to them using self-tapping screws: one of them is screwed into the wall, and the other into the window profile. Slots are sealed with mounting foam. Anchor bolts can be used for fastening. But in this way there is a risk of damaging the surface of the profile.
If the gap between the frame and the wall exceeds 5 mm, then additional plates are used. One foam in this case will not be enough.
- After the foam has hardened (usually it takes about two hours), its excess is cut off, and the wedges are also removed. The holes from them are foamed, after drying, excess foam is removed.
Installation of a window sill and low tide:
- The outer perimeter of the frame is pasted over with a special tape. It is impervious to water, but breathable.
- An ebb is attached to the lower edge of the frame. All gaps are filled with foam. A pause is taken for the time of its hardening. After that, cut off the excess with a paint knife.
- At the bottom of the frame there is a special groove. A window sill is inserted there and leveled with the help of a building level.
- The gap between the window sill and the wall is filled with foam, and the gaps between it and the window frame are sealed with silicone sealant.
- After the foam dries, its protruding excesses are removed.

Installation and adjustment of sashes
We proceed to the installation of guides, sashes with glass.
- Prepare the guides: measure the frame horizontally and saw off the profiles of the desired length. The cut points are cleaned of roughness with sandpaper or a file.
- The guides are fixed with self-tapping screws on the upper and lower edges of the frame. Mounting step - 30 cm.
- The sashes are being assembled: double-glazed windows are inserted into them.
The easiest way is to assemble the three parts of the sash in the form of the letter "P" lying on its side. The glass is pre-pasted with a rubber seal, which is notched at the corners. After inserting the double-glazed window, the second side post is carefully screwed.
- The rollers are fixed in its lower part, at a distance of at least 5 cm from the edge of the sash. It is better to use a screwdriver for this operation, and not a screwdriver, so as not to crush them.
- Along the entire perimeter of the sash, a special brush seal is attached to the grooves - a shlegel - the bristles of which must be turned towards each other. The shlegel itself should protrude 2-3 mm beyond the borders of the sash.

- The assembled sash must be inserted into the frame first into the upper guides, and then with rollers into the lower ones.
- The rise of the sashes, if they do not close well, can be adjusted with a screw. It is located at the bottom end of the sash.

The screw is turned with a hex key. To raise the sashes, it is rotated clockwise, to lower it - against.
- Adjust all accessories, achieving its perfect work.
The process of glazing a balcony with sliding aluminum windows is shown in the video.
Sliding aluminum windows are easy to install yourself. Strict adherence to the installation instructions and rules guarantees long and trouble-free operation.