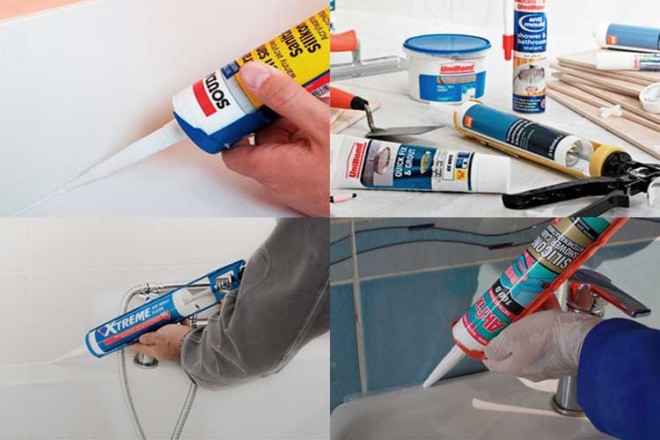
What is the best silicone sealant to use
It is advisable to seal the shower cabin with silicones with a neutral environment, despite their higher price, because acidic varieties of agents can provoke the oxidation of metal structural elements. The desire to save money can lead to premature damage to equipment, the need for additional early investments to restore joint insulation.
Silicones with a neutral environment can be safely used for any materials without fear of negative consequences, therefore, a slight excess in cost, compared with acidic counterparts, is justified.
Professionals and experienced amateurs, after analyzing the impressions of using different silicone sealants, primarily recommend the products of the following brands:
- Somafix;
- Stern;
Popularity among consumers is gaining transparent insulating masses designed to work with aquariums. A specific purchase decision can be made based on the assortment of a trading company that is convenient for a potential client to communicate with.
Pallet selection
For many, the idea of a shower cabin is associated with a design in the form of walls fixed to the floor.
Such a cabin can be found in many sports and recreation facilities.
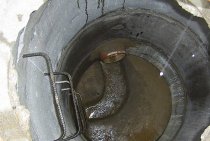
As a rule, the problem often arises that the shower cabin and, directly, the sewers are clogged.
New technologies make it possible to design a more comfortable and aesthetic shower cabin with a tray, railings, doors and other accessories.
In order for the cabin to be used for a long time and rationally, it is necessary to choose a high-quality pallet when choosing a shower cabin.
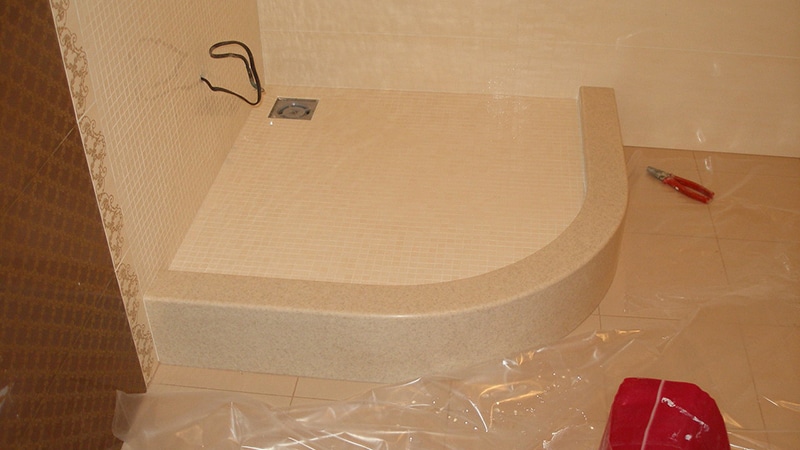
Cab with a semicircular pallet
More popular forms include the following pallets:
- rectangular;
- pentagonal;
- semicircular;
- radial.
But the quality of the pallet lies not so much in its shape, but in the material from which it is made.
Improvement in technology has led to the appearance on the market of pallets that differ in size and materials.
The classic options include pallets made of the following materials:
- ceramics;
- acrylic;
- enamelled cast iron;
- steel.
Reliable and durable pallets include sanitary equipment made of high-tech quartz or cast marble.
The probability of damage to the structure of these materials during operation is minimized.
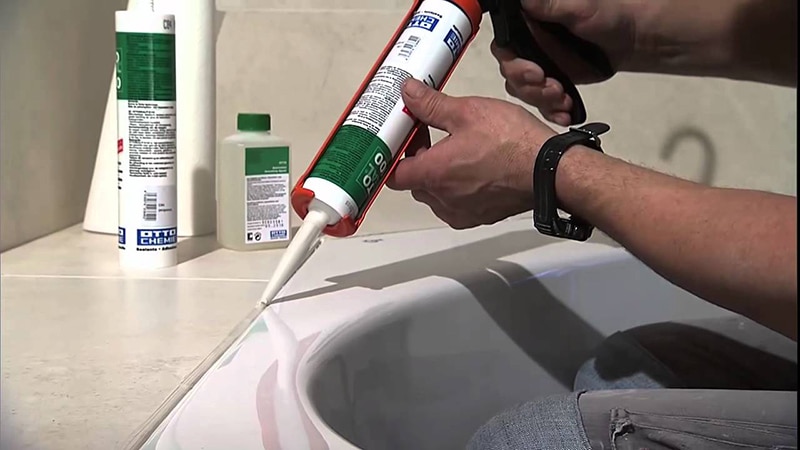
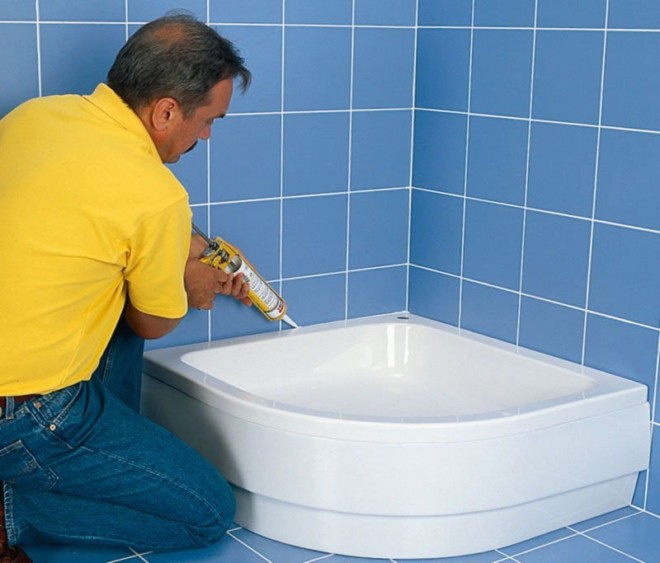
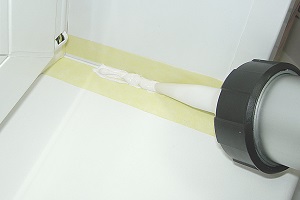
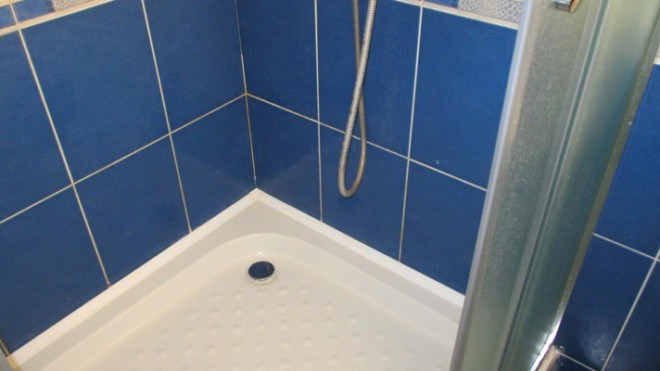
Seam sealing
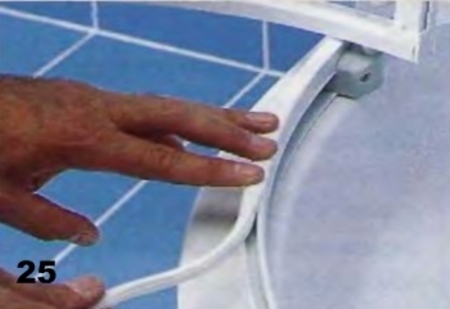
Laying the sealing cord
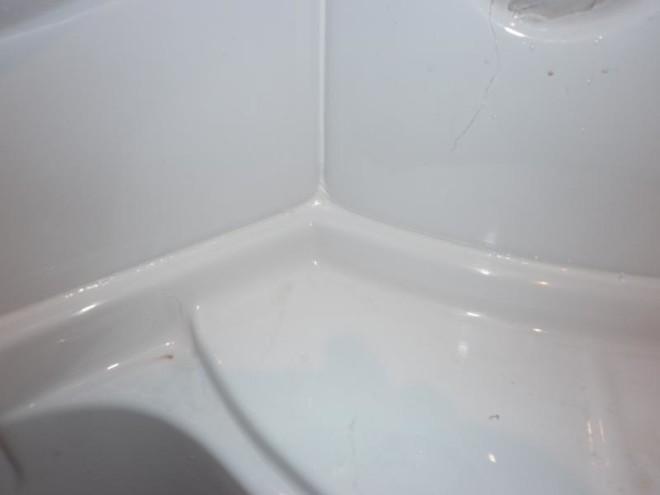
When the pallet is installed and all components are pre-fixed, it is necessary to make a test run of water into the cabin.
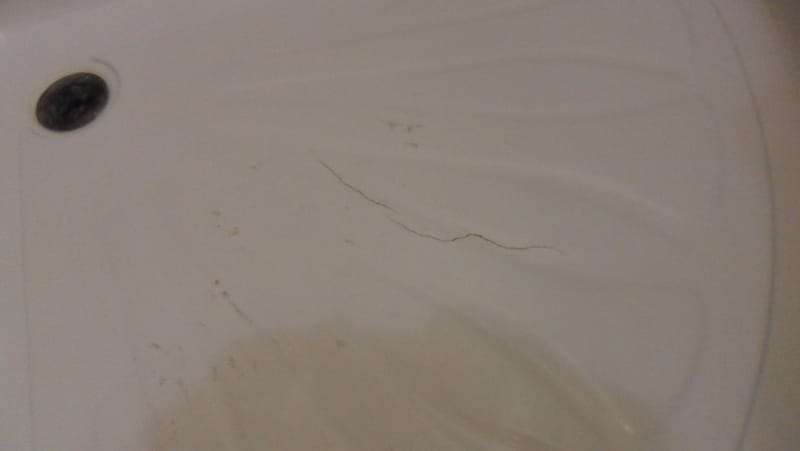
It happens that the shower cabin is leaking, and this result must be corrected.
Leakage is often caused by leaky seams.
The fixes are as follows:
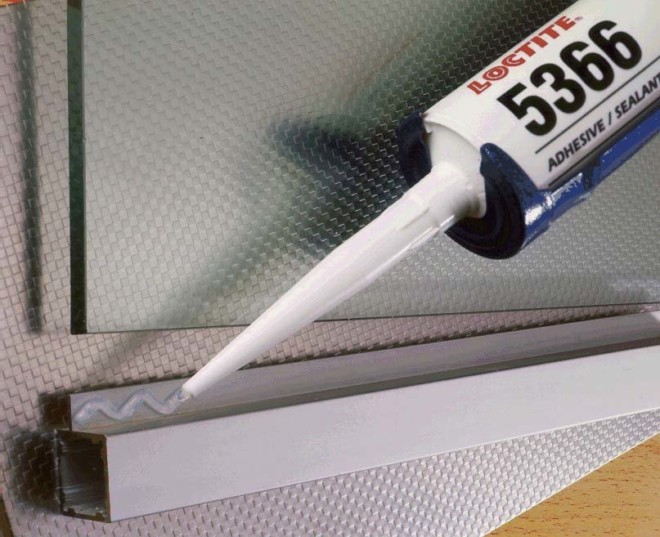
- to seal the connections, use a sealing cord from the set of elements supplied with the cabin;
- the cord of the required thickness is inserted into the junction of the cabin frame and glass;
- the rest of the elements are sealed with a sealant.
Colorless or white sealant can be used depending on cabin design.
Additional purchases
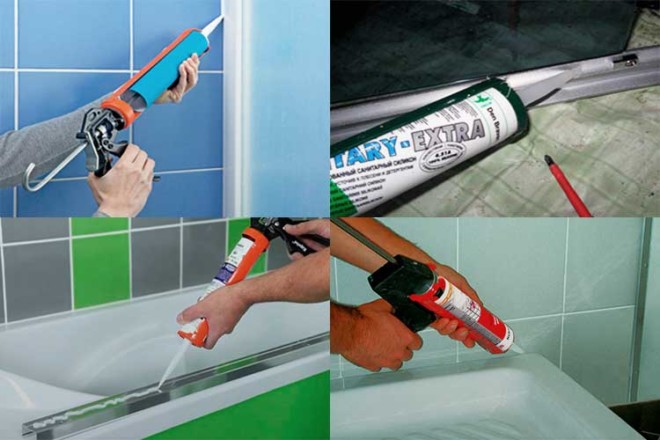
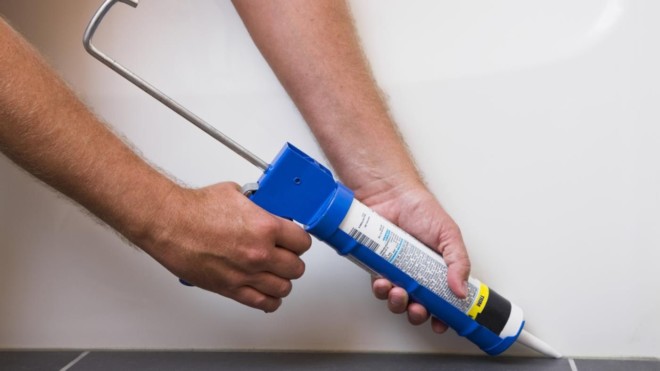
How to properly apply the sealant with your own hands, you can see in special videos.
It is better to note a few things you need to buy that will definitely come in handy during repairs:
- Masking tape: this will help protect surfaces from sealant while working. It is glued along the seam, and after drying it is torn off.
- Protective mask (respirator) and gloves: many sealants, although they do not have a smell, remain chemically hazardous substances, and therefore it is better to take care of your health in advance;
Please note: during operation, the door must always be open for ventilation
- Special knife for removing silicone sealant: it is easy to remove fresh silicone if it comes out of the seams. Also, the tool is easy to remove the excess, ugly protruding above the seam.
- Special chemical solvents for old silicone: before applying a new layer, it is necessary to scrape off the old one. If the layer is quite old, you will need to soften it with special substances. Silicon Remover, Dutch Sili-Kill and Permaloid have proven themselves well: the 7799 brand is suitable for removing from paint and metal, and the 7010 is suitable for plastic and acrylic.
Technician's note: When choosing a softener for a sealant, it is important to check that it is suitable for a particular material. The installation of any shower cabin involves sealing with the help of special means.
This is necessary to protect the seams from moisture, as well as to prevent the formation of mold.
Installation of any shower cabin involves sealing with the help of special tools. This is necessary to protect the seams from moisture, as well as to prevent the formation of mold.
Watch the video, which clearly shows the process of applying sealant in the shower:
See inaccuracies, incomplete or incorrect information? Do you know how to make an article better?
Would you like to suggest photos for publication on a topic?
Basic requirements for waterproofing the floor in the shower
Surface preparation
Make sure that there are no various damages (cracks, chips) on the floor surface in the shower room. Clean the surface from debris, grease, dust. All protrusions and cracks should be repaired and leveled. There should be no protruding screws or nails. Porous surfaces must be primed. Make an inclination towards the drain.
Waterproofing materials
Waterproofing in the shower is necessary in order to prevent moisture from getting on the surface of the walls and floor and affecting these surfaces for a long time. Therefore, the insulating sheet must be of high quality.
When performing moisture-proofing work, attention should be paid to the quality characteristics of the selected materials. Recently, special adhesive moisture-proof materials have gained particular popularity.
This is a roll type of coating, which is based on modified polymers and bitumen. Waterproofing the floor in the shower without a pallet with their use is ideal.
The covering keeps within a hot or cold method. There are self-adhesive options that must be properly laid and pressed tightly to the surface. You need to start work only after all measurements have been taken.
Special hydro-coating compositions can also be used. They are very hardy and persistent. This group includes polymer and rubber mastics with the addition of bitumen, for example, reliable waterproofing with liquid rubber or bituminous mastic.
To ensure good adhesion and elasticity, plasticizers can be added to the composition. With a notched trowel, the mixture is distributed over the surface.
Video: Waterproofing in the bathroom
When carrying out moisture-proof work in the shower room, it is important to comply with the installation technology and installation of all elements. Joints between walls, floors and drain must be properly connected
These places should be well waterproofed.
The waterproofing layer can be laid on the screed. Such a canvas is fixed with gluing. After that, you can lay the floor covering, for example, tiles.
A drain recess can be built directly in the floor screed itself. All elements of the drainage system fit there. The free space is filled with concrete mortar.
To create moisture insulation in the shower, the most common is polyethylene of special thickness or roofing felt. The insulator layer is laid out on the floor, fixed and the coating is laid on it.
To check the operation of the system, it is enough to pour a little water.
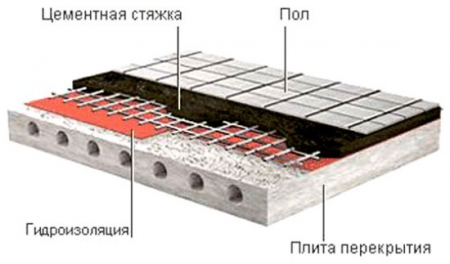
Photo: Floor waterproofing scheme
Approximate expense:
- 1.0 - 2.0 kg. per 1 sq.m. - base solvent
- 1.0 - 1.5 kg. per 1 sq.m. - water based
- 1.5 - 2.0 kg. per 1 sq.m. - hot
* check the exact characteristics of materials and methods of use with the manufacturer
Joint sealing how it is done
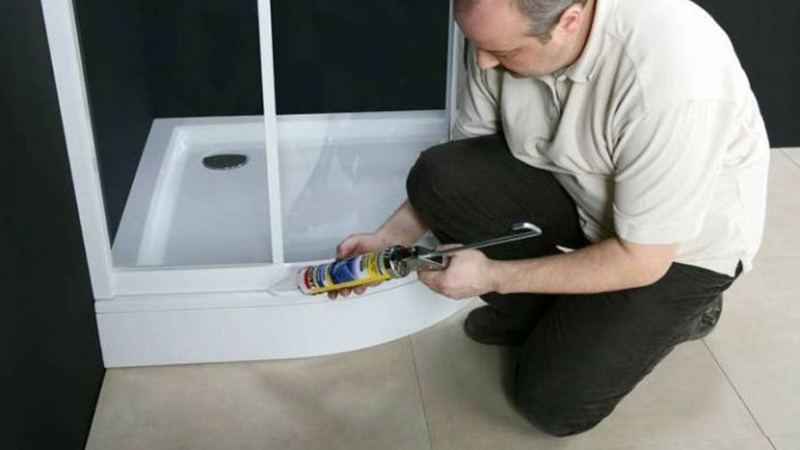
When assembling a shower, you can apply sealant to each of the joints during the assembly process itself, or you can process the seams already on the finished structure
Particular attention should be paid to places that are sealed with rubber gaskets or cords. When processing joints, you need to pay attention to the fact that all fastenings with screws and bolts are located outside with respect to the sealant layer
It is necessary to assemble the shower in strict accordance with the instructions provided by its manufacturer. At each stage, you need to process the seams and joints. To get a better understanding of the matter, watch the video of the sealing of the shower cabin. A good example shows which joints must be sealed.
Attention! Try to handle the seams so that the sealant does not get on the inside or outside of the pallet. After drying, it is quite difficult to remove
To avoid such troubles, paste over the places near the application line with masking tape.
After completing the sealing of the seams, you need to check them for tightness. This is done after drying. To do this, it is enough to close the drain and draw water into the pan, then lower it into the sewer. If you find that, it will have to be eliminated by re-sealing.
Secrets of quality
Without a ventilation device, waterproofing will be ineffective, since pasting the walls with a protective film does not get rid of moisture. Insulation materials serve only to prevent moisture from penetrating ceilings and walls. When the shower is dry, the moisture leaves the room. Ventilation is arranged in such a way that it takes in moist air, and the shower remains dry.
If the floor is not leveled before applying the insulator, then a lot of mastic may be wasted.
For deep impregnation of the surface with insulation, it is pre-moistened with a special solution.
Before application, the waterproofing mortar should be mixed until a homogeneous mass is obtained.
The next layer must be applied after the previous one has dried, otherwise the quality will suffer.
The applied layer of mastic should be smooth without streaks and empty areas.
Floor coverings
- Laminate
- Warm floor
- Linoleum
- Tile
- carpet
- Parquet
- self-leveling floor
- Wooden floor
Floor device
- plinth
- Floor screed
- floor leveling
- Sound and waterproofing
- Floor insulation
- concrete floors
- Floor repair
- Substrate
Calculation of laminate boards
Calculation of paving slabs
Tell about us
SemiGuide 2012-2019 | Information
When copying materials active link to the site is required
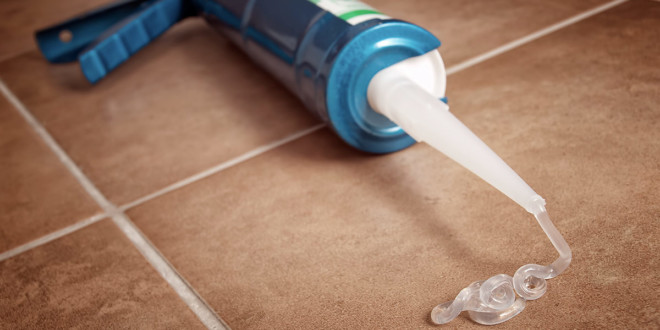
Types of sealants
It is by no means easy to choose compositions for insulating seams due to the presence of a huge number of different preparations on sale. You need to carefully study the information on the labels, delve into the essence of the manufacturer's recommendations, consult with the seller or manager offering the product, and only after that make a purchase decision.
The quality of the sealant for the shower cabin, the correctness of its application depends on the sanitary condition of the bathroom, the serviceability of the equipment, and the well-being of the residents.
Effective isolation of risk zones is provided by polymer compositions based on:
- silicone;
- acrylic polymers;
- polyurethanes.
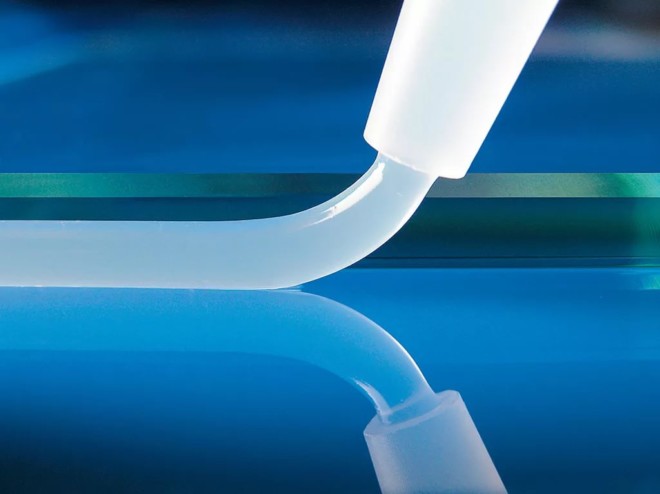
All types of products are a viscous paste-like mass, which, when squeezed out of the tube, fills the entire space of the gap, gluing the contacting surfaces.
https://youtube.com/watch?v=Xwn5wPKTn88
Polyurethanes
Composites based on polyurethanes act aggressively on the skin and mucous membranes of the respiratory system, and you can work with them only in a protective mask and gloves. Moderate performance, combined with the danger of contact, has led to the fact that now polyurethane products cannot compete with more advanced formulations and are gradually losing popularity.
Acrylic polymers
Polyacrylic compounds for sealing have a favorable ratio of consumer properties and price, which increases their attractiveness to the buyer. They are well fixed on materials due to high adhesion rates, withstand any temperature, and can be top-coated with paint, putty or varnish. The desire to purchase acrylic sealants is hindered by their not the highest resistance to mechanical deformation, the tendency of many modifications of preparations to be exposed to water.
For example, if you seal the tray with polyacrylic, and then allow an overweight person to take a shower, who may well want to give himself a hydromassage, then there is no guarantee that the seams between the lower container and the walls will not crack.
If bathers with significant weight are not expected, another misfortune may cause concern. Even composites with the addition of moisture-proofing substances do not withstand prolonged contact with water and slowly decompose, and the prospect of restoring the seams in the near future does not please anyone.
Silicone compounds
The leading positions in the ranking of sealing products for shower cabins are consistently occupied by silicones, the consumer characteristics of which make the buyer forget even about relatively high prices.
There are several types of silicone compositions that differ in the structural features of the base substances, the presence of additives.
Composites containing antifungal additives that increase the viscosity of the mass upon drying, plasticizers, pigments that create a pleasant decorative appearance of the seams make it possible to effectively silicone the shower cabin.
Despite the importance of the functions performed by the additionally introduced components, the best qualities are those with the maximum concentration of silicone and the minimum concentrations of everything else.
Material Features
Bathroom sealants differ from other similar compounds in some properties.
First of all, developers have to pay attention to the enhanced protection of the sealant.
Moisture in the bathroom is far from the only problem.
The constant appearance of steam provokes the growth of fungi and mold. It is necessary to add protective substances to the compositions and significantly improve their structure.
Most often, a fungicide is added to the composition. But after such actions, you can be calm. Mold on the sealant in the bathroom will not appear.
Fungus on the sealant in the bathroom - this is a much more serious problem, since the spores of the fungus are constantly growing and it is not so easy to remove them. However, modern sealants are protected from this problem.
As a rule, developers separately produce lines of bathroom sealants. Their still sanitary. The most popular now sanitary silicone sealant for the bathroom.
The best and most successful option is a silicone sealant for a shower or bath. The special properties of silicone play a huge role here.
Sealants are mainly used for sealing joints between structures. The most popular method is sealing the seams between the bathroom and the wall. It is through these cracks that water flows under the plumbing, which will then be very difficult to remove.
Also, the joints of the shower cabin, the seams between the tiles and baseboards are subjected to sealing.
It is very important to always use a joint sealer in the bathroom. Without seam treatment, after a few months you run the risk of serious problems with fungi and mold.
Their appearance will be provoked by stagnant water in hard-to-reach places.
Sealants are also used for work in the kitchen. It should be understood that the same sealant is used for the kitchen and bathroom. In the kitchen, the joints between the sinks and the walls are sealed in the same way.
Sometimes other elements are also sealed. Well, in general, sanitary sealants are convenient to use wherever there is plumbing.
Special attention
Particular attention should be paid to:
- various connections;
- threads;
- joints between walls;
- tray tightness.
It is in them, as a rule, that water constantly penetrates. All of them must be passed through a special hermetic agent. Even if it seems to you that water does not pass through them, this is not so. Either sooner or later this moment will come, it is better to warn him. Unfortunately, sometimes it turns out that it is impossible to completely get rid of the appearance of moisture. Therefore, you should just put a special tray near the shower. It may not be necessary to have it on all the time, just put it on when you shower. This method will save you from excessive moisture and wet floors, so you should listen to it and use it.
Even if the water doesn't seem to get through, it's best to lay a rubber mat or a drip tray to make sure the floor doesn't get wet. Thus, choosing a shower enclosure is a great option. However, there are some drawbacks, such as incomplete sealing. But these problems are all quite easily and quickly solved. Therefore, if you have a small bathroom, then you should seriously think about putting a shower stall. Remember that it requires special care and cleaning.
What is important when choosing
In addition to the composition of the sealant, it will not be superfluous to pay attention to some other features:
- Color: It is best to match the substance to the color of the place of application or choose a transparent option.
- Water resistance: the sealant must be water resistant - the other will not be able to "survive" in constant humidity. When buying a material, you must make sure that it is durable.
- Protection against bacteria: It is advisable to focus on antifungal and antibacterial options. They will help prevent mold.
- Additives in Silicone: Silicone sealants can contain a wide range of additives. It is better if their number does not exceed a tenth, otherwise the substance may be too short-lived and of poor quality.
It is important to know: when choosing, you should not chase after a low price: by choosing a cheaper option, you can end up with a low-quality sealant that will not last long. This is interesting: Sealing interpanel seams in the house - a necessity or money down the drain?
This is interesting: Sealing interpanel seams in the house - a necessity or money down the drain?
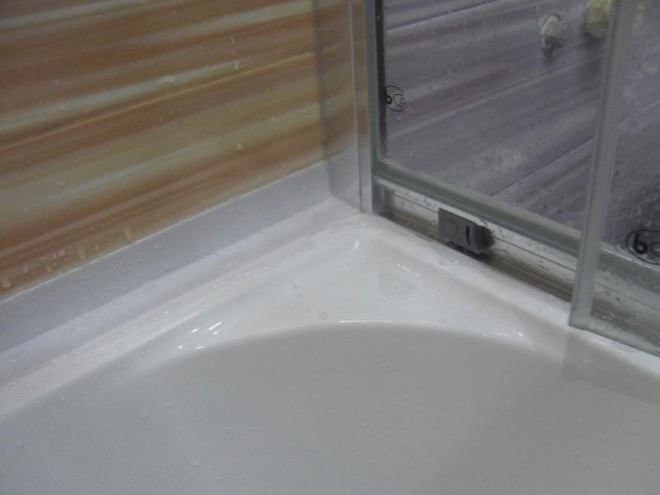
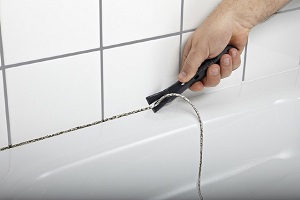
How to fix a leak
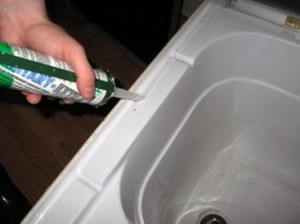
If you see that the water from the shower is leaking out, proceed as follows:
- check all joints, seams and threaded connections to accurately determine the location of the leak. You can check the joints on the walls with a directed jet of water;
- if the seam is leaking, remove the old sealant, clean the surface well, treat it with a degreasing compound, dry it well;
- treat the joint with sealant, let it dry;
- once again check the quality of the sealing of the seams in the shower cabin.
For your information! You can remove the old silicone sealant with alcohol. To do this, blot the seam along the entire length with a napkin soaked in it. After 30 seconds, the composition will become soft, somewhat reminiscent of jelly, and can be easily removed from the surface of the shower. If yellow stains remain, wipe this place with a cloth moistened with the same alcohol. They are easily washed off without leaving the slightest trace.
Re-sealing the joints will not be necessary if you follow all the rules and tips when assembling the cab.The main thing is to apply the sealant on a dry surface, then it will not peel off from it, forming a leak.
Be sure to watch the video of sealing the shower cabin with your own hands
Pay attention to even the smallest details and to all moments. Remember well which joints and which joints should be treated with a sealant
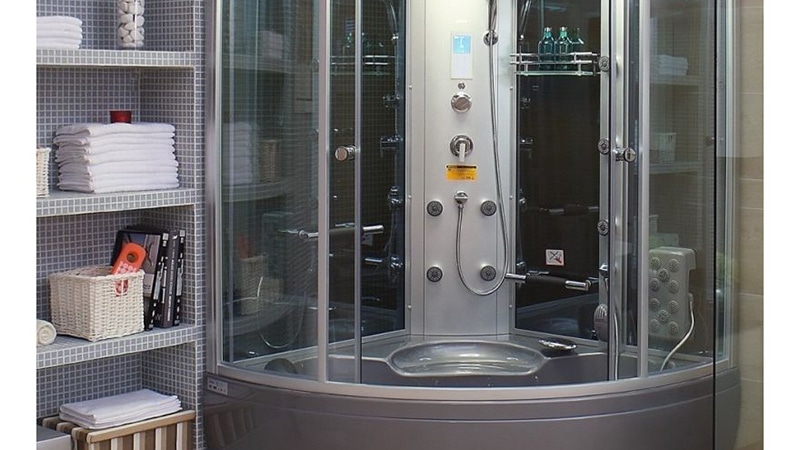
Shower cabins are becoming more popular every year. This equipment is convenient to use and easy to install. Almost anyone with even a little knowledge in the field of plumbing can assemble a shower cabin. The main thing is to know how to properly silicone shower. Only fully sealed seams guarantee no leakage. To seal the seams, silicone for shower cabins is used.
How to start the process of sealing the shower cabin
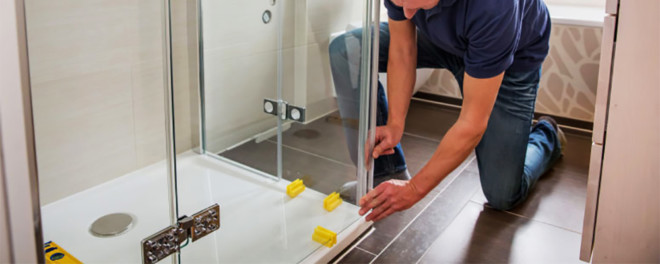
Before sealing the shower cabin, it is necessary to assemble it. First of all, a pallet is installed. Then, the side walls of the shower cabin and the guides are attached to the tray with screws. The last step is to install the top of the shower box, as well as a flexible hose.
How to silicone shower
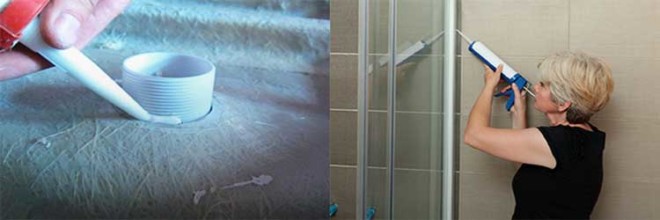
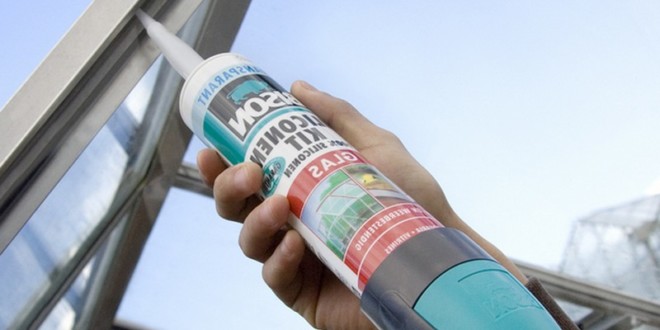
1. With silicone sealant, it is necessary to carefully coat absolutely all the connections made during the assembly of the shower cabin.
2. It is best to start applying the sealant while assembling the cab, one at a time for each joint.
3. Apply silicone sealant to the seams in such a way that all holes for bolts and screws are on the outside of the sealant strip.
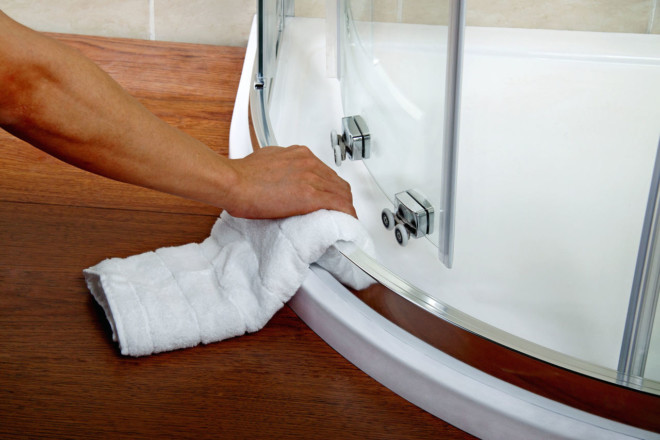
4. After the shower box is fully assembled and fastened with bolts and screws, you need to carefully inspect the entire structure from the front. Excess sealant on the seams is removed with a piece of rag.
Re-sealing shower stalls
It is not always possible to seal the seams of the shower cabin with high quality the first time. If a leak is found during the operation of the shower cabin, it must be resealed with silicone sealant. Before applying it to the place of leakage, the shower cabin must be dried well. All seams to be sealed must be absolutely dry.
Silicone sealants
1. When choosing a silicone sealant for a shower cabin, you should not save money. The sealant must be of high quality.
2. High-quality silicone sealant is made of silicone rubber (more than 45%), hydrophobic pigment filler (more than 45%), related plasticizer, as well as fungicides, catalyzate, thixotropic agent.
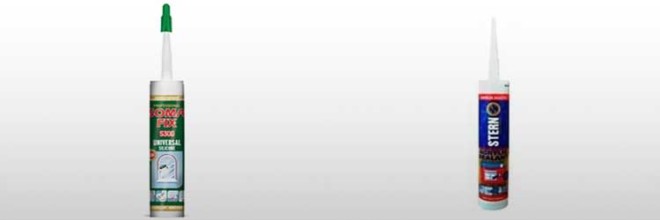
3. On sale you can find the following sealants designed specifically for showers: STERN, ANTIA, Somafix.
floor waterproofing requirements
A prerequisite is the treatment of all areas that come into contact with water with special waterproofing materials. After that, you need to check the quality by pouring some water into the drain hole
Stages of waterproofing:
- First of all, it is necessary to clean the floor of extraneous debris and dirt, which can then interfere with the quality of the waterproofing process.
- Next, on the surface, a shrob is made along the perimeter of the floor
- The surface is still moistened and cleaned
- Water mixing of the penetrating material occurs
- Next, a laying coating is prepared in compliance with all norms and standards for waterproofing work.
- The suture material is laid, within a day and a half it is moistened
- After that, the preparation of the second stage of laying takes place.
- After 21 days, the walls are cleaned of cement and sand residues
- The decorative coating is laid
Instructions for fixing leaks
Joint sealing
It's quite annoying when the shower stall leaks.
Therefore, we offer you the following instructions for solving this issue:
- Before processing the junction of parts with sealants, it is necessary to assemble the shower cabin (guides and side walls are fixed to the tray, the upper part, hoses are attached).
- All joints are smeared with silicone sealants until the cabin is assembled together.
The sealant should be applied so that in relation to it the hole for the fasteners is "outside". - After the sealed parts are connected and fastened with bolts or screws, the seams on the front side of the cabin are sealed. Excess silicone should be removed before it dries.
- Mandatory treatment with sealants is subject to the junction of cabin parts with sealing gaskets.
-
In the event of a leak after the complete assembly of the structure, before sealing the shower cabin again, it is necessary to dry all its surfaces.
Only in this case, the silicone will hold tightly and not let moisture through. - After the leaks have been eliminated, it is necessary to control the sealing of the cabin rear wall during operation in order to timely identify possible leaks.
Remember that not only the joints of the pallet and the wall, the pallet and fences, fencing and moving elements, but also pipes, hoses, and drain elements should have hermetic properties.
If the cabin leaks until the moment of use (at the stage of a trial run of water), then the reason may lie either in the incorrect assembly of the shower cabin with your own hands or in a factory defect in details.
In the event that a leak appeared during the long-term operation of the shower cabin, then it is better to pay attention to which seals, joints and pipes could have been compromised. Some items may need to be replaced
In order to avoid clogging of the cab drain, which can also lead to leaks, it is necessary to properly care for the pallet and keep it clean.