Acrylic insert
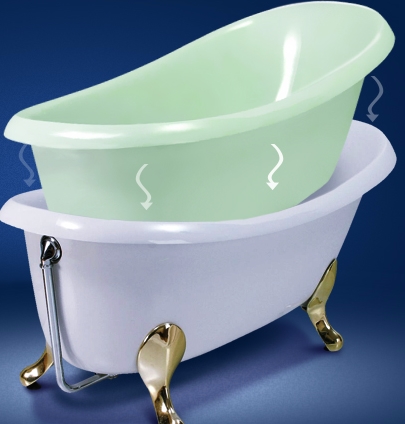
How to update your bathroom instantly and easily? A good option is a reconstruction with an acrylic liner. The main disadvantage of this method is its cost, which will be more than repairing equipment is another option.
In advance, you need to take measurements from your bathtub and purchase a ready-made liner in a special store. Inserts have the usual indicators, but are still made to order.
The preferred properties of acrylic are its strength, impermeability, resistance to high temperatures, and environmental friendliness.
It washes very easily, does not lose its artistic parameters during operation, does not turn yellow, and does not corrode.
If a cast iron bath is subject to reconstruction, then as a result an excellent system will be obtained that combines the advantages of cast iron and acrylic.
Work order
How to update the bath with your own hands by installing an acrylic liner? Important stages of work:
-
Bathtub cleaning.
- Preparing the liner, marking, determining the location of the drain holes.
- Checking hole alignment.
- Leveling the liner, trimming the edges along the wall tiles.
- Drawing on the surface of the bath and on the liner of a specialized adhesive composition.
- Fitting a bath liner.
- Pouring water into the product. The filled bath must be left for a day, to supply the maximum adhesion of materials.
How to update an outdated bath with your own hands, so as not only to remove flaws, but also to make it beautiful? An acrylic liner can help achieve a good result.
The insert itself has a small thickness, and therefore the usable space will become smaller rather insignificantly. The new bathtub is ready to serve its owner for at least 20 more years.
Similarly, having formed with the method of renovation, strictly following the recommendations, and doing a good job, it is absolutely possible to renovate your own bath with your own hands.
Bright colors
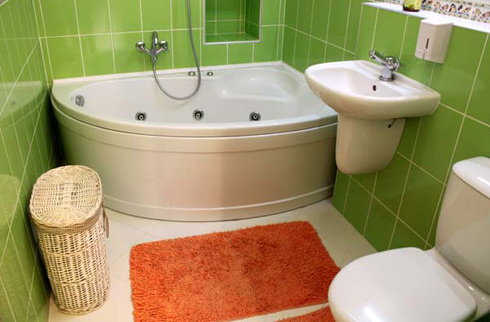
Figure 2. Bathroom update with bright elements.
How to make a bathroom stylish? It is not at all necessary to carry out repairs, you can purchase unusual accessories or decorate the walls in an extraordinary way. Before starting such work, it is recommended to use special shade combination tables. For example, various shades of green are suitable for a modern interior. It can be a swamp color, bright green, olive, khaki. You can combine them with beige, burgundy, ocher or mustard tone.
A real celebration of color can be arranged using:
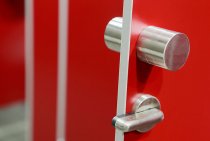
- Glass blocks to create a decorative partition, as in fig. 1. She can distinguish between the bathroom and the rest of the room.
- Tiles already on the walls can be decorated with a special self-adhesive film. Today, specialized stores offer a large selection of films of various shades. Various figures or rectangles are cut out of it to make the walls brighter and more attractive.
- Instead of standard boring furniture, bright shelves and cabinets are installed. Towels are better to take bright colors, with drawings. Beautiful rugs are laid on the floor, the shower curtain is chosen to match the rest of the decor. An example is shown in Fig.2.
How to freshen up a bathroom
In any bathroom, even if it is well looked after, sooner or later problems begin:
- the surface of the bath is no longer as white and fresh as before;
- the tile is overgrown with lime and soap deposits;
- the seams between the tiles are gray;
- in some places there are traces of mold.
How to refresh the environment without resorting to expensive funds and without ruining the family budget?
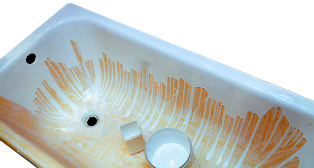
Let's start with the bath.If it looks bad, the enamel has become porous and cannot be cleaned, then there are three options to help solve this problem:
- replacing the bathtub with a new one, which will require quite serious expenses;
- installing an acrylic liner in an old bath - it will take less money, and you won’t have to take out the old bath;
- acrylic bathroom restoration
You decide. The last two technologies are quite well developed, they guarantee an excellent result, subject to the technology of work.
Cleaning tiles from plaque. To solve this problem, there are now a lot of household chemicals stores. Although you can do without them, using home remedies: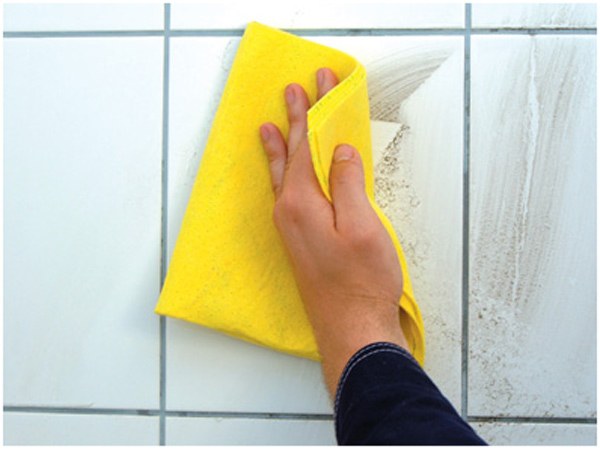
- If the tile is not too dirty, then you can wash it with a diluted dishwashing gel, which is applied for 10 minutes, and then washed off with water.
- If the tile is heavily soiled, then soda should be used. It is applied to the surface with a damp sponge, left for a while, and then wiped off the dirt. Do not put too much pressure on the sponge - you can scratch the surface of the tile.
- If you need to bleach the tile, then use bleach diluted in water. The solution is poured into a spray bottle and applied to the walls. Work with gloves and better in a respirator - chlorine vapors are harmful to the body. After 5 minutes, the surface is washed with clean water.
- If the walls are very dirty, then use acetic acid diluted with water (3 tablespoons of vinegar per 1 liter of water). Surfaces are treated, left for a short time and washed with water.
- To combat plaque, you can also use citric acid. The sponge is moistened, dipped in acid crystals and the tile is wiped.
- It is advisable to wipe water and electric heated towel rails as often as possible with a soft cloth, otherwise limescale will form on them. Chrome-plated surfaces cannot be cleaned with abrasive products, it is better to simply wash them with soapy water. To prevent the heated towel rail from being overgrown with limescale, you can periodically treat it with a special polish for stainless steel, which forms a film on the metal surface and facilitates the removal of plaque.
It is better to wipe the tiles after washing with a bamboo towel or microfiber cloth - they do not leave streaks.
And more importantly: they begin to wash the tiles from the bottom, and you need to wipe it, starting from the top.
Reconstruction of a bathtub with liquid acrylic
Liquid acrylic is today's restorative material, which makes it possible not only to remove artistic flaws, but also solid damage. This technology has a number of important positive qualities.
To update an outdated acrylic bath, specialized skills are not needed, it is enough to follow the instructions. The newly made coating is strong enough to withstand even mechanical actions.
The water in the updated bath will cool more slowly than in the cast iron system.
Acrylic does not change its facade appearance with some period, the coating does not darken, remains resistant to the action of detergents containing aggressive chemical compounds in its composition.
The working life of the restored product reaches 10 years or more. Plus, artistic and useful qualities will be completely preserved.
Preparing to create a new coating
Making a bath with acrylic with your own hands must begin with its preparation. It is worth removing stubborn dirt and lime deposits by washing the product very thoroughly with cleaning products.
To degrease the surface, you can clean it with soda.
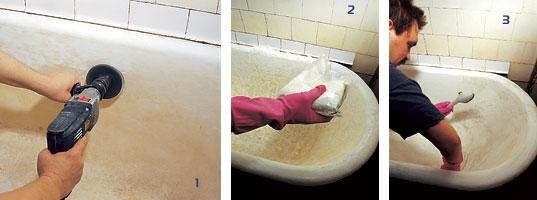
Then you will need to twist the lining on the drain hole and on the overflow and clean the bath cover with sandpaper.
This can help remove corrosion and peeling old enamel.
If the bath has already been restored by enameling, it will be necessary to remove the coating, which is already outdated.
Then the surface must be washed very thoroughly. It is recommended to heat the material to be restored by pouring hot water into the bath.After 5-10 minutes, you can dry the surface, this is very easy to do with a repair hair dryer.
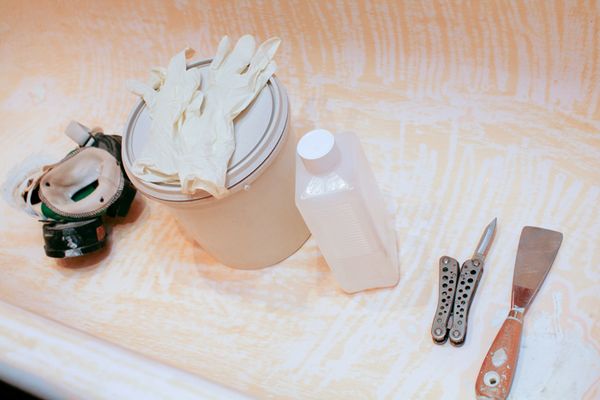
For work, you will need a small container with a volume of 1.5 liters, from which acrylic will be poured onto the bath. You also need to make a wood stick, which will be needed to mix the components of the solution, a spatula and rubber gloves.
A container must be installed under the drain hole, the remains of acrylic will flow into it, and the tiles from the tiles at the edges of the bath must be sealed with masking tape.
acrylic pouring process
After completing the preparation stage, you need to prepare liquid acrylic by mixing the hardener with the polymer base very carefully.
It is extremely important to strictly follow the instructions in order to obtain a quality result.
It is absolutely within the power to cover the bathroom with acrylic with your own hands. The process itself is the same pouring of the finished mixture onto the surface of the product. For convenience, it is necessary to use a small container made in advance.
It is recommended to start from the corner of the bath adjacent to the wall, continuing to move along the perimeter. A layer of 4-5 cm should be poured, which will flow freely along the plane of the product to the middle.
Having completed the first circle, it is necessary to proceed to another, starting from the middle of the sides of the bath. As a result, a thick layer will come out at the bottom, which will need to be leveled with a spatula towards the drain hole. Acrylic residues will be removed in a similar way.
It is very undesirable to touch the sides of the bathtub with a spatula. If there are nodules on the plane, they will be removed by themselves. Any influence on the new coating leads to a violation of its integrity.
After all work is completed, the bath must be left so that the entire surface becomes dry. This will take at least 24 hours, the specific time is marked on the acrylic packaging. The last step is to install the overflow and drain siphon, remove the masking tape from the walls.
To get a snow-white ideal and strong surface, it is enough to update the bath with liquid acrylic. The new coating will have a good grip and a long service life.
Bathroom renovation 5 less details.
A large number of bright details in the interior of this bathroom visually reduced its size.
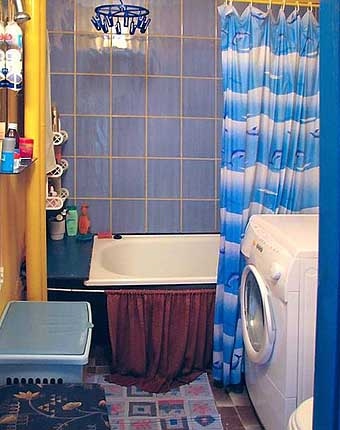 Bathroom 5 before renovation
Therefore, during the redecoration, the walls were repainted to match the tiles, only a little lighter. At the top of the wall, a wide light strip was added to match the ceiling, which expanded the space above. Also, a horizontal yellow line was made along the painted wall, also in order to expand the space. The shower curtains have been replaced with white ones, symbolizing cleanliness and tidiness. The curtain under the bathroom was replaced with a matte plastic screen. On the floor, instead of multi-colored paths, there are also white bathroom rugs. Old bathroom cabinets have been replaced with new ones with both open and closed shelves. Such a locker will allow you to put infrequently used things behind the door, which also visually lightens the space.
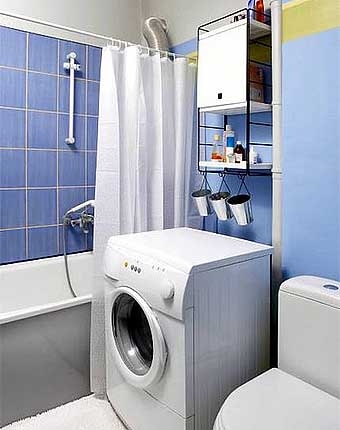 Bathroom 5 after renovation
some cosmetics
Quite often, during the general cleaning of the bathroom, you may notice that the surface of the walls, floor and pieces of furniture in some places received small scratches, chips and scuffs. Of course, this is not a reason to start a global renovation or go to the store for a new cabinet under the sink, but an unpleasant aftertaste can still remain, because even this minor detail can ruin the entire bathroom interior.
You can “refresh” such small flaws with the help of special mastic or putty. They are made in various colors, so you can choose such a tool for almost everything.
A few painting rules
It doesn’t matter what enamel the cast-iron bathtub requiring restoration will be painted with, the rules for painting are the same.The restored bathtub must dry with the windows open, therefore, before repairing the cast-iron bathtub, you need to choose the right season of the year (it is better to choose summer when it is warm)
If children live in the apartment, it is better to send them away from the place of repair. The smell of paint is harmful to health. Before starting repair work, it is necessary to acquire a professional respirator or gas mask. It is also necessary to buy several sets of rubber gloves and rubberized aprons.