Replacing tile grout
The cardinal solution to the issue is to completely update the tile grout with a new one. This is a difficult and time-consuming job, since it is unlikely that it will be possible to change the entire grout, for example, in a bathroom or in a bathroom with a tiled finish, in 1 day.
Removing old tile grout
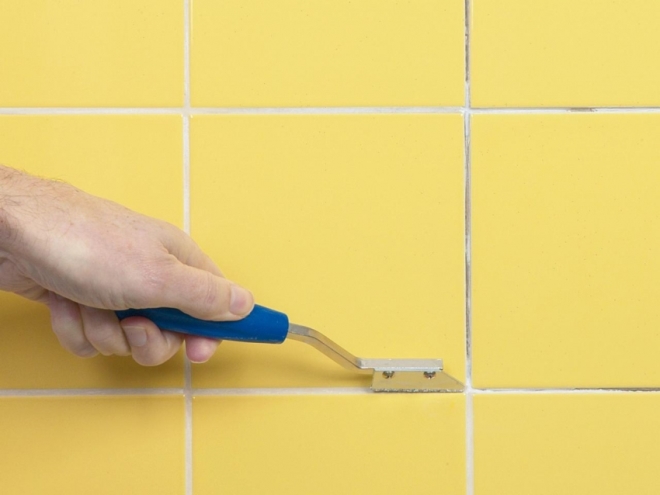
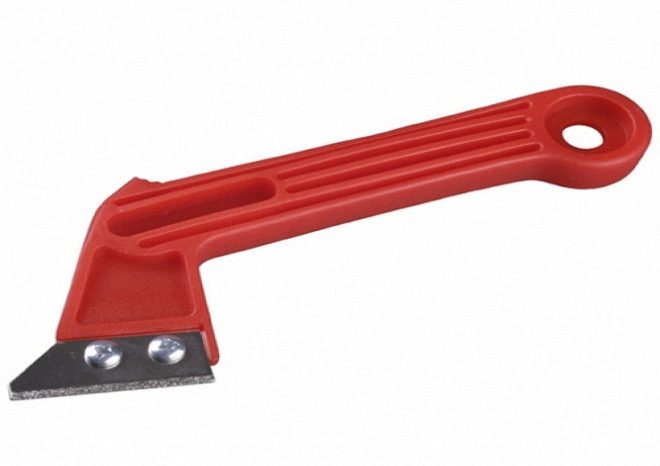
The old grout in the joints can only be removed mechanically. For this purpose, you can use a joint expander, a mounting spatula or other suitable tool. When using an expander, there are no difficulties in removing the old grout from the tile. If there are certain difficulties, then it is recommended to additionally treat the joints with an acid cleaner (Pufas, Litoclean, etc.). After removing the old grout, you must use a vacuum cleaner to remove dust and small remnants of the material.
Which grout mix to choose?
In stores, you can buy grouts for tiles based on cement and epoxy resin. Each type has its own advantages and disadvantages.
Cement. Sold at a reasonable price, it is easy to work with such grouts. But the compounds are less durable than epoxy mixtures. They also need additional treatment with hydrophobic pastes.

Epoxy. They have 100% water resistance, resistance to any household chemicals, temperature extremes. Of the minuses, one can distinguish: high price (in comparison with cement), fast hardening, the need for the most accurate proportions when preparing the mixture.
When choosing a grout for a tile, you also need to clarify what is the width of the joints that are supposed to be processed, since it is unlikely that it will be possible to replace the grout between the tiles with the first mixture that comes across. The stores sell compounds for processing joints with a width of 1-2 mm, 2-5 mm, 5-15 mm, etc.
Application process
Work on grouting joints between tiles is carried out in the following sequence:
- The first step is to prepare the grout in accordance with the instructions on the package (usually you just need to mix a certain amount of grout with water). After kneading, you need to let the mixture brew for 3-5 minutes, unless otherwise indicated in the instructions.
2. It is recommended to start processing seams from top to bottom. First, work is carried out in the most noticeable areas of the room, and at the end - in the least noticeable.
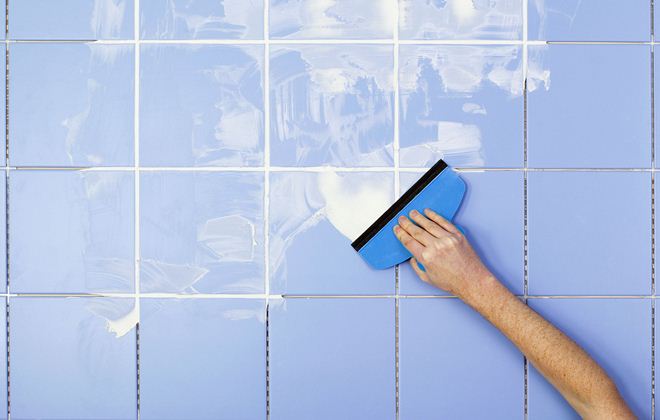
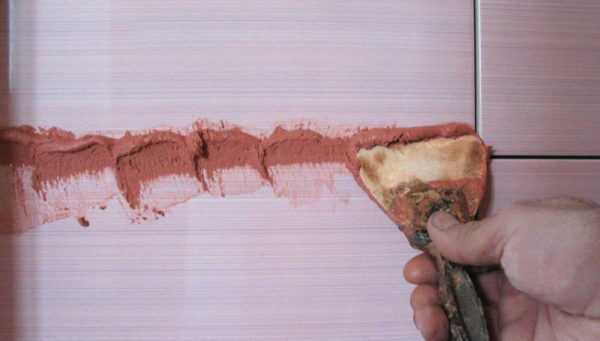
3. Processing should be carried out with a spatula, picking up a little grout on it. The first step is to press the grout mixture into the depth of the seam, and then smooth it along.
4. After receiving the finished seam, you need to walk along it with a grout, evenly distributing the grout and leveling it.

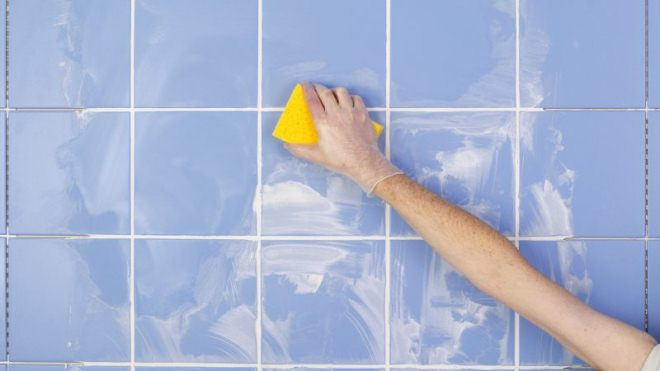
5. If the mixture gets on the front of the tile, it must be removed immediately before it hardens, otherwise it will be extremely difficult to do it later.
6. Grout for tiles in the bathroom on the walls and on the floor will dry completely in 1-2 days, after which you can continue to use the room in full (during solidification, the grout must not be exposed to loads or moisture).
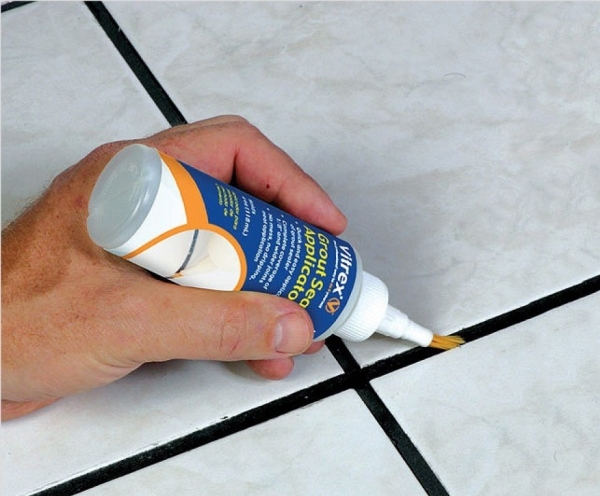
On this, the process of replacing the grouting of tile joints can be considered complete. Additionally, the seams can be treated with special protective impregnations: water repellents, polymer compounds, sealants.
Replacing old grout
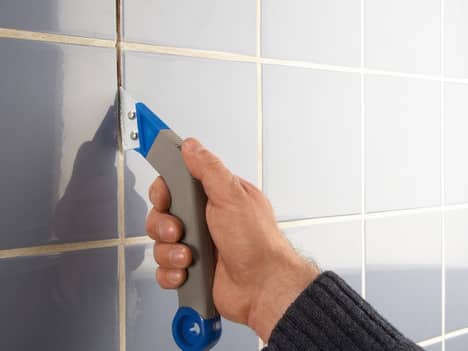
With the help of an expander, it is completely necessary to remove the old grout.
If you want to achieve the best possible effect from resuscitation of the grout, you will need to completely remove the old layer, and then put on a new one. To update the seams between the tiles, you should prepare the following tools and materials:
- seam opener;
- a vacuum cleaner;
- seam tool;
- latex gloves;
- rubber spatula;
- brush;
- an old toothbrush;
- sponge
- acid cleaner;
- grout;
- soap;
- deep penetration primer.
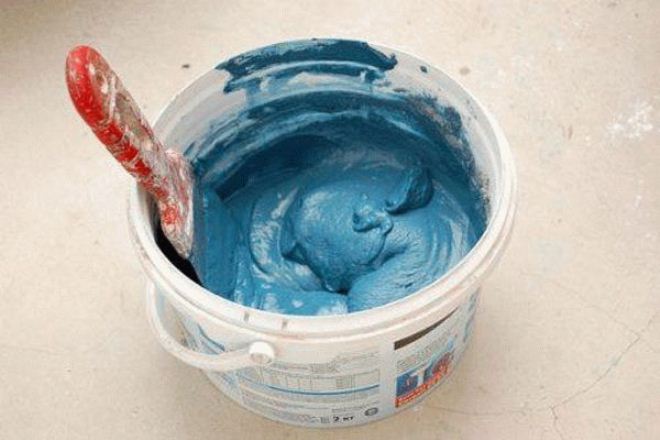
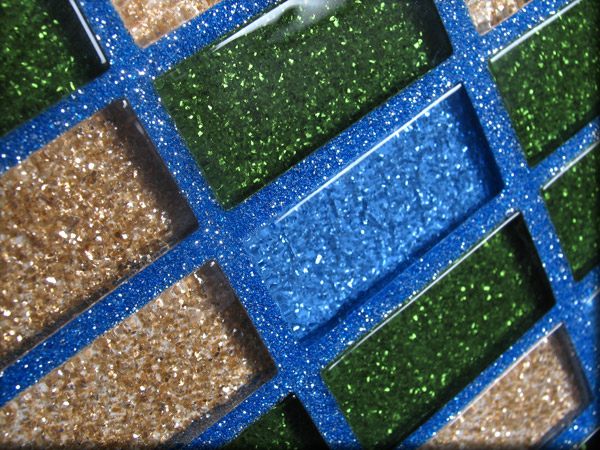
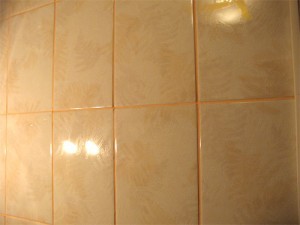
Color options for ready-made solutions for grouting.
Old grout can be easily removed with a joint remover. This tool can be purchased at any hardware store. If you do not have the opportunity to buy a jointer, you can use any other sharp tools (knife, screwdriver), but you should be very careful not to damage the tile during the work.
Sometimes a cement mortar is used as a grout, which is quite difficult to remove. In this case, it needs to be softened a little. To do this, use an acid cleaner, which is applied to the seam with a brush. After the cleaner is absorbed by the cement, the old grout will be removed much easier.
After removing the old material, all gaps between the tiles must be thoroughly vacuumed. It also does not hurt to wash them with soapy water. After the seams are dry, they can be treated with a deep penetration primer.

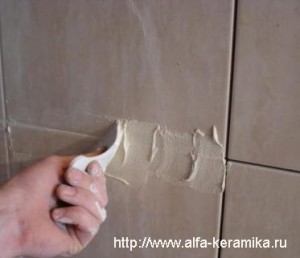
Stages of grouting.
After processing, you can start mixing a new grout mixture. When laying it, you need to work intensively, because this mixture sets quickly. To slightly delay the setting time, the solution must be made liquid. Use a rubber spatula to spread the solution. In this case, you need to ensure that the grout at the seams completely fills the free space.
To form the seams, you can use a special tool with interchangeable tips, which allows you to give the gap any profile you like. When working with this tool, try to hold it so that it simultaneously touches the edges of two adjacent tiles. Grout that has come out of the joints can be removed with a damp sponge. After the grout mixture dries a little, you can rinse the tile with warm water.
If the old grout on the wall was replaced, then the process of restoration work can be considered completed. If these works were carried out on the floor, then after they have been carried out, it is necessary to cover the tile with a special protective substance. If this is not done, then over time the grout will begin to crack and will need to be changed again.
Removing silicone grout
With poor ventilation, mold will form on the silicone grout. Silicone cannot be cleaned, so the only way to renew the joints is to completely remove the residue and reapply the flexible grout. It is also often necessary to remove the old layer due to its incorrect application the first time.
- Silicone sealant is removed mechanically with a knife or a special scraper.
Seams are completely cleaned with a vacuum cleaner.
To completely clean the joints, you can use a special silicone remover, such as Penosil Silicone R. It is applied with a mounting gun to the joints and left for at least 24 hours. After that, the product must be removed with a rag or paper. It is necessary to thoroughly wipe and degrease the surface so that the adhesion of the new silicone is good.
Seal the edges of the seam with masking tape so as not to go beyond it. Leave only a little space in the corner between the wall and the tub.
The tip on the new sealant cartridge must be cut so that it can be applied in 1 pass. By pressing the trigger of the mounting gun, the grout is evenly applied to the corner.
Then you need to have time to smooth the seam before it dries with a special rubber tool or a finger dipped in soapy water.
Immediately after smoothing, remove masking tape.
Restoration of an old seam with paint
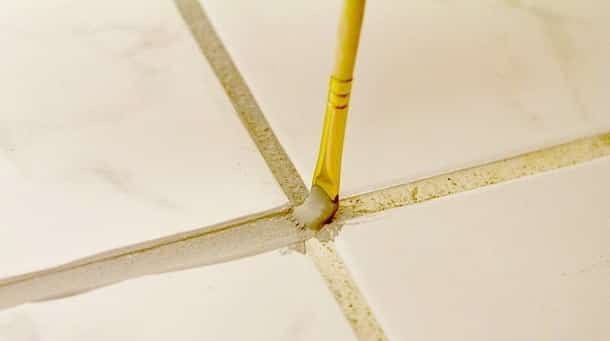
Painting the seams is carried out using a brush with a pile width slightly less than the width of the seam.
The easiest and cheapest way to update the seams is to paint or whitewash them.To carry out these works, you should prepare tools and materials such as:
- tassel;
- sponge;
- old toothbrush;
- latex gloves;
- dye;
- chlorine bleach.
You can buy paint to update the seams of tiles at any hardware store. It is worth noting that paint can be used not only to restore the original color of the gaps, but also to level them with small distortions. At the same time, restoration with paint can only be carried out in dry rooms.
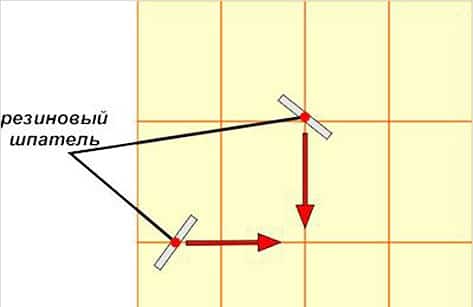
Scheme of grouting.
Before starting painting work, the seams should be cleaned of dirt and plaque. You can use an old toothbrush for this. If in this way you could not completely remove the dirt from the coating, you can use chlorine bleach, which must be diluted in water in a 1: 1 ratio. The resulting solution should be applied to the old grout and wait about 10 minutes, then rinse the surface with water. When using chlorine, be sure to protect your hands with rubber gloves, otherwise you will get chemical burns. After the seams are dry, you can apply paint on them, wait a while for it to soak in the grout a little, and then remove its residues from the tile with a damp sponge. Such restoration of gaps will last no more than 6 months.
Removing old grout
Restoration of the old grout begins with wetting the joints with a solution of water and vinegar. Take one part water and two parts vinegar. We coat all the seams with this solution with a sponge and leave for 20-30 minutes. After that, you can begin to remove the old putty. With the help of a seam saw, carefully, without touching the tile, we clean all the seams. You can do this with a special jointing or a screwdriver that is suitable in diameter. The time to carry out such work increases, but the likelihood of damage to the tile is reduced.
Then we remove all remnants of inter-tile putty with a hard brush or an old toothbrush. You can also use a vacuum cleaner. He will carefully remove all the crumbs and dust from the inter-tile space. Next, you need to coat all the joints between the tiles with a primer and let it dry for at least two hours. Then you can start rubbing the seams. If repair or replacement of tiles is required, then while the adhesive is setting, in the meantime we clean the remaining seams from putty, primer and apply fresh grout with a rubber spatula.
Do not forget to wipe the tile with a rag after priming, otherwise the primer will dry out and it will be much more difficult to remove it. Then we apply the grout of the chosen color. The grout is applied with a rubber spatula. It is better to stir the putty for the bathroom with a stainless spatula. Since the volumes of the solution are small, it does not make sense to knead with a drill with a special nozzle.
Excess putty that has fallen on the tile should be removed immediately. As much as possible. After a day, the seams completely dry out and you can put in order the tile stained with the solution. If the usual wiping of the tiles is ineffective, then we remove the dirt with special compounds.
After the restoration is completed, it is necessary to treat the seams of the tiles with a product that has a dirt and water repellent effect. Replacing the old putty can be partial, but in this case you need to carefully select its tone.
On sale there is a wide range of grouts of different colors. But I would like to note that white grout can be tinted with universal colorants. If there is a need for tinting, then it should be borne in mind that you need to tint the entire required volume of the solution at once.
In this way, you can update the seams of floor tiles and the seams of the kitchen apron. Updating tile joints in the bathroom is a fairly simple process and is accessible to everyone. With a little effort and time, your bathroom will again please you with its cleanliness and freshness.
Cleaning the seams between tiles
It is possible to clean the seams using household chemicals, as well as with the help of some folk remedies. Pollution is easily removed by mechanical means. Let's take a closer look at each of these methods.
Household chemicals
You can update the tile seams in the bathroom with purchased chemicals intended for household use. They should be selected depending on the degree of contamination of the seams. If they are simply covered with a layer of grease and soap, common products can be used. These include Pemolux, Fairy. To bleach seams affected by ingrained dirt, powders or liquids containing chlorine or acid are needed. Strong concentrates of household chemicals for bathroom renovations are BOZO, Ultra-Stripper, KiiltoClean.
When working with strong agents, precautions must be taken. Ventilate the bathroom thoroughly and wear protective gloves
To remove the fungus, chlorine-containing liquids Domestos and Belizna are used. They are applied with a brush on dirt. After 10 minutes, the product is washed off with clean water. It is not recommended to wash the seams with ordinary soap. It creates conditions for the development of microorganisms.

Dirt is well removed with a steam cleaner. Under the influence of pressure and temperature, it is brought out. It remains to erase it from the surface of the tile. Hot steam destroys all microorganisms and fungus spores. The cleaned seam can be strengthened by applying a protective impregnation or a layer of a special primer.

Folk remedies
You can whiten the seams between the tiles in the bathroom with the help of some folk remedies that will return the walls to their former aesthetic appearance. Such remedies include lemon juice or citric acid, soda, vinegar, ammonia, ammonia. Several ways to use them:
- 0.5 cups of soda is poured into a third cup of lemon juice, a quarter cup of vinegar and 7 cups of water are added. The resulting mixture is applied to the seams, after 10 minutes it is washed off with water. This tool is very powerful and requires the use of protective equipment.
- Soda (4 tablespoons) is poured into plastic dishes and hydrogen peroxide (3 tablespoons) is added. The mixture is applied to the places of pollution. After 2 hours, the surface of the tile is brushed and washed off with clean water.
- Mix equal amounts of toothpaste, mustard powder, baking soda and lemon juice. Add some ammonia. Spread the mixture on the seams, after 15 minutes brush them with a brush and rinse with clean water.
- Composition for fighting mold. A tablespoon of vinegar and the same amount of ammonia, 2⁄3 cups of pure water are mixed and applied to the seams. After 15 minutes, you can wash everything off.
It is not recommended to use vinegar, ammonia and various acid-based compounds for cleaning colored grout. It can unpredictably change the color of the mixture. Aggressive products should not be used when cleaning the joints between glass tiles. It is also not recommended to use products with abrasive substances. They leave small scratches on the surface.
Do-it-yourself mechanical cleaning
At home, a mechanical cleaning method is more effective. It whitens the seams and removes the top layer of grout along with the dirt that has eaten into it. This process requires a lot of time and labor investment. The layer is removed with a tool called a scraper.
Can be removed with sandpaper or a spatula, which cleans places with dirt, fungus. You can also use a metal brush, but it will leave marks in the form of scratches on the lined surface. You can build a tool yourself from a tube sharpened by a grinder. It is used instead of a chisel. But do not try to use a puncher. You can beat the tiles off the wall.
Paint for joints between tiles which base to choose
The desire to change the lining of the tile appears due to the fact that the seam begins to look bad. Replacing a complete cosmetic repair will help update it.Painting gaps between tiles is the most affordable and easiest way to update them.
 When choosing paint for joints, it is necessary to take into account its quality, characteristics and main features.
The basic tool can be:
- Special paint for seams;
- The composition of the aqueous emulsion;
- Marker;
- Whitewash.
The color of the paint should be slightly different from the previous one. The best choice would be a new color that will mask the wear of the grout.
The light color of the composition will go well with the shape of the tile, and the dark color will help the tile stand out against the background of the seams.
Replacing the grout layer
Replacing the grout in the joints seems to be the most time-consuming, but also the most effective and reliable way to update the color of the inter-joint space.

To implement it, the first step is to get rid of the old grout. Allow the imposition of fresh grout over the worn layer of the fugue. Which is much less labor intensive. The main thing is to choose the right composition.
Therefore, you should figure out which grouts are suitable for these purposes. It is advisable to use two types of grout compositions. Depending on the basis, this may be:
- cement composition;
- or epoxy.
Epoxy grouts are compounds with synthetic resins and hardeners that are resistant to acids and chlorine. They form strong contact with metal surfaces. For this reason, they are not susceptible to the influence of these substances, they are distinguished by a high degree of strength.
Epoxy grouts are more expensive. And the purpose provides for their use not in living quarters, since the need to protect tile joints against alkalis and acids at home does not often arise.
Epoxy grout has an increased viscosity, it is not suitable for thick tiles that are laid with small (narrow) gaps. The width of the joints is considered standardized, but the dimensions of the gaps are determined by the shape and area of the tiles. For square-shaped elements 10 by 60 cm, the optimal seam width is 3 mm. In the case of defective tiles, the width of the joint can be increased up to 1 cm.
To remove the old grout you will need the following:
- knife;
- a vacuum cleaner;
- gloves;
- spatula made of rubber materials;
- acid cleaner;
- soap (or washing gel);
- rags;
- primer.
Instructions for superimposing a new fugue on a previous one
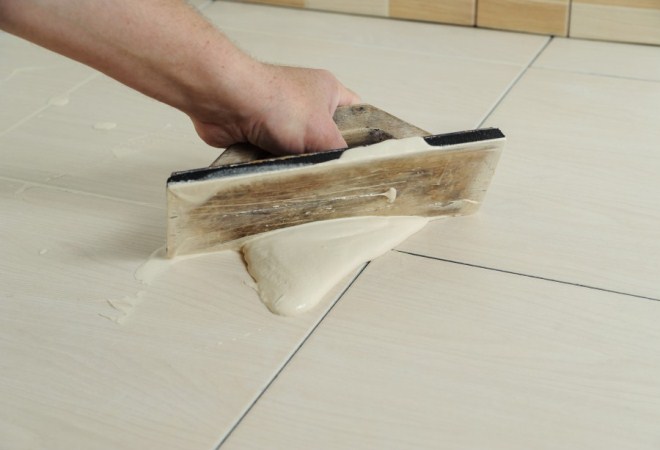
- First, put the grout mixture. By consistency, it should be like sour cream;
- Next, portionwise pour the mixture onto the floor;
- And immediately, using a spatula, a wooden block or a piece of fabric, the mixture is leveled over the surface. Why the mixture independently flows into all the recesses between the tiles and fills them. In this case, the grout should remain only in the inter-seam recesses. Whereas the grout composition is carefully removed from the coating with a cloth;
- After the grout dries a day later, a slight coating may be observed on the surface of the tile. It is removed by wiping the tile with a cloth.
For work it is better to use a rubber spatula. It copes well with tile recesses, as well as with seams.
The above recommendations are suitable in a situation where the width of the seams is 3-5 mm. For narrower gaps (2-2.5 mm) proceed differently. First, it is estimated to what depth the composition will fill the seams. If more than 3 mm, then the grout is continued further. If the composition does not penetrate deeply, then the composition is pressed with a spatula on each segment of the seams. Such a painstaking operation is performed only in areas that are subjected to increased loads. In the remaining areas, the composition is simply overwritten.

To update the color of the grout, a colored fugue is well suited. The grout can be chosen, both in tone with the overall coating, and in a contrasting shade. So you can not only repaint the seams, but also create an interesting design of the room. To give color to the grout, the use of colors (dyes) is allowed.Usually choose pasty or liquid tinting agents, which are sold in a hardware store.
Industrial colored grouts incorporate a special dry color scheme, due to which a rich and bright color of the fugue is created. More appropriate is the use of industrial colored grouts. Experts oppose taking on the independent mixing of grout with color. Because it is fraught with consequences. For example, damage to the operational properties of the composition is not excluded, in addition, during subsequent mixing, you can miscalculate with the desired degree of shade.
Knowing how to paint the joints between tiles and how to change the grout in the joints, the choice of the option to update the joints will be more conscious.
Rules for applying a new grout
After removing dirt, old grout, the surface of walls and floors should be thoroughly washed with water and soapy water. Then everything should dry out within a day.
Before applying the grout, you need to make sure that the walls in the bathroom are dry, so it is impossible to take a shower before repairing. If the old grout could not be completely removed, it is better to apply a primer to the seams. Then the finishing material is prepared. The new grouting material is diluted with water, it should resemble thick sour cream. It is better to take a rubber spatula, as a metal one can damage the wall. The seams in the bathroom are filled evenly. If the tile gets dirty, then immediately the stains are removed with a sponge. And behold, the deed is done.
In order for the new grout to serve for a long time, it is necessary to cover the surface from above with a sealant - a special fixing solution. Otherwise, the repair will have to be repeated again.
Everyone can remove the old grout and apply a new one with their own hands, for this it is not necessary to call the master. The main thing is to follow all the rules carefully. In order to maintain a clean and comfortable environment in the house, such a general cleaning should be carried out once every 2 months with cleaning of the tile joints in the bathroom. This will help maintain a healthy microclimate in the apartment. As a result, the walls in the bathroom will shine like new.
Facing a bathroom with ceramic tiles is a type of finishing work that provides aesthetics and a long service life of the coating due to the high characteristics of the tile. But the artistic component of the tiled finish has a vulnerability - seams, the decorative design of which is less durable.
Tile joints rubbed with white glue, due to the weakening of the antifungal effect of the grout, are affected by mold and become contaminated. Colored grouts are subject to the same effects, in addition, they fade over time. In addition, improperly executed grout, regardless of the color of the mixture, due to frequent cleaning of the room, is prone to cracking, dips in the joints, and spalling from the seams.
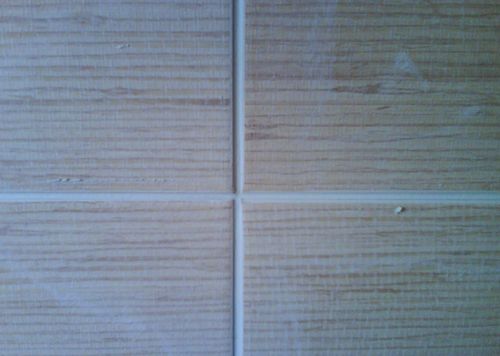
Sometimes the grout between the tile joints is covered with dirt, grease and turns yellow.
As a result of these factors, the aesthetics of the finish suffers seriously, and it becomes necessary to restore the grouting of ceramic joints. You can renew worn grout, depending on the material of the mixture and the nature of the damage, in the following ways:
1. Cleaning:
- chemical: special compounds or improvised means of household chemicals;
- mechanical;
- thermal;
- complex.
2. Painting.
3. Replacement of the mixture in the joints:
partial; full (maximum).
Let's consider the technologies for restoring the aesthetics of the tile joints of the bathroom tiling, the materials, chemicals and tools necessary for this.
Replacing the grout at the joints
Sometimes the listed cleaning methods are powerless in the face of chronic pollution, or the repeated use of chemicals has caused the destruction of the grout. In such a situation, the need to restore the solidity of the ceramic cladding by repairing the grout comes to the fore, as a result of which the issue of the aesthetics of the finish will also be resolved.To repair the arrangement of tile joints, it is necessary to remove the old adhesive from the joints to a depth that depends on the state of the grout.
Partial replacement of adhesive in tile joints
If the structure of the grout mixture is homogeneous, strong, and the purpose of the repair is only to update the design of the joints, then there is no need to completely remove the grout from the joints. To reliably fill the gaps between the tiles with new adhesive, it is necessary to remove the old composition to a depth of at least 2 mm. If the grout is cement, then it is removed with a scraper with an appropriately shaped tip. After finishing work with a scraper, the edges of the tile must be passed with fine sandpaper, and the grooves between the rows of cladding should be cleaned of dust and primed to ensure good conditions for adhesion between the adhesive and the cavity.

The grout based on epoxy resins is also removed with a scraper, but after the adhesive has been treated with a special solvent.
Complete replacement of grout in tile joints
If the old composition loses the necessary technical characteristics, it is necessary to do a complete replacement. Old glue is removed with a scraper to the maximum depth, trying to completely clean the joints from the mixture that has lost its strength. The walls of the bathroom before the new grout are cleaned of dust with a vacuum cleaner, and the grooves of the tile joints are also primed.
Repair grouting of tile gaps, partial or in full, should be done according to the usual technology, taking into account the operating conditions of the room.
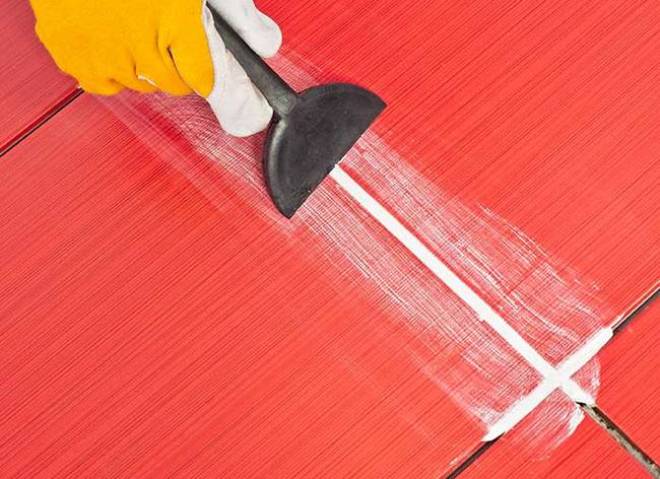
Wiping off fresh grout
If the grout is fresh (no more than a day has passed since it was applied), then it can be easily wiped off by soaking it with water.
- 30 minutes after applying the grout, remove the excess and sand the joints with a clean, damp sponge. If you often do tile work, then there are special buckets with rollers for wringing foam rubber. This was previously mentioned in the article about tools for the tiler.
- The next day, you need to remove the white coating with a felt mitten. There are also special graters with felt, but they will not wipe relief tiles well.
Sometimes it happens that the tile has a very large relief, a lot of decorative elements. When grouting it, it is advisable to pre-glue the surface with masking tape and plastic wrap. But if the grout has already eaten into the texture of the tile, you can wash it off with a terry cloth moistened with sunflower oil.
How to update the seams between tiles
Unfortunately, nothing stays perfect forever. Everything made by human hands decays, losing its original fresh appearance. This also applies to tile joints. After only five years of repair, the grout becomes dirty, turns yellow, or worse, fungus can appear on it. This is not surprising - water, evaporation, fat.
If you have long noticed darkened seams in your bathroom or kitchen, then it's time to start restoration. Moreover, the onset of the spring-summer period is very conducive to this. So, how to update the seams between the tiles?
First way. Painting or whitewashing seams
The easiest and fastest method is painting or whitewashing. But keep in mind that such a restoration will last you a maximum of six months. There is also another easy way to update the seams - apply a new layer on top of the old grout. This method can be used provided that the old joints are a little deeper and there is 2mm of room left for new grout to be applied.
The second way. Complete replacement of the old grout But, as you might expect, we are not looking for easy ways. The most effective and 100% effective method is to completely replace the old grout with a new, white and fresh one! If you have decided on such a noble cause, then go ahead!
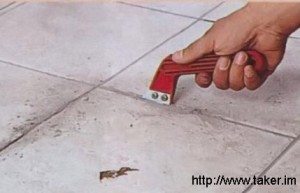
First you need to remove the old grout. For this purpose, it is most convenient to use a special joint expander, which should be commercially available. In extreme cases, you can use any suitable sharp object.When working, be careful not to damage the edges of the ceramic tiles. In most cases, old grout should come off easily.
But it may also happen that the mixture was mixed with a "super-powerful" cement compound. In this case, you will have to tinker a little. To soften the grout and make it more pliable, it is recommended to use an acid cleaner. Dip a brush in it and apply to the seams. Give the cleaner time to soak in. Do not be afraid, it is completely harmless for tiles. When the first stage is completed, we proceed to the second. Before you renew the joints between the tiles with new grout, thoroughly wash the exposed joints with soap and water and leave to dry for a day. Also, after that, a penetrating primer can be applied inside. If the old grout is thoroughly and deeply removed, it is not necessary to apply a primer.
With a light heart, we finally proceed to the final and most enjoyable stage - applying a NEW grout (choose the color yourself). To do this, we make the consistency a little thinner than the previous one and, armed with a rubber spatula, carefully rub the grout inside, trying to fill all the space for better adhesion. We remove excess grout from the tile with a sponge. Everything, the process of restoration of tile joints is completed! We enjoy the result! Now you know how to update the seams between tiles. As you can see, this work is a little time-consuming, but not without an element of creativity. New, fresh tile joints will please the eye of you, your loved ones and guests for several more years. Good luck!
Unfortunately, nothing stays perfect forever. Everything made by human hands decays, losing its original fresh appearance. This also applies to tile joints. After only five years of repair, the grout becomes dirty, turns yellow, or worse, fungus can appear on it. This is not surprising - water, evaporation, fat. If you are already
Conclusion
Updating the joints between tiles is always a necessary measure. Regardless of how much effort was spent on it, the situation should be analyzed and conclusions drawn in order to take the necessary measures to extend the life of the finish, for which frequent grout repairs are not painless.
Tiles are an excellent cladding material, especially for the bathroom. It gives the room not only attractiveness, but also comfort during operation. The tile well maintains temperature and mechanical loadings, is not afraid of water and is easy to clean. All this is enough to ensure that this material is successful in bathroom applications.
However, over time, the weakest point of this type of finish - the grout - begins to lose its properties. And then you have to think about how to clean or renew the area of tile joints.