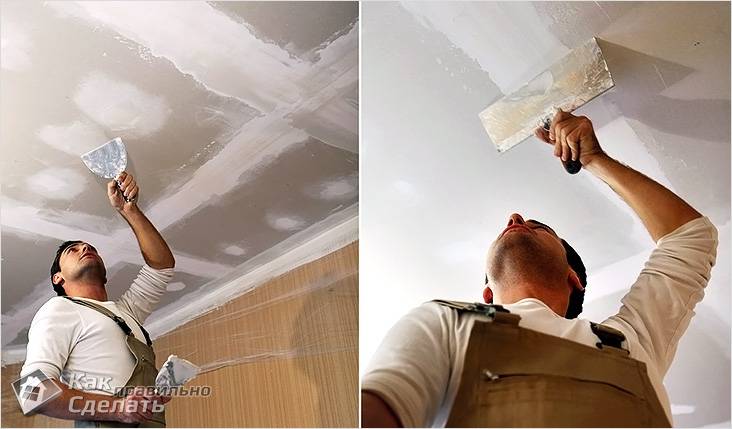
Surface preparation
Proper preparation of the ceiling surface plays an important role in painting.
The step-by-step technology of the work looks like this:
- Remove old trim. Moisten lime whitewash or water-based paint with water and, after soaking, remove with a metal spatula. Alkyd or oil enamel should be knocked down with a hammer or a hatchet, an electric drill or a perforator with a cord brush, removed with a solvent or chemical remover.
- The plaster covered with mold should be completely knocked down. Treat concrete slabs affected by fungus with chlorine-containing or antifungal agents.
- Fill cracks, crevices and joints between boards.
- Strengthen the surface with a polymer-based primer. This synthetic agent will increase the adhesion of the plaster to the base and facilitate painting.
- Differences in height are more than 1 cm, pits and depressions should be leveled with plaster or putty. After the first layer has dried, sand the surface, apply the final layer and rub.
- The day before applying the coloring composition, cover the surface with a primer.
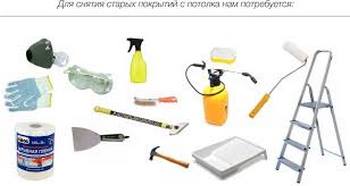 In order to quickly prepare the ceiling for painting, you need to have everything at hand.
If you do not plan to re-paste the wallpaper, you need to take care of their integrity - glue strips of polyethylene to the junction of the ceiling and walls around the perimeter of the entire room. To fix the film to the pasted walls, use only masking tape (clerical tape can damage the wallpaper when peeled off).
Choosing a tool
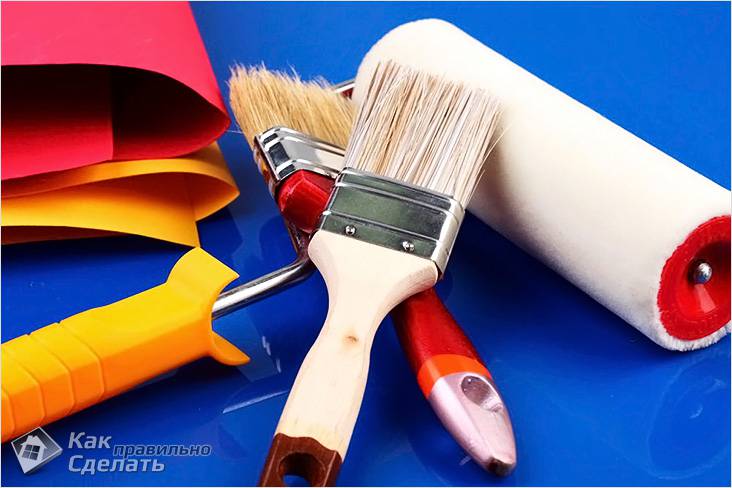
For painting ceilings, you can use the following types of tools:
Paint brushes are the most common and affordable tool that does not require special skills. Paint brushes differ from each other in material, thickness, width and shape of the bristle bundle. When painting the ceiling, it is necessary to use the following types of paint brushes:
- flute - used for painting large areas. A distinctive feature of the brush is the presence of a flat and wide tuft of bristles;
- paneled brush - used for painting ceilings with an uneven decorative surface, as well as joints and hard-to-reach places where high precision and accuracy of work is required.
Roller - used for painting large areas. It features a lower paint consumption than a paint brush and the possibility of applying a coating in a thinner layer.
Depending on the material from which the roller roller is made, it can be divided into two types:
- foam rubber - used for painting with the use of water-based paints;
- velor (fur) - used for applying coatings based on alkyd, oil and nitrocellulose enamels.
A spray gun is a device used to apply liquid paints and varnishes. Differs in high profitability and good quality of the formed covering. Requires certain skills to use. Depending on the design features, sprayers are divided into three types:
- pneumatic;
- electrical;
- mechanical.
Why do stripes and stains appear
Often, apartment owners who have no experience in painting art lament when they see stains and stripes on the ceiling at the end of painting work. They are formed in case of violation of the ceiling painting technology, the use of low-quality tools or a coloring composition.
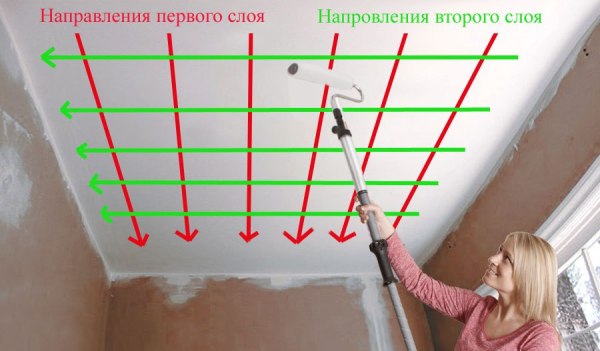
The main condition for obtaining a smooth surface when painting the ceiling is the correct direction of movement of the roller during the application of the first and subsequent layers. First, the roller paints the ceiling parallel to the window, and it is desirable to carry out even strokes from edge to edge, if possible without interrupting them. The second layer is applied in a perpendicular direction - in this case, a better painting of the ceiling is provided.If necessary (too liquid composition, the presence of irregularities), the number of layers can reach 5-6.
A defective roller can also leave stripes: if the pile is not securely fixed on it, then during the staining process, the fibers will stick to the ceiling. The same applies to the connecting seam - too noticeable will leave marks on the newly applied paint.
The result also depends on the quality of the paint: once a water-based paint has been frozen, it may crumble in places when it dries. The density of the solution also affects the appearance of streaks and streaks. Too thin diluted paint will leave some places unpainted, and with a thick composition there is a risk of uneven application of the material to the ceiling.
To avoid trouble, you should clearly follow the step-by-step instructions for applying paint to the ceiling surface.
Which roller is right for you
Let's say you settled on a paint roller. There are also sizes and diameters.
Before buying the roller you like, slightly pull the pile. If it does not remain on the hand, the tool is of high quality.
If you have a large flat ceiling area, then take a wide roller. It will immediately paint the wide part, and you will spend less effort. Small and narrow rollers are suitable in the case of multi-level ceilings - this way it will be more convenient for you to paint individual zones.
The diameter of the roller also allows you to get the job done faster. A large diameter tool uses a large area, just remember that a large roller is very heavy and “faster” will in fact be “heavier” for you. Focus on your strengths.
Although there are advantages to large-diameter rollers - during operation they do not splash paint due to slower rotation.
All rollers are divided into 3 types by size:
- small - their size is up to 100 mm;
- medium - up to 200 mm;
- large - from 200 mm (may be more than 300 mm).
For an apartment or house, medium-sized rollers are suitable.
To make painting easier, use the telescopic roller attachment. There are also ordinary handles - they are better than any stepladders. You'll get through it faster.
Complex ceiling shapes, such as levels and intricate outlines, cannot be painted with a large roller. Pick up smaller tools, maybe even a few, and stock up on brushes - they will come in handy for painting corners.
The simpler and smoother the surface of the ceiling, the more you can choose a roller.
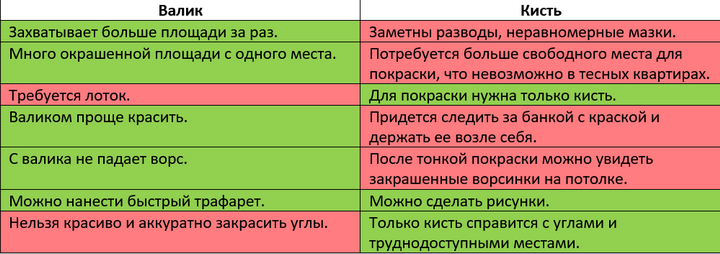
For those who still doubt whether to use a roller, here is a table. Yes, in some cases brushes are necessary, but a roller is still better.
Water based coating
Before using a water-based coating, the surface should be prepared. Regardless of whether your ceiling is painted or whitewashed, if there are cracks and irregularities on the surface, and the old finishing material moves away from the surface, then it must be completely removed. Defects and irregularities must be puttied, sanded and primed. If we are talking about a perfectly flat surface, then you just need to prime it. Before starting work, free the room from foreign objects and furniture.
If you need to remove whitewash from the surface, then it should be wetted. Work in small areas with a brush because surfaces dry quickly. If you wet it all at once, then you will have to do it many times, and this, you see, is a waste of time and effort. So, we wetted the surface, waited for the whitewash to pick up moisture, removed the layer with a spatula. Thus, remove all whitewash from the surface.
If you have planned a redecoration of the room, then start painting from the ceiling. Otherwise, there is a high probability that you will bury the walls.
What if only the top is to be processed? In this case, the walls must be sealed with a film. The same measures should be taken with respect to gender.To know how to properly apply the coating and at what temperature to do it, refer to the manufacturer's recommendations.
 Painting tools
In order for the paint to lay flat on the surface, it should be treated with a primer. It is better to buy a coating and a primer of the same brand. If you have a smooth and clean surface without stains, then it can be primed in one layer. In other cases, it is better to apply the composition in 2 layers. Then apply one layer to all dark areas. This will prevent their manifestation after completion of work. After priming is complete, allow the surface to dry.
If the ceiling is ready for the next step, then assemble and prepare the necessary tools for this. So, you will need:
- dye;
- roller, brush or spray gun;
- tray;
- painting telescopic extension for a roller or stepladder.
The subtleties of technology
Foundation preparation
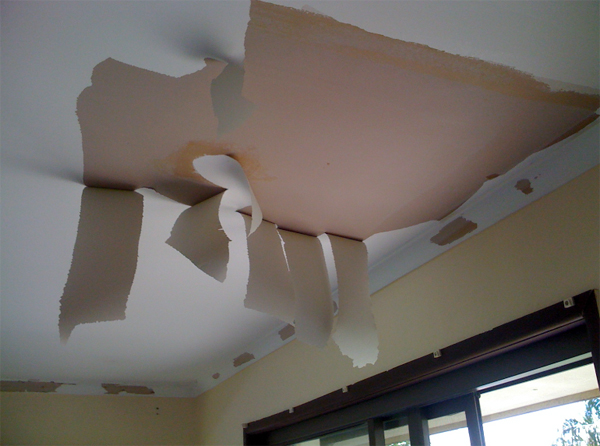
- Before you paint the ceiling without streaks, it should be carefully prepared. In the recent past, whitewashing was the most popular solution, the specifics of its application is such that it was not necessary to wash off the old layer, you can apply a new one on top and the surface is ready. As a result, a multilayer cake is formed.
- Do not believe if someone tells you that you can paint over whitewash, but only if it is thin. Whitewash must be removed. You can wash off the old-fashioned way, but it's dirty and long. It is easier to wet the surface well with a roller and scrape off with a metal spatula. You can buy a special composition for removing whitewash.
Tip: there will be much less debris, and the whitewash will be well removed in layers if a layer of paste is applied to a wet surface and allowed to dry. Then scrape off the layer with a spatula.
Cleaning surfaces from the old coating.
- The clean surface must be well inspected, chips and shells are puttied with finishing putty. If stains of paint are found under the whitewash, they must be removed, otherwise, they will later fall off along with the painted layer.
- When the surface is ready, it is covered with soil. The fact is that the vast majority of ceilings in houses and apartments are a smooth concrete surface, and in order for the paint to fit better, the ceiling should be primed.
- As mentioned earlier, you can use special formulations or dilute the same water-based paint in a ratio of 1: 5 with water. The primer is applied in 2 layers with an interval for drying. After drying, wipe with a rag.
The video in this article shows the intricacies of whitewash removal.
Application technology
The direction of the layers.
- You can buy paint ready-made, but it's cheaper to make it yourself. To do this, the emulsion is combined with water 1: 1 and color is added. It is better to cook immediately completely on the entire surface, with a small margin. The fact is that tinting also, the second time will not work, so the composition should be enough for the entire room.
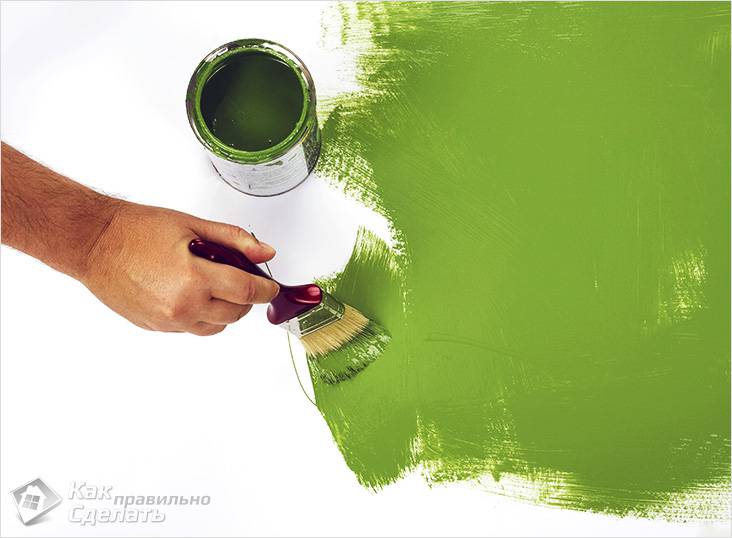
- They start painting from problem areas, with a brush, corners, borders, and so on. Forget sweeping strokes, the paint is applied in a push-and-pull manner, so brush and roller application are the same.
- After that, a roller with a long pile is taken and dipped into a cuvette, it is not worth dipping strongly, it is enough to lightly immerse and roll out well, for even distribution of the composition. Roller movements are made parallel, with a 5-7 cm approach to the previous strip. You don’t need to roll a lot in one place, an influx may form.
- Coloring is done in at least 2 layers, but experience shows that in order to achieve a decent result, it is better to apply 3-4 layers. Each layer is applied perpendicular to the previous one, after complete drying. The final layer is applied with a medium pile roller, parallel to the sun's rays, from the window. And do not forget to periodically step aside and look at your work from the side, so you can better see the flaws.
Tip: water-based paint will lie down better if you arrange a semblance of a water bath in the room, placing containers with hot water.
Painting in hard-to-reach places.
If, after complete drying of the outer layer, slight strokes remain, then they can be sanded with zero sandpaper and another layer applied.
https://youtube.com/watch?v=zBj9zVRQBT0
In conclusion, I would like to note that the instruction on how to paint the ceiling without streaks with your own hands is simple and accessible, but there is one more nuance. The layer, no matter how big it is, must be applied at a time. Otherwise, stains or streaks may appear due to uneven drying.
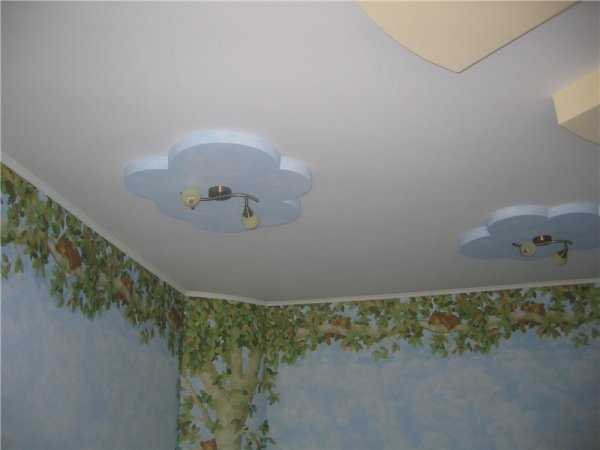
Painted ceiling in the nursery.
Perfect coverage
Nowadays, it is not uncommon to find colored, and not just white, ceilings. It is very modern, and besides, the colored surface brings some notes of freshness to the interior. If you bought ready-made material with pigment, then there is nothing to worry about. However, if you add color to the white coating, then prepare the mixture with a margin. This is due to the fact that when mixing paint by hand, achieving the same tone is unrealistic. If it seems to you that the composition is the same in color in the bucket, then after drying, smears of a light or dark shade will be visible.
As a rule, it is possible to cover perfectly the second or third time. But by following the instructions in this article, you can do it without any additional experience. The most convenient tool for work is the spray gun. However, it is probably not worth acquiring it for the sake of one operation. Unless you have free funds and you have plans to use this tool in the future.
When working with this tool, the least consumption of material, and the coating process does not require much physical effort.
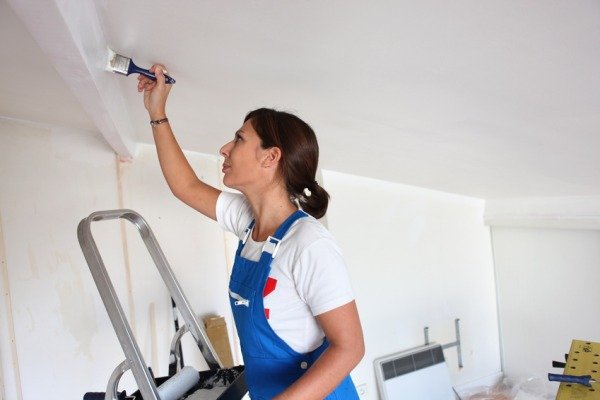
Painting the ceiling with a brush is hard and time consuming. Therefore, if you choose between a brush and a roller, then it is better to give preference to the latter. With it, the coating is even, it does not need to be re-dipped as often as a brush. In order for the joints with walls and corners to be well processed, they must be pre-treated with a brush, you cannot do without it in the process of working with a roller.
Before starting work with the roller, draw a narrow line around the perimeter of the surface, carefully covering the joints. Do not dip the entire roller in the material. After dipping it a little, roll it out in a special paint bath. Thus, the material will be distributed over the entire surface. Starting from the far corner of the room, cover the ceiling. The strips should be applied with an overlap of 5–8 cm. At the same time, there should be no thickenings at the joints, and for this, the composition must be rubbed over the surface with a roller.
Painting must be done at a sufficiently high pace, otherwise stains will appear on the surface due to the drying of the material. After it is completely covered, let it dry. Then apply a second layer.
The next layer should be applied perpendicular to the previous one. Thus, the possibility of streaks and unwanted streaks is eliminated.
In order not to emphasize the spots, do not touch the prominent places. It is better to evaluate the quality of work from the floor, because being under the ceiling you will not be able to do this. The technology of using acrylic material is no different from the technology of working with water-based emulsion.
After finishing work, avoid excess sun and drafts in the room. You can ventilate it only after the surface has completely dried, which means not earlier than in a day.
How to paint the ceiling with a roller step by step process
Painting the ceiling with a roller is not a very laborious process, since with a skillful approach and preparation, all finishing work can be completed in 2-3 hours. How to properly paint the ceiling with a roller - you can watch the video and painting tricks below if you decide to carry out this procedure yourself.
Painting the ceiling, in addition to the roller, will not do without such tools:
- Paints of the desired shade;
- paint roller;
- Finishing brushes;
- Containers for mixing paint;
- Napkins for cleaning.
Painting ceilings with rollers is divided into several stages. First of all, in order to properly paint the ceiling with a roller, you should clean the working area itself, wipe it and dry it.
 The very last layer should be painted in the direction in which light enters the room.
Further actions will be as follows:
- Application of a primer that has a transparent texture and improves the adhesion area of the paint to the ceiling. The primer can also be applied with a roller;
- The next to work is a roller for water-based paint for the ceiling. It is dipped in paint, after which it should be rolled a little on the surface so that excess paint is absorbed into the tool itself.
- Painting should be done smoothly and without unnecessary movements in order to paint the ceiling without streaks with a roller, which is very simple to do. The paint is applied in one layer, then it is better to let it dry and apply a second. So the coating will be more uniform, and paint consumption is much less. All corners are painted over with a brush, as it is more convenient for performing these procedures.
The most important trick in painting the ceiling with a roller is that each subsequent layer should be applied directly perpendicular to the previous one - this way the paint will lie more evenly and the joints will not be so visible.
How to paint the ceiling
Tip: For painting the ceiling, the roller should be chosen with a soft, fairly long pile, preferably natural. When using foam rubber coats, bubbles may form, and a short pile does not pick up enough paint.
The tool is rolled out before use. To do this, you can use a surface that you do not mind getting dirty.
For work, a polyethylene film, masking tape is purchased, which will save furniture that has not been taken out from paint streaks.
The instructions for painting the ceiling are quite simple:
- The roller is dipped in paint.
- The cover rolls out.
- Another area is being painted.
How to paint the ceiling with a roller, the tricks of the work:
- The paint is applied at least two layers. Moreover, the last layer should be applied in the direction from the window, which will additionally hide small irregularities.
- The room should be painted in one step, without stopping. Otherwise, when the areas dry, paint streaks will become noticeable at their borders.
- You can control the uniformity of color by stepping aside. This is due to the fact that unpainted areas are poorly visible at a right angle, and well at an oblique angle.
- The layer that has begun to dry cannot be tinted, as irregularities may appear.
Tip: If you find paint streaks on a recently applied coating, you need to remove them with a dry sponge, and then wait until the paint dries. Then it is applied again. Dried out influxes are removed with a grinding mesh, and then another layer is applied again.
Using a high-quality roller allows you to apply paint to any ceiling evenly and beautifully.
Graduated from the Faculty of Architecture of the Penza State Institute of Architecture and Construction. Over the past ten years, he has been a leading specialist in a large construction company in the city of Penza, which is engaged in the construction of multi-storey residential buildings. The total work experience in the specialty is 18 years. Advises on design issues, the choice of materials for interior and exterior decoration, the technology of finishing work.
Preparatory stage
The quality of the final, finishing coating largely depends on the correctness and thoroughness of the preparation of the ceiling surface for painting.
The preparatory stage includes the removal of all previous coatings, the elimination of defects and surface leveling, providing improved paint adhesion by applying a primer, cleaning from dirt, grease and dust.
Removing the old layer of paint
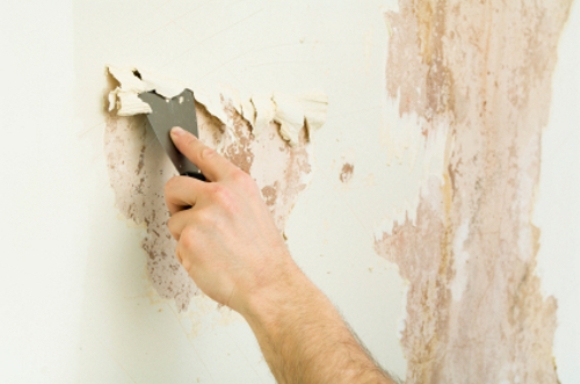
The first step in preparing the ceiling for painting is to remove the previous coatings - whitewash or paint. The more thoroughly the cleaning is carried out, the easier it will be to level the ceiling.
The most commonly used technology is:
- The ceiling is abundantly moistened with a foam roller or a spray bottle. Humidification is carried out 2 times with an interval of 15-25 minutes, and so that the water soaks the previous coating well.
- Next, you should provide a draft in the room, which will accelerate the peeling of the coating.
- Without waiting for the ceiling to dry, the swollen layers are removed with a spatula.
- After completion of the procedure, it is recommended to treat the surface with a solution of copper sulfate (4-5%), especially in places where there was mold, rust, water smudges.
If the old coating is held firmly and cannot be easily removed, then aggressive solutions can be used. The following options are recommended:
- 2-3% hydrochloric acid solution;
- a mixture of lime and drying oil in a ratio of 20: 1, diluted in water to the desired consistency;
- water-lime solution of a thick consistency with the addition of denatured alcohol (50 ml per 1 liter).
The solution is applied to the ceiling with the utmost care and aged for 12-20 minutes. The procedure is carried out 2-3 times until the coating is completely dissolved.
Old whitewash (chalk or lime) from the ceiling is simply washed off. To do this, you can use a paint roller, abundantly moistened with water. In the presence of a thick layer, you can use a spatula. The final flush is provided with a sponge.
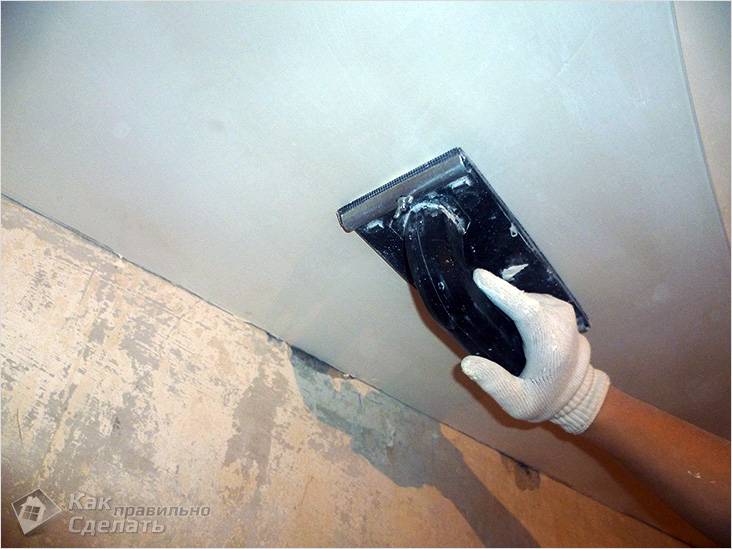
Ceiling leveling
After removing the old coating, a thorough revision of the ceiling is carried out, identifying all defects. Cracks need to be patched up. To do this, they are slightly expanded with a spatula, and then filled with putty. Concrete sags are removed with a chisel or chisel.
The leveling of the surface for painting is carried out with a ready-made putty mixture for internal work of a thin layer overlay. It can be processed with fine-grained sandpaper. Usually putty is applied over the entire surface with a spatula and carefully leveled.
Sometimes whitewash adhesive putty is used, which is distributed over the ceiling with a roller. After puttying, the surface is sanded with sandpaper manually, with a trowel mesh or with a grinder.
Surface primer
The final stage of preparing the ceiling is a primer. The use of a deep penetration primer mixture ensures reliable adhesion of the paint layer to the ceiling base.
It is applied in a thin layer over the entire surface with a brush, roller or spatula. After the composition has hardened, the final grinding of the ceiling and cleaning of dust is carried out.
For information: How to plaster the ceiling correctly
A few words about the tool
The quality of staining largely depends on the selection of the tool, this part of the preparation should be given special attention. Some craftsmen prefer to use a spray gun
We must say right away that it is convenient and fast for them to work, but it often makes no sense to buy an airbrush for a one-time application.
In small areas, it is much more economical to use a traditional roller and brush. As for the rollers for painting the ceiling. then they can be foam rubber and fur. Foam rubber is not suitable for working on the ceiling, the fact is that when rolling, after foam rubber, small air bubbles remain on the surface, which look, to put it mildly, not beautiful.
Fur rollers come with long, short and medium pile. For high-quality application, rollers with long and medium pile are useful to us. The fur, when rolled, creates a barely noticeable relief on the surface, due to which small irregularities and defects are hidden.
You will also need an ordinary paint brush to work. Too large will be inconvenient to work with, a small brush for a long time, a medium-sized tool is selected.
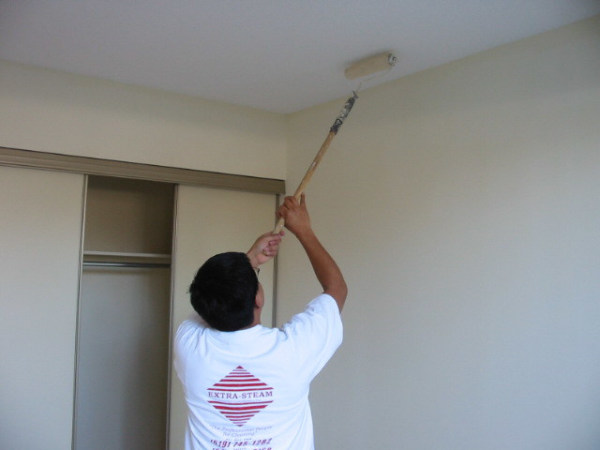
Roller on a long handle.
Tip: when choosing a brush on the market, pay attention to quality. It is quite simple to check it by taking the tool in your hands, try to pull out all the bristles with your hand, if there are a few lint left in your hand, the product is defective and the same lint will remain on the painted surface
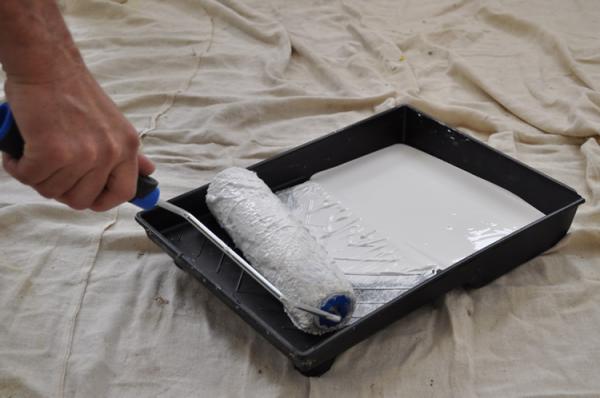
- Tray for paint, in the language of professionals, it is called a "cuvette". This is a plastic bath with a recess for the composition in one part and an inclined, corrugated surface on the other. The roller is dipped in the composition and rolled over a corrugated surface in order to remove excess paint.
- In addition to the main tool, you will also need an auxiliary one. First of all, a construction mixer or a mixing attachment for an electric drill, for mixing the composition. It will not be superfluous to purchase masking tape and polyethylene in order to keep walls, furniture and other surfaces clean.
Tip: for convenience, you can buy a roller with a long handle, you can use a stepladder, but it will need to be rearranged often. It is convenient to work from an old kitchen table or a small construction goat.
Choosing paint materials
Depending on the film-forming (base) for painting the ceiling, you can use paints and enamels of such types as:
- oil paints;
- alkyd enamels;
- nitro enamels;
- acrylic paints (water-based);
- epoxy enamels.
Before giving preference to one or another paintwork material, it is necessary to determine the conditions under which the coating based on them will be used: humidity, temperature, degree of illumination, exposure to chemicals (acids, alkalis) or petroleum products
It is also important to take into account factors such as: toxicity, antifungal and antimicrobial properties, color, etc.
In rooms with high humidity and temperature, it is recommended to use acrylic paints, nitro enamels, alkyd and epoxy enamels.
In residential areas (bedroom, nursery, kitchen), the best option would be water-based paint based on polyacrylates and epoxy resins. You can use oil paints, alkyd enamels, nitro enamels. But due to the presence of toxic solvents in their composition, after painting it is necessary to ventilate the room well and for a long time.
In high-temperature production shops, as well as in shops where acids, alkalis and oil products are used, it is recommended to use enamels based on epoxy resins.
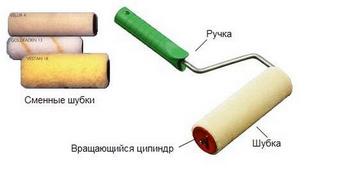
Varieties of rollers which is better to choose
Hardware stores offer different rollers, which differ from each other in the size of the byugel (metal rod), handle length, cylinder diameter, fur coat material and pile length.
To paint the ceiling with water-based paint with a roller, you need to decide how the painting process will go:
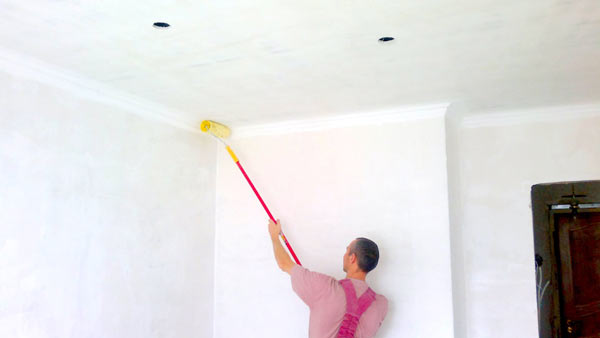
- If you plan to paint the ceiling while standing on the floor, you need to purchase a tool with a telescopic handle, which can be extended up to 2-2.5 m and folded back to its original position. If such rollers are not on sale, you can purchase an extension rod or make it from improvised materials, for example, from scraps of a metal-plastic pipe of a suitable diameter.
- When using building goats, ladders or pieces of furniture, the length of the handle should be such that, standing on a dais, you can work on the surface without much effort.
Sellers may advise you to buy rollers with a fur coat made of foam rubber, velor or plush, but they are not suitable for working with water-based paint. Foam rubber absorbs a lot of paint, which leads to overspending of paints and varnishes, the formation of streaks, small splashes and bubbles that remain after the coloring composition dries. Plush and velor rollers, on the contrary, absorb so little paint that they constantly have to be dipped into a ditch.
When painting the ceiling with water-based paint, it is better to choose rollers with a fur coat made of artificial or natural fur.Thanks to the pile, they will ensure uniform application and economical consumption of paintwork materials. Short fur does not absorb enough dye and may leave unpainted areas. A roller with a long pile absorbs a large amount of paint, becomes heavy and inconvenient to use. A tool with a medium pile will evenly paint over both smooth and textured surfaces.
When choosing a roller with a fleecy fur coat, you need to pay attention to the quality of the fur, the way it is fixed on the cylinder, the size of the working part:
 When painting the ceiling with water-based paint, it is better to choose rollers with a fur coat made of artificial or natural fur.
- Nozzles made of natural sheepskin are better and more durable than synthetic counterparts, but they are expensive. A fur coat made of artificial material will wear out faster, but such a roller can be replaced cheaper.
- When buying, you need to check the density of the pile and pull it in several places. If a piece of fur is left in your hands, you need to choose another tool, otherwise you will have to collect adhering hairs from the ceiling.
- In cheap models, the fur coat is glued to the cylinder. If you paint a large surface with such a roller, the fleecy coating will peel off from the base before the work is completed. Replaceable (sewn) fur coats can leave a seam mark on the ceiling. Therefore, builders-finishers recommend choosing hot-melt or metal-reinforced rollers.
- The area of the working surface of the roller depends on the diameter and length of the cylinder. Wide and thick nozzles can pick up a lot of dye at one time and cover a large area, but they become so massive that they are difficult to work with. Nozzles with a small diameter cylinder will often have to be dipped into a ditch, this will reduce the speed of finishing work. Therefore, a medium-sized tool is considered the best for painting the ceiling.
In addition to the roller, you need to buy a painting pan and a brush for painting the corners and the ceiling plinth.
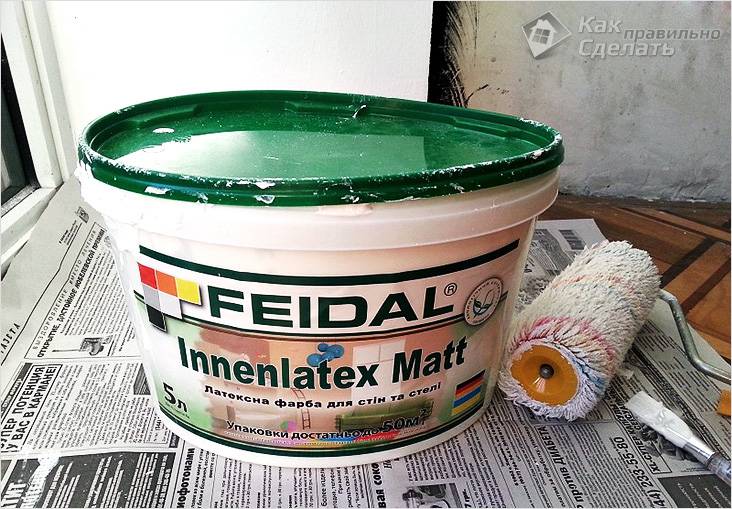
latex coating
When choosing a method, it is necessary to take into account the features of latex paint. Below we will consider its advantages and disadvantages.
Advantages

If we talk about the advantages of latex coating, then they are enough to give preference to this particular paintwork material:
- The washable cover allows dirt to be removed with a damp cloth. Surface resistance to abrasion is not the highest. If you have to wash the surface often, then it is better to choose a different composition.
- This coating creates a vapor barrier. The insulated plasterboard ceiling after covering it with latex does not need additional vapor barrier.
- Lack of smell during the work and after its completion.
- Dries quickly - from 20 minutes to 2 hours. It all depends on the thickness of the layer and the humidity in the room.
- The latex coating has good adhesion. It does not exfoliate even from polished metal, with its preliminary primer.
Flaws
There is still no man-made material in the world that does not have flaws. Therefore, it is not surprising that latex paint is also not without them:
- Under the influence of low temperatures, the coating may become cracked, as a result of which it begins to peel off. Therefore, it should not be used in rooms that are not heated or often ventilated in the winter season.
- Latex can become food for bacteria. Mold can form on the treated surface in a room with a high level of humidity. But this happens only in very damp rooms in which the surface has not been previously treated with an antiseptic. Therefore, this disadvantage can be said to be indirect.
Coating features

Water-dispersion acrylic paints, without exception, give a matte surface. Unlike them, the latex coating is also glossy. The texture of the surface after coating can be judged by the numbers on the packaging of the product. For example, Samtex20 is a latex-based silky-gloss finish, while Samtex3 is a matte finish.
If we talk about the features of a glossy latex surface, then they boil down to the following:
- Gloss is less dirty, it is easier to wash.
- The glossy surface emphasizes defects, while the matte surface hides them. Therefore, before gloss coating, the surface should be leveled.
- Gloss visually raises the ceiling due to the partial reflection of the space below it. An illusion of depth is created, which is very important in low rooms.
Preparatory processes
The preparatory processes boil down to the fact that all the exfoliated parts of the plaster and whitewash are cleaned off with a spatula.
If the entire surface or some part of it is affected by the fungus, then it must be treated with an antiseptic primer. And then treat it with a penetrating primer. Do this with a brush, because this way you can work out all the bumps.
Then putty the defects. Acrylic putty is best suited for these purposes. To make the ceiling as smooth as possible, use a wide spatula. After the putty dries, sand the irregularities. Re-prime the puttied surface areas.
Coloring
A roller with a long nap should be used. Layers should be applied perpendicular to each other, with the final coat facing away from the window. This is done in one go, otherwise bumps will be visible along the border of the dried areas. The roller should be rolled out on a paint tray or, in its absence, on a piece of cardboard.
Latex is an intermediate option between more resistant and expensive silicone and cheaper acrylic.
What's your choice
The very question of which roller to use already says that you have too many choices - materials, shapes, prices - you need to choose not only the best, but also the right one. Let's find out what we have:
- From sheepskin wool. Expensive, but high-quality roller. Definitely better than nylon or foam rubber and suitable for oil, acrylic, water-based paints.
- Velor. It is similar to the previous one both in characteristics and in price.
- Terry. Cheaper than sheepskin, but lays the paint evenly - you'll like it. Ideal for paints with synthetic resins.
- Painting. Such rollers are economical efforts. The paint is absorbed into their outer and inner parts, which allows you to dip the roller less often and work more. You first paint as usual, and then you press a little - and you have paint on the roller again. The efficiency is high, efforts are many times less, and more area is painted at a time. But if you press too hard, you will end up with more paint than you need. Sometimes this is a minus, especially at the end of the work.
- With a long pile. This is the so-called golden thread. An expensive thing due to the use of metal threads, but it holds a long pile in the right position. Painting turns out to be of high quality, although you need to carefully squeeze the tool when dipping it into the paint. If the price doesn't bother you, take this one.
- With decorative pattern. By appointment, a regular roller, but it can apply a certain pattern. It turns out beautifully, although there is only one drawing.
- Foam rubber. It is used for pipes and it paints the surface unevenly. Not suitable for ceilings.
The ideal roller has a long nap made of natural material. This is a universal rule that applies regardless of your goals. Of course, you can choose a foam roller, but it forms bubbles, and a short pile will take up little paint - more work.

You can hear about a wide variety of options and models, even automatic paint supply, but this is for walls and floors, and for ceilings there is nothing better than a regular cylindrical nozzle made of natural materials.
Learning to use a roller
After choosing the main tool, buy the rest of the inventory:
- a special plastic tray (trough, tray, cuvette) for working with a roller;
- wide paint brush;
- masking tape.
Painting the ceiling with a roller requires some skill. If you have never done such work before, practice on an unnecessary surface. Try your hand at a piece of drywall or on a section of wall that will later be covered with wallpaper.
 There is nothing difficult in painting with a roller, but if there is no experience at all, then a little training in an inconspicuous area will only be in favor
How to paint with a roller:
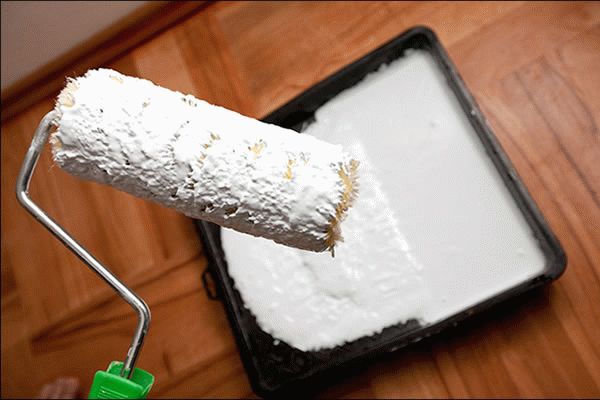
- Pour the paint into the tray.
- Dip a roller into it.
- Roll it over the ribbed side of the tray to squeeze out excess paint from the pile. If this is not done, smudges form on the ceiling. After a good rolling, the surface of the fur coat should be saturated with the emulsion evenly, without dry areas. Does the paint come off the roller on its own? Help her with a brush.
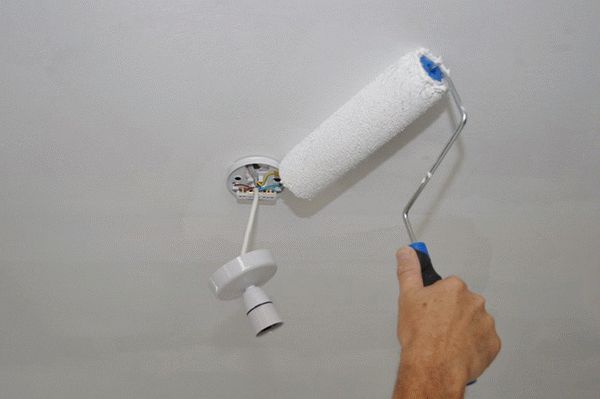
- Attach an extension to the tool or extend the telescopic handle.
- You can start painting. Press the roller against the surface and move it along back and forth, rubbing the emulsion so that smudges do not form.
 Painting the ceiling with a roller
Important! Wash tools thoroughly after painting work. Then it can be used again
If you leave the paint roller for at least a few hours, it will be hopelessly damaged.