How to drill a hole in metal
Metal products, in comparison with parts made of other materials, have increased hardness and strength, therefore, for successful work with them, it is necessary to follow the technological process and use high-quality cutting tools.
Metal drilling tools:
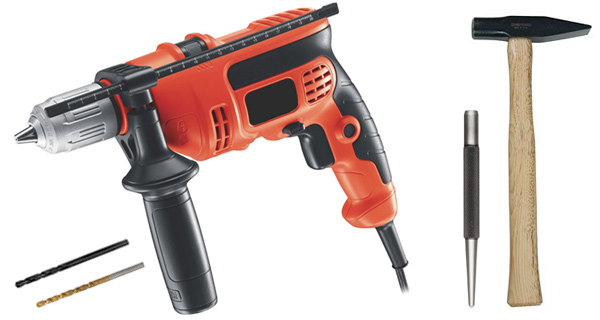
- Electric or hand drill;
- twist drill;
- Kerner;
- Hammer;
- Protective glasses.
Drills for metal are selected based on the diameters of the holes and the properties of the material being processed. As a rule, they are made of high-speed steels, such as R6M5K5, R6M5, R4M2. Carbide drills are used to work with cast iron, carbon and alloy hardened steels, stainless steel, and other difficult-to-cut materials.
The power of the electric drill must be designed to drill a hole of the required diameter. Power tool manufacturers indicate the relevant technical data on the product. For example, for drills with a power of 500 ... 700 W, the maximum drilling diameter for metal is 10 ... 13 mm.
There are blind, incomplete, and through holes. They can be used to connect parts to each other by means of bolts, studs, pins and rivets.
If the hole is drilled for the purpose of threading, special attention should be paid to the choice of drill diameter. Due to its beating in the cartridge, a breakdown of the hole occurs, which must be taken into account
Indicative data are presented in the table.
| Drill diameter | 5 | 10 | 15 | 20 |
|---|---|---|---|---|
| Hole breakdown | 0,08 | 0,12 | 0,20 | 0,28 |
| Result | 5,08 | 10,12 | 15,20 | 20,28 |
To reduce breakdown, drilling is performed in two stages: first with a smaller diameter drill, and then with the main one. The same method of sequential reaming is used when it is necessary to make a hole of a large diameter.
How to drill metal with a drill
After marking the workpiece, the center of the future hole should be punched. This will prevent the drill from moving away from the set point. For the convenience of work, the workpiece should be clamped in a bench vise or placed on a stand so that it takes a stable position. The drill is set strictly perpendicular to the surface to be drilled
This is important to avoid breakage.
When drilling metal, the drill does not need to exert much pressure. On the contrary, it should decrease as you go. This will prevent breakage of the drill and also reduce burr formation on the trailing edge of the through hole. Chip removal should be monitored. If the cutting tool jams, it is released by reverse rotation.
Cutting mode selection
When using a tool made of high speed steel, you can refer to the speed according to the data in the table. When working with carbide drills, the allowable values are 1.5 ... 2 times higher.
| Drill diameter, mm | up to 5 | 6…10 | 11…15 | 16…20 |
|---|---|---|---|---|
| Rotation frequency, rpm | 1300…2000 | 700…1300 | 400…700 | 300…400 |
Drilling of metal products must be carried out with cooling. If it is not used, there is a high probability that the tool will lose its cutting properties due to overheating. The cleanliness of the surface of the hole in this case will be quite low. An emulsion is usually used as a coolant for hard steels. At home, machine oil is suitable. Cast iron and non-ferrous metals can be drilled without coolant.
Features of deep hole drilling
Holes are considered deep if their size is greater than five drill diameters. The peculiarity of the work here lies in the difficulties associated with cooling and chip removal. The length of the cutting part of the tool must be greater than the depth of the hole.Otherwise, the body of the part will block the helical grooves, through which chips are removed, and liquid is also supplied for cooling and lubrication.
First, the hole is drilled with a rigid short drill to a shallow depth. This operation is necessary to set the direction and centering of the main tool. After that, a hole of the required length is made. As you progress, you need to remove metal shavings from time to time. For this purpose, use coolant, hooks, magnets, or turn the part over.
Drilling process step by step instructions
It is important to remember that tempered
glass or reinforced glass is best taken to the workshop. It is not recommended to carry out these works at home!
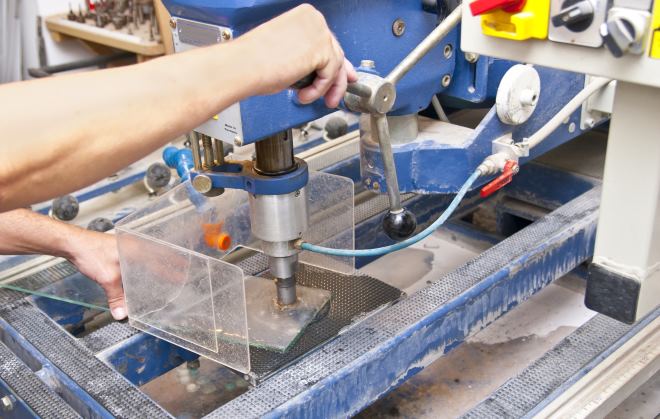
Both the diamond drill and the glass itself are afraid of overheating, so it is periodically necessary to cool the drilling site with water.
You don’t need to pour a lot, it’s enough that there is a puddle on the surface of the material that covers the future hole.
You can practice on a piece
glass you don't need. Put on protective gear before you start drilling. First of all, we prepare the material - we treat the surface with alcohol, acetone or turpentine. Let's dry well. put a mirror or
glass on a wooden flat surface. Choose a place, make a markup by drawing a square, pour a little turpentine - this procedure will help to avoid cracks.
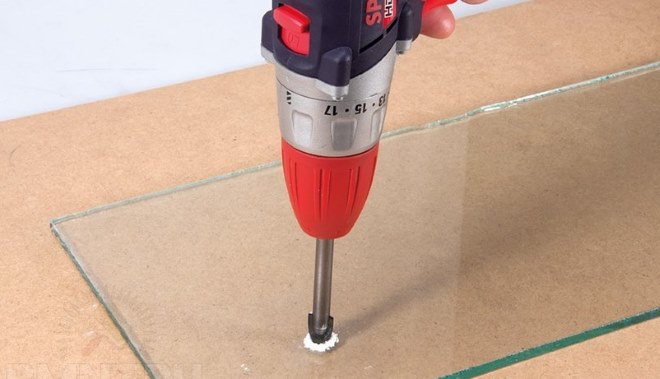
When working, do not press hard on the tool, keep medium speed, and lift the drill every few seconds so that the water moistens and cools the edges of the hole and the drill itself.
No pressure is allowed on the drill, let it seem to you that it is idling. When drilling, keep a pause of 5-10 seconds. At such times, cool the surface - pour enough water. It is a must to do this!
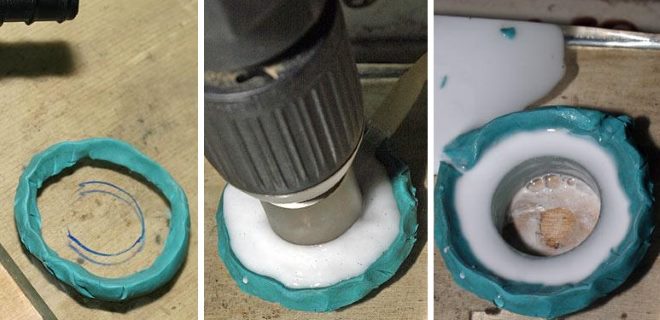
You can make a ring out of putty or plasticine, fix it around the hole and pour water.
For the literate
When drilling, hold the tool strictly vertically so that a right angle is formed. The drill will not slip if you take a piece of wood or plastic, make a hole in it and attach it to the surface. At the final stage, the mirror must be rotated and drilling completed on the other side - there will be no cracks.

The interval from the edge to the hole should be 2-2.5 cm.
Then sand the hole to prevent cuts. This description is also suitable for drilling ceramic tiles.

Almost everyone can drill a mirror at home, but there is a high probability that it will crack during operation.
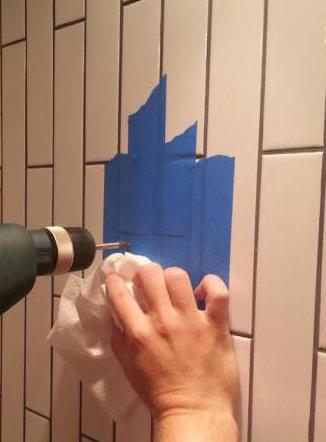
A drill should be held in one hand, and a heavily dampened rag in the other. Once the hole is drilled, wet the wall immediately.
It is clear from the instructions that
any man can drill a mirror or glass at home. But if you are not confident in yourself and doubts overcome you, then it is better to turn to specialists.
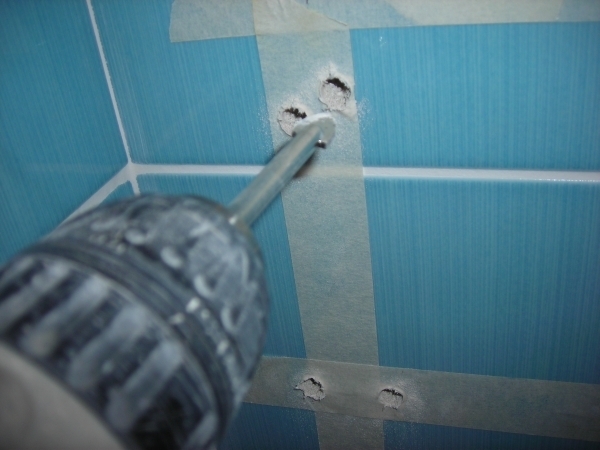
How to drill small holes for dowels
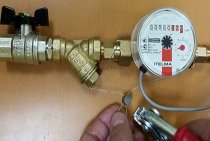
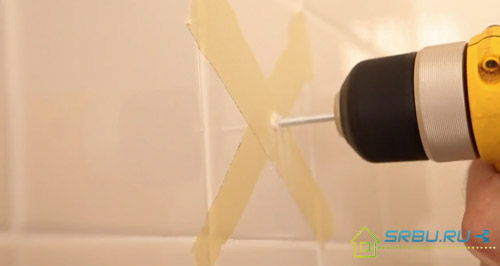
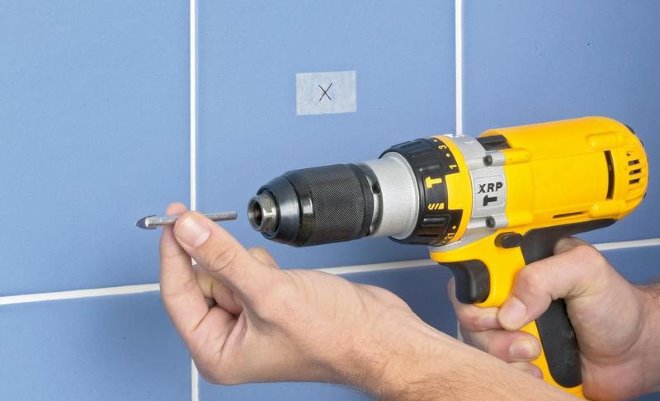
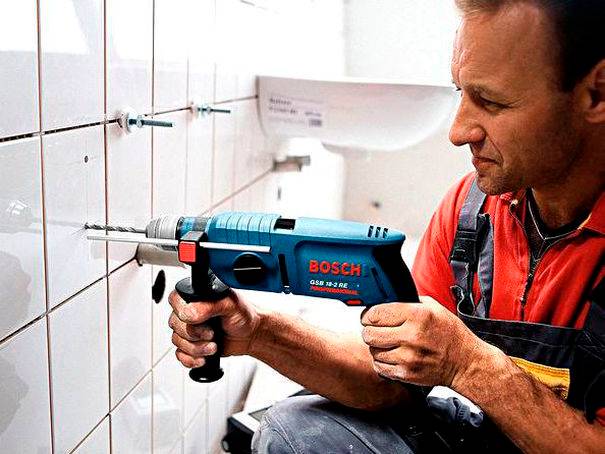
To hang a small shelf in the bathroom or kitchen, it is often necessary to make a hole in the tile glued to the wall. In order for the shelf to hold firmly, it is necessary to make a sufficiently deep hole that penetrates into the wall. A dowel made of nylon is then inserted there, into which a self-tapping screw is screwed.
As a rule, an electric drill is used for these purposes, and then the hole is finished with a puncher. The rotation speed of the drill should be low.
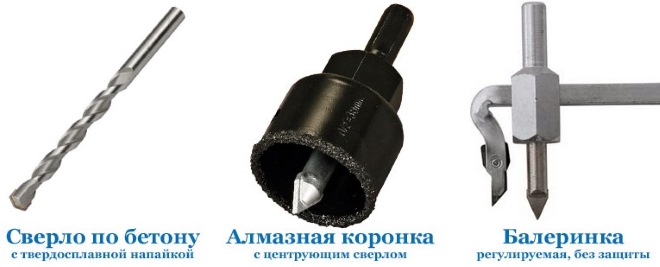
Which drill to choose for tiles
1. The diamond-coated tool showed itself best when drilling tiles. It is quite expensive and not everyone can afford it. And it makes no sense to buy it in order to make two or three holes. But a professional who often has to drill tiles often has several such drills of different diameters in his arsenal. In this case, they pay off quickly.
2.Spear bits with a Pobedite tip are specially designed for drilling ceramic tiles and reduce the risk of tile splitting. Due to the special sharpening, it has the shape of an arrow, which eliminates slipping at the beginning of work. Due to the sharp angle of the cutting edge, the area of contact surfaces is reduced. Because of this, you can work with a drill with less effort - which means that cracks on the tile are unlikely to appear.
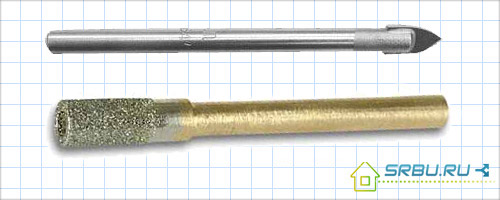 Spear-shaped drills, above with a pobedite tip, below with a diamond coating.
3. If absolutely nothing is at hand, take a concrete drill made of carbide. It must either be very well sharpened, or have a coating of pobedit
Just remember - you need to work with such a tool very carefully, since it is not intended for tiles, but has a completely different configuration
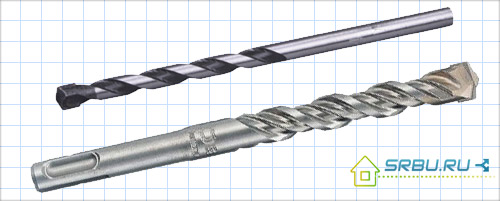 Drill and drill for concrete.
We drill tiles according to the rules
Before you start drilling tiles, with a marker that stands out well on its front surface, we make marks in the right places. Keep in mind that the drill, while it has not yet penetrated into the tile, usually tries to insidiously slip along its smooth surface. To prevent this, glue a piece of plaster or paper tape at the drilling site.
At the very beginning, when you have to drill the surface of the tile, set the speed of the drill to a minimum. As soon as the drill goes deep enough into the tile, you can add speed. However, it is not necessary to be very zealous in this case - you should work slowly and carefully. Remember that a strict ban should be imposed on the impact mode of a drill or hammer. Otherwise, you will have to sadly collect fragments of tiles.
If you have to drill part of the wall to fix the dowel, we work in two stages. First, drill through the tile with the appropriate tool. Then we turn off the drill to replace the drill with one that is more suitable for the concrete surface. Here, the shock mode of a drill or a puncher will not hurt either - otherwise hard concrete cannot be pierced.
Dowel drilling
Holes for dowels will need to be drilled, most likely on an already mounted coating. Such work is performed if necessary to hang a shelf, a mirror, hooks for towels, a lamp and other accessories.
For a dowel, a number of features should be considered. Ceramic tiles are usually quite slippery. The cutter may move because of this. This will spoil the coating, and the result of the work will be unsatisfactory.
To prevent this from happening, masking tape is glued to the tile. This will make the job easier.
It must also be remembered that a concrete drill is not suitable for tiles. So that it does not crack, it is necessary to use only special tools. There are recommendations for such work.
In order for drills for ceramic tiles and glass to perform their task in the best possible way, it is necessary to listen to the advice of specialists in the construction and repair business in their work.
At least 15 mm must be retreated from the edge of the tile so that it does not split. Before starting work, the tiles can be soaked in water for an hour. This will also prevent chips and cracks from forming. It is allowed to simply moisten the drilling site with water.
The safest place to create holes in an already installed coating are tile joints. If possible, dowels should be installed here. Although such a choice of drilling location is not always possible. Therefore, when carrying out work, you should always adhere to a low speed of the drill, and also do not press hard on the surface.
With the wrong approach to drilling, the coating can be damaged. It happens that when cracking tiles, you have to change several elements of the coating.
After reviewing the recommendations on what should be a drill for ceramic tiles, it will not be difficult to choose the necessary equipment. By correctly performing all the actions, even at home and with the installed coating, even a non-professional can make the necessary holes in the tile. When performing work, one should take into account the recommendations of professionals on the technology of its implementation.
There is a mass of communications that require channels. In addition, these rooms cannot do without hanging furniture, lamps, shelves, mirrors. The kitchen most likely has one or more outlets. There's nothing you can do if you don't want to pay the master, you'll have to learn how to drill ceramic tiles on your own.
What to consider when drilling ceramics
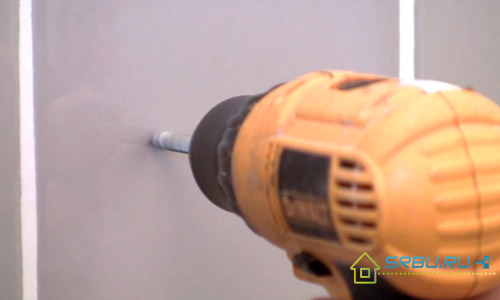
If you need to perform drilling work on tiles, you should choose the right model of an electric drill. Those models that can work at low speeds and in which there is no or can be turned off the shock drilling mode are suitable. Thus, in order to drill a hole in a ceramic tile with high quality, the following devices are optimally suited:
- electric drills that can operate at the minimum rotation speed of the cutting tool;
- cordless screwdrivers, the maximum chuck rotation speed of which does not exceed 800–1000 rpm;
- low-speed screwdrivers operating from the central electrical network.
The main types of tile drills
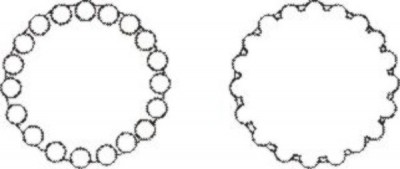
A tile or ceramic tile drill differs in its design from a tool used to drill any other material. Tile processing with a special drill is carried out due to the friction forces created by the abrasive material deposited on the working surface of the tool. The working part of the drill for ceramics or any other similar materials may have an arrow-shaped or crown configuration. In such situations, a tool with an adjustable processing diameter is also often used, which is colloquially called a ballerina.
- It is necessary to constantly monitor the temperature of the drill and the ceramic tiles being processed, as their overheating can lead to tool failure and cracks on the surface of the product. To prevent overheating, the processing area and the drill should be periodically watered with water.
- The pressure exerted on the drill while working on ceramics should not be too weak (in this case, it will not be possible to drill through the tile) and too strong (this may lead to breakage of the workpiece).
- The drill should rotate slowly and only clockwise, the reverse mode cannot be used, as this can lead to cracking of the tile.
- In the event that it is necessary to drill not in the tile itself, but in the gap between two adjacent products, the drill should be located strictly in the middle of the tile joint. Holes should be drilled very carefully if they are located in close proximity to such a seam. In this case, the drill can easily slip into the seam, and it will not be possible to get a hole in the required place. It should also be borne in mind that along the edges of the tile, the thickness of the protective layer applied to it is minimal (or not at all), therefore, when drilling in such places, pieces of material may break off from the tile.
Masking tape pasted before marking will help make the hole more accurate
Very often you can find advice on pre-drilling the surface of the tile in the place where you need to drill a hole. The design of modern drills used for tile work is designed in such a way that there is no need to perform this procedure, which can easily lead to breakage of the product.
How to fasten a beam
In order to work with the timber easily and without problems, the best solution would be to buy a twist drill. Its design is such that it enters the tree with the effect of a self-tapping screw, without the need to put pressure on the drill. The price of such a drill is higher than that of a feather drill, but the quality of the hole is worth the cost. The edges are not torn, there is no axial deviation, the diameter is strictly the same throughout the depth. The length of the drill should exceed the thickness of the timber by at least one and a half times. This will make it possible to drill 1 beam through, and the second half. Be sure to follow a simple rule: the holes for the dowels should be 2-3 cm larger than the dowels themselves. Due to this, when the wood dries out, there will be a margin in height, and the timber will not hang.
A drill for drilling holes for dowels must be powerful enough. Experience shows that when using a 25 mm twist drill with holes in pine timber, an 800 watt drill can easily cope. True, I mean a low-speed drill. The fact is that power is proportional to the number of revolutions and torque, which means that the more one, the less the other. When drilling large holes, torque is much more important than speed. Therefore, a low-speed drill is more suitable for such work.
In this regard, when choosing a drill, you should pay attention to its reduction gear. It is advisable to use a tool that has several speeds.
At the first speed, the torque will be maximum.
How to drill a hole? There are several technologies. You can do them when trying on a beam, after all plumb lines, levels, and dimensions have been checked. After that, the beam is removed. Batting, jute or other similar material is laid. It frees up space above the holes in advance. The beam is laid in place and dowels are inserted into it. They are allowed to be knocked out, but the impact force should be small. Otherwise, either the dowel will break, or it will not correspond to the diameter of the hole made. Too tightly clogged dowel will prevent the beam from shrinking when it dries out.
Some use a different sequence. The beam is laid immediately on the batting, leveled, and then drilled. This allows you not to remove it once again from the wall. But this method also has its drawbacks. The quality of batting, linen and jute sold in stores varies. Often they contain long fibers, which, once under the drill, begin to collect the batting and wind it around the drill. This entails a number of problems. The drill heats up, loses its technological properties, so turning it out even with the use of reverse is not so easy. The drill for drilling the beam under the dowels is overloaded and may fail. Not to mention the fact that in this case you still have to remove the beam in order to restore the batting layer.
Technologies are different, often they have to be changed due to the characteristics of the materials used. But it is necessary to follow 2 rules in any case: the diameter of the dowel and the holes for it must match each other, and the drill must be slow and powerful.
Drilling tiles for a socket or pipe
How to drill tiles, what tools can be used for this?
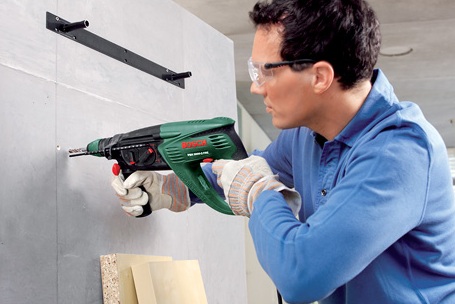
Drilling with a hammer drill with a diamond-coated bit
The cost of diamond-coated crowns depends directly on their quality, but it is still expensive.
- Before drilling a tile, it must be laid on a flat, not very hard surface (wooden can be).
- On the front side of the tile, mark the place for drilling.
- Using a puncher, drill a hole of the desired size.
This method is the fastest and safest.
Drilling with a drill with a diamond crown
How to drill a tile?
You need to do the following:
- Mark the location for the hole.
- Drill the drill from the front side of the tile, without applying too much pressure on the drill.
- If the diamond-coated crown is in good condition, a hole of the required diameter can be made in two to five minutes.
Drilling tiles with a drill
Drilling with a circular drill for tiles - "ballerina"
How to drill a tile if you need to drill a hole of a non-standard size?
- Set the desired hole diameter (for example, if it is 5 cm, then the distance between the drills must be set to 2.5 cm, respectively).
- Mark the drilling site.
- Start drilling tiles.
Tip: in the process of drilling with a drill, you can’t swing, you can use a special tripod for a drill.
Drilling with a drill with a drill bit fitted with a diamond tip
This method can be used when it is not possible to purchase a crown.
How to drill tiles?
- On the front side of the tile, mark the diameter of the desired hole. If it is a switch or socket, then you can take a box of a certain size, attach it to the tile and circle it with a pencil. If the hole is for a water pipe, then you can use a compass.
- Drill the drill around the entire contour of the hole so that the edge protrudes beyond the intended line by 1-2 mm at least (up to 20 holes 4-6 mm in diameter).
- Carefully knock out the core.
- The teeth that remain must be broken out with wire cutters or pliers.
- Sand the cut surface.
This method is the longest and requires a lot of patience and skill.
Contour drilling
Drilling with a tungsten core drill with a center drill
This method is suitable when the tiles have already been laid.
- So that the crown does not slip or move during the drilling process, it is advisable to use a special template with the desired hole diameter.
- Attach the template to the wall.
- Press with a drill with a crown and make a hole.
Drilling ceramic tiles is a rather difficult task for many, because they do not know how and with what to drill tiles.
Most often, you have to drill a tile already laid on a wall or floor, so you have to be careful not to damage the entire masonry. The main thing is to select the right drill, which is best suited for the intended purpose.
When the walls in the bathroom and in the toilet shine with brand new tiles, it's a pleasure to look at them. But after all, the repair is not finished yet - you need to hang the shelves and fix the mirror. But not everyone knows how to drill ceramic tiles correctly in order to prevent accidental chips. Alas, it is very easy to damage fragile ceramics, and then an excellent repair will go down the drain. In order not to puzzle over where to get a tile to replace a damaged one, you need to know how to work with it. Read more about it.
Suitable nozzles
Drill
When working with tiles, it’s not even the power tool itself that matters, but the drills you use. For ceramics, special drills with diamond or corundum coating are produced. Some masters allow the use of a pobedit drill, but the strength of its tip is not enough to make holes quickly. However, when it comes to just a couple of sockets for dowels, it makes no sense to overpay for professional diamond consumables.
The shape of drills for ceramics is varied enough to make it possible to find a suitable nozzle:
Spear-shaped
They look like a triangular wedge with two or four divergent blades. For the preparation of landing sockets for dowels with a diameter of 4-12 mm, they are quite enough, moreover, this is one of the few types of drills that can cope with ceramics even with victorious tips. The "spears" are relatively inexpensive, they do not slip over the glaze, but they work well only at low speeds and still get dull quickly. However, their low price quite reconciles with this.
Tubular
They are hollow tubes of different diameters (from 5 to 75 mm) with continuous coating along the cutting edge. It is easier and more convenient to work with them - due to the large contact area, such drills evenly enter the thickness of the tile and do not leave chips. However, for each hole you will have to purchase a separate nozzle of the right size, and the coating on them is erased quite quickly. When using tubular drills, the rotational speed should not exceed 500 rpm - they are expensive, and due to the burning of grains with excessive heat, they can soon become unusable.
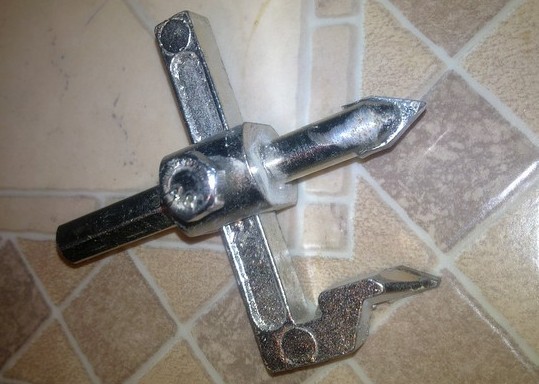
Circular (ballerinas)
Universal drills that can make holes of different diameters from 30 to 90 mm in diameter. They have a central wedge-shaped spear and a length-adjustable stem, on which an additional blade is located. The disadvantage of the ballerina is that she literally begins to dance on the tile, trying to snatch the drill out of her hands - it will take considerable experience to drill a hole with it without breaking the tile. In addition, the blade knocks out rather large fragments, leaving far from ideal edges.
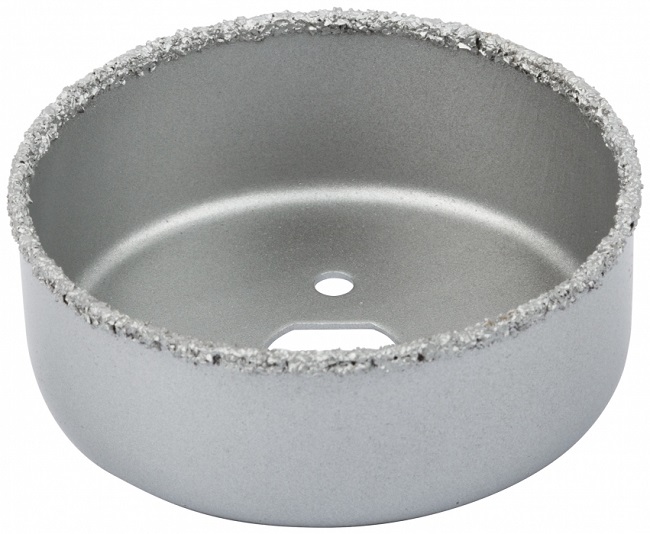
Crowns
They are used to get a hole of the correct shape and large diameter up to 160 mm on the tile (for example, for a socket, switch or communications outlet). These are wide cups, similar to tubular drills, all with the same corundum or diamond coating on the edge and a centering tip in the middle.
Working with crowns requires special accuracy and the correct installation of the cutting edge - strictly in the same plane with the tile. But first, the central bit is drilled into the thickness of the tile. This allows you to create a rigid axis of rotation of the cup and set it parallel to the surface of the cladding.
At the end of the work, the round plate of the tile is removed from the wall along with the crown. If it sits tightly on the solution, you can pry it with a screwdriver or knock it out with a chisel, trying not to damage the rest of the finish.
cutters
To cut a hole in a non-standard size, square or rectangular shape in a tile, it is easier to use a manual engraver by installing a disk cutter on it. Cut-off wheels of small diameter from 18 to 50 mm with a diamond non-segmented edge will do.
Drills for ceramic tiles
Special drills are used to work with ceramics. They are fundamentally different from those used for drilling concrete, wood, and metal. The principle of action on the tile is different - the drill is rubbing through the abrasives. Having increased strength, drills are able to drill a resistant tile plane.
Drills can be divided into a number of groups.
- Tile drills - a key purpose: making holes in the clay coating. Crowns of this type are suitable for holes from 12 - 80 mm.
- A crown with a diamond coating is an expensive mechanism, which at the same time has an impeccable performance. If you need to make 2 holes in the tile, it makes no sense to purchase it. These tools belong to a number of professional ones, used by repair specialists. Using "diamond" drills, you can make any flawless hole without any effort.
- Carbide drills - used for drilling holes up to 12 mm. A distinctive characteristic is the method of sharpening the drill. It is made on one side at an acute angle. Ideal for ceramics, since it is the sharp corner that eliminates slipping and “clings” to the smooth and unyielding surface of the tile.
- Spear-shaped drills are victorious - they have a long period of operation. They are used when drilling holes for dowels, for hangers and other little things. The cost of the tool is democratic, so it is possible to do a quality job without any special financial costs.
- Ballerina is a drill specialized for drilling holes with a diameter of up to 90 mm. The circular drill has two disks: centering and parallel.The moving parts of the ballerina are bolted. Cutting takes place with the help of special solderings, which are equipped with the cutting parts of the discs. There is no better toolkit for working with specific holes.
You can choose a drill, guided by the following table.
| Drill name | Application |
|---|---|
| Tiled | Holes with a diameter of 12 mm - 80 mm |
| Diamond crown | Holes of large diameters, up to 160 mm |
| Carbide drills | Holes up to 12 mm in diameter |
| Spear drills (victory) | Small holes for hangers and dowels |
| ballerina | Holes up to 90 mm diameter |