simple case
The toilet is unfolded or transferred to a small distance, about a dozen or two centimeters.
Dismantling the toilet is highly dependent on the installation method.
If the toilet was mounted on standard fasteners, and its outlet is connected to the sewer with a standard rubber cuff, everything is simple:
- Unscrew the screws securing the toilet to the floor;
- Pulling the toilet toward you strictly along the axis of the socket of the sewer pipe, pull out the toilet outlet from it.
In this case, it is not even necessary to shut off the water to the tank.
If the toilet is planted on glue or cement, and its outlet is smeared with the same cement in a cast-iron pipe, you will have to tinker:
Armed with a strong screwdriver or a narrow chisel, carefully remove the putty from the space between the sewer socket and the toilet outlet. Be very careful: an unsuccessful move - and you have to go for a new toilet
http://kanalizaciyadoma.ru/wp-content/uploads/etu-zamazku-nam-predstoit-akkuratno-udalit-ne-raskolov-vypusk.jpg
We have to carefully remove this putty, without splitting the issue.
When the release is released, we will need to loosen the toilet on the floor
A wide chisel is carefully, with little effort, driven in turn from different sides under the base of the toilet bowl. Sooner or later it will sway, announcing that the deed is done
Then, again, we feed the toilet towards ourselves, pulling out its outlet from the sewer socket strictly along its axis. If it gets stuck, don't pull harder, but rock the toilet slightly from side to side. Of course, before that it is better to turn off the water on the tank and drain the water.
Since the distance to the sewerage and water pipes will be small, we will not need to alter the sewer system or build up the water pipe.
If the old flexible eyeliner is in good condition, we will not touch it. If it leaks or has insufficient length - just change it to an analogue. The operation is simple and, I think, does not require a separate description.
We will connect the toilet with the sewer with a corrugation. This corrugated pipe, in general, has rubber seals on both sides; but it's a good idea to stock up on sewer pipe silicone sealant.
In addition, you will need a set of fasteners for the toilet.
Important: fasteners must be equipped with plastic washers. Steel screws must not be pressed directly against the faience
This is what the whole set will look like.
- Clean the toilet outlet and drain socket of debris and wipe dry.
- Mark new holes in the floor for the toilet mounts and drill them. If there is a tile on top, first pass it with a drill through a tile of a slightly larger diameter.
- Put the corrugation on the toilet outlet, after applying the sealant.
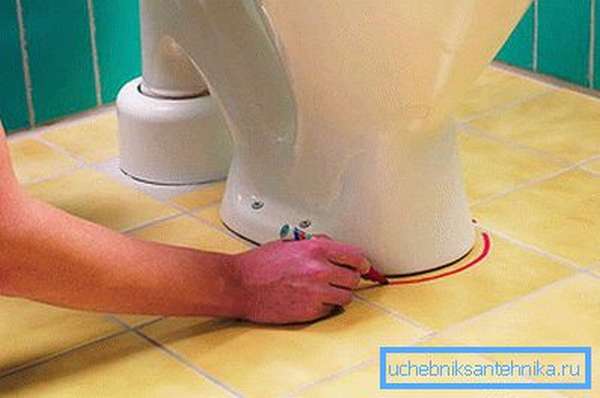
- Pull the toilet to the floor. He needs to stop staggering, nothing more. Cover the gaps between the base and the tile with cement mortar - this will prevent the lateral force from splitting the base of the toilet bowl, creating additional support for it.
- Insert the corrugation into the socket - again on the sealant.
- Enjoy.
As you can see, the result is quite satisfactory. Only the seat is slanted
Article tags:
Transferring the toilet from the center of the toilet room to the corner where the riser is located
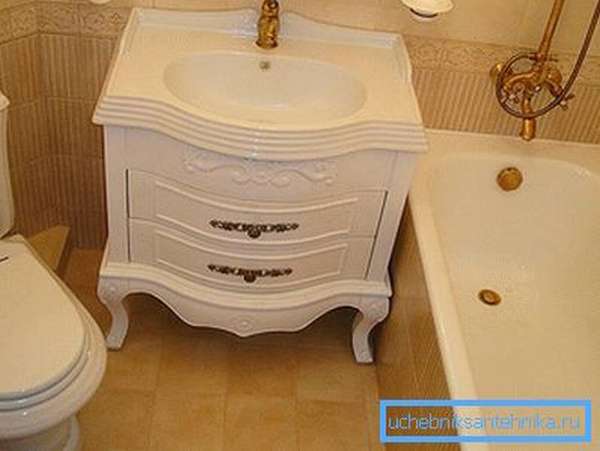
In most standard apartments of high-rise buildings built back in the days of the Soviet Union, the location of the bathrooms was not convenient enough. For example, installing a washing machine in a small room is almost impossible. The solution to this problem is to move the toilet slightly, moving it at an angle of 45 ° to the riser located in the corner of the room.

Types of toilet connection: in the wall, in the floor and with an oblique outlet.
Thinking about such a rearrangement, the first important decision will be the mandatory replacement, which has already served for a considerable number of years. now it’s not difficult, since there are a huge number of them in various plumbing stores and in various price categories. They differ not only in cost, but also in quality, shape and color, that is, the goods are presented for every taste.
Despite the fact that the back wall of the toilet will be installed in the corner of the room (close to the riser), you should not buy a model that has a corner drain tank, which seems to be specially designed for installing the toilet in the corner of the toilet room. It is worth abandoning such models because the outlet of this toilet bowl in the combined bathroom rests against the wall and it will be impossible to make a suitable connection to it in this case.
To move the toilet bowl to a new location, it is better to pay attention to compact options of medium size, the width of the tank in which is 35-38 cm. Moreover, the width and length of the toilet bowl will not depend on the size of the tank, so everyone has the right to choose it, guided only by their own wishes and dimensions of the room
How to carry and deploy the toilet in a combined bathroom?
First of all, you need to purchase some materials. For the reconstruction of the bathroom with your own hands you will need:
- 2 elbows made of 90° PVC, Ø 110 mm.
- 1 45° WC bend with outlet seal.
- A piece of a fan pipe with a socket, the diameter of which is 110 mm. It can be used as an extension of the transitional knee to move the toilet as close as possible to the corner of the room.
In parallel with this, it is necessary to resolve the question of what to do after transferring the toilet with the floor that will remain in place of the former? This place will stand out on a tiled floor. The best option, but by no means the most economical, would be to combine the work of moving the toilet bowl with a general repair of the bathroom.
Assembly and installation work
Collect all the elements indicated in the list for the subsequent installation of this design. In order to fit it in size, experts advise removing the rubber seals not only from the corner bends, but also from the sockets. It is necessary to try to ensure that the ends of the knee exactly coincide with the release of the toilet bowl, which is installed in a new place. Do the same with the connection to the fan pipe. This can be achieved by pushing in and out of the connecting elements. As a result of such actions, it will be possible to choose the correct length of the straight section.
After the fitting work is over, it will be necessary to mark the connection lines on the bends with a felt-tip pen or a simple pencil. In this way, it will be much easier to assemble a structure fitted in advance to the existing dimensions. After that, disassemble the knee and coat the rubber cuffs included in the joints with silicone grease. After that, you should install them in their original place and reassemble the outlet structure. Now attach its outlet to the outlet of the toilet bowl, and connect its opposite end to the fan pipe, which is located in the riser structure.
After these actions, it remains only to adjust the tap in height. Make sure that this design slopes evenly from the toilet to the riser at an angle of more than 2 °. Then, through the holes in the toilet pedestal, use a marker or pen to mark the points where your new toilet will be fixed. Next, install the drain tank. At the same time, be sure to check if it creates an emphasis on the wall. Then drill holes in the marks on the floor, insert dowels into them, with which the toilet will be fixed in place. This completes the relocation work. It remains only to bring all the plumbing into the room allotted for it.
Transferring the toilet in more complex cases
If the toilet is installed near a dilapidated place, then it will be easier to connect the water with a flexible connection. Reworking the drain system will come in handy if, at the end of the toilet movement, it is found out that the length of the corrugation is shallow. In some cases, it is necessary to make a tie-in into the sewer riser, especially at a time when the input must be made lower.
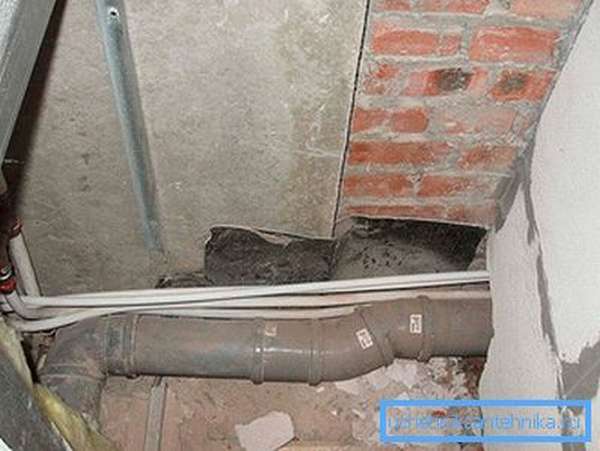
For the installation of a new sewer system, a 110 mm plastic pipe is useful
When assembling the system, it is fundamentally important to think about what specific fittings and corners can come in handy, and how many of them will be needed.
Clamps will help fasten the sewer pipe. In other cases, the sewer is simply mounted directly on the floor, in the corner between it and the wall. Under such conditions, it will most likely be necessary to remove the outlet to the toilet from the tee to lower the sewer almost to the floor mark.
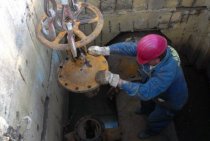
If the riser pipe is made of cast iron, it is necessary to warm it up with a burner or a blowtorch so that it is possible to remove the dilapidated pipe. It goes without saying that such troubles would not have happened with plastic, but alas, in dilapidated multi-storey buildings, the risers are mostly made of cast iron.
When heating cast iron, you need to take care of a new sealant - a dilapidated cable will burn out at the end of such a procedure. At the end of the warm-up, it is possible to remove the pipe from the socket. A fitting is used to insert a plastic tube into a cast iron tube. For more reliable fixation, its edge, which will be inserted into cast iron, is smeared with sealant. sealant is no less meticulously applied to the cast-iron pipe.
Advice! When installing the sewer, it is necessary to observe a slope to the riser from the toilet bowl of 1–2 cm per 1 m.
Before you insert a new pipe into the socket, you need to do one unpleasant job - if there is dirt, it must be removed. A burner will help with this. You need to be prepared for the fact that there will be an unpleasant smell. Indeed, it's worth it - at the end of such cleaning, the sewer will not clog for a long time. After making sure that there is ventilation for ventilation, and a respiratory protection device is prepared - a respirator, it is possible to start cleaning.
To make it easier to fit a plastic pipe to the outlet, you need a fitting that will provide a chance to connect to the toilet. At the end of the connection, it is possible to supply water to the tank and try to flush the toilet. It is possible to close the sewer pipe with a neat drywall box.
If everything works fine, it means that the installation went as it should, and the one who installed the toilet bowl exactly applied all the recommendations from this article.
What should be the sewer pipeline
Optimal characteristics of fittings connected to the toilet:
- The length of the pipe - from the toilet to the riser - is not more than 1500 millimeters. A longer fitting will provoke the formation of a cork from the sewage being washed off. The drain tank simply does not have enough power to push all the fecal drains through such a pipe. Part of the sewage will settle on the inner wall of the pipe, causing a congestion that grows after each drain. In addition, when effluents move along an excessively long pipe, rarefaction areas appear in it. As a result, water from the hydraulic siphon valves associated with such a pipe goes into the sewer, opening the way for the stench accumulated in the septic tanks.
- Pipe diameter - 50-100 millimeters. Moreover, the larger the diameter, the less the risk of congestion or rarefaction. Therefore, it is 100 mm pipes that are connected to most toilets.
Pipe slope - 20-30 millimeters per linear meter. That is, taking into account the maximum length - 1.5 meters, the slope of the pipe connecting the toilet bowl and the riser should be 30-45 millimeters. Simply put: the toilet drain pipe will have to be raised 30-45 millimeters above the point where the pipe enters the riser. Otherwise, a congestion from sewage is guaranteed to appear in the pipes.
What should be the minimum slope of the sewer pipe - canalizator-pro.ru/uklon-kanalizacionnoj-truby-optimalnye-znacheniya.html
The above parameters guarantee the drainage of wastewater by gravity. Therefore, when arranging a toilet bowl in a new place, you will have to focus only on these dimensions.
How to move a toilet from a riser
- Take a 1.5-meter piece of rope or twine.Tie one end to a sewer riser and attach a pencil or piece of chalk to the other. Outline an arc on the floor indicating the zone of the maximum possible distance of the toilet bowl from the riser.
- Choose in the outlined area the most convenient, from your point of view, place for placing the toilet. And you'd better not go out of your way. Otherwise, you will get problems with the patency of fecal effluents and the operation of hydraulic valves.
-
Install the toilet in the chosen place. Measure the height from the floor to the center of the drain pipe and compare this parameter with the height of the tie-in point of the sewer pipe into the riser. The toilet pipe should be located above the tie-in. The optimal height difference is 30 millimeters. If the toilet is installed lower, build a podium that raises the drain pipe above the tie-in point (riser tee).
- When you have completed the preparation, fix the toilet to the floor or on the podium and install the fittings connecting the drain pipe to the riser tee. At the same time, remember about the inadmissibility of using 90-degree corners - it is better to replace them with bends with less sharp internal corners.
In addition, in addition to arranging the sewer water supply, you will have to deal with connecting the tank to the water supply. However, this problem can be solved much easier by using one and a half meter hoses that are connected to the building tie-in point in the water supply and the cistern fitting of the new toilet bowl.
Alternative Solution
What if the best place to place the toilet is more than 1500 millimeters away from the riser? Or does a 100mm faecal drainage pipe get in the way of your washroom or en-suite bathroom? In this case, you will have to purchase a special installation that provides forced removal of fecal effluents - a sololift.
The fecal pump is mounted behind the toilet bowl, and some models are placed directly in the tank. The main task of the sololift is to crush solid inclusions and pump the resulting suspension to the riser.
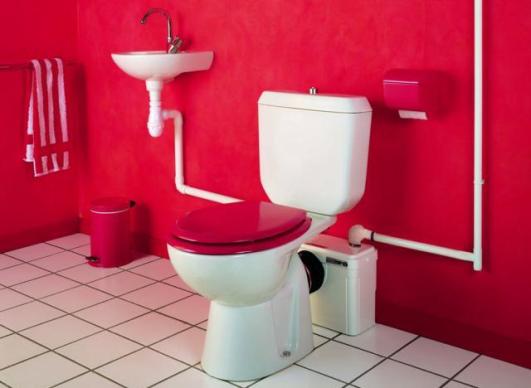
Installed fecal pump behind the toilet
In this case, you can ignore all restrictions on the length and diameter of the pipes connecting the toilet and the riser. The first parameter - length - is limited not to one and a half, but to 100 meters. Well, the diameter of the pipe connected to the sololift can be equal to 18 millimeters.
As a result, owners of toilet bowls with fecal pumps can mount their purchases literally anywhere, regardless of the distance to the riser. And the pipe for pumping sewage can simply be walled up in a floor screed 30-40 millimeters thick, clearing the interior for more aesthetically attractive designs.
Installing a toilet in a new location
Replacing the flexible piping is not necessary if the system is working well. If you still need to change it, then this is done quite simply. First you need a sealant for sewer pipes to get a better mount. Connect the toilet to the riser with a corrugation. The advantage of such corrugated pipes are rubber seals located on both sides. Then we fix the toilet bowl to the floor, optimally on the screws. If the floor is not very level, it is possible to make a small layer of adhesive-cement screed.
Advice! When installing the toilet bowl on the screws, you should never press them without plastic washers, otherwise the base of the toilet bowl may be damaged.
Here are a few tips to help you install the right way:
- The socket of the pipe to which the toilet outlet will be connected must be clean and dry.
- To install the toilet with screws, you need to drill holes in the floor for new fasteners; on a tiled floor, you need to drill holes with a larger drill.
A pre-purchased sealant is applied to the floor, after which a toilet is installed.In order to correctly make holes and spread silicone where necessary, a toilet bowl is applied to a dry floor, the contour of its base is outlined and the holes are marked. After that, holes for the screws are drilled along these marks, and silicone is applied along the contour. After that, it is possible to install a toilet bowl, after the installation of which a corrugation is put on its outlet. Putting the toilet in a new place, you need to make sure that it is stable.