Stages of decoration
Before starting decoupage of the battery, it is necessary to prepare its surface.
First, thoroughly flush the radiator. It is especially worth the effort when cleaning sections of cast-iron batteries.
Secondly, you should sand the radiator with coarse sandpaper to smooth out all existing bumps and remove old paint.
And thirdly, paint the battery with heat-resistant light enamel. It is not recommended to use nitro paint, because. it puffs up when heated.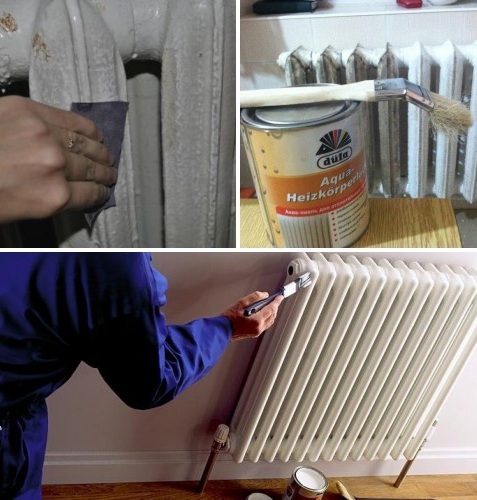
Then, when the paint is completely dry, you can proceed directly to decoupage.
drawing
You can first draw a sketch on paper, this will make it easier for you to work later.
Prepare pieces of decoupage paper. You need to do this as follows: you take the picture you like and cut off the edges of the paper so that you only have a fragment in your hands that you will stick on.
This is done not only for better adhesion of pieces of paper to each other, but also to mask the boundaries of decoupage fragments. The transitions are almost imperceptible, and one pattern can smoothly transition into another.
You should first try on the prepared fragments on the sections themselves.
For decoupage of radiators, PVA glue is used, diluted with water in a ratio of 1: 1. It adheres well to various types of materials and is convenient to use. Special glue is sold in creative stores, but it is not economically viable to use it for decoupage on batteries.
We apply a piece of napkin to the radiator fin, apply glue from above to the center of the picture. With smoothing movements of the brush, we distribute the PVA over the entire surface evenly from the center to the edge.
If desired, you can draw some details with acrylic paint, glue voluminous plastic decorations.
And finally, let's reveal a few secrets. Do not apply many layers of napkins on top of each other without intermediate drying, a thick layer of paper may warp.
If you have failed any part, and you notice it after drying, do not be discouraged. Just paint over this part with white paint, let it dry, and then glue the new fragment on top.
If in general the result suits you, but there are sharp transitions between the fragments, paint them with paint to match with light tapping movements of the end brush or with a sponge.
Battery decoupage will last much longer if you fix it with interior varnish.
Particularly annoying are the cast-iron "harmonicas", reminiscent of the times of the Soviet Union. Old batteries heat well, but do not differ in proper aesthetics. There are many ways to disguise radiators protruding from the wall, most of which are quite economical and original.
-
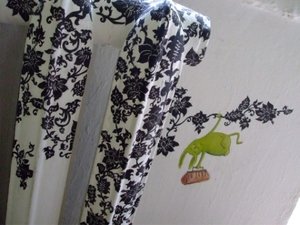
Fabric cover for radiator. With a little work and spending a certain amount of dense fabric, pieces of fur, leather, accessories, you can sew an interesting case that will hide the radiator underneath and serve as additional protection for little fidgets.
Fabric cover for radiator
-
Screens made of wood, glass and metal. Similar products of various shapes and colors are available in a wide range of stores, but if you are leaning towards this option, learn that even through a thick frosted glass an old battery will be visible, and the wooden lining on the radiators will completely become similar to “patches”. Metal screens are more aesthetic, but you should take care to combine the shade of the wall behind the radiator with the color of the metal, so as not to attract attention with contrasting surfaces.
- False walls and niches from plasterboard. Drywall constructions are not difficult to make.Accordingly, you can hide heating pipelines behind a neat false wall with your own hands. However, it is not worth completely covering the entire battery with panels, because this will lead to heat loss and a decrease in the useful area of \u200b\u200bthe room.
-
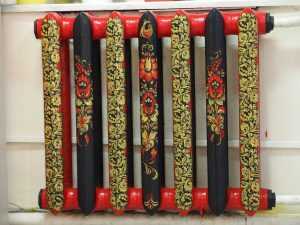
Do-it-yourself stickers and decoupage of heating batteries. This method is creative and does not require large financial costs. Applying a beautiful pattern, turning the radiator into a decorative element, is very simple. But it will take preparation and a responsible approach to the quality of materials for work.
Do-it-yourself decoupage heating batteries with napkins photo, video

Cast iron batteries are the eternal enemy of the aesthetic appearance of living rooms. They can be hidden in the summer behind furniture and blackout curtains, but in the winter they have to be opened. How to give the radiators an attractive look with your own hands using decoupage with napkins, it will be interesting for every needlewoman to know.
Color and pattern selection
You can apply decor on radiators with your own hands in different ways, but the simplest and does not require serious costs and special skills is decoupage with napkins.
It takes a little time to complete such a technique, but the result will certainly please.
The main thing is to choose the right pattern and color scheme, as well as do the work carefully, and it will be completely unnoticeable that the battery is decorated with simple napkins.
When choosing napkins, you should take into account the color scheme and the general style of the room where you plan to decoupage the radiators.
It is also necessary to decide on the purpose of decoupage: to disguise the batteries and make them invisible or vice versa to focus on them. You can choose napkins with an ornament that will be combined with the pattern of the main wallpaper
This option will help to make the radiators one with the overall decor. It is recommended to perform it in small rooms with low ceilings.
You can choose napkins with an ornament that will be combined with the pattern of the main wallpaper. This option will help to make the radiators one with the overall decor. It is recommended to perform it in small rooms with low ceilings.
It is advisable to pre-prepare a sketch by sketching the desired composition on paper, which will greatly facilitate the workflow in the decoupage process.
An example of battery decoration is shown in the photo:
Materials and tools
To enjoy a continuous creative process and not be distracted by the search for the right materials, it is better to prepare for work in advance. To decorate radiators with napkins, you will need the following:
- PVA glue;
- multilayer napkins;
- degreaser;
- white enamel;
- heat-resistant varnish;
- a sheet of sandpaper;
- brush;
- scissors.
Instead of napkins, you can use rice paper.
The decoupage process
Despite the fact that decorating heating batteries with napkins is not a complicated process, in order to obtain the desired result, it is necessary to adhere to a certain order of work.
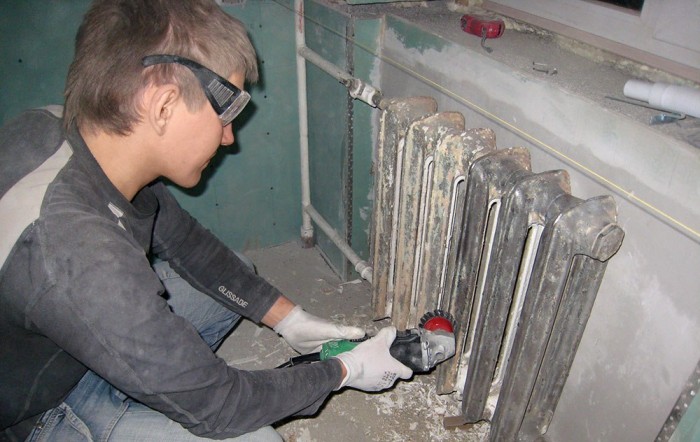
Surface preparation of radiators
First of all, it is necessary to thoroughly wash the battery with detergents. It should be noted that there are many hard-to-reach places on the radiators, so it is recommended to use a brush with a long handle or a brush to remove all dirt as much as possible. Then let the surface dry or wipe dry with a cloth.
Next, you should give the surface perfect smoothness. To do this, you need to take sandpaper and clean out all the bulges and bumps, as well as remove pieces of peeling paint. It is better to use coarse grit sandpaper to eliminate deep irregularities, and then sand the surface with fine grit sandpaper. After that, rinse the battery again.
The final stage of surface preparation is the application of heat-resistant white or light tones of enamel.The paint must dry completely, for this it must be left for a day.
Important! Do not use nitro paint, as it will swell when heated
Decoupage application
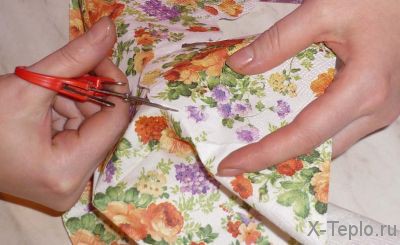
After the surface of the battery is ready, it is necessary to prepare fragments of the pattern for decoupage. There are several drawing methods. For example, you can cut strips of napkins with patterns. To do this, first measure the width of the radiator fin and line the napkin into strips of the appropriate size, then cut it out.
You can do it differently: take a napkin with a pattern and cut off the edges so that only a fragment of the pattern remains. This method will mask the edges of the transition when composing the composition, and will also provide more reliable adhesion of the fragments to each other.
Next, you should try on the drawing on the battery and evaluate how it corresponds to the drawn up sketch.
Currently, there is a huge range of adhesive compositions for decoupage of various surfaces, but in order to save money, it is better to use PVC glue, especially since its properties are in no way inferior to other means. PVC adhesive should be diluted with water in proportions of 1:1.
If some fragments did not turn out the way we would like, then you should not be upset. An unsuccessfully glued napkin can be painted over with white enamel, wait until it dries, and try again.
Ideas for decoupage can be viewed on the video:
Decoupage battery or old new life
You made repairs in the apartment, but decided to leave the old heating system. After all, cast iron or other metal heating appliances are time-tested and heat your home well. But the radiators somehow do not fit into the general modern interior. What to do?
You can purchase decorative frames for radiators, which abound in stores. And you can decorate your old battery and do it yourself, that is, decoupage an old thing and thereby give it a second life and decorate your home at the same time. And most importantly - it does not take much time and money. It will also help you unleash your creativity.
Conditions for getting started
Each owner of an apartment or house sees in advance what kind of decoration of the house needs to be done for the design of his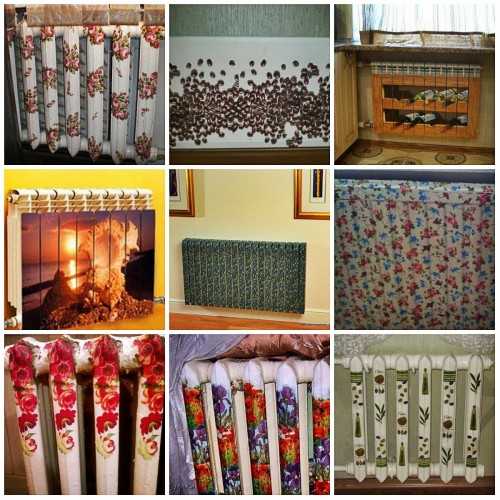 dwelling and roughly imagine what will be in the final version and what kind of decoupage he needs. Therefore, the main thing is to see an updated version of your battery, which should fully fit into the overall interior of this room and thus decorate it. You can see photos and videos that are located on the Internet, then find a suitable decoupage option and start working with your own hands. Thus, for finishing you need only three things:
- Wish.
- Old battery.
- Update option.
Decoupage options
In fact, there are many options for decorating your old heaters, but the most common, reliable and proven ones are:
- Wrapping old batteries.
- Drawing on radiators.
- Applying stucco.
Consider each decoupage separately.
pasting
You have decided that your decoupage is sticking pictures on your batteries with your own hands that will harmoniously fit into the interior. And found pictures for decoration. These can be napkins, stickers, favorite images from magazines, stickers on rice paper. When the pictures you need and suitable for pasting are found, you need to prepare:
- Sandpaper.
- PVA glue.
- White enamel paint.
- Brushes for gluing and painting.
- Actually pictures.
- Heat-resistant colorless varnish.
First you need to thoroughly rinse the heating device. In cast iron radiators, even hard-to-reach places must be washed. Then carefully sand the battery to achieve a smooth surface without roughness and notches.
After that, we apply heat-resistant white (you can use a different color - according to your taste) paint with a brush.Let her dry for a day. After that, we proceed to the most creative process - we begin to decorate the battery with our own hands. If the choice fell on colored napkins, then: 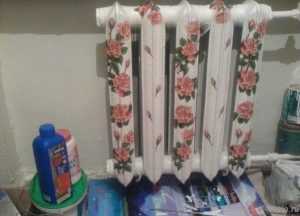
Everything, your new-old batteries are decorated and decorate the design of the house, as in the photo and video.
Painting
 For finishing in the form of drawing drawings, you need:
- Acrylic paints
- Brushes.
Same technology:
You can do the decor of heating radiators in the form of drawings with your own hands or use special stencils (see photo) for applying flowers, butterflies, patterns. Choose the color of paint to match the color of your room. For a detailed acquaintance with the application of drawings to decorate the heater, you can watch the video. And to choose a pattern - look at the photo.
stucco work
Stucco as a decor is often used for wall design. If you have such an option, then do-it-yourself stucco molding on batteries will look harmonious in your interior. It fits well on the metal, quickly sticks and looks original.
Decoration method 1
Decorating radiators is not such a difficult task, and soon you will see it. The first method is the most common staining. You don't have to paint your radiators white. Indeed, today you can find paints of a wide variety of shades and colors on the market.
Places that do not need to be painted should be sealed with masking tape. If the radiator has not been painted, then it must be treated with an alkyd base primer with pigment.
Decorating radiators with staining is almost an old method. And earlier, a mitten was used for this, such a device helped to do such work efficiently and without unnecessary smudges and layers. The paint also mixed well.
Let's talk a little about this method: the mitten itself is made of fur - a piece of it is taken, folded in half, sewn together to make a bag. Now the mitten needs to be put on the hand - but first a rubber glove is put on so as not to smear the hand. Next, you can paint the batteries with a mitten - the paint falls evenly and in a thin layer.
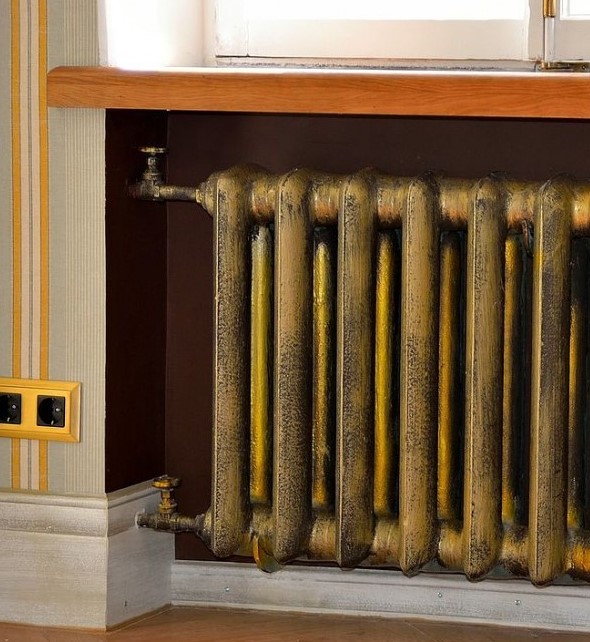
Black and red colors are taken, mixed, the resulting bronze color is applied with gauze to those places that are marked. So, we get a heating radiator that looks like a piece of jewelry. And such decoration of heating radiators can be additionally decorated with drawings.
How to make decoupage on batteries

- Decoupage technique: acquaintance
- Preparatory stage
- Decoupage instructions
- Conclusion
The appearance of heating radiators, albeit modern ones, does not suit everyone. Someone wants to make bright and beautiful radiators, others dream of disguising them so that they are not conspicuous. It is possible to completely get rid of radiators, but it is too expensive, hiding them behind decorative screens is impractical and will also cost a pretty penny. Creative people who can draw can solve the problem cheaply and cheerfully by coloring the battery as they like. And what about ordinary homeowners? There is an option for them too - to decoupage the battery with their own hands, and this article will tell how this is done.
Decoupage technique: acquaintance
Not everyone can create a beautiful drawing with patterns. The decoupage technique allows anyone to perform not only a remarkable design of heating radiators, but also any other interior items, whose appearance leaves much to be desired. Although, as always, in the first place are the old cast-iron batteries, which cannot be replaced for various reasons.
By the way, the flat surface of modern aluminum and bimetallic radiators is very attractive for applying not only patterns, but also whole pictures on them.
If you translate the word "decoupage" literally from French, you get "imitation of painting."This imitation is made by gluing finished drawings on the surface or applying paints through stencils. The option when stickers are made on the battery is the most accessible and popular. For this, drawings, patterns or ornaments made on:
- special napkins for decoupage;
- thin rice paper;
- regular paper napkins for serving.
All these materials have one thing in common: the base on which the drawing is made is very thin and, after gluing to the surface, the borders of paper and paint applied to the battery are practically invisible.
Given the height of the heaters, it will be difficult to choose a napkin with a pattern of this size, unless we are talking about a solid picture pasted on a flat surface of aluminum radiators.
Therefore, to decoupage a cast-iron battery, you will need napkins or rice paper with a repeating small pattern, which can be easily combined after cutting. Another way is to take paper with a large pattern that fits the width of one section of the radiator.
Preparatory stage
To make the decor of the heating battery made by yourself look attractive, you must first create a decent background. In simple words, the radiator must be repainted if the coating is old and has lost its appearance.
At the same time, it is not necessary to paint the places where the pattern will be glued, the main thing is that then the old background paint does not spoil your entire work.
By the way, it is far from always necessary to paint the radiator white, the background color can be selected depending on the selected pattern.
Drawings on the radiator
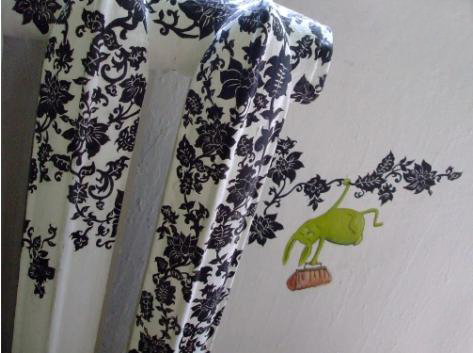
Posobnost to drawing open up great opportunities in decoupage. You can realize any creative idea, create images of any subject on the battery. Luxurious roses or modest daisies can bloom on the radiator sections, ladybugs, butterflies, birds or reptiles can “settle”, ethnic ornaments, ornate patterns or futuristic symbols will appear. It all depends on personal preferences and fantasies.
The work uses acrylic paints.
They are durable, resistant to external influences, dry quickly. These paints differ in density and purpose, so when buying them, you should make sure that they are suitable for the job. indoors.
The beauty of the applied pattern will last for many years. Additional varnishing is not required.
On the radiator, you can create and voluminous decorations.
Masters who have skills in modeling and have creative abilities should use them to decoupage the battery. Sections can create stucco elements
Renaissance or ancient times, use floral, plant, animalistic motifs. In the children's room, heroes of fairy tales and cartoons can become excellent decorations.
This type of decoupage uses self-hardening mass.
It easily takes any shape, is perfectly attached to metal, and has high heat resistance. Finished jewelry will dry quickly. They can be painted with acrylic paints to give the necessary brightness, and then coated with a double layer.heat resistant varnish.
Manufacturing materials
It is quite possible to make products with your own hands using various types of materials. The characteristics of the material determine its technical features.
For example, metal shutters can be painted in any color. They perform their protective functions perfectly and look great.
Using the perforation technique, you can create an unusual and interesting effect. The steel and aluminum model is very easy to install. The product made of wood looks very impressive in any interior.
For those who want to create a similar decoration element with their own hands, it is better to use the available materials:
It is an inexpensive material with low thermal conductivity. It heats up unevenly and has little strength.Working with plastic is quite difficult. Plastic should be thick, as thin material has low strength.
May release toxic substances when heated. Products made from such raw materials are light in weight, resistant to moisture, not subject to corrosion and do not heat up much.
When choosing a material for a decorative product, one should remember not only the attractive appearance, but also the microclimate in the room. Therefore, it is necessary to select a damper with a minimum surface and leave a small space from the floor for air movement.
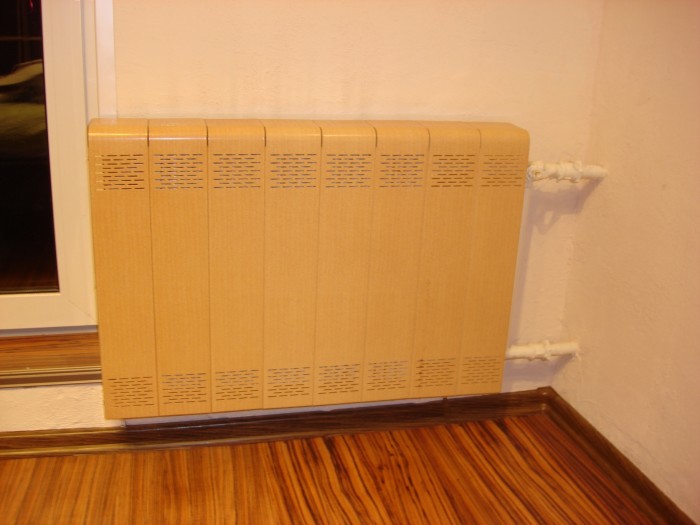
Wooden products can be painted in any color and decorated with artistic painting. Four types of crates can be made from wood. For example, rhombus, circles, cage and in the form of blinds. The interior with wooden elements looks very aesthetically pleasing and goes well with other materials.
The best types of wood for such products are beech and oak. They are durable and reliable. They can be both tinted and painted with enamel. So that the gratings do not interfere with the circulation of heat, they are not mounted on the floor, but at some distance above its surface. For better passage of warm air, certain holes are made in the upper part of the box.
Fences at an affordable price can be made of rack fabric. This is an excellent stylish element that perfectly passes warm air and performs a protective function.
Metal has a high thermal conductivity, but you need to be able to work with it. This is an excellent material for a homemade design. Two types of products can be made from it: stamped and by welding.
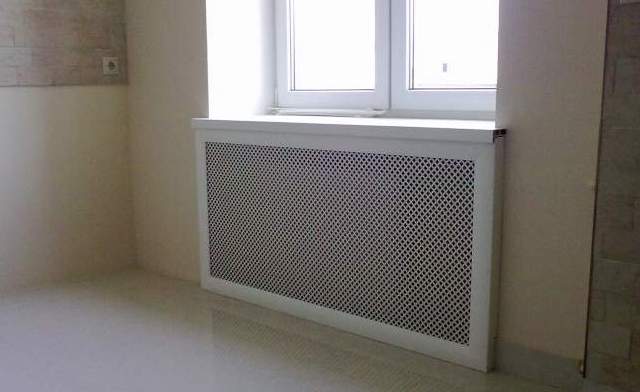
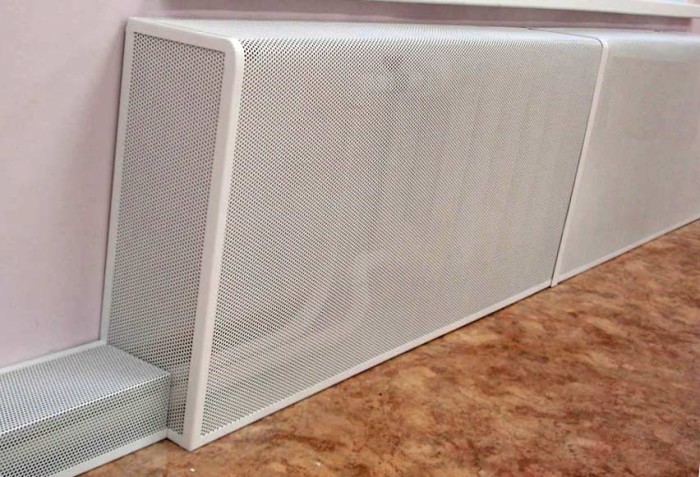
Stainless steel dampers look more elegant and beautiful. They can cover both part of the battery and the entire radiator. They are divided into 3 types: with two sidewalls, with one and without sidewalls. The choice of option depends on how the heating device is connected.
The metal element does not interfere with high-quality heat transfer. The box, made of aluminum or steel mesh, perfectly transmits heat. These products are very easy to install. They are decorated with various designs. For example, an openwork lattice or a solid canvas with open space.
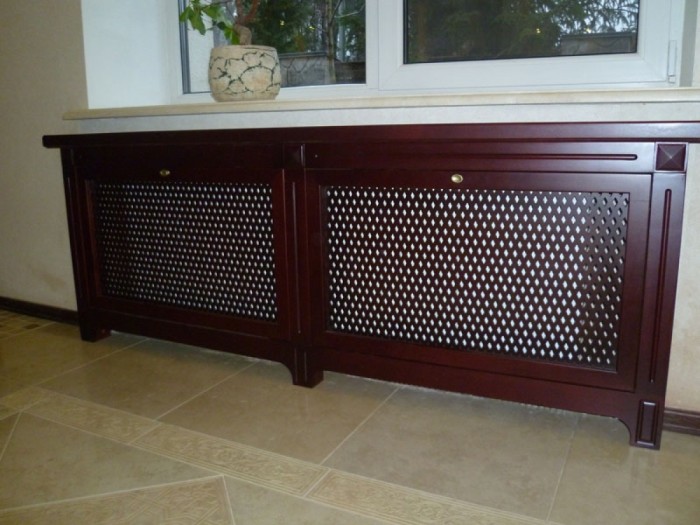
MDF panels provide a wide variety for decoration.
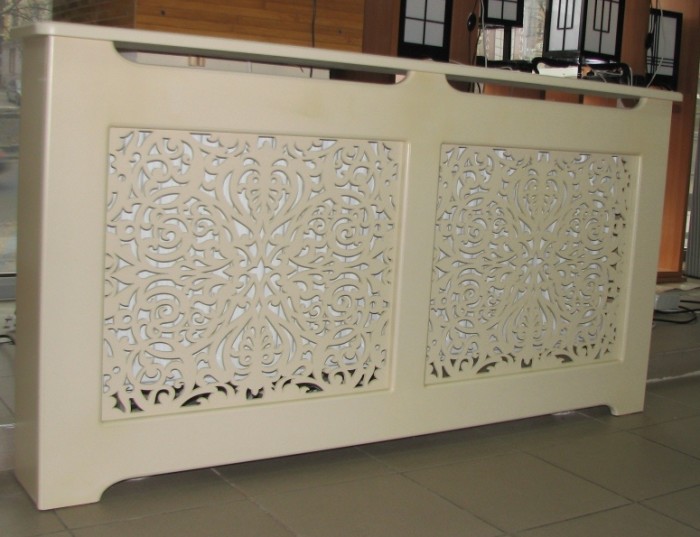
They are created from perforated parts equipped with a decorative frame. These models are suitable for different heating systems. They can decorate both cast-iron and bimetallic radiators.
This material can be used to make exclusive railings for radiators. Glass in this case can be stained glass and tempered. A certain pattern is applied to the surface. Such design elements are made of particularly durable raw materials with a wall thickness of at least 8 mm. They are almost impossible to break.
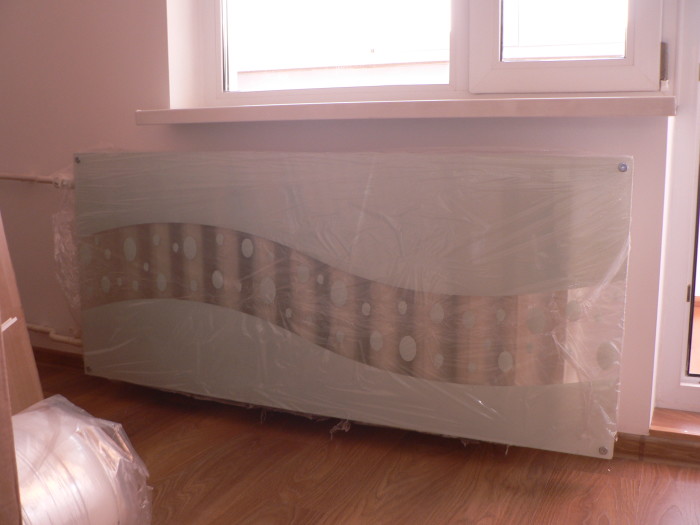
The edges of the product are carefully polished, which makes them safe and endows with great strength. A special substance is applied to the surface of the glass, which has protective properties and allows you to use ordinary detergent in the future.
Glass perfectly transmits the sun's rays and does not reduce convection. And if necessary, dismantling work is carried out very easily and quickly.
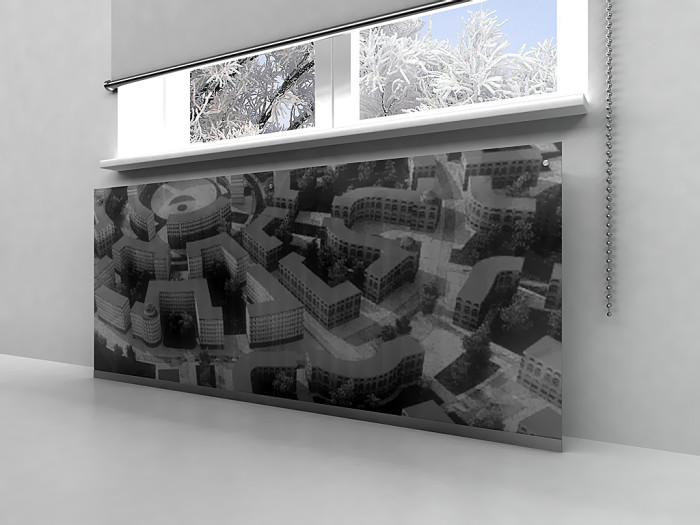
There is another type of glass - acrylic. Acrylic glass has a variety of colors and can be easily transformed. Screens can be matte, transparent and plain. LED lighting can be attached to them.
How to do it yourself
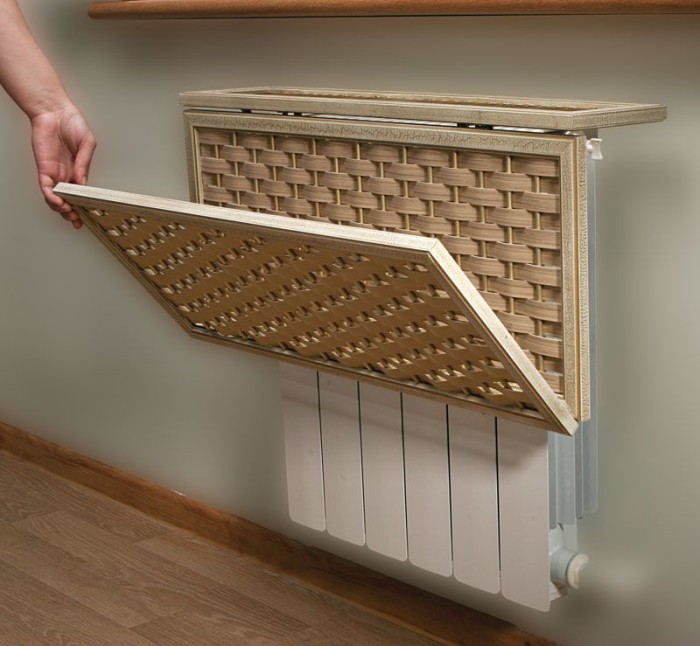
First you need to decide on the desired design. If the heater is located in a niche, then you will have to make a screen in the form of a flat grate. It will be enough to choose a decorative panel according to the size of the niche and install it in it.
In most houses, the batteries are suspended under the windows on the wall. You have to choose between a hinged and attached box.
First you need to make a frame of wooden blocks.In width, it will be 8-10 cm wider than the battery (4-5 cm on each side). The height for the mounted version is the same 8-10 cm more, and for the attached screen, you will have to add 5 cm to the distance from the floor to the top of the battery. A gap of a couple of centimeters is also required between the radiator plane and the screen grille. All these indents are necessary for the free circulation of the air heated by the heater.
Based on these dimensions, the frame of the box is made. To form its side walls, you can use plywood, chipboard or board. The front side can be made of MDF sheet with holes in the form of any pattern or glass.
If you plan to use the top of the box as a shelf, then it is made from a solid board. Otherwise, you should choose the option with holes for the exit of heated air.
To fasten the parts of the box and strengthen the entire structure, metal corners and self-tapping screws are well suited. Then the front panel is nailed or screwed to the frame. To improve the view around its perimeter, a frame of small slats is stuffed.
If necessary, the sides are pasted over with self-adhesive wallpaper in the color of the front panel. And the slats and all wooden parts can be stained. It is better not to use oil paints and varnishes.
To attach the hinged screen, you will have to drill a couple of holes above the battery for dowels with hooks. And the attached analogue is simply moved to the wall.
This information should be enough to understand how to make a screen on the battery with your own hands. Further depends only on the presence of minimal skills in working with wood and the desire to do something on their own with their own hands. If you turn on your imagination, you can create a truly unique decorative screen on the radiator.
We do battery decoupage. Master Class
Take general measurements of the unit and each section separately. Cut out the part of the required size. During this procedure, try not to mix the elements. Otherwise, it will be difficult for you to select a pattern later.
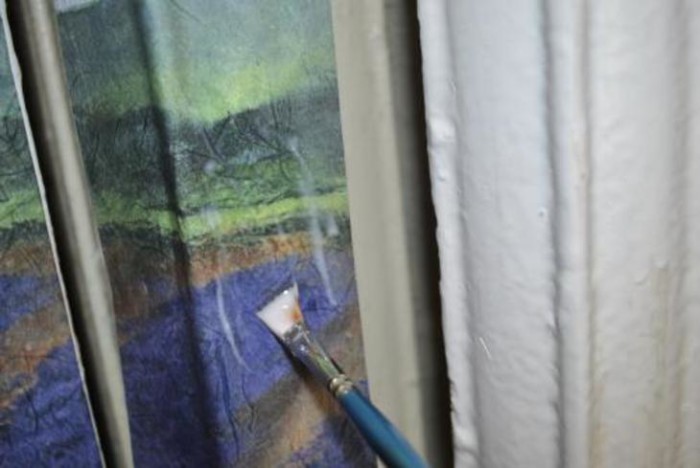
Dilute PVA glue with water 1: 1. Attach one part of the paper blank to the section of the heater and attach it. How to do it? Dip the brush in the glue mass and apply it with strokes on rice paper. Move from the middle of the section to the edges, carefully expelling excess air and smoothing out the folds. Thus decorate the entire surface of the battery.
The next stage of work is the finishing of details. Rice paper for the most part comes in a standard size - 34x100 centimeters. And if you glue all the elements exactly in the middle of the device, then unformed areas will remain above and below. To give the product a finished look, they will have to be decorated with acrylic paints.
Those masters who have artistic inclinations can choose the right colors and shades and finish the continuation of the composition, which is made on rice paper. If this option is unacceptable for you, we suggest simply painting the battery in a color that matches the coloring of the decoupage material. Well, best of all, when preparing materials for work, buy two identical sets of rice paper or look for larger rolls.