General recommendations
- When choosing any paint, be prudent:
- specify the composition and purpose (what can be used to paint a potbelly stove in a carpentry workshop may be unacceptable for an iron bath or home brick oven);
- find out the availability of certificates (unfortunately, there are dubious products on the market made from ingredients that have not been tested for safety. Certificates largely remove this issue and inspire confidence in the manufacturer);
- do not forget to use the product correctly - prepare the base (clean it from dust, grease, debris) and apply the required number of layers.
Caution and rationality in finding solutions will help you achieve your goal without harm to health, beautifully paint your stove or fireplace, protect them from damage from the outside.
Factors that negatively affect the paint
The main problem that arises when choosing a coating is the high surface temperature. Therefore, the standard options for solving this issue are not suitable. Ordinary paints will not withstand use on metal heated to three hundred degrees, they will simply peel off or burn out. But this is not the only thing to think about when choosing a composition. There are other conditions, namely:
- Any metal tends to expand as it heats up. The material for furnaces is selected in such a way that this indicator is minimal, but it is still impossible to reduce it to zero. Therefore, there is a considerable risk of paint cracking during use.
- In the bath during its operation for its intended purpose, a considerable amount of steam is generated. High humidity causes the coating to peel off, so this factor must be taken into account when choosing the type of paint.
How to paint a brick oven in a house video instruction for painting with your own hands and a photo
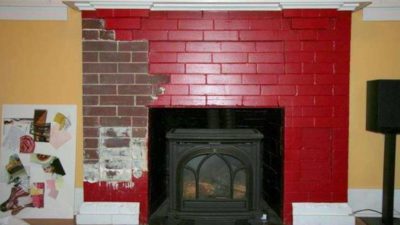
Many are interested in how to paint a brick oven in the house, because the old and tarnished masonry does not always harmoniously fit into the interior of a kitchen or room.
We will tell you how to paint a brick oven and how best to do it yourself.
How to paint a brick oven - there are several options.
Peculiarities
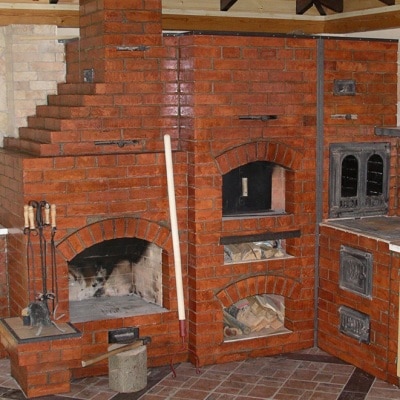
The photo shows what the painted oven looks like.
The operation of furnace equipment takes place in the mode of elevated and extreme temperatures, and this imposes a number of specific requirements on finishing materials:
- The coating should consist of refractory non-combustible components that retain their properties at high temperatures;
- Finishing must tolerate significant temperature changes, because the difference between the heated and cold surface of the furnace can be very significant;
- The material from which the stove is built undergoes noticeable thermal expansion during its operation, therefore the finishing coating must be elastic enough to level these changes in the geometry of the structure;
- The surface of the coating must radiate heat well. It is known that radiation in the infrared frequency range most actively occurs with a dark color, moreover, dull and rough surfaces give off heat better;
- The composition of the paint or varnish should not contain components that, when heated, will release harmful compounds and toxins into the atmosphere. Solvents contained in heat-resistant enamels must quickly and completely evaporate, and paints must be prepared on the basis of water or non-toxic solvents;
- Coatings for metal parts must withstand high temperatures - from 600 degrees and above.
A special mode of operation imposes specific requirements.
Important! The purpose of the finish is different.If walls and facades need to be protected from moisture, solar radiation and biological corrosion, then the stove coating is applied for decorative purposes and for the convenience of cleaning the surface from dust and ash
If walls and facades need to be protected from moisture, solar radiation and biological corrosion, then the stove coating is applied for decorative purposes and for the convenience of cleaning the surface from dust and ash.
Applying varnish to the stove
Choose a heat-resistant varnish.
For those who want to open their stove with varnish, we have compiled a step-by-step instruction:
- Before painting a brick oven, it must be prepared: cleaned of dust and dirt, puttied cracks and chips, repaired flaws. To do this, you can mix brick flour with egg white and milk and apply to the surface of a warm oven with a brush in places where the surface is damaged;
We clean and repair the surface of the furnace.
- After the repair compounds have dried, open the jar of varnish and mix its contents well. If the material is too thick, dilute it with solvent 646 or turpentine to the desired density (like paint);
Open and mix the varnish, if necessary - dilute with a solvent.
- We apply varnish with a brush with a hard bristle. The first layer should fill all the pores and irregularities, after it dries, we apply the second layer, which will level the surface, and then complete the process by applying the finishing third layer;
Gently apply varnish to the surface in three layers.
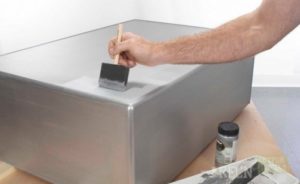
- We paint metal parts from a can with refractory paint or enamel. Products must be thoroughly washed and degreased with alcohol or solvent prior to coating.
We paint metal parts.
Important! Before applying the paint, the borders of the surface should be edged with masking tape so that later you do not clean off the stains from everything that is around the area to be painted.
Why paint
The main task of paint is to protect the surface from rust. No matter how high-quality the material from which the stove was made in the bath, the consequences of negative influences can appear over time. The hot water tank is most at risk of rust, and due to the fact that it forms from the inside, it is quite difficult to avoid this.
The second reason why the sauna stove is to be painted is the aesthetic component. An object made entirely of metal is difficult to harmoniously fit into the overall picture of the room. Some finished products are sold already painted, otherwise you need to do it yourself.
Coloring instructions
Having learned how to paint the stove in the bath, you can purchase paint and prepare the stove for painting.
Tools and materials
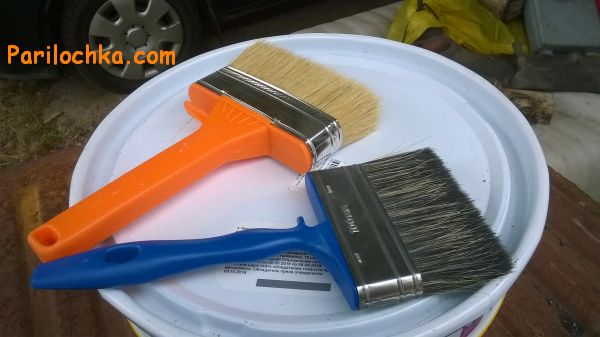
To do the work yourself you will need:
- paint, preferably in aerosol cans;
- if liquid paint is used in cans, you will need to purchase a roller and brush;
- sandpaper to remove a layer of rust;
- metal brush;
- when cleaning large areas, use a grinder;
- solvent for degreasing parts;
- for painting, you can use an airbrush and a compressor, especially with large dimensions of the structure;
- rags;
- paper or old sheets to protect the surface of the walls and floor when painting.
Having dealt with the question of how to paint an iron stove in a bathhouse and having prepared the materials necessary for work, you can begin to carry out the preparatory work.
Surface preparation
To do this, you need to perform a number of simple works. But the preparation of surfaces must be approached with full responsibility, it depends on how the paint will fall on the metal and how long its layer will withstand high temperatures:
- with a metal brush, we clean the stove from adhering dirt, soot and rust;
- We clean the finished surfaces with fine sandpaper. Such work will make the surface smooth, remove minor scratches and bumps;
- we sweep and remove dust from the details of the furnace;
- having abundantly moistened a rag with a solvent, degrease all surfaces;
- if stainless steel or galvanized parts are installed on the furnace, there is no need to paint them. Therefore, we will apply a layer of grease or other lubricant to the parts;
- we close the surface of the floor and walls next to the heater, paper or cloth.
Paint application algorithm
We know how to paint an iron stove in a bathhouse, the necessary preparatory operations have been completed, now we can proceed to the main stage of work. This does not require much time and effort. All work is carried out in the following sequence;
- open and stir the paint well. If it is thick, it can be thinned with a thinner suitable for this enamel. Be sure to read the instructions and dilute the paint only with the indicated mixtures. Otherwise, you will just throw away a can of expensive paint;
- if an airbrush is used to apply the layer, the paint is diluted to a more liquid state, then poured into the airbrush through a paint sieve or the wife’s old tights;
- first apply a layer on all inconvenient places and edges of the oven and only then treat the surfaces, slightly overlapping the previous layer. When painting with a brush, work is carried out in a similar way;
- the paint is applied in 1 layer, so avoid gaps by painting all surfaces evenly.
Work is done. Now leave the oven until the enamel hardens completely.
At the same time, it is important to close all doors and windows so that dust does not enter the room. Some paints will require you to light the oven, they harden only when heated fork
Therefore, carefully study the instructions and strictly follow the specified rules.
How often should you paint in the future?
The paint for the sauna iron stove will serve for the period specified by the manufacturer
It is necessary to pay attention to this characteristic when buying enamel.
In any case, if the oven is made of thin metal, it may fail before the paintwork of the surfaces. Paint is a short-lived coating, so every sauna owner should be prepared for repeated work to protect the stove.
Is it possible to achieve a durable protective layer of the heater surfaces? Yes, in this case, a simple operation on the galvanic method of protecting the metal will help.
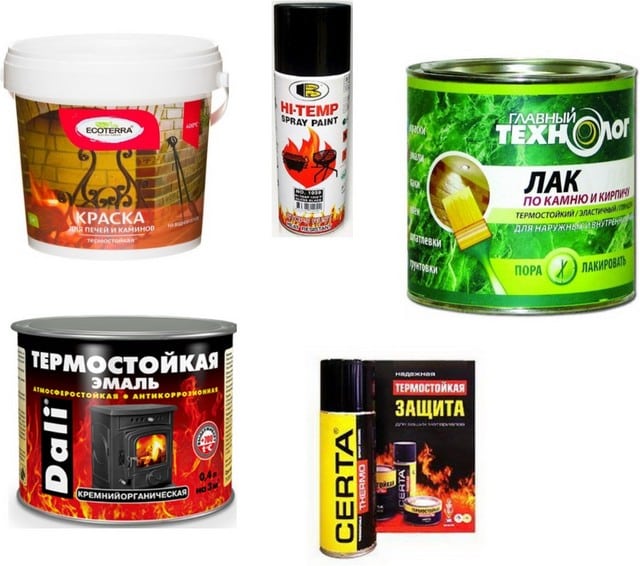
Types of paints and their differences from each other
You can use different paints for applying a protective coating:
- water-based acrylic;
- organosilicon;
- polyurethane.
Water-based acrylic paint material is very convenient and affordable. The downside is that it can only be used for stoves located in a room with low humidity, so this option is not suitable for saunas.
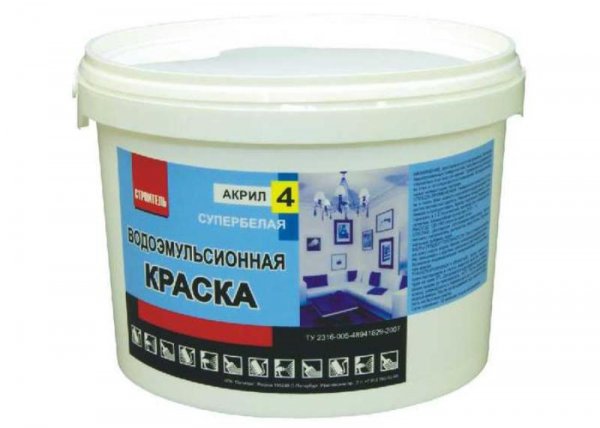
Photo 1. A can of water-based acrylic paint in white. Producer "Builder".
Polyurethane paints are more heat resistant and can withstand heat up to 600 degrees, it all depends on the constituent elements and additives in the paint. Learn the ingredients in detail
Please note that polyurethane mixtures may change color when heated.
Silicone lacquer enamels are considered the most environmentally friendly and durable. They are able to withstand temperatures up to 800 degrees. The composition does not contain toxic substances, so their use is safe. The only downside is the high cost.
lime and chalk
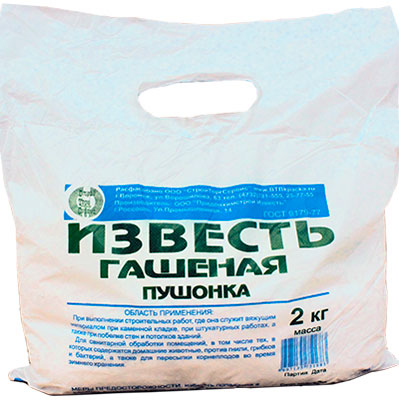 These two solutions are often practiced when the question arises: how to paint a brick oven. The key word here is "brick". The choice of coloring matter will also be appropriate. The paint must have good penetration. Further differences will affect the room in which the object is located. If in a bath, then the relevance of moisture resistance and invulnerability to steam increases, if beauty is important in a living room, strength is important in garages and industrial premises.
Furnaces in garages and other non-residential areas are often exposed to mechanical stress - accidental shocks from handling tools, etc.etc. Accordingly, the paint layer should hold on as tightly as possible.
 Perhaps these are the most ancient and life-tested methods.
- Advantages:
- financial accessibility;
- ease of preparation of the composition;
- ease of application;
- antifungal effect (in the presence of lime).
the need for repeated application (otherwise, the transparency of the upper light layer against the background of the dark lower one is guaranteed);
Lime and chalk are absolutely not suitable for painting red brick ovens. In the absence of experience, it is quite difficult not to make a mistake with the consistency;
- zero moisture resistance (accordingly, such solutions are unacceptable for sauna stoves);
- both lime and chalk are problematic to apply to old water-based layers. But applying the mortar after plastering is an ideal option.
Useful tips from the masters
- Experts recommend:
- focus on the density of thick kefir or liquid sour cream. Such a mixture will not spread during application;
- add 30-40 g of salt previously dissolved in warm water. This will increase the strength of the applied mixture;
- before starting work, if possible, remove old chalk and lime layers, thoroughly wet the base with water using a spray bottle or a wide soft brush;
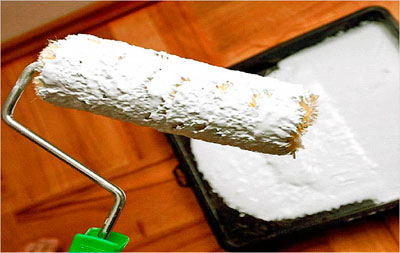
- for painting, use brushes only with natural bristles, and in some cases you can use a roller made of foam rubber or short-haired fur;
- apply each subsequent layer on the previous one only after it has dried
As for the number of layers, there should be 2-3 layers in total. Primary, main and fixing.
What are the reasons to work
Can it be applied to brick, metal, enamel? As a rule, lime and chalk are used for painting brick bases. For example, if you need to renovate a Russian stove in a residential building or a brick or stone building in a country house.
Iron is sometimes also covered with lime (almost never with chalk), but the result is quickly reset to zero - the coating literally comes off in patches within a few months after the work has been done. On iron bases, it is best to work with special paints.
Neither lime nor chalk is categorically compatible with enameled bases - the applied solution is repelled from a too dense smooth base.
What stove
So, some are looking for how to paint a stove in a metal bath, while others are interested in how to paint a brick stove - we have answers to both questions.
metal
 Metal stoves for bath procedures are made either from steel or cast iron. Either circumstance is not particularly important when choosing a paint - it is much more important that the paint be especially heat-resistant, because it will have to withstand the temperatures of a red-hot stove.
On sale you can find paints with a different temperature limit, which is formally expressed in its definition:
Heat resistance is a word that defines the ratio of paint to temperatures up to 600 degrees. However, on the label you can find a clearer definition - there are paints that can withstand up to 200 degrees (they are useful for painting heating radiators, not your stove).
BY THE WAY! There are heat-resistant varnishes, the limit of which is in the region of 250-300 degrees - also not an option for the stove, but they can be useful in its environment.
Heat resistance is a loose concept, but this is what paints are called that can withstand the temperature we need above 600 degrees. Their upper limit is somewhere around 1000 degrees. It is this category that comes in handy when you need to paint a metal stove in a bath from the outside (!).
Because inside it is better to use paints that are called "refractory", which means the following: they are not afraid of contact with open fire.
IMPORTANT! Do not confuse "fire resistance" with "fire protection". There are paints that protect the surface they cover by inflating like a pillow and preventing the fire from reaching this surface, at the same time depriving it of oxygen supply.
Do not cover the oven with them))).
 So, to summarize: you can paint an iron stove in a bath outside with heat-resistant paint, and inside with refractory paint.
It remains to choose the method of application, taking into account that choosing a brush, you slightly increase the amount of paint consumed (compared to a spray gun, for example), but you win in price when compared with the price of paint in spray cans. Heat-resistant paint can be applied as usual - with a brush, spray gun, roller or from a spray can
Heat-resistant paint can be applied as usual - with a brush, spray gun, roller or from a spray can.
brick
The question of painting a brick does not come up very often. Previously, stoves were either left as is or painted with lime, but more often they were plastered brick stoves.
In general, stoves were plastered with the aim not only to make them more beautiful, but to ensure that the brickwork did not lose its tightness, because over time, all these temperature drops during kindling in frost, for example, affect the masonry - it cracks, paints, and opens up smoke into the room.
Therefore, the stove was plastered and covered with lime - in order to immediately see the cracks, which were blackened by smoke.
Nowadays, this is more often done with chimneys, and they prefer to leave sauna stoves “in nature” - with bare bricks. But there are also designers who paint the bricks in different colors using modern paints - this is another way to make the interior more attractive.
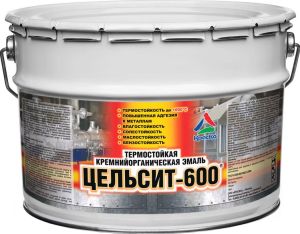
So, you can either whitewash the stove with lime or chalk, or paint it with the same heat-resistant paint. And as an example, we will show you a video where the stove was painted red and gray using CERTA:
And this, by the way, is a question: is it worth taking paint with a limit of 750, if such temperatures do not happen close on the surface of a brick? After all, the higher the limit, the more expensive the paint - it was possible to get by with heat-resistant ones ...
Which one is better to use
How to paint a metal stove in a bath? To do this, it is imperative to buy heat-resistant or organosilicon enamels, varnishes that can withstand heating up to 6000. The layer must maintain its solidity and prevent the formation of rust on structural steel, from which inexpensive bath "aggregates" are made.
As a rule, dark colors are used, up to black. It increases the level of heat transfer of the furnace. Aluminum based paint is not recommended. Silicone enamels from Russian and foreign manufacturers are most in demand. In its composition:
- resin organic;
- aluminum powder;
- organic radicals;
- silicon base and oxygen.
Now let's go through specific brands:
- The leader among domestic brands is Cetra. Available for various heating temperatures. Black enamel is able to withstand heating temperatures up to 9000.
- Another heat-resistant paint produced in cans and having good properties at a low price is heat-resistant Kudo brand enamel.
- Among foreign manufacturers, the Finnish "Termal" from the company "Tikkurila" can be distinguished.
How to paint a metal stove in a bath from the inside? To do this, it is better to use refractory paint. Its only downside is its high price.
We paint the brick oven correctly
Sometimes it becomes necessary to update the appearance of a brick-lined oven. What to do here, how to paint a brick oven in the country or in the bath, provided that the finishing work will be done by hand.
If you have a question about how to paint a red brick oven, we will try to help you.
You can successfully use lime whitewash with the density of liquid sour cream. But there are also special paints designed for painting bricks.
painted brick
Before you start painting the stove in the bath with your own hands, be sure to read the instructions, there are paints for interior and facade bricks. But in our case, there is a more difficult question - how to paint a brick oven so that later during operation the paint does not change its color and peel off?
Paints and methods of application
Before buying paint, be sure to check that it is heat resistant. Silicone-organic enamel is well suited, it is able to withstand temperatures of about +600 ° C. Silicone-organic paints of brands are on sale:
- KO-168
- KO-174
- KO-813
- KO-835A
- KO-1112
To dissolve these enamels, turpentine or thinner 646 can be used. To obtain a good result, the paint must be applied in 2 - 3 approaches as thinly as possible. This will get rid of the formation of smudges.
Paint for bricks - we cook it ourselves
If there is no suitable paint available, you can cook it yourself. This will require varnish PF - 283 and turpentine. The ingredients are mixed in proportions of 1: 1 and mixed well.
The resulting mixture has a transparency with a slight haze. To get the color you want, do the following:
- Gouache of the required color is taken and dried well.
- Dry gouache is ground to a fine powder
- Dry gouache powder is added to a mixture of varnish with turpentine until the desired shade is obtained. Can be dyed.
Varieties of paints
As already noted, not every paint will withstand the test of a hot surface and high humidity. Therefore, intending to paint the stove and water tank, you should be very careful in choosing the coloring composition. Special products are based on silicone or other substances containing silicon. With sufficient heating (up to approximately +150°C), polymerization occurs, as a result of which the paint fuses into a durable film that can withstand all types of external influences and prevent rust. The most famous compositions include the following types:
 Advantages of paint KO-8101
- Paint KO-8101. The most affordable option, guaranteeing a service life of up to 15 years.
- Lacquer KO-85 based on organosilicon. Shows excellent results in conditions of high humidity, is not afraid of rust, but the maximum withstand temperature is only 250 degrees, and this may not be enough.
- Enamel KO-8111. A high-quality composition that not only provides the necessary level of protection, meets environmental requirements, but also pleases with a wide range of shades.
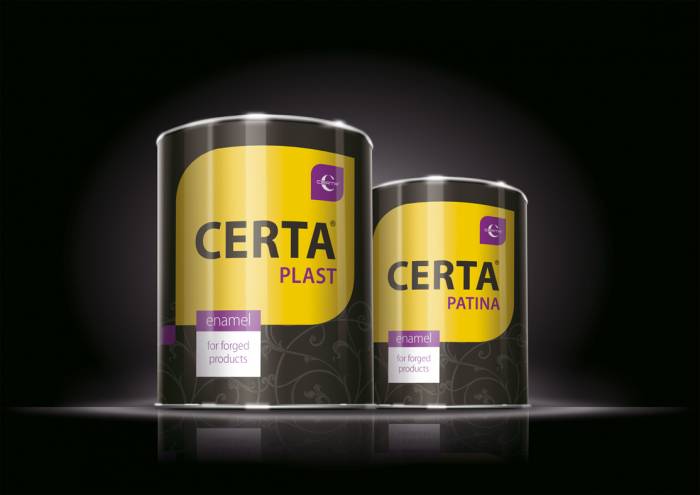
- Heat-resistant paint "Certa". Quite popular in the CIS countries, has the additional name OS-82-03T.
- Enamel KO-8222. Coating with the best thermal stability up to 800°C. Because of this advantageous property, it has a high price.
In addition to painting the sauna stove, you need to take care of the hot water tank, special attention should be paid to processing it from the inside. There are several "grandfather" methods for this:
- The application of aluminum powder provides not only protection against rust, but also environmental safety.
- A solution of lime with cement in equal proportions. The water tank is coated inside with this mixture and dried.
- Processing with iron minium, which can be easily purchased in stores.
A number of modern tools have been developed with which you can forget about the problem of rust forever:
- ZVES No. 2 anti-corrosion composition containing zinc powder and ethyl silicate.
- The already mentioned heat-resistant "Certa". The service life of the coating in a bath is 7 years or more.
- Zinc-containing enamel "Ekotsin". It additionally protects against mechanical damage, which is a considerable plus: the tank walls will not be scratched when you are trying to get rid of scale.
- Enamel KO-422. Processing with such a composition is called "cold galvanizing".
How to paint an oven
Often in country houses they use a stove that is heated in the traditional Russian way. And then the owners begin to think about how to update and paint the stove so that it is not only practical, but also beautiful.
The most common and easiest way is to whitewash the oven with chalk or lime. This method has been used since ancient times. If the surface of the furnace is uneven and has some defects, it must be plastered in advance (you can smear the seams between the bricks with a clay solution.
In order to prepare the plaster, asbestos and clay must be mixed. This mixture must be applied to the heated oven. When the plaster dries, you can start painting.
How to paint a brick stove - with chalk or lime - is up to you. Both materials have their pros and cons.
In order to prepare a chalk solution, you need to put pieces of chalk in a deep container and fill them with water so that the chalk is completely covered. Leave to infuse for about an hour. At this time, you need to prepare a solution consisting of animal glue and water in a ratio of 25: 1, respectively. When the chalk solution is ready, mix it with the second one to the desired consistency (a drop of the solution, lowered onto the vertical surface of their glass, should slide down 2-2.5 centimeters.
As you know, whitewash often gets dirty. To prevent this from happening, salt must be added to the water. (50-100 grams of salt is enough for 1 bucket of water). And so that the whitewash does not turn yellow over time, you can add a little blue to the chalk solution (about 60 grams per 10 kilograms of chalk). It is necessary to paint in 2 layers. The second layer can be applied only after the first one is completely dry.
Many prefer lime to chalk, because it is elementary to paint the oven with it. Pour one kilogram of freshly slaked lime with water (1.5 liters). There also add 1 dessert spoon of drying oil, 25-30 grams of blue for a blue tint and 5 grams of salt. Mix everything thoroughly and apply on the stove in 2 layers. In this case, the second layer of whitewash should be placed on top of the first one while it is still damp.
If plastering work is not for you, you can use the same lime, but thicker, like steep sour cream.
If the whitewashed stove does not fit into the interior of the room, you will have to use enamel or oil paints, which have a variety of shades, so you can choose the perfect combination of colors for the stove and walls.
But what kind of paint to choose is a difficult question.
To begin with, carefully study the properties and composition of enamel paints. Their main property is heat resistance. Also, the composition should contain a minimum amount of chemical dyes. It is better to purchase imported products, on which manufacturers honestly indicate whether the stove will turn yellow over time or not. Many of these enamels are able to withstand temperatures up to 600 °C. Such paints are applied to the oven in several layers.
Do not buy aluminum-based paints, as well as paints in bright colors - they will reduce the amount of heat from the stove.
Experts also do not recommend using oil paints, justifying this by the fact that due to high temperatures, the drying oil, which is part of them, will begin to burn, and as a result, an unpleasant odor will appear.
You can also use stain, heat-resistant varnish, transparent paint to paint the oven. But these are less common options. Some owners of country houses themselves prepare a mixture of PF varnish, turpentine and dry gouache.