It is very easy to prepare the whitening composition yourself.
Primer for whitewashing
First of all, prepare a primer for the ceiling. First, take slaked lime (ideally, it should be thick enough) - this is the so-called lime dough. Of course, it must be diluted with warm water. For two and a half kilograms of lime, you need about five liters of well-warm or even hot water. After that, dissolve in a mixture of one hundred grams of ordinary table salt.
Add more warm water to the resulting mixture so that you end up with about ten liters of primer. If at this stage there are small inclusions of particles in the composition, strain the primer through a sieve.
In conclusion, stir in wood glue (ten percent) two hundred grams of powdered chalk. After thorough mixing, when the mixture becomes homogeneous, add it to the primer.
During the preparation of the primer lime mortar, mix it thoroughly at each stage. All ingredients must be evenly distributed in the mixture.
As a result, you will get a primer with which you can prime almost any surface for whitewashing. The mixture is applied with a paint roller or brush.
whitewash preparation
There are several common recipes for making whitewash. Perhaps the most popular and simplest is made with warm water, chalk, and wood glue.
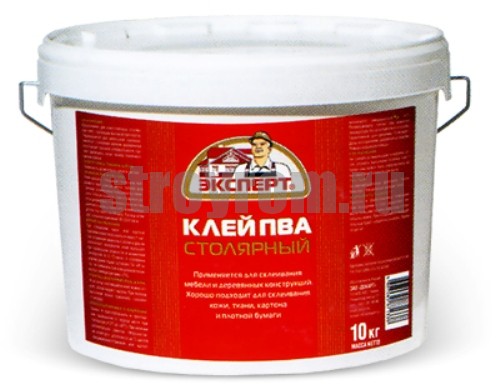
First, heat up about five liters of water. The water should be well warm, but not too hot. The optimum water temperature is fifty degrees. Then, little by little, dissolve three kilograms of sifted chalk in water and add thirty grams of wood glue. This amount of whitewash should be enough to process fifteen square meters of surface.
The following composition has not received such wide distribution as the previous one, but it provides the highest quality of whitewashing.
To prepare a whitening composition according to this recipe, dissolve sixty grams of laundry soap in four liters of hot water. Then add fifteen grams of blue or ultramarine and ninety grams of wood glue to the soap solution. Chalk should be added to the resulting mixture at the very end - approximately two and a half kilograms. This amount of whitewash is enough to process ten square meters of the ceiling or walls.
The third most popular whitewash recipe is called "lime whitewash". Dissolve two or three kilograms of slaked lime in five liters of warm water. Then, add one hundred grams of ordinary table salt, half a kilogram of dyes to the mixture and bring the volume of the mixture to ten liters. It might not hurt to add a little blue to the whitewash.
By the way, experienced craftsmen claim that table salt for whitewashing can be replaced with potassium alum. True, with salt is still simpler - it can be found in any kitchen.
Do it yourself
Do-it-yourself swing for children Our children are always in active movement, so let's try to diversify their rest with the help of a swing. Let's start with a simple option. Children love swings, which…
How to make a bed Bed made of glued laminated timber with your own hands. The bed is a very important element of any room, whether it is a bedroom for adults or children. A large comfortable bed in your bedroom is the key to good sleep and good mood throughout…
Do-it-yourself wardrobe Today, many owners of both small apartments and large houses are thinking about purchasing a wardrobe. Unfortunately, it is not always possible...
Do-it-yourself corner sofa Of course, one of the main elements of furniture in the house is the sofa. This thing is extremely necessary and useful, in addition to a comfortable stay, you can hide a lot of household things in it,…
Do-it-yourself screen Some people think that the screen is the last century, not a fashionable and useless thing. Meanwhile, the screen is a very convenient and beautiful tool for zoning a room. In the living room there is a screen…
Why whitewash the boles of fruitful trees
Whitewashing of trees is carried out in late autumn (November) and early spring (March). Gardeners do this not for beauty. The bark is the protective barrier of trees: it protects them from environmental influences. Therefore, it is she who is primarily exposed to temperature changes: it dries up, exfoliates, cracks from the heat, freezes in the cold, and is damaged by bark beetles.
If you do not strengthen it, do not take care of it, then the wood becomes bare, begins to deteriorate and rot. This greatly weakens the plants, which eventually leads to their death. What does the whitewash protect from?
- White color has reflective properties, so it does not allow the sun's rays to overheat, burn the shell of the plant and its branches.
- Autumn whitewash protects the trunk shell in winter from the formation of ice during the period of alternating thaws and frosts.
- The smell of lime scares off animals that gnaw on the trunk bark.
- A layer of whitewash will protect the plant from insect pests crawling out of the soil and destroy those that hid in the cracks of the shell for the winter.
Obviously, whitewashing plays the role of a strong protection of the plant from external destructive factors.
It is necessary to whitewash the trunks in spring and autumn in dry weather, otherwise the whitewash layer will be washed away by rain.
After drying, the lime layer will become more resistant to precipitation; some gardeners sometimes even add glue to the solution for greater moisture resistance of the paint.
ceiling whitewashing process
For whitewashing you will need:
- ladder;
- small brush;
- roller 20 cm long;
- plastic container.
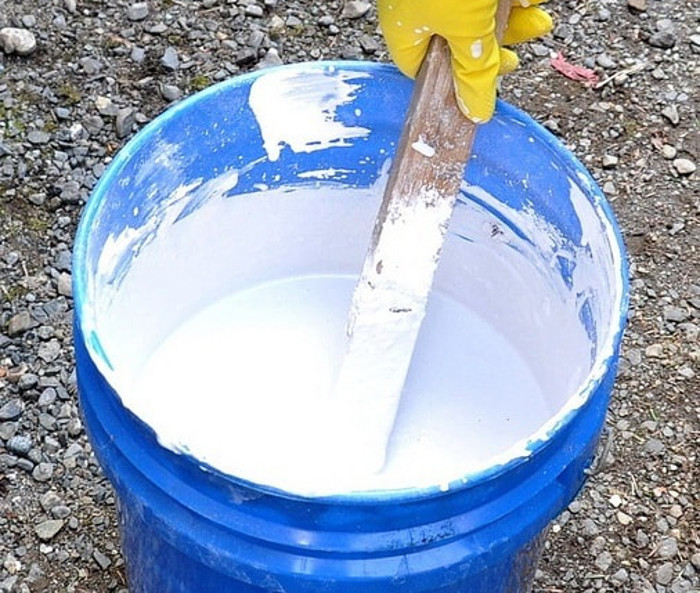
Step 1. Solution preparation
To dilute the chalk, you need water, preferably warm, PVA glue and blue. Glue is first diluted in water, and then chalk is added in small portions. The solution is well stirred, all lumps are broken, blue is poured in. Again, everything is mixed until a uniform color. For 10 square meters you will need 3 kg of sifted chalk, 30 g of glue and 20 g of blue.
Less lime is required for the same ceiling area: you need to dilute 1.7 kg of lime in water and add 40 g of blue. At first they take a little water, about 5-6 liters, and then add it little by little, depending on the required concentration of the solution. The paint, if necessary, is also diluted, adding only clean water. If you want to give the ceiling a color shade, you can use special pigments.
Step 2. Applying the first layer
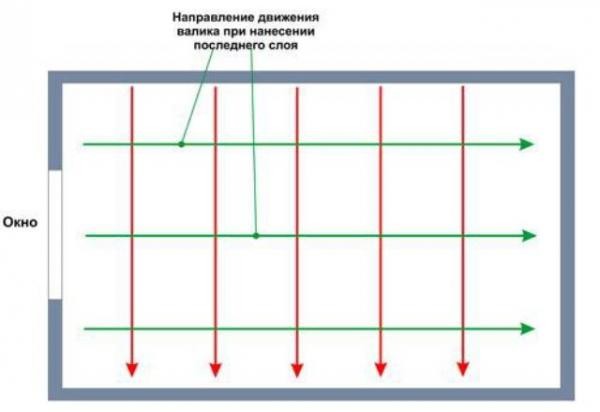
They begin to whitewash in the corner from the window; first, the joints of the ceiling and walls are carefully treated with a brush, and then whitewash is applied to the surface itself with a roller. You can not strongly dip the roller into the paint, in order to avoid splashing and streaks, the layer must be thin and even. Whiten should be parallel movements perpendicular to the direction of light. After finishing the application of the first layer, the surface is left to dry completely.
Step 3. Reapply whitewash
The base can shine through the first layer, the stripes from the brush or roller are also clearly visible. To remove these defects will help the second layer of whitewash, which is applied perpendicular to the first. The solution must be mixed, because lime, chalk and paint could settle to the bottom. After that, they begin to whiten from the same place as the first time. Movements should be as uniform as possible, confident, then the quality of whitewashing will be high. So that there are no unpainted areas left, when applying the composition, the ceiling is visually divided into strips and overlaps 4-5 cm wide are made at the joints.
After completion of work, it is necessary to exclude the occurrence of drafts and illumination of the ceiling with sunlight, otherwise the coating may crumble.Also, you can not dust in the room while the whitewash dries; all paint stains on the floor and walls should be wiped immediately with a damp cloth, and then swept up later so that dust does not settle on the ceiling. Subject to these simple rules, re-finishing will be needed no earlier than after 3-4 years.
Lime consumption for whitewashing per 1 m 2
Lime consumption depends on the type of surface being treated: porous, embossed surfaces require more consumption to obtain a dense coating. So, for example, more lime is needed for whitewashing brick walls than for smooth surfaces.
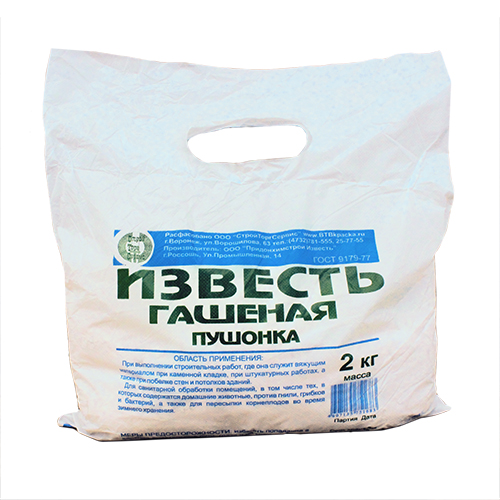
In addition, the consumption of raw materials depends on its type. On sale, for today, there is slaked and quicklime. The slaked raw material is sold in the form of powder and dough (lime paste). The fluff is bred in a ratio of 1: 3. So, from a 4 kg package, 12 liters of a solution ready for application can be obtained. This amount of whitewash is enough to process 24 square meters. m smooth, flat surface.
It is quite difficult to determine the exact consumption of a substance: in any case, somewhere you will need to walk around the place several times. But, the material itself is affordable and can be easily found in any hardware store. Therefore, if necessary, you can easily buy a few more kg of lime.
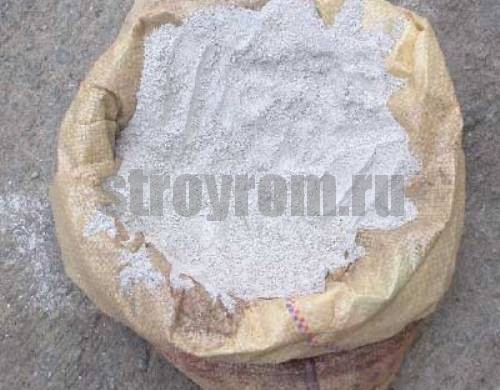
Slaked lime
Slaked lime
Preparation of a whitewash solution from slaked lime is much easier and safer. To get about 10 liters of the mixture, you will need lime dough in the amount of 3 kg, 100 grams of salt and a little blue (about 40 grams).
To begin with, fluff (or lime dough) is diluted in about 5 liters of water. Then a pre-prepared hot salt solution (1 liter) is poured in and mixed. In order not to overdo it with blue, it also needs to be stirred in a separate container, and then gradually added to the general mixture. Before whitewashing, bring the solution to about 10-11 liters, mix and strain through cheesecloth or stocking.
Before whitewashing the ceiling with lime, the old coating must be removed. This must be done especially carefully if the surface has previously been whitewashed with a chalk solution. Surface defects are eliminated with putty, and then the ceiling is primed.
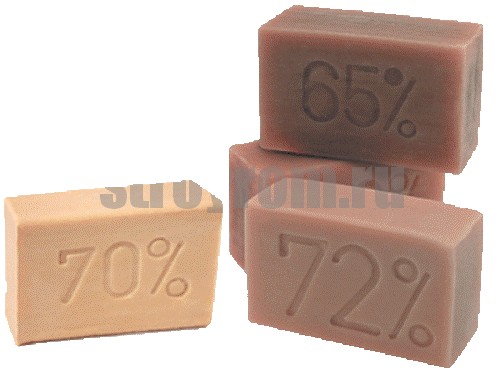
To prime the ceiling, instead of salt, grated laundry soap is used (1 bar per 10 liters of water) and 300 grams of wood glue, and the amount of lime remains the same. You can add a couple of tablespoons of drying oil. These additives contribute to a better adhesion of the lime mortar to the surface. The same composition can be made and topcoat.
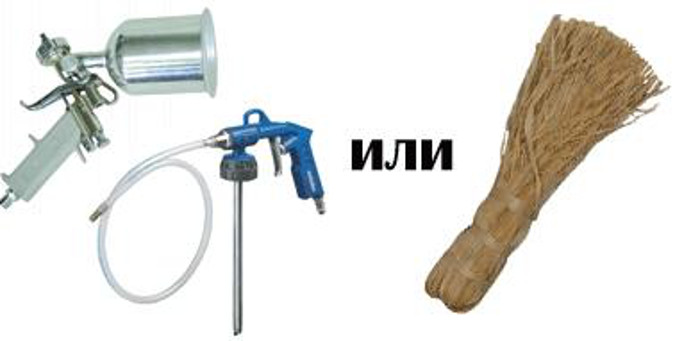
Lime whitewash is applied with a brush or sprayer. Spraying will give the most uniform surface, so this method is preferred. You can purchase a special nozzle for spraying with a vacuum cleaner or an electric paint sprayer.
There are also hand-held whitewash spray guns available, which are convenient because they do not require an electrical connection and have a long spray nozzle.
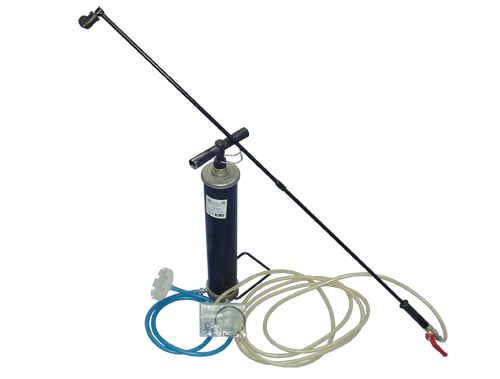
Airbrush
In addition to the above methods, do-it-yourself whitewashing of the ceiling with lime can be done using a conventional garden sprayer. Here you only need to strain the lime mortar well and select the viscosity of the material.
Before applying lime whitewash, the ceiling must be moistened, and the second whitewash layer is also applied to the dry previous one.
Whitewashing the ceiling with lime with a roller is done crosswise: the first layer is rolled parallel to the windows, the second is perpendicular. During the drying process, drafts should be excluded.
By following these simple tips, you can get an inexpensive and high-quality ceiling covering in your home.
Best Answers
Corundum:
You will whiten, do not forget to put salt. Otherwise it will get dirty and washed off
Vadik Andreev:
You can add color to lime.
Alex Mishin:
You can add, BUT: 1) the pigment used in lime colors must be alkali resistant; 2) the pigment used for outdoor use must be lightfast. It seems that natural ultramarine - natural mineral blue - satisfies both of these conditions. But if you buy not a painting blue, but a washing one, you must wash it several times with water before use: dissolve it in water and let it settle to the bottom. Otherwise, the admixture of sodium sulfate present in it will ruin everything for you. Perhaps ochers are suitable - I'm not sure of their alkali resistance. In general, the choice of pigments that suit you is small. Read Shepelev’s books “Repairing an Apartment on Your Own”, “How to Repair a House Yourself”, etc. - they largely repeat one another.
P.S. The word "color" actually means "coloring suspension" and not "substance that imparts color."
Can of Raccoons:
It is easier, more practical and more reliable to paint with facade paint.
Botan Botanovich:
Lime colored whitewash
Hydrated lime is an alkali, so it can only be tinted with dry alkali-resistant pigments (liquid dyes for high-voltage paints will eat alkali). To do this, an alkali-resistant color scheme is introduced into a ready-made lime mixture (how to dilute lime, see here): chromium oxide - green, iron minium - red-brown, ocher - yellow, ultramarine - blue, umber - brown, soot - black and others. At the same time, it should be taken into account that a large amount of pigment (more than 5% by weight of lime) significantly reduces the strength and service life of colored lime whitewash. Therefore, it is almost impossible to obtain a bright saturated color without harming the performance of the coating - as a rule, these are muted shades of the primary colors.
How to dilute lime for whitewashing
Now it is quite difficult to find a master who will take up this work, because the work is not the cleanest, and no one will work for low pay. So you have to whiten yourself. Do-it-yourself whitewashing is not at all a difficult task, but very unpleasant, and most importantly, dirty. Before work, it is necessary to cover the floors and furniture with a film if it is not possible to completely free the room. Also prepare protective clothing.
The consumption of whitewash, first of all, depends on the method of its application and on the treated surface. If you apply whitewash with a brush, the consumption will increase. Brick walls will require more material than smooth walls. Approximately 0.5 liters of finished whitewash per 1 sq. m.
In stores you can find slaked and quicklime. Slaked is sold in the form of powder - fluff lime, and in the form of lime dough. Fluffy lime should be diluted in a proportion of 3 liters of water per 1 kg of powder. Accordingly, from one package of fluff weighing 2 kg, you will receive 6 liters of whitewash, which is enough for about 12 square meters. m of surface, only if it is not brickwork. Ready-made lime dough is diluted in a ratio of 3 liters of water per 1 kg of dough.
Quicklime, lumpy, must first be extinguished, and only then diluted with water. To do this, lime must be poured with water in a ratio of 1: 1. As a result, you will get a powder, and if you add three times more water, you will get a lime paste. After that, the resulting powder or dough can be diluted with water. From 1 kg of quicklime, approximately 10 liters of whitewash are obtained, ready for use. You will not calculate the whitewash consumption with an accuracy of a square. Lime is an inexpensive material, so you may well buy a couple of extra packs.
Take precautions when extinguishing lime. When extinguished, a large amount of heat is released and steam is formed.
Slaking lime may splatter from the tank. In this case, rubber gloves, goggles and thick clothing will help to avoid burns if lime gets on the skin. After quenching, the solution must be allowed to stand for at least two weeks, and only after that it can be diluted with water and whitewashing can begin.It is advisable to buy slaked lime, because it is much easier, faster and safer to prepare it for work.
In diluted lime, based on 10 liters, add 2 tablespoons of drying oil, 100 g of table salt and paint blue. But before that, salt and blue are diluted in hot water. These components give whitewash whiteness, and drying oil contributes to better adhesion of whitewash to the surface and gives it strength. The saturation of the solution mainly depends on the method of its application. If you apply whitewash with a brush, then make the solution thicker, and when applying whitewash with a sprayer, make the mixture more liquid and be sure to filter it through several layers of gauze.
You can improve the composition of lime by adding additional ingredients to it. So you get paint with completely new qualities and even properties. In addition to water, liquid glass can be mixed with lime. glue, soap, salt, milk, flour, egg whites and any colored colors. When adding color, you can get any shade and your whitewash will easily become cream, yellow or even brown. In some cases, linseed oil is added to the lime, most often this technique is used to whitewash very smooth surfaces on which paint does not adhere well, such as furniture. Glue is added so that the lime is more viscous, and after drying, it does not stain things so much. As you can see, inexpensive whitewashing with lime can be a great paint for any surface. Its main disadvantage is that it is not suitable for whitewashing walls, as it strongly sticks to hands and clothes. This method is appropriate if it is the upper half of the wall.
How to breed lime
There are two ways to dilute slaked lime for whitewashing surfaces.
Method Ν1
: take 400 g of powder, add 6 liters of water, 5 g of salt and a teaspoon of drying oil. All this is thoroughly mixed and filtered through a sieve. If you want a bluish tint, add 25g ultramarine.
Method Ν2
: For 3 kg of dough, 10 liters of water and 100 g of table salt are used. Further, the process becomes a little more complicated: the dough is diluted only in half the water to obtain milk of lime, the salt is separately stirred in 1 liter of hot water and added to the milk. All this is thoroughly mixed and then increased to a volume of 10 liters by adding water.
How to whiten? You can manually use a special brush or roller, or you can use a spray gun, but in any case, you must first prepare the walls for whitewashing.
The process takes place in two stages: the application of the first layer, and after it dries - the second. It is preferable to work in the evening hours or in cloudy weather. This is done so that the liquid does not evaporate so quickly and the layer is more durable.
- choose what you want, but with all this good old whitewashing does not lose popularity
. Among the main reasons are low cost, ease of application and environmental friendliness. These qualities are sometimes enough to turn a blind eye to the low durability of the coating. Let's figure out how to whitewash the ceiling and walls with lime and chalk, decide whether water-based paint belongs to whitewash, and which material shows itself better.
Preparing walls for whitewashing
If whitewash is applied for the first time
In order for the whitewashed walls to look beautiful, the surface must be prepared for repair. In the event that the walls are simply plastered and have never been whitewashed before (as, for example, in a new building), the work is simplified. True, it is necessary to whitewash the walls under these circumstances in three layers.
The first layer can be applied without the use of blue. When the base coat dries, it will be possible to apply already and subsequent ones, in which, if necessary, you will add ultramarine blue or a special dye of a suitable shade.As for the drying time of the surface, it is approximately five to six hours for each individual layer.
Remove rust and grease stains
Grinding the surface of the ceiling
In the same case, if the surface of the walls is not ideal, careful preparation should be made before applying a layer of lime whitewash. First of all, gently wash the stains on the walls with plain water, as well as rusty spots. Then treat these places well with a solution of copper sulfate. The proportions for preparing this solution are as follows: from fifty to one hundred grams of vitriol are diluted in one liter of boiling water.
What to do if there are greasy stains on the walls you plan to whitewash? In this case, soda ash will come to the rescue, from which a two percent solution is prepared.
Dampen a clean white rag with this solution, and then blot the stain well. Keep the rag on until the stain is completely gone. Next, the surface treated with a solution of soda ash should be thoroughly rinsed with water.
No soot and cracks or whitewashing at 100%
But if the walls are sufficiently smoked, another recipe will help you. Take a solution of hydrochloric acid (two or three percent) and wipe the surfaces to be whitewashed with this solution.
In the event that there are cracks and other defects on the walls, you will need to repair them before you start whitewashing the walls. This will require putty. It is not necessary to buy an expensive branded mixture.
You can make your own solution. To do this, take one part of gypsum, two parts of chalk, and two parts of wood glue (diluted). Keep in mind that when diluting wood glue, you also need to take into account the rules regarding proportions: for example, fifty grams of glue is required per liter of water. As a result, you will get the simplest, but fairly high-quality putty mixture.
There is another recipe for excellent putty. Take lime dough (that is, thick slaked lime) in the amount of two and a half kilograms. Add five liters of water to it. And finally, add one more component - one hundred grams of ordinary table salt (it needs to be diluted in hot water).
Then you need to add another five liters of water to the resulting solution and mix everything gently and thoroughly. Then strain the mixture through a fine sieve. The last stage is the addition of wood glue, diluted with water in a ratio of one to ten, as well as with chalk powder (about two hundred grams).
The adhesive solution will be required for such an amount of putty about one and a half liters. So, as a result, you get an excellent consistency, which in the future you can also use for priming walls. Such a composition creates an even, smooth film and may well replace an expensive branded primer. As for the application of putty, then an ordinary spatula will be needed here.
How to whitewash the walls with your own hands
Whitewashing can be done with a brush, roller or sprayer. At the same time, it is recommended to treat rough surfaces with a brush or spray, since in this case you will not achieve a uniform distribution of color with a roller.
The walls are whitewashed with a brush in several approaches. The first layer is applied with smooth and even brush strokes from top to bottom or vice versa. After it dries, you can apply a second layer and so on. In this case, each subsequent layer should be applied perpendicular to the previous one. This approach allows you to evenly distribute the lime over the entire finishing surface and minimize the formation of unpainted streaks and streaks.
If you do not have practical skills in working with a brush, then it is recommended to whitewash with a roller. To do this, first, lime is applied with a brush in a small strip along the entire perimeter of the wall, after which the rest of the area is processed with a roller. The procedure for applying the solution is the same as when working with a brush.
If the finishing surface and lime mortar were prepared correctly, and the whitewashing process was carried out taking into account all the instructions and recommendations, then such walls will retain their attractive appearance for 4 to 5 years without the need for re-finishing.
Whitewashing is a way to update the appearance of utility and residential premises, known since childhood. With the help of whitewashing, you can restore freshness and attractive appearance to surfaces, and disinfect them. For the preparation of whitewash, lime is used - a material obtained by roasting carbonate rocks. Lime has beneficial benefits.
6. How to whitewash the ceiling and walls with a brush, roller or spray
Theoretically, you can apply whitewash:
- brush;
- roller;
- spray gun;
- vacuum cleaner with air blowing function.
We note right away that the first two options are more applicable - it makes sense to use a vacuum cleaner and an airbrush with a large surface area to be whitewashed.
Whitewash brush
they take a special one, made of natural bristles 15-20 cm wide. After work, the brush can be washed and reused later. To whitewash a brick wall, you can use a brush with natural bristles. It is advisable to soak it in water a few hours before use. In this case, the wooden handle swells a little and holds the bristles well, which will not fall out during the whitewashing process. 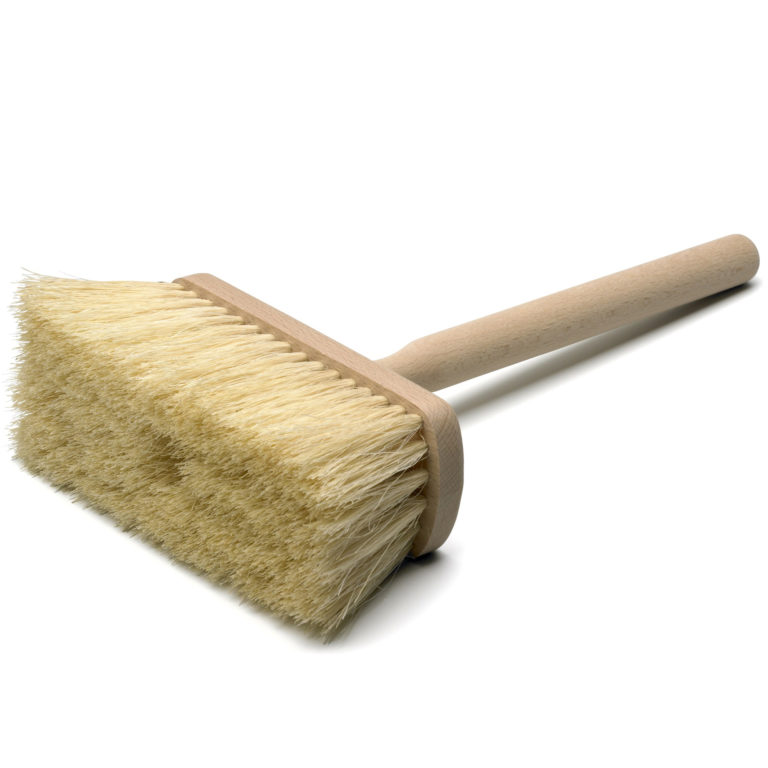
Before applying the mixture, it is important to mix well again so that the shade is uniform. The first layer is applied perpendicular to the window, the second - parallel to the frames
In this case, the stripes from the brush will be minimally noticeable. Experts recommend slightly moistening the surface of the ceiling and walls before applying the mixture.
It is better not to use a whitewash roller. When there is only one layer, this tool will still fit, but when applying the second layer, the dried first one may fall off. If you act carefully, you can get a beautiful matte surface.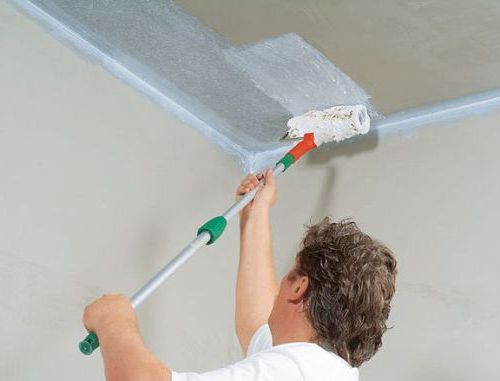
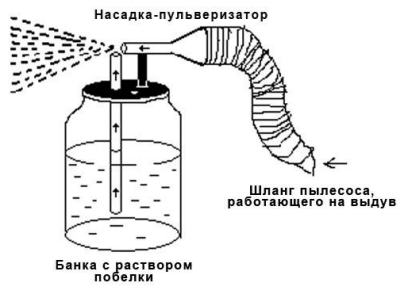
Sprayer and vacuum cleaner
take only when you have to finish a large surface. The consumption of the solution increases, it is applied in a thicker layer, but it will be possible to mask small defects. If you have a sprayer at your disposal, then there are no questions.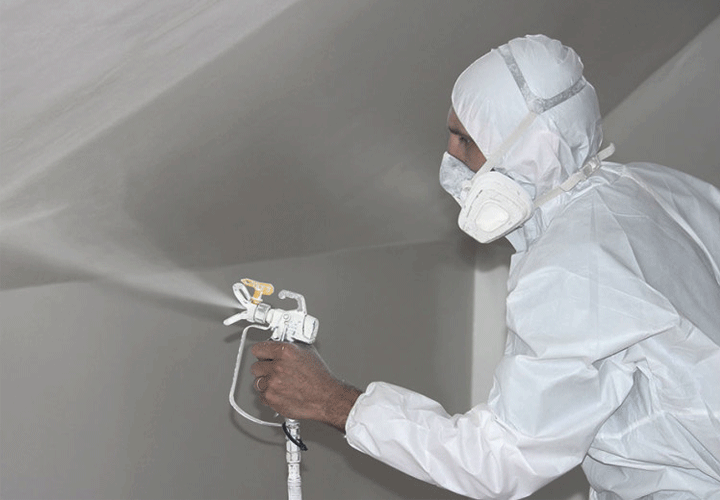
You can also apply whitewash with a vacuum cleaner if it has an air blowing function. Among the numerous nozzles in such models there should be a polyethylene cover with tubes. This cap is the atomizer. It must be put on a jar and connected with a hose to the outlet in the vacuum cleaner. It turns out that when air is blown out with a vacuum cleaner, air enters the sprayer, draws the solution from the can and sprays it through the nozzle. As a rule, there is a special hole on the sprayer, covering which you can get the required solution supply pressure. It is better to apply the solution in a circular motion, spraying at a distance of 70-100 cm.