Additional design features
Some experts advise welding supports or brackets. This is not very good, because it makes the design more massive and not universal. Without welded supports and brackets, it can either be hung on the wall or installed on stands fixed on the floor.
In some cases, the owner, who dismantled the old sectional batteries. using a radiator key, and made the device, could make a mistake in calculating the optimal dimensions of a homemade radiator. As a result, the design is not able to heat the air in the room to the desired temperature. One way out is to manufacture an additional heater. However, you can improve already made.
To enhance heat transfer, vertical metal plates can be welded. They will also heat up and give off heat. Thanks to them, convection will improve.
These plates can be cut from a metal sheet with a thickness of 1.0-2.0 mm. Their features should be:
- The height is greater than the height of the battery.
- Width - 10-15 cm.
- The presence on one side of 3 cut out squares or rectangles. The dimensions must correspond to the dimensions of the profile pipe.
Such plates are applied to the battery and welded. As for their number, the more, the better, because the greater the heat transfer becomes.
Size calculation
Making your own pipe heating device is not very difficult. But there is one important point here - to correctly calculate the dimensions of the device. After all, such an indicator as heat transfer will depend on them.
Required indicators
The calculation is not easy, because it requires some criteria of the room itself. For example: the area of glazing, the number of entrance doors, which windows are installed, whether the floor, walls and ceiling are thermally insulated.
All this is difficult to take into account, so there is a simpler option, which takes into account only two indicators:
The heating radiator is selected on the basis of heat transfer per 10 m² equal to 1 kW of thermal energy. The ceiling height must not exceed 2.8 m.
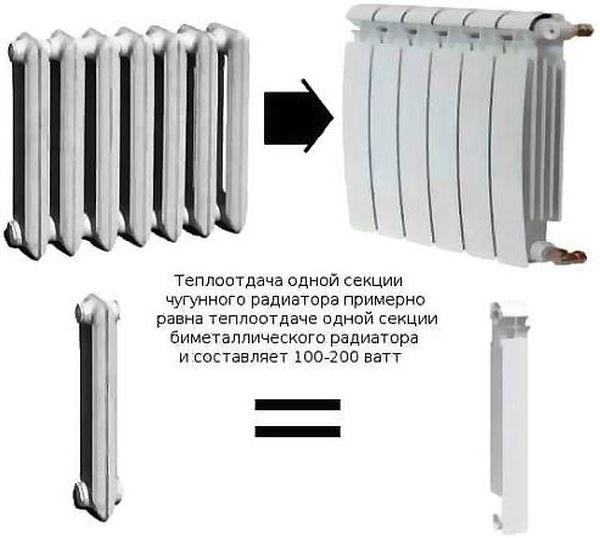
How can this help when assembling a homemade heating device? To do this, you will have to compare with a conventional cast-iron radiator of the MS-140-500 brand. The heat output of its one section is 160 W, the volume is 1.45 liters. What does this give us?
You can determine exactly how many sections will be needed if you use a cast iron appliance. From the number of sections, the total volume of coolant is determined, which will fit in one battery. And knowing this number, you can approximately set the volume of the pipe radiator.
The thing is that the thermal conductivity of steel is 54 W / m * K, and cast iron - 46 W / m * K. That is, a small downward error will not have any effect on the quality of heat transfer.
Calculation example
We will conditionally assume that an eight-section cast-iron heater corresponds to the above ratio. Its volume is 8x1.45 = 11.6 liters.
Now you can calculate the length of the pipe with a diameter of 100 mm, which we will use to assemble a homemade battery. The pipe cross-sectional area is standard - 708.5 mm². We divide the volume by the section, we get the length (liters are translated into mm³): 116000: 708.5 = 1640 mm. Or 1.64 m.
A small deviation in both directions will not greatly affect heat transfer. Therefore, you can choose either 1.6 or 1.7 m.
Parts cutting and screen assembly
The screen on the cast-iron battery can be made of MDF sheets. To form the front profile, it is necessary to cut out rectangular parts, the width of which will be 11 cm. An angle of 45 ° should be made on them using a hacksaw. This manipulation must be carried out in the place where the elements will be in contact with each other.
It is important to remember that multidirectional angles should be made on one of the bottom profiles.This is how the inner lattice is formed.
You can fix the elements with carpentry glue, which is complemented by finishing nails. If you decide to carry out a hinged screen on the battery, then after all the previous steps can be mastered, you can proceed to the assembly. For the front part, a mesh is used, which must be cut to size, you can use a hacksaw for this. The edges are finished with a fiberboard profile, which is located along the perimeter. The same principle should be used for the side parts. A frame should be created from a decorative beam, which should be fixed as firmly as possible, otherwise the structure will be movable and unstable.
Holes for pipes are cut in the side faces
It is important to ensure that the center of the radius from the width and height of the side bar is 7.5 cm away.
The dimensions of the canvas must be equal to the dimensions of the decorative lattice. This will eliminate heat losses and redirect the heat flow inward.
The decorative screen can be fixed to the wall using a stable frame or anchor grips. However, there is another way, but it is more expensive and complicated, in addition, it implies the need for additional purchase of expensive parts. Such metal battery screens are sometimes covered with rails and mounted on legs made using special corners. This part is usually made adjustable so that it is possible to adjust the height of the structure.

9 Famous Women Who Have Fallen In Love With Women Showing interest in someone other than the opposite sex is not unusual. You can hardly surprise or shock someone if you admit it.

7 Body Parts You Shouldn't Touch Think of your body as a temple: you can use it, but there are some sacred places that you shouldn't touch. Display research.

Contrary to all stereotypes: a girl with a rare genetic disorder conquers the fashion world This girl's name is Melanie Gaidos, and she burst into the fashion world quickly, shocking, inspiring and destroying stupid stereotypes.
Unforgivable Movie Mistakes You Probably Never Noticed There are probably very few people who don't like watching movies. However, even in the best cinema there are errors that the viewer can notice.

These 10 little things a man always notices in a woman Do you think your man knows nothing about female psychology? This is not true. Not a single trifle will hide from the gaze of a partner who loves you. And here are 10 things.

11 Weird Signs That You're Good in Bed Do you also want to believe that you're giving your romantic partner pleasure in bed? At least you don't want to blush and apologize.
Choosing a material
First you need to choose the right material from which the screen for the heating radiator will be made. The options are:
Plastic is of little use for our purpose. Not only does it poorly conduct heat, but it also warps over time from its effects. In addition, the cost of plastic panels is quite high. The only advantage - ease of processing is completely crossed out by significant shortcomings.
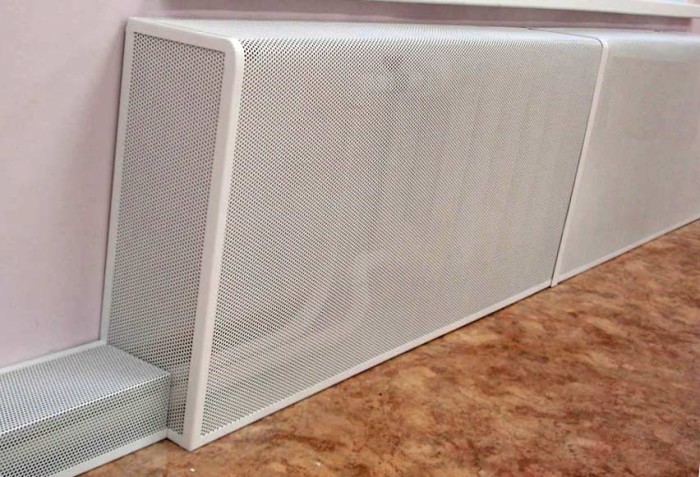
From the point of view of heat transfer, metal screens on radiators are the best option; by installing such a casing, you can easily meet 3% losses, which is almost imperceptible. To do this, you can purchase sheet metal with a polymer coating of the desired color and fix it, for example, on profiles for drywall systems. However, metal processing is not an easy task, and at home, and even without skills, it is unlikely that it will be possible to assemble a decent product.
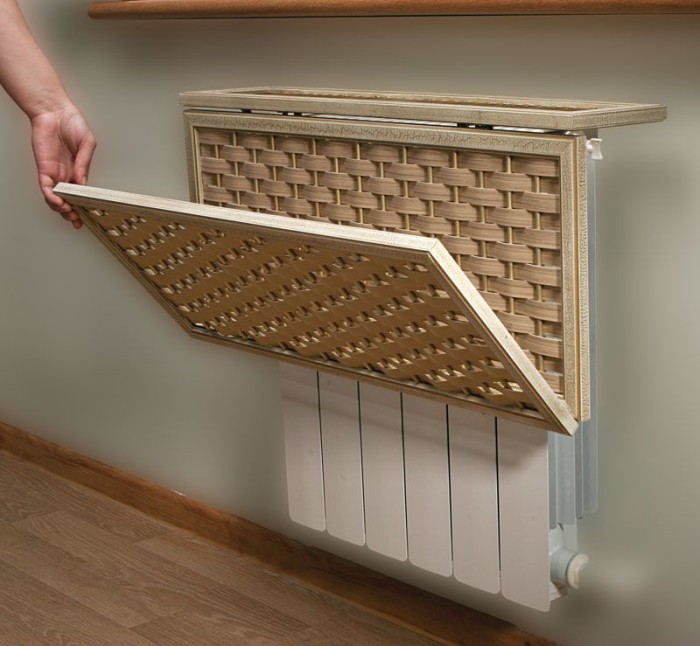
A good option is wood battery screens.Despite the fact that wood does not conduct heat well and requires care, but there is room for imagination and the ability to perform a simple and successful design. It is quite possible to assemble it yourself, and it will serve for a long time.
The same should be said about such material as laminated MDF panels. They are easy to process, strong and durable, and the outer pattern can be successfully matched to the interior of the room. Another advantage is that MDF screens do not require maintenance, like wooden ones. The cost of the material is quite affordable, so wood products and MDF are the most common options for ennobling heating appliances.
A little about drywall sheets as one of the most popular finishing materials. It is also quite suitable for our purpose, only it is more difficult to make a home-made drywall screen, it requires initial skills in working with this material, and it will turn out to be more expensive at a cost.
Wooden screens
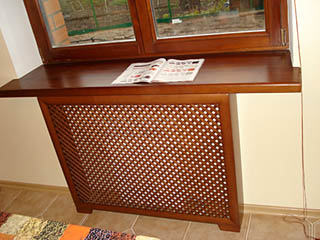
The simplest screen to manufacture is a panel in the form of a lattice of wooden slats, fixed on a wooden frame. The position of the rails can be any - vertical, horizontal, diagonal.

If desired, you can make a cellular lattice by placing the slats at an angle to each other, and using two opposite layout directions. Moreover, the angle between them does not have to be right. But in order for the lattice to be flat, you will have to make grooves at the connection points, and, given the thickness of the rail and the manual manufacturing method, it will definitely not be easy to do everything.

Another type is the screen-blinds. Such a screen resembles classic wooden shutters-blinds on windows. In order for the slats in the frame to be at the same angle to the plane, the same parallel cuts are made on the side posts using a miter box. Since the thickness of the hacksaw blade for wood is less than the thickness of the rail, then two cuts are needed for each of them, and the excess must be removed with a narrow chisel.

Both the beam for the frame and the slats must be dry. Given the proximity of the screen to the battery, it is necessary that their own humidity is not higher than 12% (these are the general requirements for wood intended for carpentry). There is a simple home method for checking - if you try to tie thin chips into a knot, then it should break.
In the manufacture of both types of screen, each rail must be carefully sanded before attaching to the frame. After they are fixed in place, the grating is primed, coated in two layers with varnish, paint or enamel.
As a decorative finish, trims made of wood or MDF can be fixed around the perimeter of the frame. If these are wooden platbands, then they must be processed in the same way as the grate, but their finish does not have to be the same - the perimeter may be of a different shade.

When the battery is in a niche, the screen can either completely cover it, or hang on hooks, leaving small gaps at the top, bottom and sides.
When attaching the screen to the box, the side surfaces are sheathed with laminated fiberboard or chipboard. The ends of the skin may not be trimmed with a decorative edge if the screen platbands cover them.
Another common type of wooden screen is the use of plywood as a panel. With the ability to work with a jigsaw, you can cut out an openwork lattice with any pattern transferred to the plywood surface using a stencil. The finishing treatment of such a panel does not differ from the lattice: grinding, priming and painting.

Important! When choosing chipboard or plywood for the screen, you need to pay attention to their class. For plywood, it should be E1, for chipboard - E0
Starting to make a homemade radiator
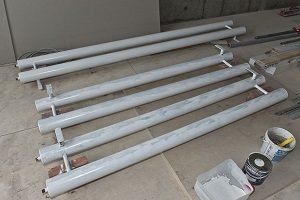 Let's break down the progress of the work:
- To weld the supporting frame, steel pipes are needed. For greater efficiency and heat transfer, it is better to use large diameter pipes. Scrap or scrap metal will do - the main thing is that they are in good condition and not covered with rust.If the pipe has threads or other metal elements, then they need to be cut off. All pipe edges must be smooth, without burrs.
- Calculate the power of the future radiator system. In order to correctly distribute the batteries around the house, you need to write down the quadrature of the living area.
Master's advice: feel free to take calculations for standard cast-iron pipes, you can't go wrong!
We measure the primary indicators: the outer diameter of the pipe = 12cm; pipe inner diameter = 9.5cm; thickness of the outer wall of the battery = 3.5 cm; sectional area = 7.8 cm.
Battery volume = 14500 cm3. Further, the volume of the radiator must be divided by the cross-sectional area. We get the length of the desired radiator = 2 meters.
- You can bring your own nuances to the design of the battery: if you often experience air in pipes, freezing of water or heating fluid, water hammer, then install a special swivel-type crane. At the right time, you can easily restore the pressure in the system.
- The battery can be with any number of sections. It all depends on the type of room where it will be attached:
- in a large room (more than 30 m2), it is advisable to install a three-section radiator;
- in the bedroom, study or children's room, a two-section is enough;
- for basements, warehouses, pantries, where it is necessary to maintain a minimum positive temperature at any time of the year, a single-section radiator can also be installed.
- Before you start working with the grinder, free up space around you. Make sure the extension cord is at a safe distance.
Specialist's note: remember about safety when working with power tools!
Take a large diameter pipe and cut it into 3 equal parts.
In each part, make holes at an angle of 180 degrees and with a diameter of 2.5 cm, with a power tool equipped with a ballet nozzle
Pay attention to the distance between the holes: they need to be done by measuring 5 cm from the end on both sides. As a result, you will get a design in which the holes are located both in the lower and in the upper part of the pipe.
Clean the pipes and sharp edges of the holes with coarse sandpaper from metal chips.
Next, take a thin pipe with a diameter of 20 cm and measure it in the middle
Then cut with a grinder to make 2 pieces of 10 cm. Weld these pieces of pipe to the structure of large pipes, so that you get a cruciform water circulation system.
Cut thin rods and weld to the opposite side of the large pipe structure. Thus, you will get a rigid and stable frame that can withstand strong water pressure.
To fix the resulting frame, install the slings: one sling is welded to the inlet, and the second to the outlet.
Good to know: in order to check the radiator for leaks, it is necessary to close the bottom outlet with a plug. Pour water into the upper drain and observe: if there is still a leak, then drain the water, dry the radiator and weld the gap.
 If you have central or steam heating, then you can make a battery from ordinary plastic water pipes. They are light weight, low cost and quick to install.
To increase the temperature in a living room or apartment, a pipe structure is welded to a ready-made profile battery. These manipulations are subject to agreement with the chief engineer of the ZhES and registration with public utilities.
The danger of carrying out this type of work by an incompetent specialist is that the registers will record a decrease in pressure and such “work” will lead to airing the water supply system of the entire residential building. To avoid trouble, you must completely turn off the water supply and block the inlets.
It is important to know: in no case should you embed home-made structures without the presence of a specialist. A sharp water hammer can lead to depressurization of a welded radiator
As practice has shown, 15-16 battery ribs are needed for 20 m2. This is quite enough to maintain the optimum temperature of +20 degrees Celsius.
Watch the video in which the specialist explains how you can make a heating radiator with your own hands:
Design and physics
Recall from school: the best way to emit and absorb radiation is a completely black body. The outdoor screen should absorb the IR from the battery and then radiate it into the room. To do this, first, it must have good thermal conductivity so that the absorbed IR does not return back. Secondly, the darker it is, the better. How to decorate the battery from the outside is primarily a matter of taste; but the underside of the screen in any case should be painted black.
Let's explain with an example: Let's say the screen is black; IR absorption coefficient k = 0.8. It absorbs radiation on one side and radiates on both sides. The thermal conductivity of the screen material is also not infinite. The back radiation will additionally heat up the battery, it will radiate more strongly. The exact calculation is quite complicated, requiring knowledge of advanced mathematics, but the end result is simple: 1 divided by the square root of 2 is multiplied by the square of k. That is, 0.707x0.64 = 0.453 of the regular IR flow will go into the room.
This is already less than what an aluminum radiator with profiled channels will “pull out” with worse convection. With a bright screen, the heat transfer to the room will worsen even more. Where does the unused heat go? It goes into the return pipe, but you still pay for it. Can the matter be corrected? Yes, you can. First of all - additional thermal shielding from the wall.
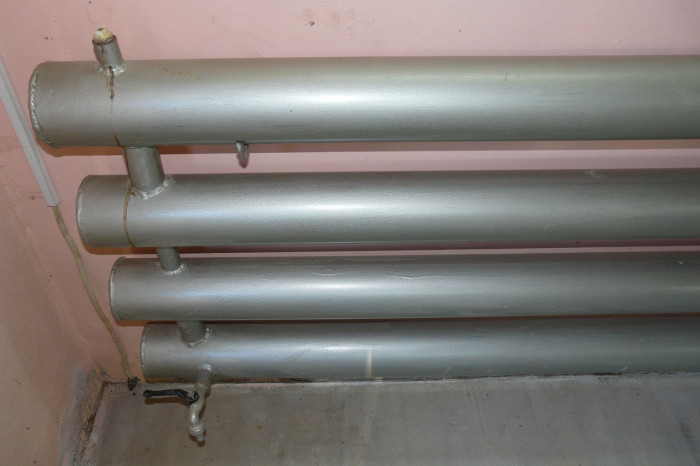
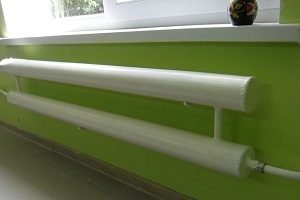
Production of a heating battery from a profile pipe
A heating radiator is such a device that not only industrial companies can make, but also homeowners, including beginners in this business. True, the latter will have to spend a lot of time. The easiest way is to make a battery from a profile pipe with a square or rectangular sectional shape. That's because it doesn't spin and is easy to lock in place, allowing you to focus on all your welding and cutting jobs.
The device of a heating radiator from a profile pipe is as follows:
- 3 horizontal pipes;
- 4 vertical jumpers;
- 6 plugs;
- sleeves with internal thread welded to the ends of the upper and lower pipes.
Vertical lintels are placed at the ends of the pipes and allow water to flow from the top pipe to the bottom.
We weld the structure
This process is done like this:
- The pipes are set up with their own hands so that cut-out 10-cm round tubes fit between them. The holes should "look" to the sides. The ends of the profile pipes must be in one straight line.
- Wooden planks or other objects (for example, a wrench) are substituted under the round tubes so that the first are placed and fit snugly into the holes made.
- Tack welding 25 mm tube. In two or three places, the tubes are welded to the profile pipes. If two tacks are made, they should be positioned so that the line between them represents the diameter of the tube. If you plan to make three tacks, then they are evenly dispersed along the length of the tube. Choosing one of these methods, fix each end of the jumper.
- They put the structure in a vertical position and proceed to welding the jumpers of the profile pipe. Experts recommend that you first make a thin seam using a small current. This will fill all the gaps. Next, you need to make a thick main seam. Do it by increasing the welding current. This tip is primarily for beginners. Professionals can immediately make a beautiful, durable and reliable thick seam. So boil the seams at each end of the jumper.
- They clean the internal space of the structure made from metal debris and slag.
- Plugs (rectangles or squares cut out of sheet metal) are applied to the ends of the profile pipes and they are grabbed in the same way as the jumpers were.
- Weld plugs to the ends of the radiator base. At the end, you get a rough design, in which you still need to make holes for the inlet and outlet of water.
- Processing welds. Parts of the seams that protrude very much are knocked down with a hammer, which could lie near the radiator key. A large wrench may work instead of a hammer. Next, each seam is treated with a grinder. Sanding will make them smooth.
- Holes in an almost finished radiator are drilled depending on how it will be connected. In general, it is desirable to make four holes. Unnecessary will be closed with a stub. Then, if necessary, it will be used. Holes can be made at the ends of the pipes or at the bottom and top sides of the created structure. Again, it all depends on the features of the connection. If the holes should be at the ends of the profile pipes, then they are not made in the center of the ends. The upper holes are placed closer to the top of the structure, the lower ones - closer to the bottom.
- Couplings cut in half by 15 mm are welded to the holes made. First they are seized, and then the main welding seam is made. Below, instead of muffs, you can use transitional knees. Of course, at the end of each of them must be an internal thread.
- They clean all the seams, plug three holes and pour water into the radiator through the last one. The water must be under pressure. You can pump air. In any case, check the reliability of the seams. If there are problem areas, they are marked and then additionally boiled, having drained the water before that. If not, then that's good.
- Clean the outer surface. they process, or rather wash it with a degreaser and paint it with heat-resistant paint, which stood next to the tools and the radiator key.
- A Mayevsky crane is installed in one of the upper holes (the key to it is placed in a safe and at the same time accessible place). You can also fix the shut-off valve.
Manufacturing materials
It is quite possible to make products with your own hands using various types of materials. The characteristics of the material determine its technical features.
For example, metal shutters can be painted in any color. They perform their protective functions perfectly and look great.
Using the perforation technique, you can create an unusual and interesting effect. The steel and aluminum model is very easy to install. The product made of wood looks very impressive in any interior.
For those who want to create a similar decoration element with their own hands, it is better to use the available materials:
It is an inexpensive material with low thermal conductivity. It heats up unevenly and has little strength. Working with plastic is quite difficult. Plastic should be thick, as thin material has low strength.
May release toxic substances when heated. Products made from such raw materials are lightweight, resistant to moisture, not subject to corrosion and do not heat up much.
When choosing a material for a decorative product, one should remember not only the attractive appearance, but also the microclimate in the room. Therefore, it is necessary to select a damper with a minimum surface and leave a small space from the floor for air movement.
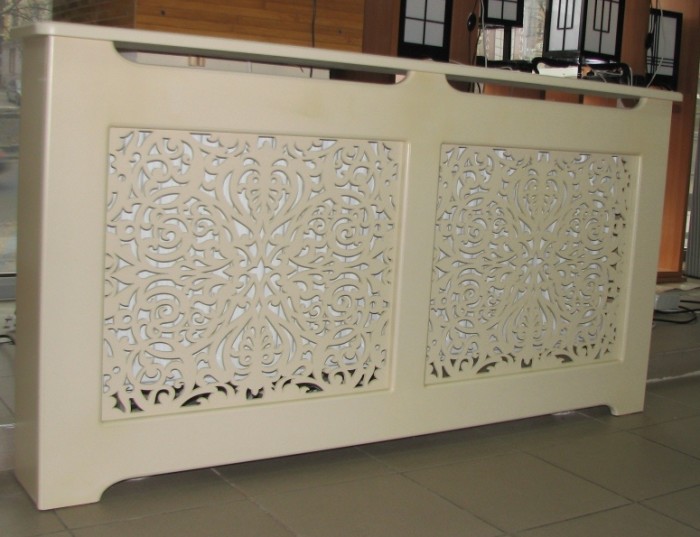
Wooden products can be painted in any color and decorated with artistic painting. Four types of crates can be made from wood. For example, rhombus, circles, cage and in the form of blinds. The interior with wooden elements looks very aesthetically pleasing and goes well with other materials.
The best types of wood for such products are beech and oak. They are durable and reliable. They can be both tinted and painted with enamel.So that the gratings do not interfere with the circulation of heat, they are mounted not on the floor, but at some distance above its surface. For better passage of warm air, certain holes are made in the upper part of the box.
Fences at an affordable price can be made of rack fabric. This is an excellent stylish element that perfectly passes warm air and performs a protective function.
Metal has a high thermal conductivity, but you need to be able to work with it. This is an excellent material for a homemade design. Two types of products can be made from it: stamped and by welding.
Stainless steel dampers look more elegant and beautiful. They can cover both part of the battery and the entire radiator. They are divided into 3 types: with two sidewalls, with one and without sidewalls. The choice of option depends on how the heating device is connected.
The metal element does not interfere with high-quality heat transfer. The box, made of aluminum or steel mesh, perfectly transmits heat. These products are very easy to install. They are decorated with various designs. For example, an openwork lattice or a solid canvas with open space.
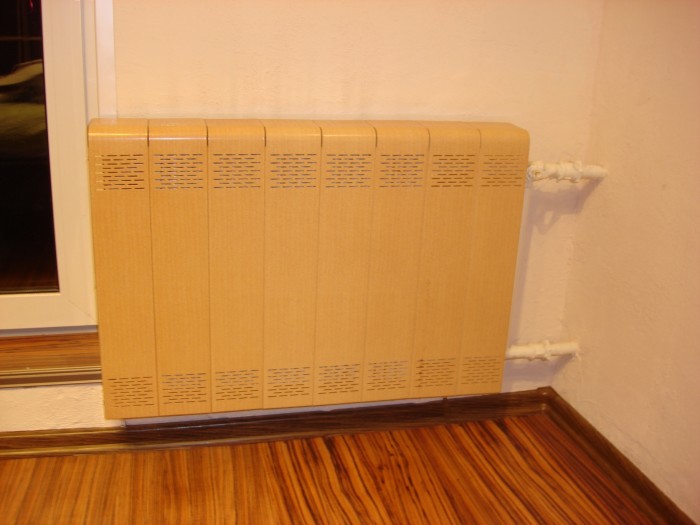
MDF panels provide a wide variety for decoration.
They are created from perforated parts equipped with a decorative frame. These models are suitable for different heating systems. They can decorate both cast-iron and bimetallic radiators.
This material can be used to make exclusive railings for radiators. Glass in this case can be stained glass and tempered. A certain pattern is applied to the surface. Such design elements are made of particularly durable raw materials with a wall thickness of at least 8 mm. They are almost impossible to break.
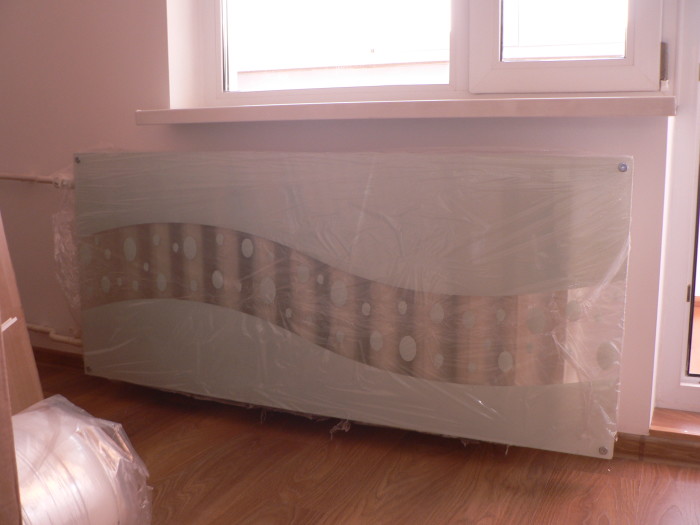
The edges of the product are carefully polished, which makes them safe and endows with great strength. A special substance is applied to the surface of the glass, which has protective properties and allows you to use ordinary detergent in the future.
Glass perfectly transmits the sun's rays and does not reduce convection. And if necessary, dismantling work is carried out very easily and quickly.
There is another type of glass - acrylic. Acrylic glass has a variety of colors and can be easily transformed. Screens can be matte, transparent and plain. LED lighting can be attached to them.
How does it warm
The transfer of heat from the battery to the room is carried out due to the flow of heated air - convection - and by radiation in the infrared (IR) range of electromagnetic radiation. The ratio of radiation and convection varies depending on the temperature of the hot water in the system, external conditions and the design of the radiator.
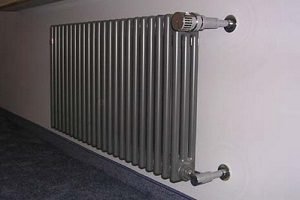
"Harmonic"
The old "cast iron" in autumn or mild winter warms mainly due to convection. With intensive heating (radiator temperature +50 degrees or more), infrared radiation gives a significant proportion of the heat flow into the room. Nowadays, in some regions, such a situation seems abstract and fantastic, but people of the older and middle generations remember how it was impossible to touch the batteries in a harsh winter.
profiled aluminum
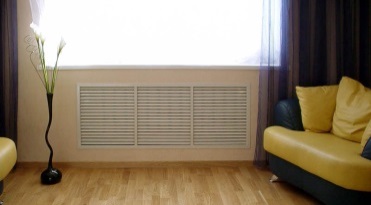
Good screen for a heating radiator
Modern radiators operate in much the same way, but they are able to adapt to external conditions to some extent. If the air circulation in the channels is hindered by something (for example, a curtain), the heat flow in the metal mass is redistributed towards the front flat panels, and the radiator switches to heat radiation mode. This is achieved by precise numerical simulation of the radiator on powerful computers.
From this it is clear: the radiator screen must provide not only air circulation, but also the transmission of infrared radiation to the outside. This is achieved in two ways, see the next section.
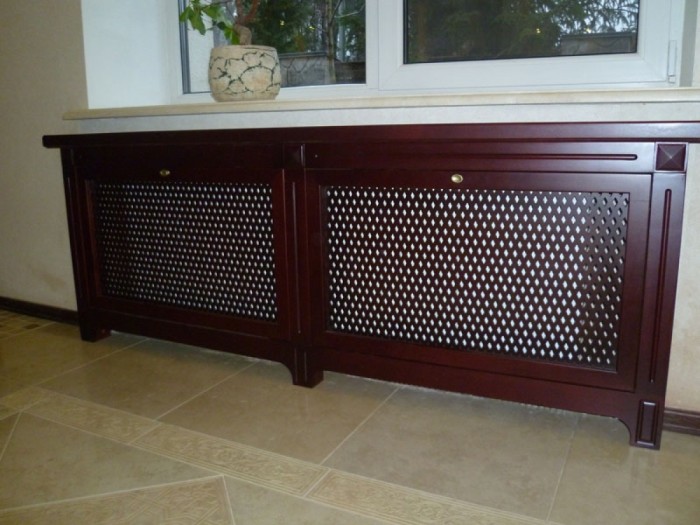
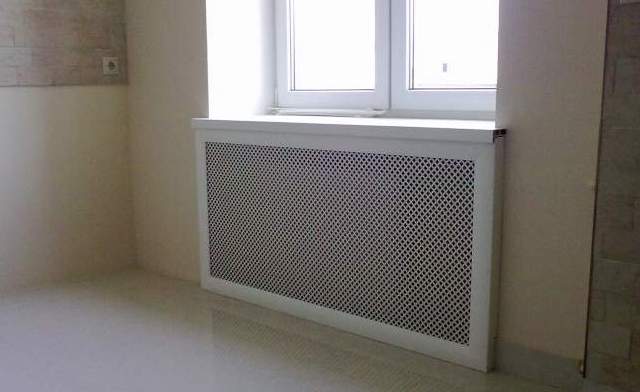
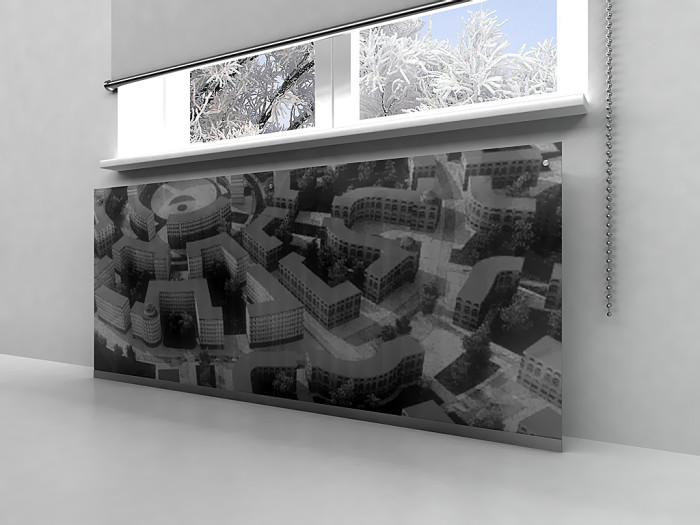
According to convection, the conclusion is simple: the front panel of the correct screen should not be deaf or with rare small holes. A good screen is a battery grille, fairly sparse and with plenty of space above the heatsink (see picture on the right). But to ensure heat transfer that is not inferior to the regular one in free space, this is not enough.
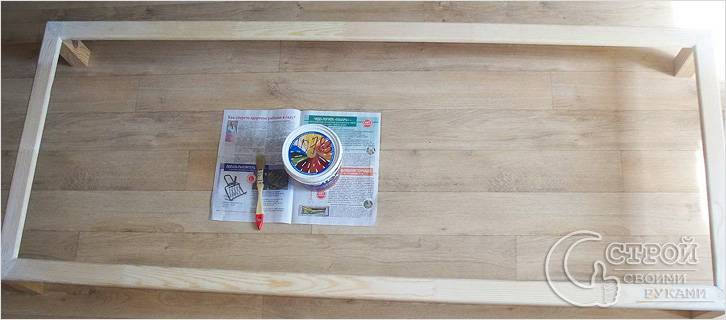
Material and tools
To make a battery screen, you will need: a hacksaw, a pencil, a ruler, a tape measure, a hammer, a drill. A hacksaw can be replaced by an electric jigsaw. You also need screws of a suitable length and small nails, as well as metal corners. To attach the screen to the wall, you will need two hangers (they are usually used for wall cabinets) and dowel-nails of the appropriate diameter.
The battery screen is easiest to make from wood, chipboard (plain or laminated), or thick plywood. At the same time, the front part - the screen panel - can already be bought ready-made in the store, or you can make it yourself, for example, twist the furniture edge in the form of a "lattice" (with a bottom layer of thermal glue).
Note! The smaller the total area of the holes in the screen panel, the worse the battery will heat the house. Note! If you decide to use materials that do not have a beautiful front side for the manufacture of the screen, it is better to paste over the finished product with self-adhesive wallpaper of a suitable color
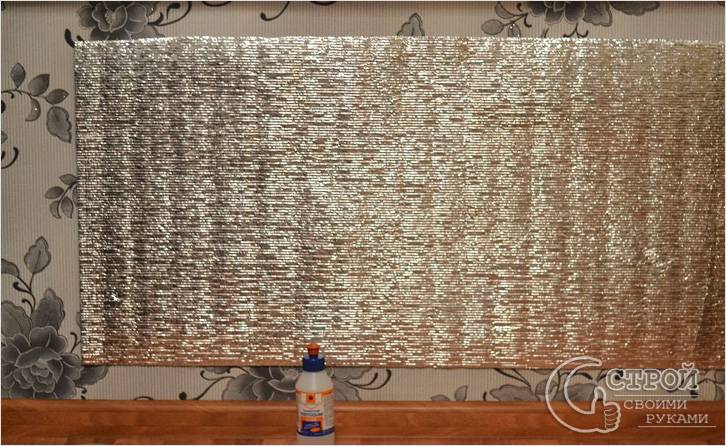
Note! If you decide to use materials that do not have a beautiful front side for the manufacture of the screen, it is better to paste over the finished product with self-adhesive wallpaper of a suitable color. To make a heat-reflecting screen behind the battery, you will need a polystyrene foil substrate of any thickness, scissors and glue (you can use Bustilat or PVA)
To make a heat-reflecting screen behind the battery, you will need a polystyrene foil substrate of any thickness, scissors and glue (you can use Bustilat or PVA).
How to do
 Screen frame for battery
- First, you should decide on the design of the screen for the battery: it can be made hinged or resting on the floor in the room.
- The next step is to make a drawing (by hand on paper) of the future screen for the battery, measuring the width and height of the battery, as well as the distance from the wall to the place where the screen panel is fixed. Add to the values obtained:
- 3-4 centimeters on each side - to the width of the screen (this will allow air to circulate more efficiently),
- 2-3 centimeters - to the distance from the wall to the screen panel.
 Painted screen frame
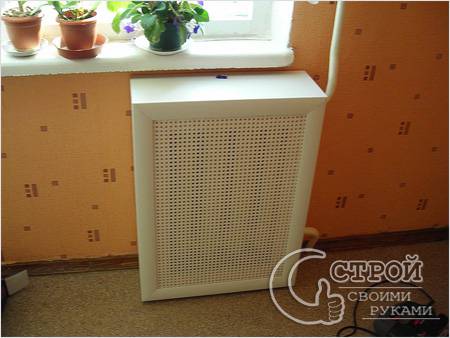 Battery screen box
The screen for the battery itself is a voluminous box, the sides of which can be made of a solid array (chipboard, chipboard, boards, plywood), and the upper part with holes for warm air to escape. Therefore, when making a drawing, do not forget to take into account the thickness of the material from which you will make the box.
In strict accordance with the dimensions that you have obtained in the drawing, file (using a jigsaw or a hacksaw) the necessary elements of the box, then connect them together with metal corners (this will give the whole structure rigidity).
 Screen installation drawing
- Attach the screen bezel to the box with small studs. To improve the appearance around the perimeter of the panel, you can fix small slats, creating the appearance of framing it into a frame.
- Cover the sides of the screen with self-adhesive wallpaper, if necessary. The slats around the front panel can be coated with special wood compounds to give the right shade.
 Battery shield resting on the floor
Then you should fix the screen for the battery on the wall (if the screen is simply installed on the floor in the room, this stage of work is not relevant for you). The difficulty is that the screen must be removable, otherwise you simply won’t be able to wash the battery later or get to the valves that regulate the temperature of its heating.Therefore, two hangers must be attached to the battery screen box on the back side at the top. Next, attach the finished screen to the battery and mark the holes for drilling with a pencil. Remove the screen, drill holes, hammer plastic dowels into them and screw in the screws. It remains only to hang the screen for the battery in its permanent place.
 Heat Reflective Foil Screen
If you want to make a heat-reflecting screen behind the battery, then cut out a rectangle from the foil substrate exactly according to the inside size of the screen box. Then cut holes in it for hooks coming out of the wall (the battery is held on them) and glue the resulting heat-reflecting screen to the wall (with the foil out).
Hang the screen in place and make sure that the foil does not peek out from under it.
What needs to be done to improve battery efficiency with a screen
The screen to some extent reduces heat removal from the surface of the battery. That is, the difference in the temperature of the coolant between the direct supply and the return will be less.
It is impossible to speak about an unambiguous deterioration in the convection rate due to the presence of a screen. It is enough to give an example of electric convectors, in which the heating element is located in the housing in the form of a box with an inlet from below and an outlet from above. Such a device even improves convection, since the duct acts as a vertical duct, which increases the flow rate.

But what is good for convectors is not suitable for radiators. The battery works on both convection and radiation (radiation). And the screen absorbs some of the infrared radiation, and reflects some back. And if the thermal energy absorbed by the screen creates conditions for secondary convection, then the reflected one heats the facade. This heat can be made to work for space heating. Even under normal conditions (without a screen), it is recommended to install a reflective plane behind the radiator, which returns infrared radiation from the inner surface of the battery into the room. Usually foil foam (or similar material) is used. When installing the screen, this recommendation is doubly relevant.