How to plaster behind a battery
Next, you need to level the wall. From our original picture it is clear that the wall will have to be plastered. It is in this place that you can breathe a sigh of relief once: it is not necessary to plaster on the lighthouses! Even if you lie a little and make a slight curvature, then this will definitely not be visible under the batteries. Therefore, we take the plaster and begin to level the wall by eye. I have a separate section about .
We take about 3 hours to prepare the plaster solution and the work itself (for a non-professional)
And now an important point that many people forget. The plaster takes a long time to dry. From 2 to 7 days. (unless, of course, we want to do everything according to the right technology). It all depends on the thickness of the plaster layer, the season, the dampness of the room itself. But still we take the average time equal to 4 days
. A sign of complete drying of the plaster, for example, gypsum Rotband, will be a change in the color of the wall from cream to snow-white, as will be seen in the following picture:
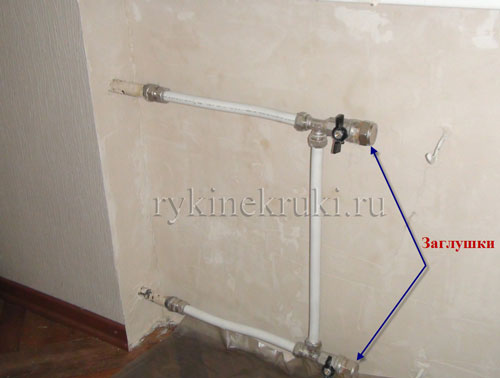
Yes, I almost forgot. If you are making repairs during the heating season, I highly recommend that you install plugs immediately after removing the battery for your own safety. .
Hidden broach
 Laying heating pipes in the wall is a fairly popular practice. This is justified by the fact that heating communications spoil the interior premises. This is their big disadvantage. They stretch along the walls, catch the eye, and do not add attractiveness to the overall design. For these reasons, many want to hide them.
Heating laying can be done in different ways, but the most common of them is installation in the wall. At first glance, this is a very good solution, the pipe is completely hidden, the general appearance of the room has improved a lot, but is it really so simple, and what are the advantages of this solution?
Often, when laying a heating network in the walls, the joints lose their sealing. As a result, leaks form. It is impossible to see such places on a hidden pipeline, and defects can only be detected by a water pressure sensor.
All modern heating devices are equipped with such a device. When determining the leak, you need to establish the location of the accident, and make repairs.
If, after weighing all the pros and cons, it is decided to lay the heating line in the wall, then the surface coating must be designed in such a way that access to possible emergency zones is free.
For these reasons, cladding is made from plastic panels, clapboard, drywall, and the like. The disadvantages of various decorative plastering is that in the event of an accident, the wall will have to be dismantled, and this is not only physical, but also financial costs.
Also, one more nuance should be taken into account. Minus the plastic system -
During installation, this minus must be taken into account.
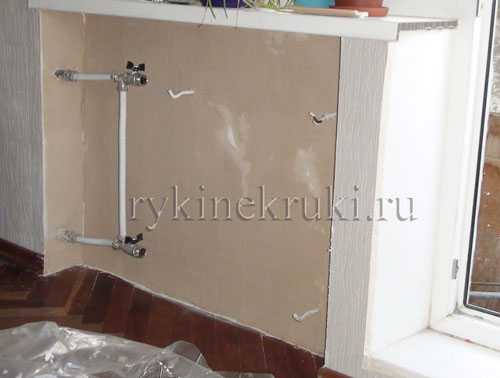
Primary processing of the wall behind the battery
The picture above clearly shows that the wall behind the battery is not processed. If you remove the battery for the first time, then most likely, there will be not a white at all, but a gray dusty wall, with old, ingrained paint. It is clear that wallpaper cannot be glued on such a wall right away. If you decide not to glue the wallpaper, but to make the wall cladding with a decorative panel, as can be clearly seen in the pictures in the article, then in any case, the wall needs to be treated at least in order to remove the smells of old walls and old repairs (advice from my personal experience ).
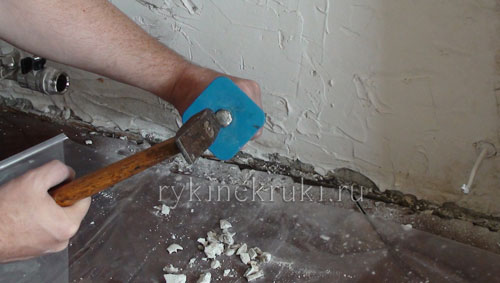
So where do you start? We begin to beat off extra bumps on the wall, the remnants of old putty and paint with a hammer and chisel. We especially pass in those places where the plinth should be attached to us.
Estimated time around 1 hour
:
Then it is necessary to remove all debris and prime the wall (see Rubric).
We primed the wall 2 times.The priming itself takes 10 minutes, but the drying time of each layer is 1.5 hours.
Total: cleaning + wall primer + drying time is about 4 hours
.
Electrical before or after plastering
First you need to decide on the placement of electrical wiring relative to the wall. The wiring can be located on top of the wall, in special boxes (cable channels), or wiring is planned hidden in the wall. If you plan to install electrical wiring on top of the wall, then you should first perform plastering and finishing work, otherwise the finish will not work, because the wiring will interfere with the finishing.
When working with drywall, electrical wiring must be laid in advance, and you also need to take care of the holes for switches, sockets, and so on.
The easiest way to determine the order of installation of electrical wiring, given the maximum thickness of the plaster layer. If the plaster layer is planned to be less than 2.5 centimeters, then there is no reason to lay electrical wiring in advance. It is easier to drill the necessary channels after finishing work is completed. For these works, a special tool is used - a wall chaser. And then calmly place the wires and re-plaster them.
In the case when the uneven surface of the walls, or other reasons make the thickness of the plaster layer large, then, in order to save finishing materials, it is better to lay the wiring in advance. The ideal option is the opinion of the worker who is engaged in the repair. If you are this worker, ask yourself the question: plasterer or electrician, which comes first.
If the repair is not done on your own, consult with the builders, they will choose: an electrician before plastering or after.
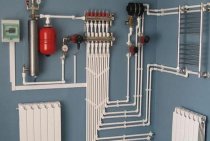
Heating pipes under a false wall
Watch the video If a decision is made to hide the heating pipes in a false wall, then in this case there are no particular difficulties. First, a base is erected from the guides, and at the end it is decorated with any of the selected materials: clapboard, drywall, blockhouse.
There is an opinion that if you hide the heating in a false wall, then the useful space of housing is significantly reduced. Fortunately, this minus is only a myth. For example, if you need to hide the heating pipeline under the window, in reality this space is practically not used.
The only thing that is lost in this situation is an incomplete fifteen centimeters under the windowsill, but it itself becomes wider by the same distance. Such an addition is much more useful than the unused area under the window.
If you need to hide unaesthetic designs of the heating system, then experts recommend a false wall. They call it just the perfect solution. A very important advantage of this building is that it can be designed without the participation of professional craftsmen. And this is a big advantage of this building.
Another big advantage of this method is the excellent combination of construction with the overall design. When deciding to hide the heating pipes under a false wall, you can also review the placement of other systems; this method can also be effective for decorating them.
Wall decoration behind batteries. Think about the little things
It turns out that when people make repairs in their apartments, they completely forget that the decoration of the walls behind the batteries is just as important as the decoration of the main walls. And when they finish the work, they realize that the batteries, in fact, have not been completed, the wall behind them is ugly, and of course it needs to be brought into the appropriate form.
Why is this happening? Here are some reasons:
- the heating battery covers part of the wall, so there is no need to do something behind it;
- there will be long curtains from the eaves to the floor and the batteries will not be visible at all;
- decorative screens will be hung on the batteries.
It is difficult to disagree with these points, since they are absolutely fair.But, not every family is able to plan all future repairs, as they say, on a turnkey basis, and many little things are thought out along the way. For example, after the repair is completed, it turns out:
- probably in this room with such wallpaper, blinds are better suited, or short curtains to the windowsill, and not to the floor;
- the room is relatively small in area, and if you hang decorative screens on batteries, they will look very bulky and steal space in the room.
So it turns out that the primary vision regarding batteries has changed. It turns out that there will be neither long curtains nor decorative screens. So what then? A terrible raw wall behind the batteries, which, in the absence of curtains, is very visible? By the way, there are houses where there are 2 windows in the rooms. So 2 scary walls will be visible?
What is the difficulty, you ask? Think of a small piece of wall, it can be done in a couple of days. However, this is an erroneous, at first glance, opinion. If the wall behind the batteries is really crooked or with potholes, then you can’t just stick the wallpaper on it, most likely it will have to be leveled at the very least, which means you will have to mess around with the primer, and with plaster, and with putty. Read my detailed article about. After wallpapering, you must not forget to cut out and, which under the batteries are solid external and internal corners. The most terrible thing is that if your main repairs have already been completed, then the apartment is relatively clean. And just imagine, in a mini version, you actually have to repeat the entire repair from start to finish with a small piece of wall.
True, I can reassure you a little, since there are certain assumptions that will nevertheless reduce the time.
So let's start. In parallel, I will take into account the time spent on such repairs.
Best Answers
Vladimir Degtyarenko:
Now they will advise you! Of course, plastering is not to be done in frost, but heating is only after plastering, because: 1. You need to know the level of the wall surface 2. With pipes, no virtuoso plasterer will plaster with high quality. Advice to do the opposite is given by amateurs who have no idea about the order of work. Install pipes only Ecoplastic - Headquarters, about heat loss - they retain it due to a thick plastic wall, soldered joints, which makes it impossible to leak (polyfusion welding at the molecular level), which cannot be said about metaloplast: the pipe is designed to give off heat (initially it is for warm floors), thin-walled, threaded connections cannot be walled into the solution. Believe me, I had to redo it.
Dima Korenev:
Put dynamite in the basement and instead of fireworks on a holiday! ! That will be cool!
Tanya_doctor Kurpatov:
well, when my drma did repairs, they first laid heating, and then plastered
Sergey Leschev:
Better metal. Cheaper and easier to hide first, then plaster
TALDOMCHANKA:
hire craftsmen. Aren't you afraid that the pipes hidden in the walls will someday flow?
it will certainly be more interesting - first plaster and then break it down again ... especially if you like the process in construction.
Alexander Bogdanov:
Which pipe does not matter much, but you don’t need to hide it in the wall, there will be more heat loss, and heating costs money in your house.
Valery:
It is definitely better to do engineering in the house first, then plaster. And it is better to carry out plaster work in a heated room, with good (35-55%) humidity. in a metal screen) And which ones are absolutely not important. Your masters are required to know all the nuances that exist when working with pipelines from the material they have chosen.
The Man Who Wasn't There:
It is quite good to create water (warm) floors. More expensive, but more pleasant from all sides, especially in the cottage.
Hermit:
start plastering the walls, and then lay the pipes.
The nuances of internal plastering
So, we examined the basic technology for applying plaster, however, as mentioned above, when performing repairs in a dwelling, you will have to face a number of other nuances, so we will list the main ones below.
Scheme of plastering the doorway
Finishing door and window openings
When finishing any room, the first problem that novice masters have to face is the finishing of slopes.
In reality, there is nothing complicated in this:
- First of all, before plastering the opening, you need to install.
- Then, on the outer, upper side of the slope, a perforated corner should be installed, checking its position with a building level.
- After that, plaster is applied according to the same principle that we discussed above, i.e. spraying is performed first, and then the covering layer. You can level the surface of the opening using a bevel or a special device in the form of a stick with a cutout.
- After completing the upper slope, vertical corners are installed and the sidewalls are finished in the same way.
The same is true for window trims.

Plastering a shell wall
Finishing porous surfaces
Often, home craftsmen need to finish porous surfaces, such as shell rock, which raises a number of questions. In reality, the technology of finishing these materials does not have any features.
The only thing is that before you start applying the solution, the surface must be well moistened with water. Otherwise, the finishing is performed in the sequence described above.
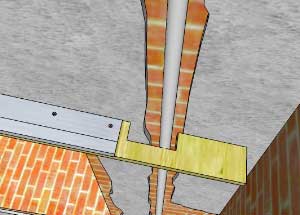
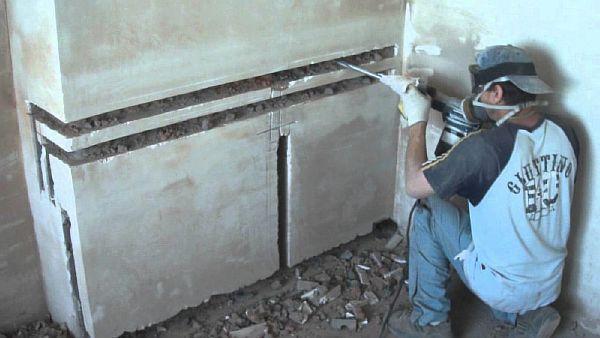
Plastering the surface behind the pipe
Plastering hard to reach places
Often, when performing repairs, it becomes necessary to plaster hard-to-reach surfaces, for example, a section behind pipes where it is impossible to install plaster beacons and level the surface with a rule. The solution to this problem is quite simple - you need to make a fixture from a sheet of plywood and a rule.
Plywood, or other sheet material, should be screwed to the rule, after cutting out the cutout for the pipe. Thus, the rule can be dragged along the beacons and at the same time align the remote area. The space under the pipe can be filled with plaster using a spatula.

Plastering stoves and chimneys
Another problem area that can cause difficulties when finishing is the stove or chimney. The process of applying plaster on such surfaces does not differ from wall decoration, but there are a number of requirements for plaster mortar.
At one time, clay-based mortars were used to plaster stoves and chimneys, but now there are special heat-resistant plasters on the market that can withstand temperatures up to 1000 degrees Celsius. These are the ones you need to use when doing this kind of work.
Technoplex plastering
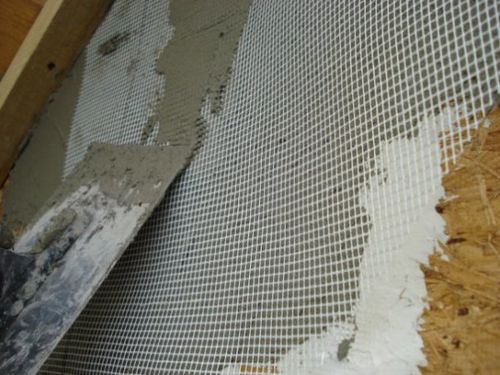
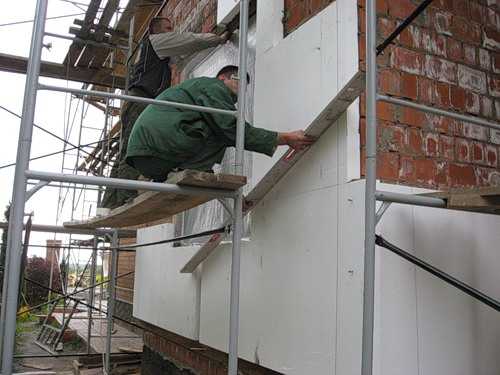
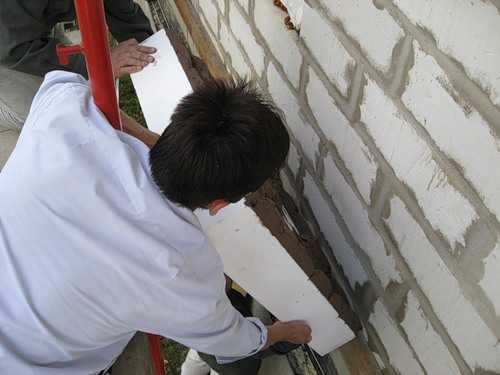
Plastering of walls insulated with technoplex
Recently, such heat-insulating material as technoplex has become widespread.
Plastering walls insulated in this way has the following nuances:
- Finishing is carried out with a universal adhesive for the installation of insulation systems.
- Lighthouses are not used, since the installation of technoplexes itself implies the alignment of the walls.
- A fiberglass reinforcing mesh is glued on top of the insulation. Glue is applied to the mesh with a layer of about 3 mm.
- After the first layer has dried, the surface is covered with a finishing thin layer of glue, which finally levels it.
Here, perhaps, are all the main difficulties that you may encounter when plastering your home on your own.
Plastering OSB boards
Plastering OSB boards
The need for this operation usually arises when finishing frame houses.It is impossible to apply plaster on OSB in the usual way, as the coating will quickly begin to crumble. Therefore, the best option is to finish the surface with expanded polystyrene, which will serve as a heater, and then perform plastering using the technoplex finishing technology.
In addition, there is another way of plastering - OSB boards are pre-coated with bituminous cardboard, after which a reinforcing mesh is glued to them with a special adhesive, according to the technology described above.
Coordination of teams of electricians and plasterers
Coordination of the work of different teams is a headache for any foreman or customer. Here the dilemma “electrician or plaster” is particularly acute.
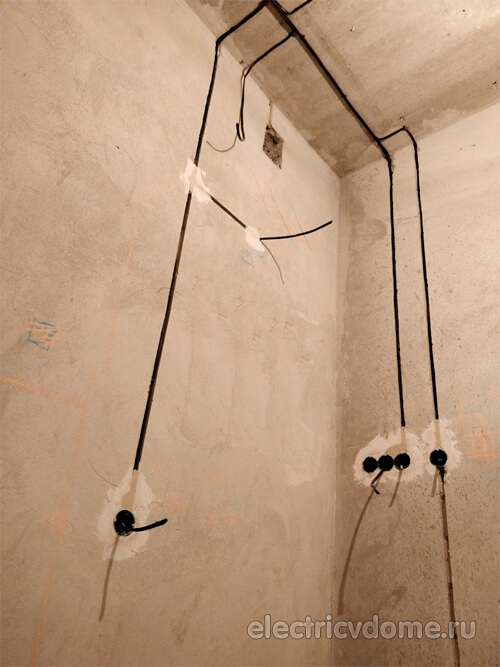
When choosing a method of installing electrical wiring before plastering, the procedure will look like this:
Electricians run the cable along the ceiling, mount junction boxes, bring electrical wiring to switches and sockets
Please note that at this stage the wiring is not yet operational;
Then the masters of finishing works begin to work, who plaster the walls;
Then the electricians start working again, whose task now is to align the sockets, install the shield;
Finishing masters appear again and do a fine finish;
After them, an electrician appears again and installs sockets and switches .. Now consider the procedure if the method of installing electrical wiring after plastering is chosen:
Now consider the procedure if the method of installing electrical wiring after plastering is chosen:
- Finishing masters produce rough plaster work;
- A team of electricians at once ditch, lay the wiring and put it into operation;
- Fine finishing of walls is carried out;
- Electricians install sockets and switches. By the way, the installation of sockets and switches, if the client does not mind, can be carried out in the previous stage of work.
Thus, the second method is much more practical and more controllable than the first.
Also, the possibility of accidental damage to electrical wiring during plastering is completely excluded. Such damage can cause undesirable consequences, up to the redoing of all construction work on a new one, which will require both additional time and additional cash injections, which is highly undesirable.
Conclusion
Due to the above circumstances, it becomes clear that it is better to deal with laying electricians after plastering: it saves time, money and nerves, which is important. Laying electrical wiring before the plastering process is used in cases where, due to certain circumstances, it cannot be done by another method
Laying electrical wiring before the plastering process is used in cases where, due to certain circumstances, it cannot be done by another method.
Now the question “what is plaster or electric first” will not cause any difficulties.
Be able to correctly determine the method of installation of electrical wiring and good luck with your repair!
Related content on the site:
- How is the phase and zero
- Methods for attaching the cable to the wall
- Electrical wiring in a wooden house - rules
- Detailed decoding of the NYM cable
Dismantling the heating battery
The first thing to do is to remove the heating battery. Although a jumper (bypass) is installed in front of it, and by turning off the taps, you can independently dismantle it, you still need to take into account one point. If the heating in the apartment is not turned on, then you can remove it yourself, but if the heating has already been turned on, then who knows in what condition you have ball valves that block the battery. Did they lose weight over time? In this case, self-eating can turn into a big disaster for you and your neighbors, and it would be better to call the master.
It is necessary to prepare a place for future repairs, purchase the necessary materials and tools. Plus, call the wizard to remove the battery and do not forget to include the time for the wizard's work itself. We are planning 1 day for everything.
After running the wizard, we will see the following possible picture:
Why an electrician AFTER plastering is more profitable
For a better understanding of the benefits of post-plastering electrical wiring work, read the following points:
- 1. Save time
- 2. Save money
Let's explain with simple examples. According to all the same regulatory requirements, the depth of laying the electrical cable must be at least 1 centimeter.
Since in some places, the thickness of the plaster layer is a little less than 1 centimeter, yellow characteristic stripes may appear on your wallpaper, caused by the fact that the electrical wiring runs close enough to the wall surface and spoils your interior as a result of natural heating. To prevent this from happening, it is better to ditch the already finished layer of plaster to the desired depth than to take it and goof off out of the blue.
Again, take the minimum thickness of the plaster layer of one centimeter. If you lay electrical wiring before plastering, you will have to add another half a centimeter that occurs when laying the cable in order to compensate for the distance from the wall surface to the cable itself. Naturally, these half-centimeters should not stick out of the wall, so the entire wall will have to be leveled. Let's calculate how much such "alignment" will cost us.
For example, let's take a room with an area of 45 square meters. The standard ceiling height is 2.7 meters. The total area of the walls is 76 m2. The number of points on the walls - 25 pieces. The number of strobes (technical channels for electrical wiring) is 10 pieces. It turns out that the total length of the strobe will be 20 linear meters (10 * 2).
1 linear meter of strobe for brick / plaster costs about 100 rubles. Accordingly, all strobes will cost 2000 rubles.
The average plaster consumption per 1 square meter, with a plaster layer thickness of half a centimeter, will be about 5 kilograms. The average cost of plaster, for example, the Volma LAYER brand is 30 kilograms - 300 rubles. It turns out that 1 kilogram of plaster mixture will cost about 10 rubles.
The cost of 5 kilograms will be 50 rubles. Now we multiply 76 square meters (the area of the surface to be leveled) by 50 rubles, we get - 3800 rubles, which is 1800 rubles more than to gouge. Do not forget that making strobes will be much faster in time than plastering the entire surface of the wall with an additional 5 millimeters.
By the way, some brigades for laying electrical wiring as a bonus offer free work to cover up the strobe after the work is completed.
Expert answers
Vlad:
First, the plaster is made: firstly. dirty work must be moved to the beginning, and secondly, the plaster will be stronger if it dries more slowly, thirdly, the finished plaster will open the front of electrical work - heating does not hold anything.
Natalya Brodskaya:
Heating first...
Marina Chernova:
heating
future gusssss:
heating of course.
Teen Wolf:
First heating and then plastering, although to each his own and put polypropylene advice
skull with hair
always heating first.
Olga to:
heating first, as they will cook and welding will burn the walls. But if it’s the other way around, then nothing terrible, the main thing is not to glue beautiful and expensive wallpaper first.
Bokov Alexander:
pipes are thrown, then plaster, then radiators are hung
Vasily Anoshko:
Of course, plaster, otherwise you won’t plaster over pipes and batteries later.
ninel:
first to be warm and then work for yourself
Esmira Kosenko:
of course heating first
Tatiana Tatiana:
Naturally, plaster, if at the beginning you weld the heating, then behind the batteries and pipes there will be no plaster or anyhow, because you can’t crawl, then you’ll be tormented to glue the wallpaper !!!
Kudesnik:
If in the summer it’s better to plaster first, and if in the winter then of course it’s warm first
SamSard:
You can plaster and then heating. Now they will make plastic pipes without welding in 2 days.
Alexey Pastukhov:
advised…. plaster…. heating….
Qty:
means how you like it
wanderer:
Based on finances, they are now doing it with polypropylene, cleanly neatly.
Egor Nikitin:
And it is best to put film heating! This is the latest technology! See alternative heating site peo/. PEO - film electric heaters, attached to the ceiling. Economical, warm and profitable! Then 100 times will pay off. Go to the site and read everything in detail - you will be surprised!)))
How to glue wallpaper behind a battery
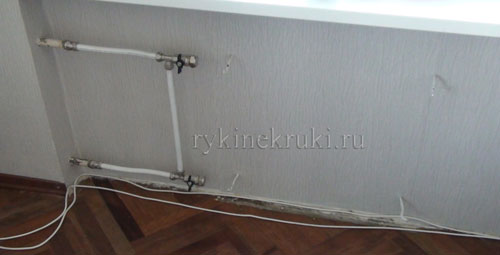
Now we prime the wall for the last time (again 2 hours
along with drying) and you can start pasting wallpaper:
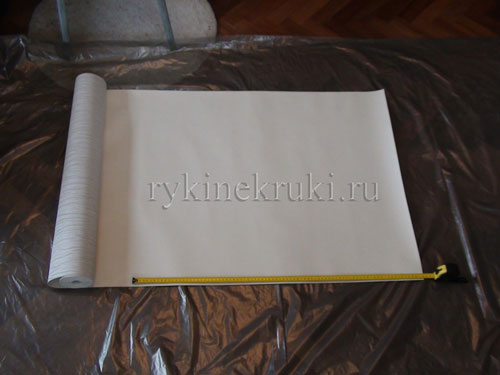
We select the glue that is suitable for this type of wallpaper. For example, in the picture, you see paper-based vinyl wallpaper. Here's the glue for them:
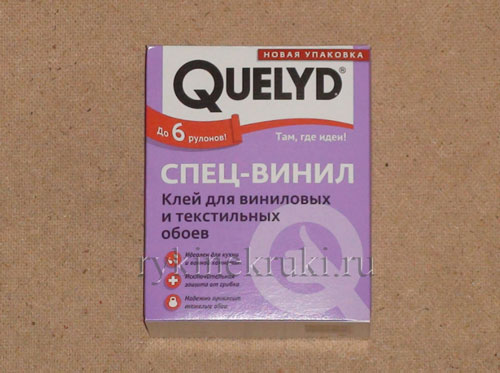
We prepare the glue according to the instructions and glue the wallpaper. We take 0.5 days for pasting
taking into account the preparation of glue, marking rolls and pasting. There is an important comment on gluing panels. It is necessary to glue one canvas on one side of the niche under the battery, and start gluing the second canvas on the other side of the niche. This is done so that the seam is exactly in the center of the battery, and not somewhere where it will be clearly visible, since the battery does not cover the entire niche with us:
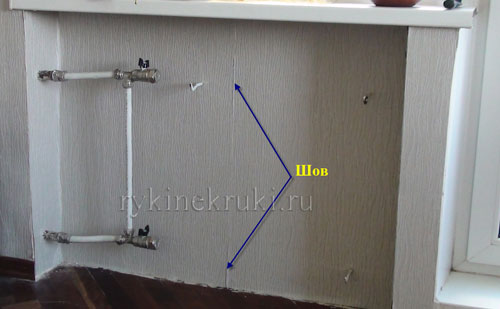
If the niche is long, then we begin to glue the canvas on one side, following it end-to-end, but on the other side of the niche, we also already glue one canvas:
How to hide the heating system in the apartment, consider ways
In panel walls, heating pipes can be hidden in several ways. And for this room, there are not so many of them. The first option in panel houses is the use of strobes, and the second way is the construction of false walls. Each of the options has pros and cons, and the decision for yourself must be made after a detailed study of these methods.
 In the wall of a panel house, the heating pipe can be hidden when a new circuit is being assembled, or repairs are being carried out in an already functioning structure. As a rule, the wall of a panel house and the heating main are placed in different planes.
And when you need to bring them into one plane, recesses are cut in the panel walls and a heating main is placed there
With such actions, you need to focus on the following points:
- Before starting work in a panel house, the riser is blocked. You should not hurry when performing these actions. And be sure to make sure that the work is planned on the right riser.
- If the depth of the canal exceeds half of the septal thickness, then the best option would be to abandon the planned actions. So, for example, a bathroom in a panel house is a separate concrete block system. And the thickness of such panel walls for this task will be small.
- The dimensions of the strobes in panel walls should not run end-to-end, and they should not infringe on the contour. Recesses must be done with the calculation of the fasteners of the system, its volume and the insulating layer.
- Before you cover the system in the wall of a panel house, otherwise condensation will occur on the surface of the pipe.
- Before you fasten the structure to the wall of a panel house, you need to determine its main places. These include joints and zones of change in the direction of the heat carrier.
To facilitate the action of chasing a wall in a panel house, it is recommended to use a grinder. First, markup should be made, and then, along the corresponding lines, the recesses are made to a certain depth level.
According to existing rules, the communication network in the wall of a panel house should be located in an unhindered access zone. Only those areas where the possibility of an accident is zero are left directly closed.
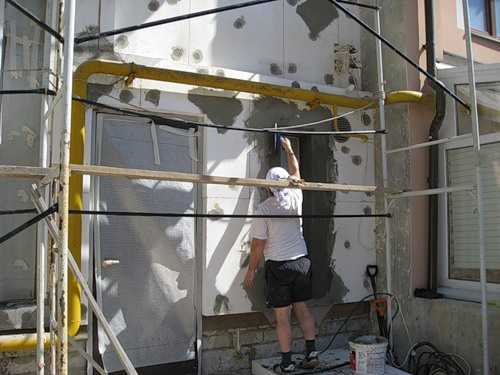
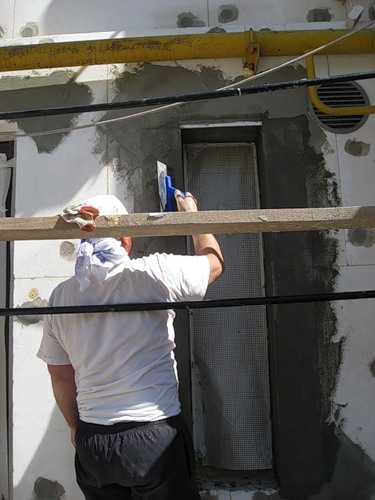
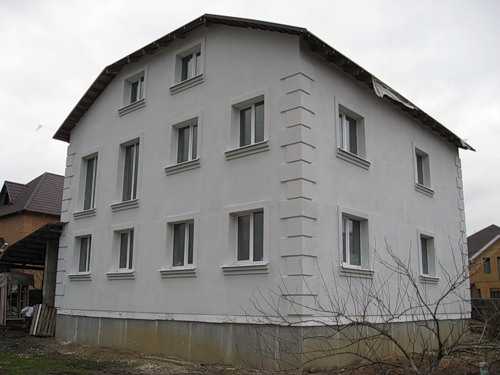
What to do before warming the outside of the facade or finishing inside the house
Where to start, from the outside or from the inside?
Where to start, from the outside or from the inside? - Many people ask themselves such a mess. All pros and cons need to be considered.
If a house is built from classic materials and the thickness of the existing walls meets the requirements of thermal insulation, the roof is completed in the house, doors and windows are installed, electricity is supplied, the heating circuit (heat supply), sewerage and water, and the ventilation system are launched, then it makes sense to start finishing first inside.
The performance of such work as the installation of screeds, work with plaster is associated with mixing in mortar mixtures of a huge amount of water. In the process of drying, a large amount of water comes out of the plaster and screed, the ventilation system cannot cope with such an amount, and in addition to natural drying, water tends to go out through the walls. In order not to take the risk of finishing from the outside, it makes sense to finish all internal screeds, plasters and other water-intensive processes, wait for them to dry completely and, after making sure that there is no excess moisture, proceed to finish the outside.
However, the opposite situation often appears, the walls of the house are made from the calculation of the bearing capacity, do not meet the requirements of thermal insulation. If you turn on the heat supply in such a house in winter and start finishing inside, then on cold days you can come into contact with the defrosting of the heating system, also with the fact that due to thin walls the dew point will be on the surface inside the wall, which will automatically lead to wetting of the walls, plaster and the screed just won't dry. In such houses, it makes sense to first do insulation work on the outside and cladding, stick insulation material, install dowels, make a base reinforcing layer, and prime it under plaster with a decorative effect. Do not do the final cladding, it makes sense to apply plaster with a decorative effect after all internal screeds, plasters and other water-intensive processes have been completed. Even if a water hammer occurs, if there is a breakthrough in the water supply, heat supply, sewerage systems, if a roof leak occurs or another problem occurs, this will not bring catastrophic results, the repair of the base reinforcing layer is quite concise and does not require large expenses.
gluing foamed plastic PSB-S M-25F
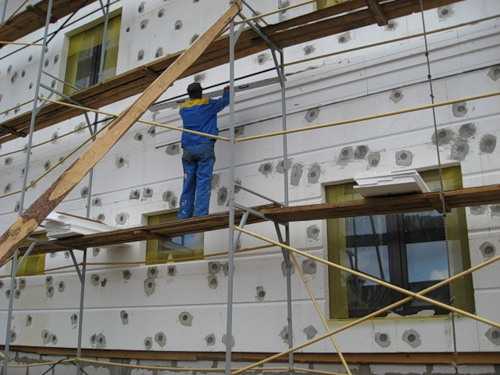
Basic reinforcing layer
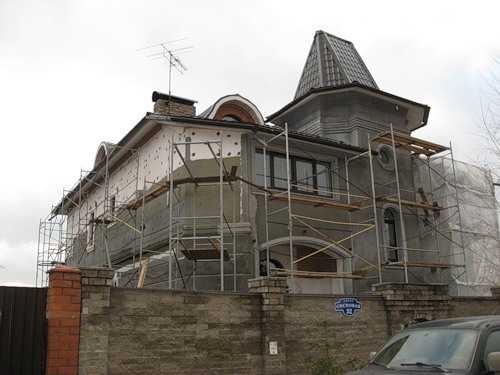
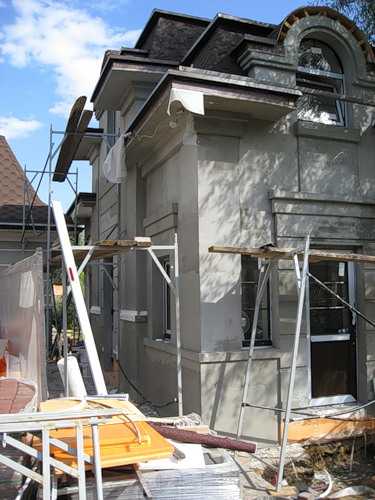
In this form, it can be left for a couple of years.
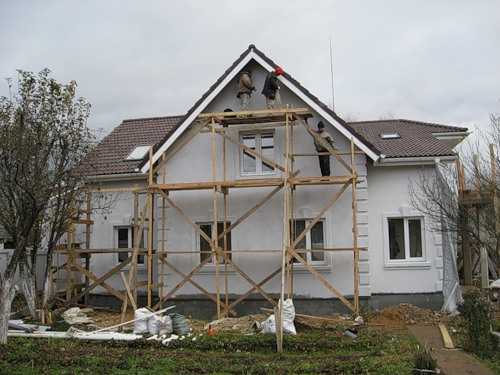
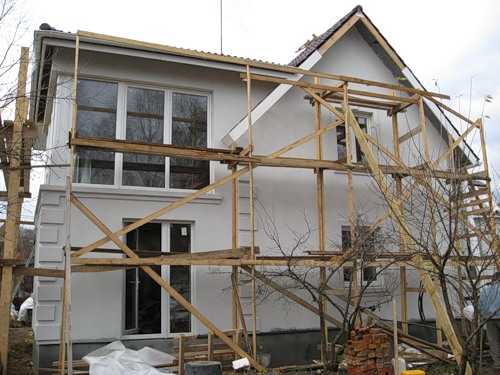
This is how the houses look warm and prepared for finishing inside, in a similar state they can work quietly for a couple of years, after the completion of work inside, and sometimes after the necessary working capital has arisen. Scaffolding is installed and structural plaster is applied, it takes a couple of days.
And get your dream home, a quality home!
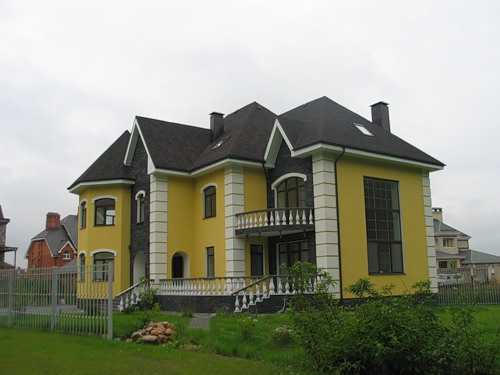
Construction company N-Dom
Moscow, Volotsky lane, building 7
Phones +7 (495) 743-27-96, +7 (495) 724-77-28
Heating ‘target=”_blank”>’)
When is it better to plaster the surface of the walls in the house before the installation process of pipelines and electrics or after
It is better to plaster walls before the installation process of technical communications - pipelines and cable routes.
This sequence of work is due to the fact that wall plastering is associated with a very decent amount of movement of employees in the home, the tray of materials, movement under the walls. The main part of communications lies in the floor and constant "walking" leads to their damage. In simple terms, pipes and wires are simply “trampled”, thermal insulation is damaged, etc.That is, it turns out that if you first make the laying of technical communications, then further plastering can lead to their damage.
Even if further laying of cables in the walls will have to cut strobes in plastered walls (for an additional fee), this will be more cost-effective than replacing damaged pipes and cables. Especially if the damage is not detected immediately, but after pouring the screeds or finishing.
Summing up the wall decoration behind radiators
Let's sum up our mini-repair in case we left the batteries for later.
- We'll have to breed a lot of dirt again.
- You will have to live in a state of repair for quite a long time (count all the hours that I brought, it will obviously not be 2 days, which we thought about when the conversation about batteries was just starting).
- Separate repairs under the batteries are not very profitable in terms of money (you need to pay the master for removal, installation of the battery; you need to buy a primer, plaster, putty separately, and in small quantities this is not for sale, which means there will be a lot of excess material; you need to remember that you have a supply on the wallpaper and on the plinth, which you didn’t think about at first).
Hence the main conclusion: when we make repairs, we think through everything to the smallest detail.
Today we learned literally step by step how to finish the walls behind the radiators. Have you had a similar experience? Or maybe someone met even more difficulties?
Very often, during construction work, heating pipes are hidden in the wall, pros and cons
This method of hiding pipes must be studied thoroughly to determine whether this method suits you or not. Otherwise, not only the functioning of the heating, but also the design of the room may suffer.
It is better to make hidden pipe laying at the construction stage. In an already functioning house, this issue is much more difficult to solve. If earlier communications were left fixed to the walls, then a significant plus of a high-quality repair of a modern level is that these options are not acceptable.
Summing up the wall decoration behind radiators
Let's sum up our mini-repair in case we left the batteries for later.
- We'll have to breed a lot of dirt again.
- You will have to live in a state of repair for quite a long time (count all the hours that I brought, it will obviously not be 2 days, which we thought about when the conversation about batteries was just starting).
- Separate repairs under the batteries are not very profitable in terms of money (you need to pay the master for removal, installation of the battery; you need to buy a primer, plaster, putty separately, and in small quantities this is not for sale, which means there will be a lot of excess material; you need to remember that you have a supply on the wallpaper and on the plinth, which you didn’t think about at first).
Hence the main conclusion: when we make repairs, we think through everything to the smallest detail.
Today we learned literally step by step how to finish the walls behind the radiators. Have you had a similar experience? Or maybe someone met even more difficulties?
Almost any repair in the house involves finishing by plastering. At the same time, those who take up this business on their own and for the first time, there are a lot of problems. If it is still more or less clear with the plastering of straight walls, then not everyone knows how to open an opening, slopes and other complex surfaces.
To make this task easier for novice craftsmen, then we will consider the main nuances that usually arise when plastering houses and apartments.
Wall plastering