How to turn a balcony into a room
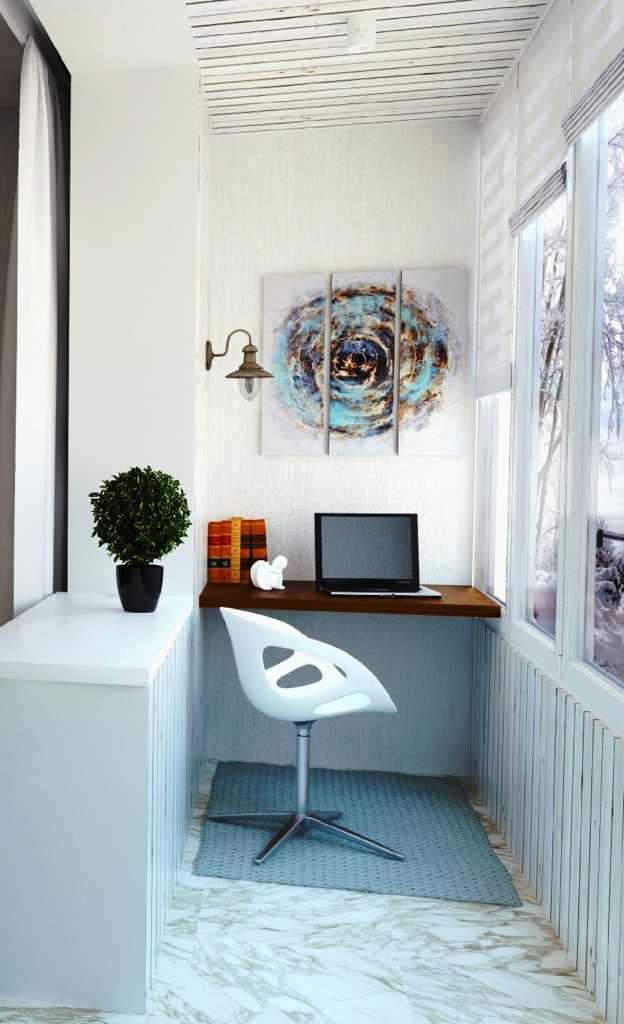
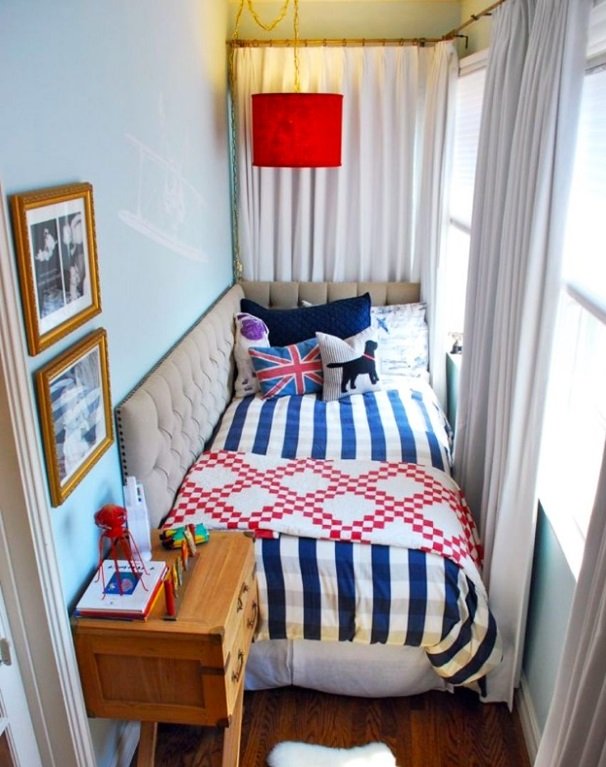
Many people like to make a bedroom out of the balcony, depending on its size, a bed and a computer desk can fit, or you can make a dressing room out of the balcony. If it is planned to place a closet on the balcony, then it must be of a closed type so that things do not fade in the sun. When placing the desktop, you also need to take into account the ingress of sunlight.

On a small balcony you can place a full double bed, although there is no space for a closet. But this problem is easily solved, because boxes for storing clothes can be made under the bed. To visually expand the space, you can make the cabinet doors mirrored and take care of additional lighting. The color of furniture and walls must be chosen bright or delicate light, this will also create the illusion of a large space.
How to make a warm balcony with your own hands
The main goal pursued when insulating any room is to create a heat-insulating shell that will prevent the passage of cold from the outside and retain the heat generated by the heating devices inside the building. To achieve such indicators, the thermal insulation process is performed in the following sequence:
- Installation of double-glazed windows.
- Warming of internal surfaces.
- Installation of a warm floor.
Creating comfort should begin with repairing the balcony and eliminating all kinds of cracks and crevices. After all, through them precipitation, wind, cold air can get inside. Any comfort with such shortcomings will not be achieved. Therefore, all defects are pre-sealed with silicone sealant, cement or mounting foam.
Balcony repair

Many balcony glazing companies seem to be oblivious to the fact that they are installing heavy plastic frames on the balcony parapet structure or on the concrete base. The problem is that they can loosen even from gusts of wind (not to mention several tens of kilograms of lightweight aluminum windows), and as a result, everything will have to be redone. Do not forget that a considerable amount of rubbish is stored on the balcony, which also puts pressure on the stove. As a result, this can lead at least to subsidence of the slab, and sometimes even to the collapse of the balcony. This is due to the fact that concrete has a certain number of freeze / thaw cycles, and the lower its grade, the fewer such cycles it withstands. And since the old Soviet houses are made of low-strength concrete grades (not because of economy, but because there were no necessary additives in those days), most of the balconies are in poor condition. Yes, you yourself could see the slabs of the balconies, which have darkened from the water, the concrete is crumbling, even rusty reinforcement is partially exposed - in general, they look as if they are about to collapse, and this is not far from the truth. If you do not strengthen the balcony, then its glazing is out of the question.

It should be noted that the Elitbalkon company has been operating in the market for the improvement of balconies and loggias since 2000, and its employees know everything about the repair and restoration of balconies. One of the main advantages is following the building rules. The Elitbalkon company mounts balconies on metal frames according to its own technology, adheres to GOSTs suitable for the activity and carries out full control of all stages of repair and decoration of the balcony.
How to make a living room out of a balcony
Today we will talk about how to turn your old balcony into a cozy space that can be used as a small room or office. Experts from the Elitbalkon company, headed by Vladimir Kozhushko, who has experience in glazing since 1998, told us about the stages of creating a turnkey balcony.He started as an installer, then worked as a measurer, then as a manager, and since 2007 he has already become the owner of the aforementioned company. Thanks to the experience and direct participation of the CEO in each project, you can be sure that your balcony will have only high-quality glazing.
How best to insulate a balcony
When all documents are signed and all permits are received, the turn of the balcony insulation comes, so that in the end you get not only a beautiful, but also a comfortable additional living area.
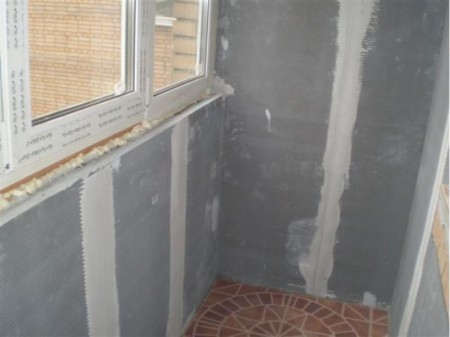
The walls of the balcony, as a rule, are very thin, so it is advisable to overlay them with additional silicate brick, which, being full-bodied, has increased soundproofing properties, frost resistance and resistance to temperature extremes. Its main advantage and difference from foam blocks is that subsequently it does not need to be plastered.
The next stage of insulation will be the glazing of the balcony. The most optimal options are sealed double-glazed windows, which will be in perfect harmony with other windows on the general facade of the building. Penoplex plates are ideal as a heater, which are laid in a timber frame on all walls, except for the inner one, as well as on the floor and ceiling.
The final layer will be reflective thermal insulation - penofol, which will keep warm in winter and cool in summer. Finishing the balcony can be made of various materials, depending on taste and financial capabilities.
You can use wooden or plastic panels, drywall, followed by wallpapering or applying decorative plaster.
Elements of a warm balcony
Before proceeding to this section, it is necessary to answer one question that worries those apartment owners who decide to carry out the insulation with their own hands. Is a permit required for this type of work? Permission is not needed, but please note that the facade of the balcony must comply with the architectural standards of the building.
 This is especially true for those apartments whose balconies are located on the front facade, looking at the main street. By the way, in big cities permission for such apartments will still have to be asked. And practice shows that many do not receive such permission.
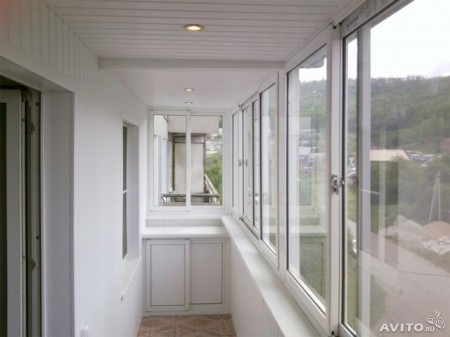
Glazing
The best option is plastic windows. Glazing of this type makes it possible to increase the space of the balcony due to the so-called extension design. That is, starting from the parapet, the windows are taken out by 30-40 cm.
Do-it-yourself glazing, especially with removal, is not worth it. It is better to entrust this process to professionals.
wall construction
As mentioned above, at present, experts use blocks of cellular concrete for the construction of walls. This is a small (non-standard) wall material, lightweight, with good thermal insulation qualities.
 You can also use the frame method for the construction, for which you will need a wooden beam measuring 50x70 mm or 70x70 mm. The do-it-yourself frame is constructed in the form of a crate (vertical racks, plus a frame around the entire perimeter of the walls), between the elements of which heat-insulating material is laid.
Please note that glazing (with or without extension) must be installed precisely on the newly erected walls of the balcony. But additional fastening should also be carried out to a metal fence
Warming
To insulate a balcony, you can use various heat-insulating materials with different prices and technical characteristics. The main thing is to correctly approach the solution of the issue itself.
 For example, using cheap materials such as mineral wool or foam plastic, you will have to build a crate with your own hands not only on the walls, but also on the floor and ceiling. But for penoplex, the crate is not needed. This reduces the time for thermal insulation work.But in any case, thermal insulation of a balcony is a simple matter, even a beginner can do it with his own hands.
Finishing
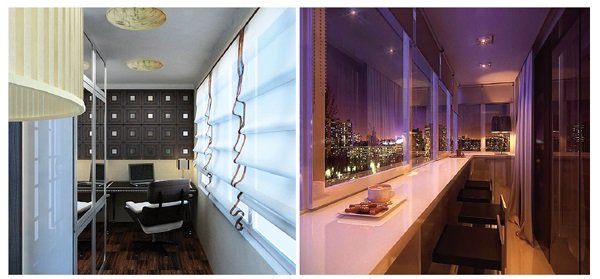
Since a warm balcony is a full-fledged room, the design of this room must match the decoration of all other rooms. Basically, you will have to consider the purpose of the balcony:
- If it is decided to arrange a women's boudoir in it, then the design should be light, soft, gentle.
- If it is a playroom for children, then the design will have to be adjusted to match the game elements with bright patterns and shades.
- If this is an office, then the design is accepted in the form of an office with elements of comfort with upholstered furniture and fabric wall upholstery.
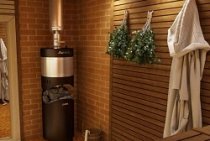
- If it is decided to arrange a greenhouse (winter garden) on the balcony, then the design of this room should be natural. It mainly uses lining, wooden glazing (with or without removal), linoleum on the floor for parquet, and so on.
Do not forget that the design of the attached balcony is one of the main parts of the whole process.
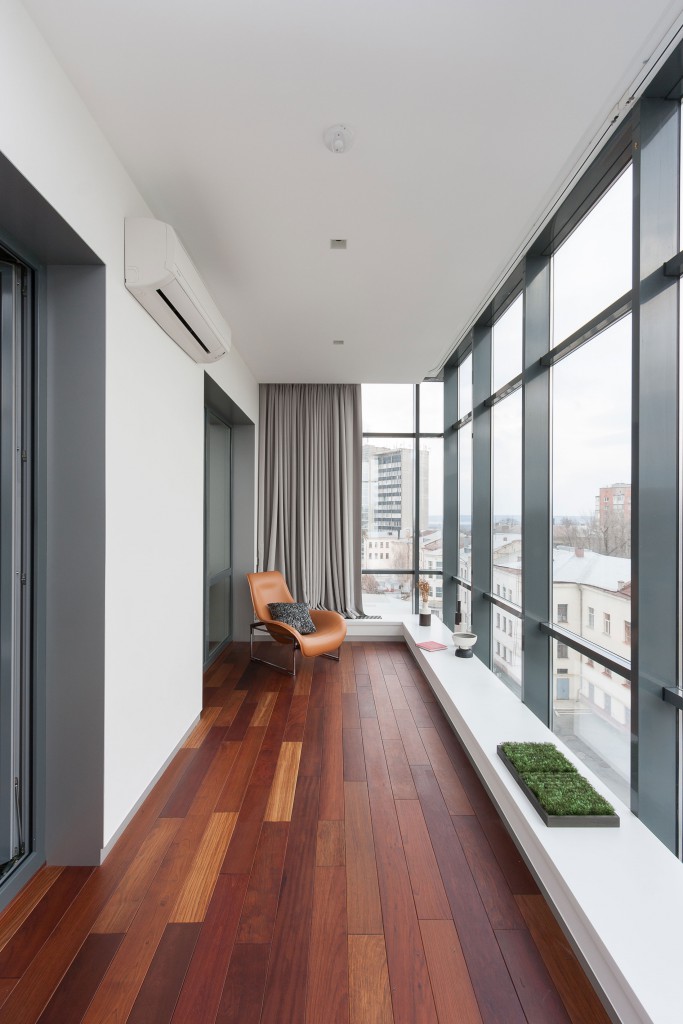
Balcony as an extension of the room
The design of the room connected to the balcony makes two options:
- these are two completely autonomous rooms, the room that adjoins the balcony becomes a walk-through, and these two spaces have a completely different interior;
- the room and the loggia are made as a single space, while they complement each other.

In the first case, the room and the balcony are visually separated by decor, it can be a curtain or a panel. This arrangement is well suited for apartments with a large area. If the room is small, then it is better to enlarge it with the help of a balcony. The addition of a room can have a different functional purpose, often it is a recreation area or an office, a library or a full-fledged dressing room. With this repair option, the main thing is that the design of the room and the balcony are the same and complement each other.
What is recommended to do when merging:
- common floor, if the difference between the room and the balcony is maintained, then a neat step is made;
- the walls are decorated in the same style, made the same color;
- furniture is selected similar, preferably from the same collection;
- you can mask the opening with a beautiful drywall construction.

If the room serves as a bedroom, then it is worth using pastel shades, a large spacious bed and a TV on the opposite side look good. You can make an exclusive repair using photo wallpaper near the bed. Bedside tables and a wardrobe will not be superfluous. In the office, there must be a table and a chair suitable for the style. So that things can be stored on the walls, it is better to use whatnots and lockers with a large presence of shelves.
Video gallery
https://youtube.com/watch?v=C5zIHw104BE
Balcony insulation
Before proceeding with thermal insulation work, you need to choose a heater. The material for the purposes under consideration should be characterized by the following qualities:
- high strength;
- resistance to moisture;
- environmental friendliness;
- fire safety;
- ease of installation;
- affordable cost.
The most popular heat insulators, both for warming a balcony, and in general for arranging residential premises, are mineral wool, expanded polystyrene, and also polystyrene. Each material has its own advantages and disadvantages:
- mineral wool. The insulation has good heat and sound insulation, is environmentally friendly, fireproof and easy to install during installation. However, when moisture enters, its properties deteriorate;
- expanded polystyrene. Differs in the high durability, simplicity of laying, long service life and moisture resistance. The main disadvantage of the insulation is the relatively high cost;
- Styrofoam. This heat insulator is characterized by low price, simple installation, low weight, resistance to fungi and mold. The main disadvantage is flammability.

Which material to choose depends only on your personal preferences and financial capabilities.
Waterproofing
The laying of thermal insulation material on the floor is preceded by a waterproofing process. For these purposes, use penofol or polyethylene. Thus, a barrier is created from the penetration of dampness into the room. Experts recommend laying penofol with the reflective side up. It would be useful to install waterproofing also on the walls.
Joints between sheets of waterproofing material are glued with foil tape.
Floor insulation
Before starting work, prepare the following list of tools and materials:
- impact drill or hammer drill;
- screwdriver;
- ruler, tape measure;
- fasteners (nails, anchors, self-tapping screws, etc.);
- construction stapler;
- wooden beam 50 * 50 mm;
- hydro, steam and thermal insulation materials;
- antiseptic.
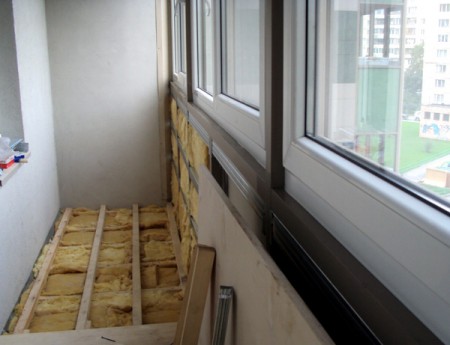
After arranging the waterproofing layer, proceed to the installation of the log. As a rule, for these purposes, a wooden beam is used, which serves as a frame for the floor, as well as for the side walls and ceiling. When choosing a log, the moisture content of the wood should not exceed 12%. To exclude the formation of fungus and prevent decay, wooden elements are coated with an antiseptic or special primer. The rest of the step-by-step process of installing the balcony floor consists of the following steps:
- The logs are mounted according to the level, for which they are laid longitudinally with a distance from each other corresponding to the width of the insulation. The beam is fastened with anchors. If the height of the beam is not enough, use substrates in the form of wooden scraps. First, the extreme logs are mounted, after which they pull the cord and lay the beam in the middle.
- A heater is laid between the timber. At the joints, mounting foam is used, while the material should fit snugly against the lags.
- When using mineral wool, a vapor barrier is placed on top of it. Styrofoam or Styrofoam does not require this layer.
- According to the dimensions of the balcony floor, cut off the necessary pieces of plywood or OSB boards, taking into account a gap of 3 mm around the perimeter.
- By means of self-tapping screws, plywood or other material is mounted to the logs.
Wall insulation
On the previously mounted waterproofing layer, a crate of wooden beams is installed by analogy with the floor. The size of the timber is also chosen based on the parameters of the heat insulator. The wall between the balcony and the living room is insulated in one layer, and the rest in two. You can also use thicker material.

Ceiling insulation
The balcony ceiling can be insulated in two ways - with and without a frame. Preliminary it is recommended to treat the base with an antiseptic material, which will prevent the formation of mold. The essence of the frame method is similar to the installation of bars on the floor and walls:
- Fasten wooden elements with dowels.
- Install a heater.
- Perform finishing work.
When using mineral wool, the sheets are fixed with mounting foam, and the foam or polystyrene foam will be held without additional fasteners.

If the ceiling is insulated without a frame, then the sequence of actions is as follows:
- The base is cleaned of contaminants.
- The surface is treated with soil.
- Fix foam sheets with glue.
- The joints are sealed with mounting foam.
Important: The adhesive for fixing the insulation on the ceiling should not contain toluene, which is a toxic substance.
Where to begin
Since any work related to the redevelopment or refurbishment of residential premises requires permission from the state housing inspection, it is first necessary to collect a package of documents:
- Redevelopment project signed by an authorized BTI specialist;
- Technical opinion on the safety of residential premises for living;
- Documents confirming the legal rights to own this housing;
- Certificate of compliance of the project with fire safety standards;
- A document confirming the consent of the other tenants to the redevelopment.
In some cases, the authorities may require a certificate confirming that the house is not in a dilapidated or emergency condition.
Balcony insulation
You can insulate the balcony with your own hands, without the help of craftsmen. When the windows on the balcony are installed, it is necessary to process the seams with a sealant. The old insulation must be dismantled, and if this is not the case, the walls must be cleaned and prepared for work. If there are gaps and cracks on the surface of the walls, they must be foamed with mounting foam. Do not spare money on mounting foam, poor-quality material will not be able to withstand changes in temperature and moisture. Bad foam will crumble, and all work will be ruined.

To insulate the balcony, it is necessary to use polystyrene foam or mineral wool, there are many other materials, but in terms of price / quality ratio, these two are the most popular and durable.
How to fix the insulation:
- a layer of insulation is glued to the fence;
- make a crate out of wooden bars; metal corners are used to attach it to the ceiling and floor;
- the second layer of insulation is attached between the crate;
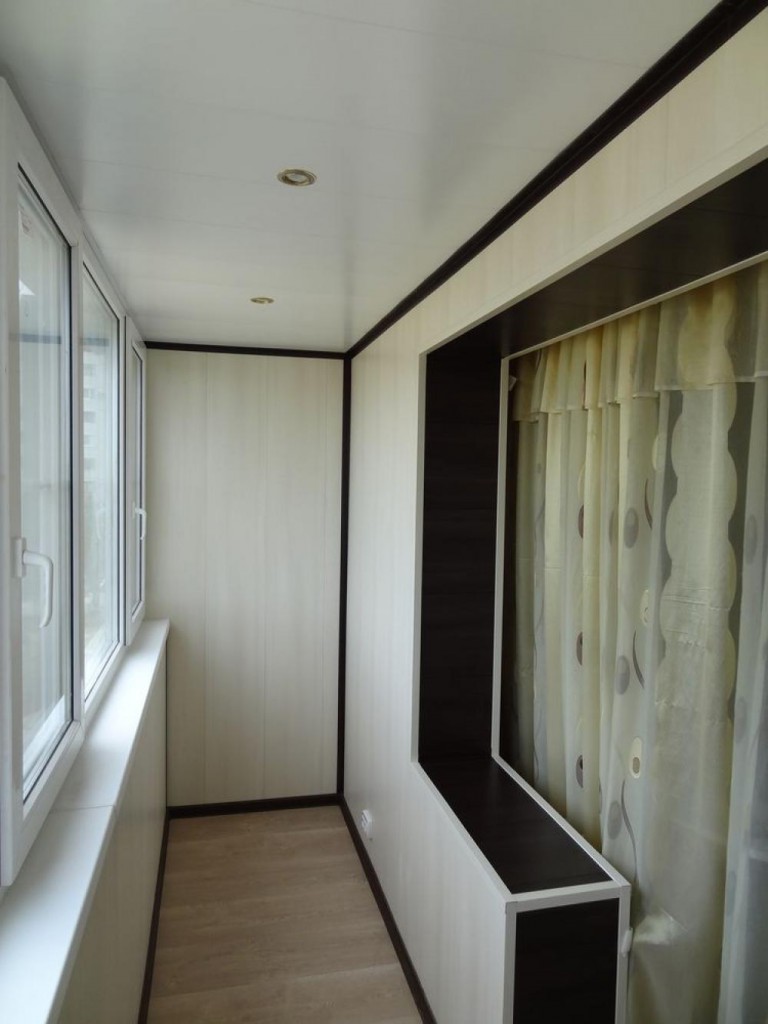
- make the decoration of the balcony with plastic panels or clapboard.

Next, you need to insulate the floor, this is done in the same way as with walls, or a warm floor is made, but for this you need to call specialists. When all the insulation work is done, you can proceed to the design of the balcony in the living room. From the balcony you can make an office or a playroom, a bedroom or a nursery, a library or a cinema hall, there are many options, it all depends on your desire and on its size.
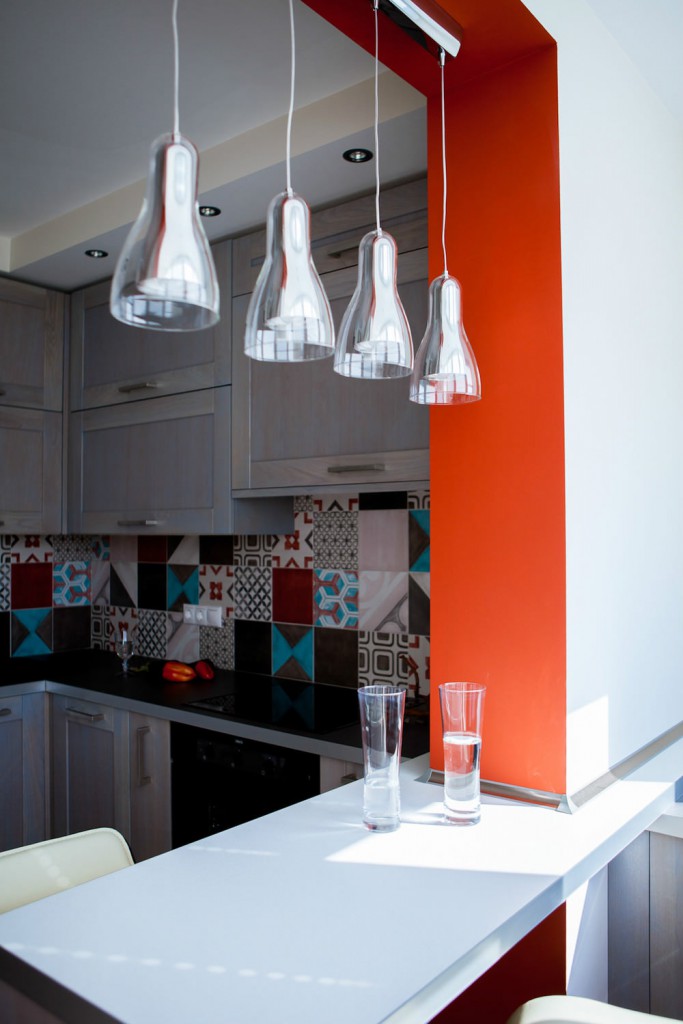
You can increase the usable area by combining the space of the room with the adjoining balcony. This is done simply: it is worth removing the window and the door, then only a piece of the wall with a battery remains from the partition, and the balcony will become part of the room. Such a wall can be converted into a bar counter or an original table.