Furnace cladding with ceramic tiles
After completing the preparatory work at home, you need to start finishing - you will need to fix a wood rail at the bottom of the stove (as you can see in the photo). It should be positioned so that it is the width of one side of the tile to the floor. Using the building level, you need to measure how evenly the rail is located.
Facing the oven with ceramic tiles with your own hands is carried out as follows - to begin with, the second row of tiles is laid in the first row, if you count from the floor. Mounting is carried out on a wooden rail from the corner of the furnace. This is necessary to avoid distortions in the future. A thermal adhesive is applied to one tile using a flat trowel, which must be leveled with a notched trowel. When using glue, you must follow all the recommendations listed in the instructions.
The tile is applied to the surface of the stove, after which it is gently pressed with the palm of your hand. To make the lining of the furnace with ceramic tiles better, it is necessary to improve the fit, for which you can use a rubber hammer, as in the photo. It is better to clean the remains of the glue immediately with a damp cloth, so the finish will look attractive.
To ensure smooth seams, you need to use plastic crosses that are removed before the grouting procedure. All distortions and resulting irregularities must be corrected immediately upon detection, so that the glue does not dry out, and the lining of the furnace with ceramic tiles looks neat. After removing the rail, the last bottom row is laid. If there is a need, then the tile is cut for finishing.
After three days after the glue has dried, using a rubber spatula, it is required to fill the seams located between the tiles. For this, a special grouting solution is used, the excess of which is removed immediately. After the solution dries, the final cleaning of the surface is carried out, and the do-it-yourself lining of the furnace with ceramic tiles is completed.
How to clad a house made of lightweight concrete
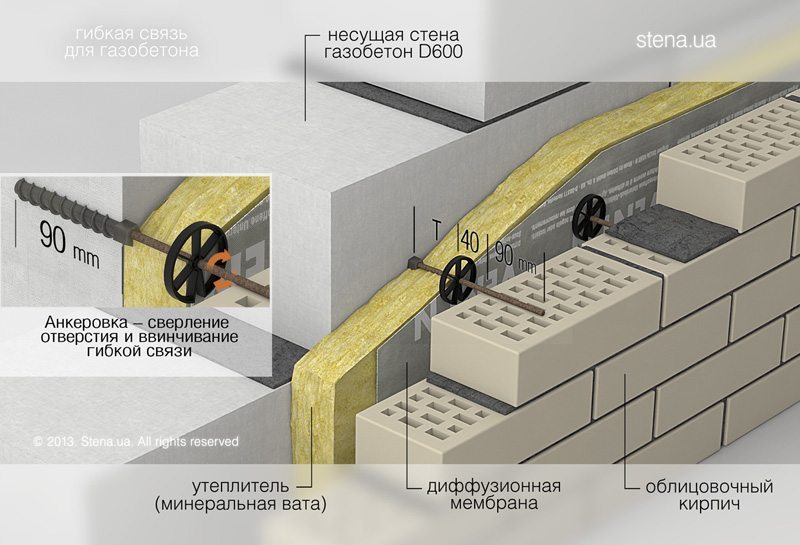
A lined house in this case can be built from aerated concrete, gas silicate, foam concrete, cinder blocks, expanded clay concrete. A house made of facing bricks is less breathable than the listed materials. For this reason, as in the previous case, it is necessary to provide for a ventilation gap.
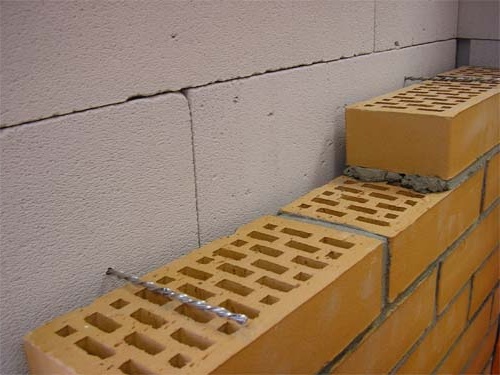
The installation method is very similar to a wooden house. The only difference is that you can use rigid connections between the wall and the cladding. The minimum number of connections is 3 pcs. per 1 sq.m. Ties are not allowed to be laid in the seams of the main wall, they are nailed to the surface.
When building a building from fragile cinder blocks, it is recommended to build a frame that will take on the load from floors and other building structures. In this case, the walls will be self-supporting.
Finishing the house with facing bricks is attached to the cinder block very carefully
Your house, lined with brick - it's beautiful and reliable. But when carrying out work, certain recommendations must be followed.
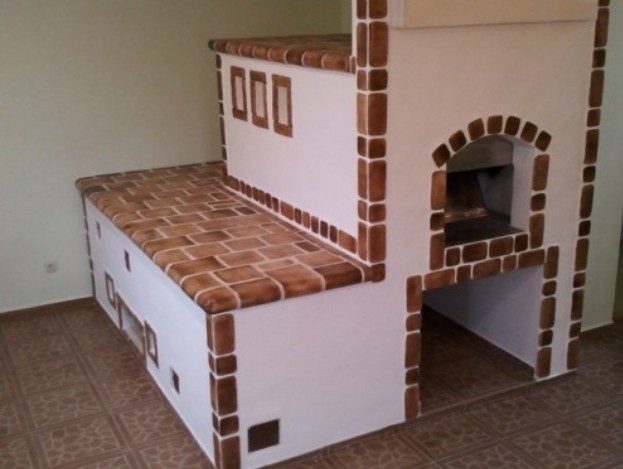
Furnace cladding with terracotta tiles
Facing the oven with your own hands at home can be done with terracotta tiles, which are natural materials. It is environmentally friendly, has a natural color, durable, resistant to high and low temperatures.
To independently overlay the oven with terracotta tiles, you will need (you can see more in the video):
- Divide the space into equal sections with the following calculation - five rows of terracotta tiles per section, taking into account 10 mm per seam.
- Apply the adhesive to the surface using a notched trowel in a circular motion.
- Place the terracotta tile from top to bottom, then tamp it down using a mallet.
- Using this technique, lay several rows, and then let them dry.
- Continue the work started on laying terracotta tiles.
- The lining of heating furnaces is completed by laying cut tiles in places where it is necessary.
- Carry out grouting after laying the terracotta tiles, this finish is completed.
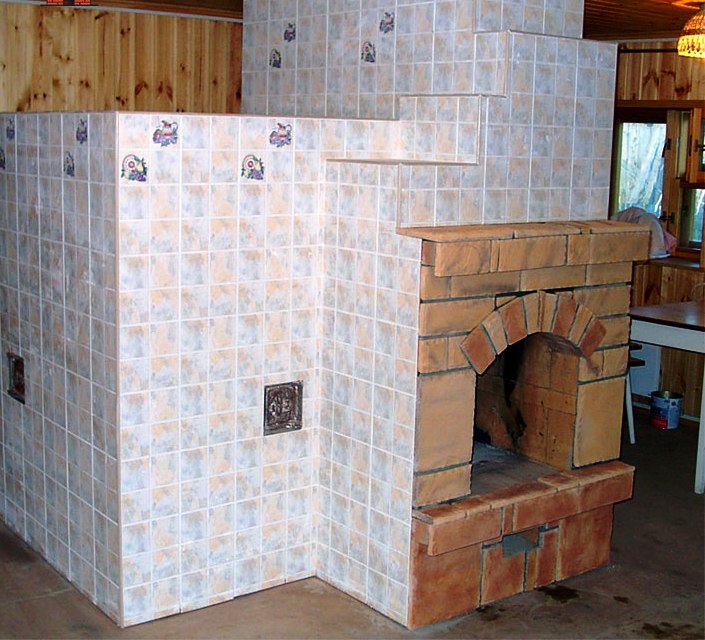
Terracotta tiles look neat after finishing.
Tile selection
The choice in favor of ceramic tiles (tiles, terracotta, etc.) is made by the majority of owners of houses in which a stove is installed. The reason for this is its qualities - the ability to improve the heat capacity of the stove and give the whole room an unusual look, which can be seen in the photo. Before you start facing according to one of the above techniques, you will need to choose a high-quality material with the following properties:
- Fire resistance (eg terracotta);
- Increased strength;
- Rigidity (for example, tiles);
- Heat capacity.
Attention! If you choose and buy a tile correctly, then even after several years of operation at home, it will retain its original properties and appearance, so it’s better to spend time looking for it.
Expert answers
elf:
Fireplaces, unlike stoves, do not hold heat, but give off instantly. So you won't get much from it. You can only improve the return if you leave space between the fireplace and the second brick shirt and ensure the movement of air. Those. at the bottom there is an entrance, and at the top there are openings closed with a decorative lattice for an exit.
Ay! Yes! Cat!:
Mom! :))))))))))
Darth Vader:
yes, there is no need for specialists here ... the stone should be porous ... as far as I know from acquaintances in the village who have stoves - they are all made of bricks ... so lay it over with bricks ... well, then - to make it look beautiful, you need a special facing tile ... so as not to spoiled
Vova Friend:
There is a brick. Chamotte is called. P.S. My father-in-law is into it.
Alexander I:
The fire resistance of granite is insufficient, since it cracks at temperatures above 600°C due to polymorphic transformations of quartz. In some cases, crushing of granite particles from the surface of the stone is possible with the loss of polishing of the stone. Marble has a higher thermal resistance and can be used for fireplace lining with almost no restrictions (except for the inner lining of the firebox). A fireplace insert is a ready-made weighty part of the fireplace, which is created in a production environment. It consists of a combustion chamber, which is protected by fireclay plates, as well as a chimney connection pipe, a smoke box and a door with heat-resistant glass. The walls of the furnaces are made of refractory cement mixture, refractory glass, fired crushed fireclay clay or gray cast iron, as these materials are able to withstand high temperatures. The firebox is mounted in the already erected masonry of the fireplace body. The installation of the fireplace insert must be carried out taking into account the direction of the heat energy flow.
Lion Heart:
Your fireplace must be lined with refractory brickwork. In order not to greatly expand the fireplace, the brick is placed on the edge. And then veneer with whatever you like.
alexey5791:
It is better to use wild stone.
Usa Tyan:
A site where you can buy Dagestan stone for cladding al-kam
Best Answers
Vlad.P.K.:
Oleg Korolkov:
There are special heat-resistant mixtures up to 120-1500 degrees. Ask at a hardware store, I don't know what you have available.
Man:
even in the firebox, at least not in the firebox - ONLY clay.
Uncle from the Future...
It is possible for a solution of chamotte sand
**:
I’m just from a rural dynasty of stove-makers (I don’t have a specialty, I work as an economist), but Grandfather was a stove-maker, my mother learned from him, and I learned from her.The solution is made from clay (1 part by volume) and sand (3 parts by volume). Clay should be almost clean, free of sand and dirt. If the clay is mixed with sand, then adjust the volume of sand (reduce to 2 parts). First, clay is diluted (the volume is filled with water half the clay), stir, it must stand so that the existing lumps blur to a homogeneous clay mass (there were no lumps), then add sand, if necessary, add water so that the mass is not completely dry, but and did not flow when laying bricks ... Good luck to you!!!
Larisa maxtor.lya :
Two months ago, a stove was laid for us in the village. The stove-maker did everything as Ninel wrote, but when he began to lay out the firebox, then he added cement, about 1.5 kg per 10 kg of mortar, he said the bricks would hold on stronger.
Difficulties working with metal
The metal heats up quickly, and if touched, there is a chance of serious burns. Of course, these shortcomings can be eliminated. Nowadays, there are many materials for insulating stoves and chimney pipes in the house and in the bath.
A brick oven in a bath is often tiled or tiled, and other materials are also used. You can simply overlay the iron stove in the bath with bricks with your own hands, a similar finish is also suitable for chimneys. Using brickwork, you can improve the design of the bathhouse itself, increase the heat transfer of the furnace. This article is devoted to the question of how to overlay a metal furnace with a brick in a bath. Moreover, not only an iron furnace can be lined, pipe lining is often practiced.
How to overlay a brick oven with tiles with your own hands
In this article we will tell you how to tile the oven, what varieties and tools exist. It seems to many that it is elementary to do this - I bought ceramics, diluted the mortar and glue, but everything is not so simple. In order for the finish to be of really high quality and serve for at least 20-25 years, it is necessary to follow a certain technology and choose the right material. Much also depends on the quality of the adhesive.
The modern market of facing materials offers a wide variety of products. Some owners of stoves or fireplaces prefer not to use the finish at all, leaving the brickwork and styling it like rustic. Such a decision cannot be called rational - over time, the brick begins to burst, smoke and soot penetrate the room through the cracks. Finishing should be, but what it will become is up to you.
Pros and cons
In construction, it is very difficult to combine materials of different properties. In this case, there are always nuances and negative aspects. Finishing the facade with brick for a wooden structure has three disadvantages:
- reduced ventilation, the likelihood of moisture accumulation in the insulation;
- different shrinkage of wall parts, which does not allow to rigidly connect the cladding and the main wall;
- the high mass of brick compared to wood (more than 3 times) makes it necessary to build more powerful and expensive foundations.
In general, we can say that it is better to finish the old house with bricks. For new construction, it is recommended to consider other more economical and efficient options.
But the technology has its advantages:
- improvement of thermal performance (especially when using ceramics);
- reducing the level of fire danger;
- reliable and durable protection of wood from negative atmospheric phenomena.
How to overlay a house from a foam block
A ventilated gap is also required between a facing brick wall and a foam concrete wall, since the vapor permeability of cellular concrete is higher than that of a brick. When laying bricks close to the wall of aerated concrete, condensation will form between the materials, and as a result, when it freezes, the destruction of the material.
A house made of foam blocks is bricked up in the same way as a wooden house.Screw nails or galvanized perforated metal strips are used to connect two walls. The number of links should be at least 3 pieces per 1 m2.
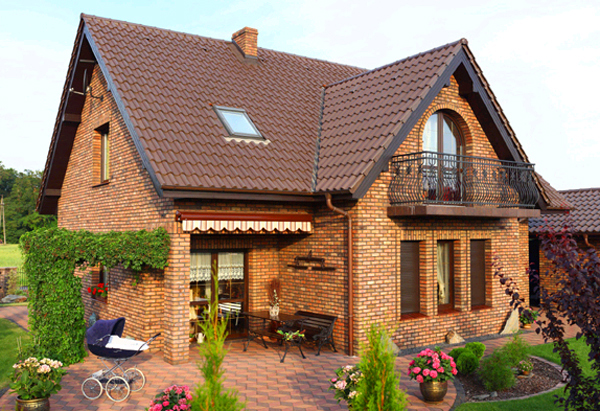
Do-it-yourself brick cladding of the house will breathe new life into the old building, and give the new one a unique wonderful look.
Video. Clinker brick laying.
Many people own houses built from natural wood. Someone is satisfied with the appearance of their home. But there are those who carry out its decoration. Various materials are used. The most commonly used siding. Often the choice of owners of wooden houses falls in favor of brick lining.
Brick lining the house is resorted to in several cases:
- if the house is old or poor quality material was used in its construction. In this case, brick lining is a reasonable solution. The house will be radically transformed and will look attractive;
- if the facade walls of the house have certain defects. In this case, with the help of built brick walls, you can hide them. However, facade decoration in this way can only be resorted to if the shrinkage process of the building is completed.
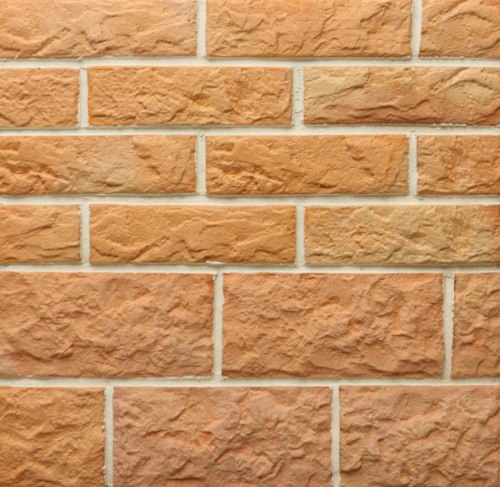
What tiles can be used for cladding
Ceramic tiles are the most affordable way of finishing, but also very stable in operation. Even at the production stage, the tile is subjected to heat treatment - the pattern is baked at a temperature of 480-500C. Such material is resistant to temperature peaks, does not burst when exposed to water, and is easy to clean. Since the choice of adhesives and mixtures is also huge, it will not be difficult to tile the stove with your own hands.
Video 1 Wall tiling with ceramic tiles
So, what kind of tiles can be laid over the stove and fireplace, in addition to the standard one:
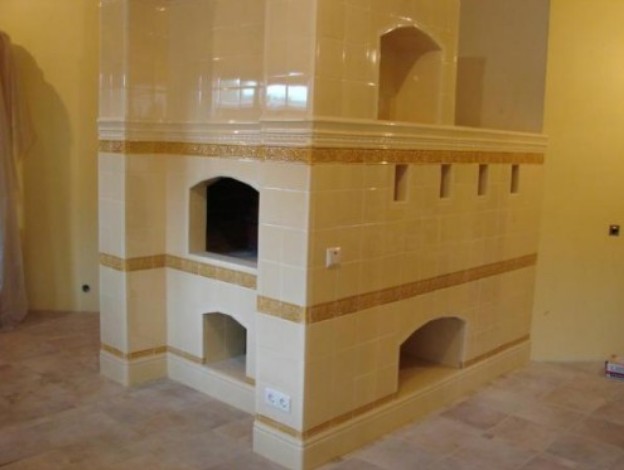
Terracotta - unglazed with a characteristic roughness on the front side. It is made from refractory clay and fired at a temperature of 500C. The color is uniform throughout the lot, the natural color range varies from creamy to rich terracotta.
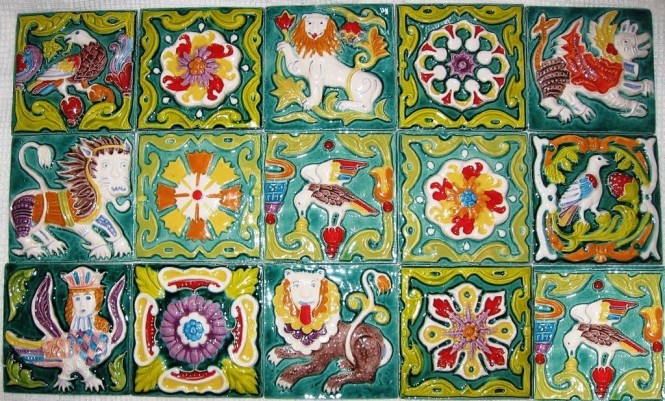
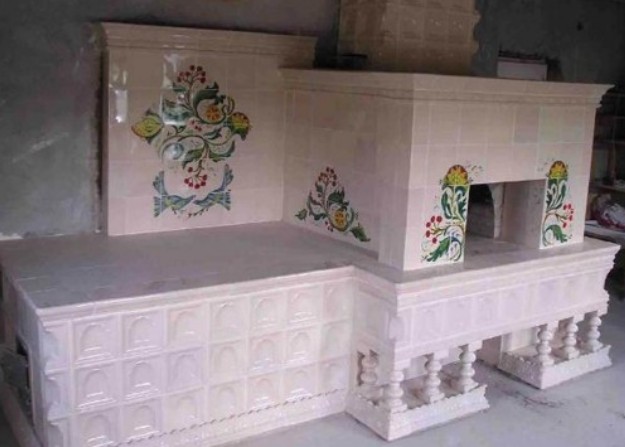
Majolica is a more expensive and improved sample, which is made according to the principle similar to terracotta, but a pattern is applied to the front side and additionally fired. Not so long ago, it was extremely expensive to overlay a stove with majolica tiles.
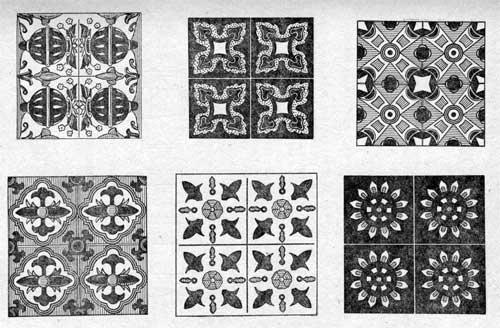
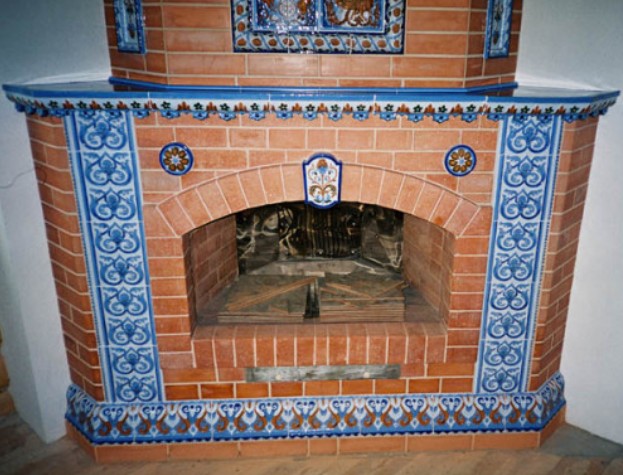
A tile is a unique, primordially Slavic material for decorating stoves. The technology for manufacturing such material has been developed since the first half of the 17th century, when the reliefs of monasteries and churches began to be decorated with wide tiles.
Today, baked clay is used for production, which is then glazed and baked at a temperature of 1150C. They can be embossed, smooth, glazed or raw. For convenient fastening, the reverse side is designed in the form of a box (rump).
If in the case of terracotta and majolica, you can simply cover the stove with ceramic tiles, then the tiles are laid out even at the construction stage.
Clinker is a refractory tile used from a mixture of fireclay powder, clay and appropriate mineral dyes. Can be used for exterior and interior decoration. It is characterized by high strength and resistance to damage.
Porcelain stoneware is a particularly durable tile material, which is made from the composition of clay, sand, fine marble and granite waste. Fired at a temperature of 5500C, it is characterized by a monolithic structure and resistance to abrasion and damage. Used to imitate more expensive materials.
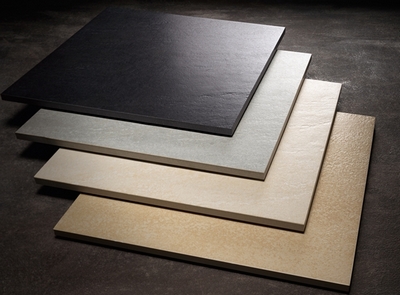
Porcelain stoneware and clinker are the most durable in the range of materials, but also the heaviest. For their laying, a separate technology and a special adhesive composition are used. Masonry always starts from the bottom and moves evenly up to the ceiling.
Since ceramic tiles are the most popular and inexpensive material for decorating furnaces (see video), it is worth starting with it.
Preparatory process
Necessary tools and materials:
- mallet (rubber mallet);
- tile cutter, grinder and string;
- drill;
- level and plumb;
- spatulas;
- metal brush;
- ceramic tile;
- mesh for reinforcement, fiberglass;
- heat-resistant primer;
- heat-resistant glue for stoves and fireplaces;
- nails with dowels;
- crosses for seams;
- white or colored grout.
It is forbidden to tile the oven immediately after its laying. It must take at least 5-6 months, including the heating season, for the oven to shrink technically. During the operation of the furnace, not only the solution is pressed, but also weak points “crawl out” - cracks, holes, etc. which can be closed.
You clean the surface of the furnace from dust, dirt and cement residues - first you just wipe it with a dry cloth, then you clean it with a metal mesh or rub it with a grinder. Finally, the walls are washed from dust
Pay special attention to the seams between the bricks, they should be thoroughly cleaned.
Apply a primer mixture, be sure to refractory.
After the primer dries, level the walls with a cement-sand mortar in a ratio of 3: 1. Recommended brand of cement M400
The wall must be absolutely flat, including the seams. You check each stack with a level or a plumb line. After drying, rub with a wooden float for better adhesion.
Photo 1 Leveling the walls of the furnace with cement mortar
- Fix the reinforcing mesh, and better, of course, fiberglass. This is a thinner and stronger analogue, which does not give additional weight, unlike the mesh, and also securely fastens the bases. Use nails to secure.
Step by step diagram and video
At this stage of work, the most important thing is not to rush and check each tile with a level - any distortion in the future will come out sideways, both literally and figuratively.
Preparation of the adhesive solution
We note right away that the modern arsenal of refractory adhesives is too large to do it yourself, but real craftsmen lay tiles exclusively on cement-sand mortar in the proportion of 3 parts of M400 cement and 1 part of sand. For a good bond, you should add ordinary rock salt.
Laying out the first row
This is the most important, load-bearing row. Apply glue (read - mortar) with a notched trowel on a 3-4 mm thick tile, hold for a few seconds and apply to the base. Press lightly, fix, check the level for perfect evenness and move on to another tile. Now we use crosses - put 2 on the edge and 1 on the intersection. By the same principle, bring the row to the end around the entire perimeter.
Be sure to check each tile with a building level - horizontally and vertically. Correcting the wrong masonry will already be almost impossible - you will have to knock down and start over.
Lay out all other rows
Also, alternately apply glue / solution to each, hold for 3-4 seconds, press, check, put crosses. If the tile does not fit into the row completely, mark where to cut and remove the unnecessary part with a tile cutter. Do not throw away the leftovers, they can come in handy.
Photo 2 Laying tiles on the stove
Grouting
To do this, use a special composition or adhesive / solution residues. The composition, of course, is much more preferable, because you can pick up a certain color and make it more contrasting. The seams are rubbed a day after the completion of the masonry work. First, remove all the crosses, and then apply the grout with a soft rubber spatula. Do this very carefully and so that there is no free space left.
Remove excess grout immediately after application. If it has time to dry, it will have to be chipped, which may cause cracks.
Final
After you have rubbed all the seams, damp, but not wet, go over the entire tile with a cloth. Remove the remnants, but do not touch the actual seams, so as not to remove the still fresh solution. After an hour and a half, depending on the temperature in the room, do the same, but with a damp sponge and carefully treat the surface near the seams. After another 2 hours, wash the entire tile so that there is no white coating left on it.
You can heat the stove only after 7-10 days and not at full power.
Separately, we should talk about how to overlay tiles near the stove so that it is a single ensemble and additional fire protection.
The principle of work is similar to laying ceramics. You also completely clean the surface in front of the oven, treat it with an antiseptic, primer, apply a cement-sand mortar and lay out the tiles. Fix each with a mallet and be sure to check the level. This type of work is carried out last.
Features of ceramic tiles
Many, along with how to properly tile the stove, are interested in working with tiles. The main process corresponds to ceramics, but certain nuances are distinguished, namely:
- Unlike analogues, the tiles are first laid out on the floor in front of the stove, then the front part follows in order, then the end, and only at the very end - the corners.
- Since tiles, as well as majolica, most often come with a certain pattern, before starting laying, they should be laid out on the floor or other work surface and numbered. Further work goes in order.
- It is best to cut along the string - mark the place of the cut, make small cuts on both sides and saw it. In this case, there will be practically no chips.
- Even if the base is laid out on the mortar, heat-resistant silicone should be used to fix the corners. The corners of the oven are the critical area where the main expansion enters, so the adhesive backing must be slightly movable.
That's all we wanted to tell. Now you know how to tile a stove or fireplace with your own hands, what materials to use and in what sequence. If you follow the technology and take your time, in just a few days your design will change beyond recognition.
How to overlay the stove with different tiles and on which solution with your own hands - video: