Balcony railing
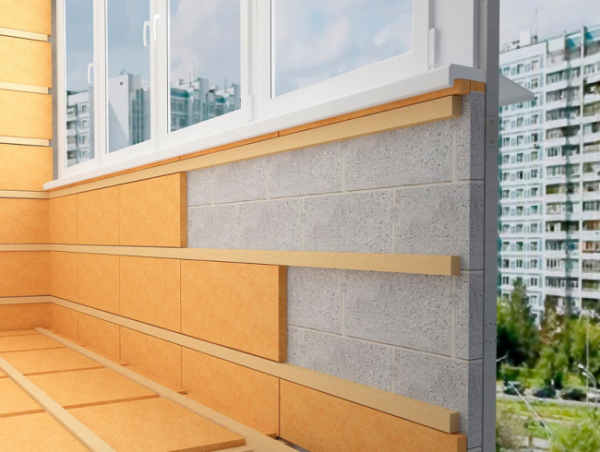
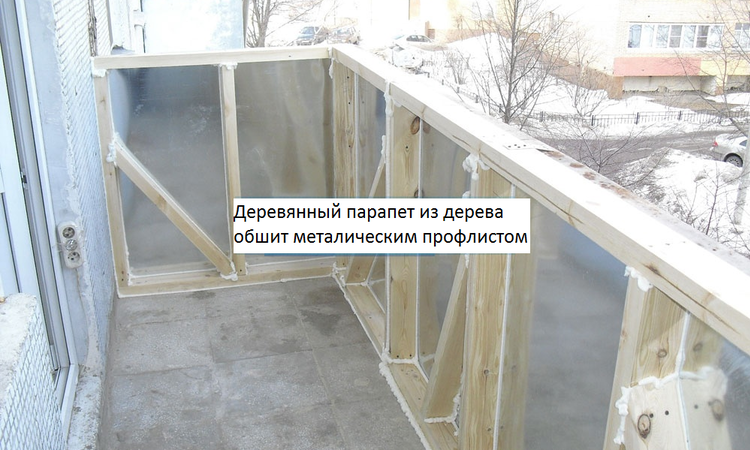
After creating the fence structure, the next step is to prepare it for sheathing. To do this, a wooden crate is made on top of metal frames and masonry foam blocks. If necessary, a heater is attached to it, only then finishing materials. The bars of the crate should be up to 3 cm wide, they are fastened with dowels. The crate is needed to level the surface before fixing the facing materials. Work begins with the side walls. It is desirable to impregnate the bars with antifungal protection.
Dimensions of vertical racks for lining: from 40x40 to 50x50, they are mounted with a certain step (up to 50 cm) over the entire surface of the barrier structure and must be installed in the corners. Crossbars are made in size: from 20x40 to 30x50. A heater or sound insulator is placed in the gaps of the crate. If necessary, you can lay an electrical cord in the crate.
If you need internal insulation of the balcony parapet with a metal frame, you can do it:
- foam;
- penoplex;
- mineral wool;
- foiled polyethylene foam (penofol).
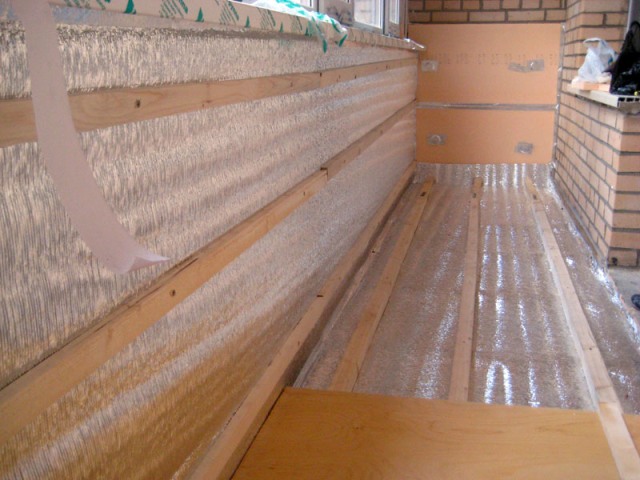
Sheets of insulation are fixed between the bars of the crate, covered with a waterproofing material on top. The seams are closed with a metal film. Warming of the parapet of the loggia is done in the process of warm glazing of the balcony. Only after that the frames and the window sill are installed, the slopes are attached.
Finishing the parapet inside the balcony

The main stages of the interior decoration of the parapet from the blocks:
- moisture protection installation;
- installation of the crate; fastening of finishing materials.
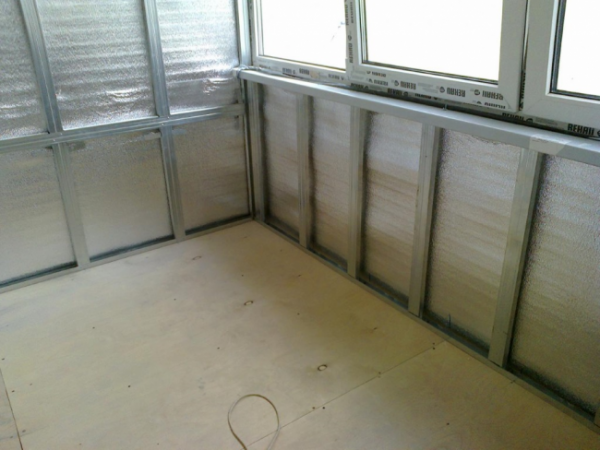
First, a vapor-tight waterproofing material is laid. To do this, it is better to use roll foam. It is attached to the plastered masonry with self-tapping screws. Then, at the bottom and at the top of the fence around the entire perimeter, a wooden bar is horizontally attached, on it are vertical wooden planks of the crate in increments of 40 to 60 cm.
The insulation is cut along the width of the step, inserted between the vertical bars around the entire perimeter. The sealing of the seams is done with mounting foam. From above, the insulation is closed with plywood, drywall or PVC panels. The finishing material is laid end-to-end, fastened with self-tapping screws to the beams of the crate.
This design of the inner side of the under-peril space gives the balcony a finished look and serves as additional thermal protection. It is better not to use heavy building materials for these purposes. Euro lining is considered the most decorative and ecological finish.
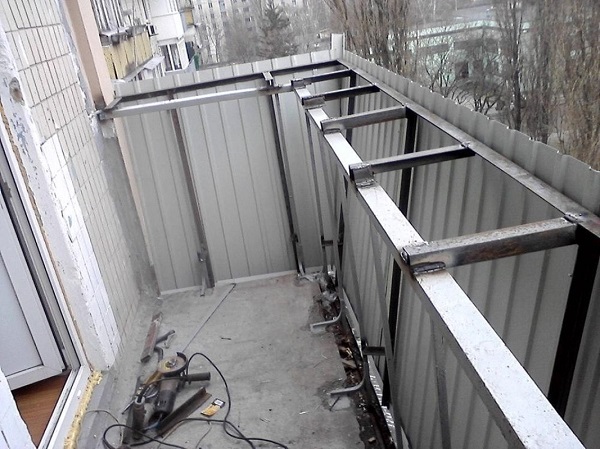
Sheathing of the parapet from the side of the street. The most efficient way
If the parapet is made of bricks or gas blocks, there are no problems with the lining: the lining is immediately attached to the masonry using long self-tapping screws or dowels.
Metal structures require preliminary lathing. To do this, the support bar is attached to the railing for subsequent glazing. Lathing racks are attached to it with a step of 60 cm. To install the siding, first fix the guides, the starting bar: for the horizontal assembly of panels - the bottom, for the vertical - the side.
Then the first 3 profiles are started, they are attached to self-tapping screws. Work continues around the perimeter. If the parapet requires insulation, the sheets are laid between the metal structure and the finish from the outside. Then all voids are foamed from the inside.
From the inside, another layer of insulation is laid. It is attached to the sheets already installed from the outside with special fungi. Vapor barrier in the case of double insulation is not done.
Internal insulation
When carrying out work from the inside of the room, all elements of the balcony or loggia are protected from heat loss, with special attention being paid to the external enclosing structures and walls adjacent to the street or technical rooms.To protect the premises of the loggia from heat loss, it is necessary to perform the following blocks of work:
To protect the premises of the loggia from heat loss, it is necessary to perform the following blocks of work:
- if necessary, replace old glazing with new double-glazed windows or wooden structures;
- close up all defects and cracks in the external enclosing structures;
- perform waterproofing of walls, parapet, floor and ceiling, as well as the frame outer wall for the balcony;
- lay insulation on all walls, floor and ceiling surfaces;
- fix an additional layer of vapor barrier;
- finish the room.
All types of work do not require special professional training, so anyone can insulate their balcony or loggia on their own.
Strengthening the balcony parapet with a foam block
Strengthening the parapet on the balcony can be made of foam block, which has the following characteristics:
- high strength;
- thermal insulation;
- soundproofing;
- fire resistance;
- durability;
- environmentally safe.
This material is lightweight, easy to cut, so you can strengthen the balcony railing with a foam block yourself. This will require:
- foam blocks 70-100 mm wide;
- adhesive composition for blocks;
- mixture for plaster;
- primer;
- material for waterproofing;
- iron bars;
- fittings;
- galvanized mesh;
- Bulgarian;
- circular saw or hacksaw;
- perforator;
- propane burner;
- hammer;
- putty knife;
- plumb;
- level.

The following procedure is followed:
- Taking measurements of fences and windows. The new fence should be 10-15 cm higher than the previous one, this is necessary for installing a drainage system. In a 10-storey building, its height should be at least 1 m, in a higher one - at least 1.1 m.
- If the screed is of poor quality, then it is removed, and then a new one is poured.
- Laminated waterproofing material. This requires a propane torch. Sometimes waterproofing is not performed. Instead, a U-shaped aluminum channel is laid around the perimeter of the balcony. It is fixed with cement mortar and screwed with dowels. The bottom row of the foam block is laid out in this profile.
- The required number of blocks is calculated. If it turned out not an integer number of rows, but for example 3.5, then the blocks are cut to the desired size and used for the first row, while they are stacked with the cut side down.
- Along the edge of the balcony slab, foam blocks are laid parallel to the old parapet. The distance between the old and new fence should be minimal, then there will be more usable area on the balcony. However, you can make a larger gap and put insulation in the gap. The solution for foam blocks is applied with a spatula. When laying, a plumb line and a level are used.
- Reinforcement and iron bars must be hammered into the junction of the wall and the foam block masonry in such a way that one end is in the wall and the other is located exactly on the horizontal masonry seam.
- Foam blocks are laid "on the run" on a special masonry mortar.
- The masonry is reinforced with galvanized mesh with a wire diameter of 3 mm.
- During the construction of the parapet on the loggia or balcony, the foam blocks are primed with a primer intended for porous materials. Then they are plastered outside and inside with facade plaster.
- The previous paragraph can be omitted if the foam block parapet is immediately sheathed and glazing is performed.
Warming
It is very pleasant to enjoy comfort both in summer and in winter. But in order to use the balcony at any time of the year, it must be insulated for the winter. Moreover, such measures will limit the access of cold directly to the apartment itself and keep it warm for a longer period.
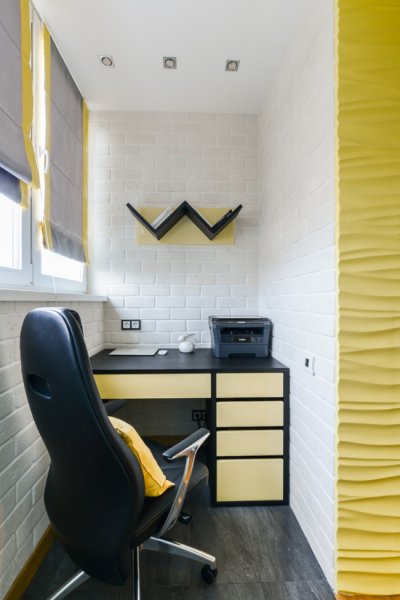
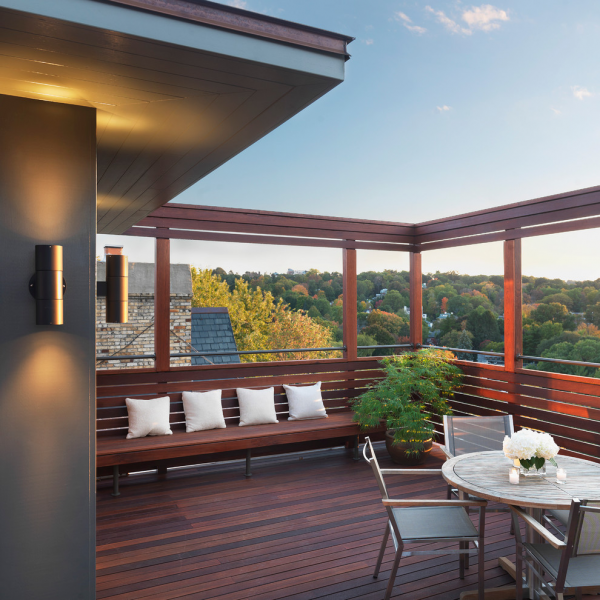
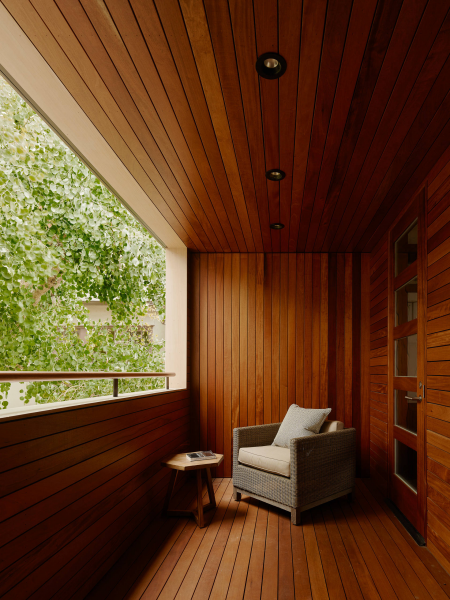
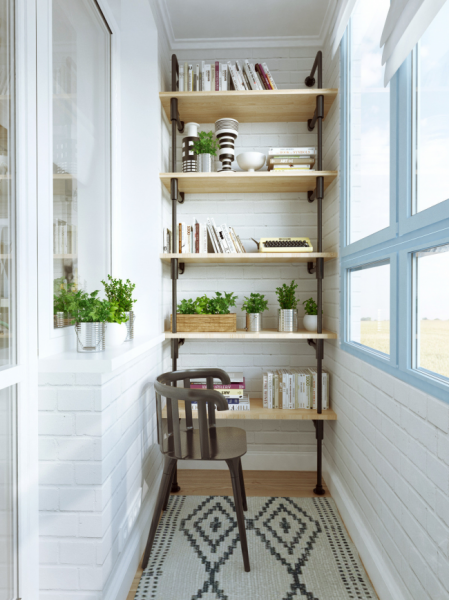
Stylish work area on the balcony
Insulation can be carried out both from the inside and from the outside, depending on what types of finishes will be applied next.If you plan to sheathe the parapet from the outside, then a heater can be inserted between it and the sheets used inside the frame. You can do the same inside. There is a wide range of thermal insulation on the market today.
According to the composition, materials for thermal insulation can be divided into three types:
organic;
inorganic;
mixed.
Scheme of insulation of the outer wall
Foil will help create reflective thermal insulation
Experts recommend the following options for warming the balcony of the most popular:
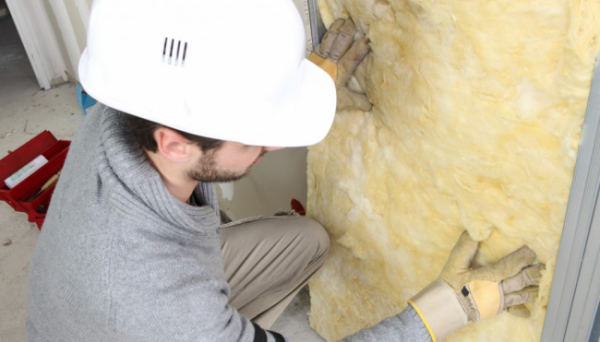
Glass wool is affordable, easy to purchase at any hardware store, and has a service life of up to 15 years. Among the shortcomings, one can note the complexity of laying associated with the special structure of the material. If it comes into contact with exposed areas of the body, it can cause severe irritation.
When installing glass wool, it is necessary to use protective equipment
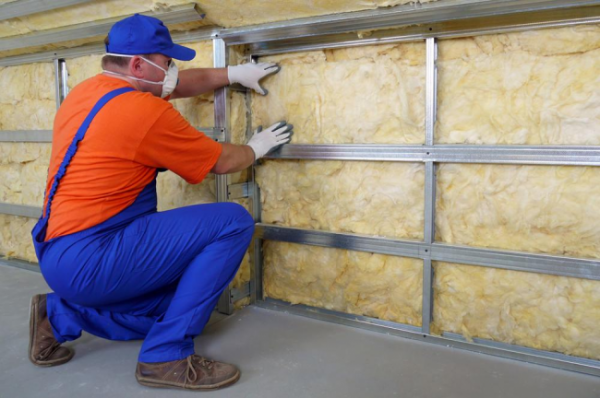
Basalt fiber belongs to the type of mineral wool. For its manufacture, basalt is used as the basis, which ensures its environmental safety. But among the advantages, fire resistance is the main one. It also easily withstands a wide range of temperature changes.
Installation of mineral wool
- Polyethylene is a fairly expensive material. It is best to lay it under the foil, creating a reflective thermal insulation.
- Polyfoam is the most affordable and one of the most durable materials. Some manufacturers guarantee its service life up to 30 years. However, it has a high fire hazard. Given the features of the functionality of the balcony, this factor is not so significant.
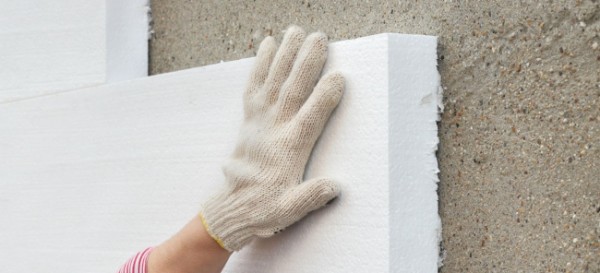
Insulation with foam

The use of foam boards for thermal insulation avoids "cold bridges"
This is not the whole list of thermal insulation options. Your choice may be driven by factors such as price, durability and ease of installation.
https://youtube.com/watch?v=YKO00flP1tA
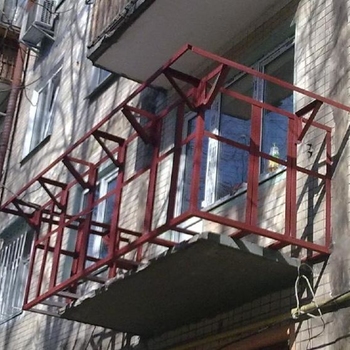
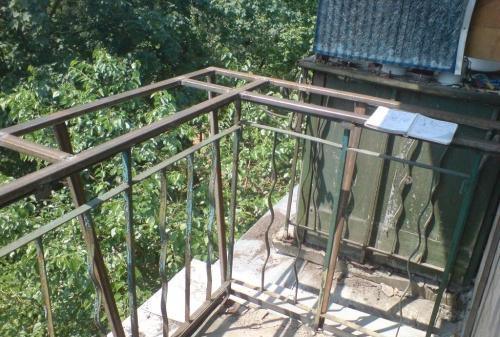
Reinforcement of the parapet with a metal structure
This reinforcement method is used if it is planned to leave the balcony open or make cold glazing. The complexity and type of reinforcing metal structure depends on the goals of the event. So, if you just need to strengthen the old metal fence, which can no longer withstand wind loads, it is enough to do the following:
- Prepare new vertical supports.
- Fix them to the concrete slab through the corners, weld to the existing parapet.
- Lay horizontal railings on top of the supports and also weld them.
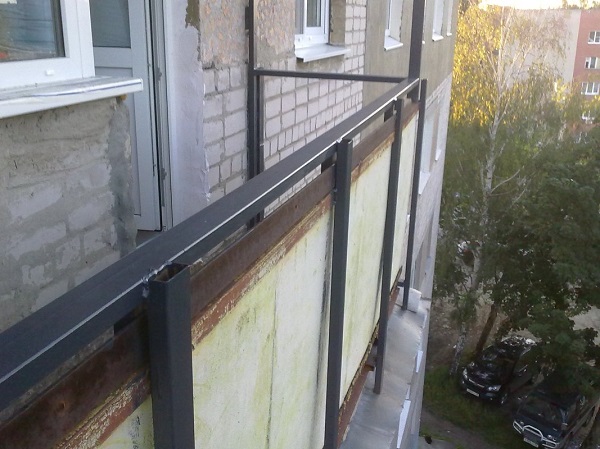
If glazing is installed on a new fence, a more complex structure must first be welded, possibly with a removal beyond the main perimeter of the balcony. Then fix it to the slab and the outer wall, weld it to the old parapet.
What to make a parapet on the balcony
As we said earlier, fences can be made of different materials: wood, metal, brick, aerated concrete block, etc. Let's consider each of the possible options.
Tree
For those who are interested in wooden balcony railings, which are much easier to buy and install (of course, if you do not have experience in welding), but you should know that wood is unreliable. Under the influence of the atmosphere, the material loses its strength. Therefore, wooden parapets cannot be used for subsequent glazing.
Metal
Metal constructions of balcony railings are the most reliable material.
If you plan to install a balcony railing without subsequent glazing, then you can choose a forged metal structure as a parapet. This option will give the balcony personality. Available in any size for a variety of designs.
It is worth noting that the forged parapet is mounted to the wall of the house and the remote plate using anchor fasteners.
If you plan to glaze the balcony, you should choose a welded metal fence.The structure is assembled from several elements and fastened with anchors. Outside, such a parapet can be covered with siding, corrugated board or other material for outdoor work.
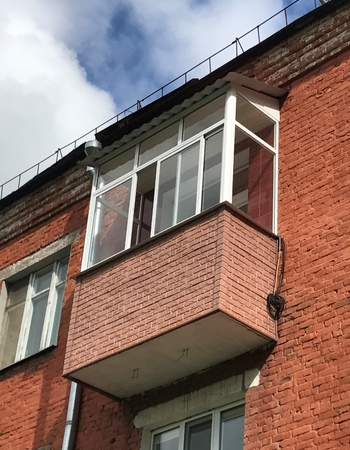
Brick or foam blocks
A heavy fence made of bricks or aerated concrete blocks is not suitable for remote slabs of balconies, although there are craftsmen who want to insulate the balcony and load the slab to the fullest. The material is used only when installing parapets on loggias.
The main stages in the installation of thermal insulation from the inside
Work on the insulation of walls, floors and ceilings is carried out after the installation of new glazing. If the balcony or loggia is already closed with metal-plastic or other modern double-glazed windows, then the integrity of the layer of mounting foam and sealants applied during installation is checked again.
Surface preparation
The parapet of the loggia is carefully inspected for cracks and defects. To achieve minimal heat loss, as well as to protect the structure from waterlogging, it is necessary to carefully seal all cracks with polyurethane sealant or mounting foam.
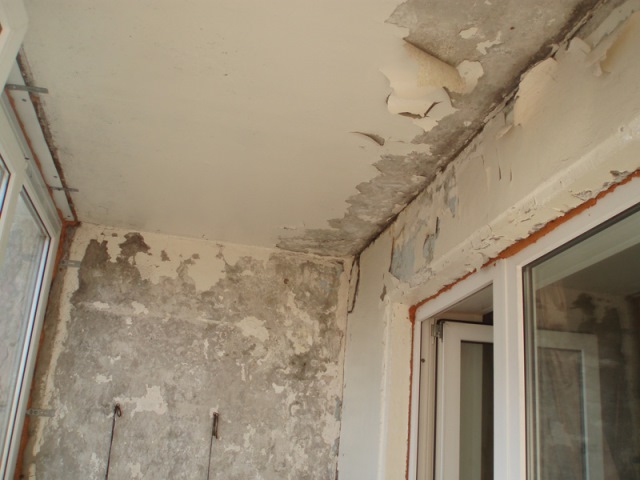
Additionally, all seams between the parapet, walls and floor are processed. The surface of the walls bordering the street is also inspected. It is necessary to protect all structures as much as possible from the penetration of moisture and heat loss through cracks and defects.
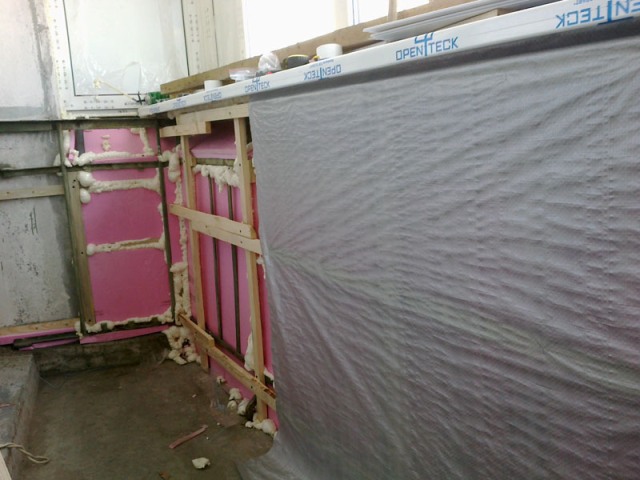
Waterproofing device
After eliminating the identified cracks and defects, it is necessary to protect the surfaces of the room from external moisture. To do this, the balcony or loggia is completely covered from the inside with waterproofing films. The membranes are overlapped with adjacent sheets overlapping by 5 - 10 cm and all seams are glued with protective tape.
When using polyurethane foam or extruded polystyrene foam, the waterproofing layer can be omitted. The low permeability of materials will not allow moisture to penetrate into the body of the insulation.
Insulation laying
After the preparation of the walls, the ceiling and the floor of the loggia or balcony are completed, they are covered with heat-insulating materials. Rigid slabs are attached to concrete or masonry by means of plate-shaped polymer dowels. The distance between the individual fasteners should not exceed 40 cm. Most often, five dowels are consumed per standard plate.
The joints between the sheets are additionally insulated with mounting foam without toluene. All winter variants of such materials may contain toluene, but its use is unacceptable due to the negative effect on polystyrene.
Vapor barrier device
After laying the insulation, all structures are closed with a vapor barrier. For these purposes, it is best to use special polymer membranes or polyethylene foam. The presence of a thin layer of foil from the inner surface of the material will help create the effect of a thermos and additionally protect the room from heat loss.
The vapor barrier can be fixed with polyurethane adhesive. All joints are also overlapped 5 - 10 cm and glued with waterproofing tape.
Frame installation and cladding
After the main protective layers are assembled, a frame is being installed from wooden bars 40x20 mm or 50x25 mm for attaching the finishing material. Sometimes a metal profile 60x27 mm is used instead of wood.
The railing guides are fastened only after the elements are leveled. For fixing, self-tapping screws are used, the length of which allows you to attach a beam or profile directly to a concrete or brick base. The location of the frame is assigned based on the selected material.
So, for drywall it is better to set vertical guides, and plastic panels - horizontal. The distance between the guides should not exceed 40 cm. After installing the frame, the walls, ceiling and floor are sheathed with the selected finishing material.
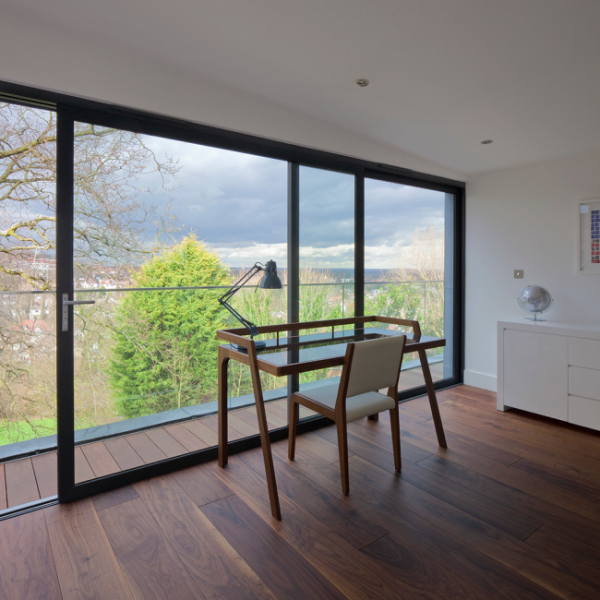
Insulation of a balcony or loggia will allow you to expand the usable space of the apartment and get an excellent study or lounge.
Insulation of a metal profile on the parapet
So, first of all, I had to solve a problem known and discussed in many forums on warming the loggia, namely: what to do with the U-shaped profile, which is installed on top of the brickwork and is designed to reinforce it, and also its second function is the “railing” function ".
First, about the essence of the problem: such a profile with one of its sides goes outside, and the other is turned inside the room and, as a result, it is a bridge of cold.
The figure below shows that cold air from the street cools the profile metal and penetrates into the room through this cold bridge. Moreover, frost forms on the surface of the metal at negative temperatures, and at cold, but positive temperatures, condensate, since a “dew point” appears on its surface. Thus, due to the impossibility of raising the temperature of the profile, it is necessary to protect its surface from warm air and transfer the dew point inside the insulation.
Moreover, subtlety was added: this profile is the basis for installing the corners of the window sill, which further complicates the task.
Since it was not possible to shoot the profile due to the fact that frames with glazing had already been installed on top, or, simply speaking, the loggia was glazed, we had to get out and get out of the situation.

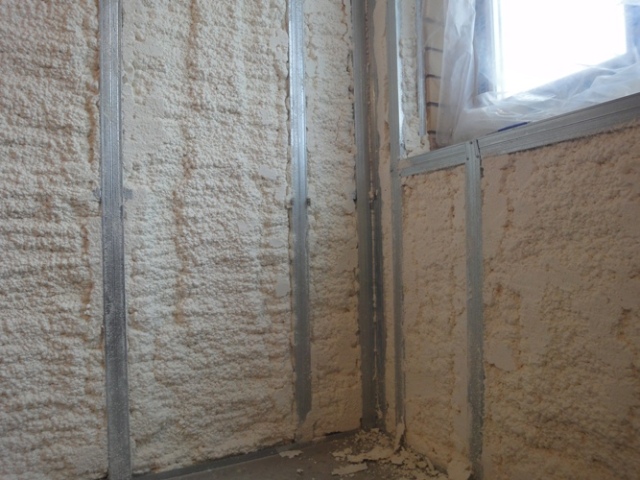
Metal profile on the parapet
Having a little brainwashed, I pasted over the entire inner part of the profile, which is inside the room, with isofol (penofol or analogues). Since it does not stick well, I used bituminous mastic to fix the foamed polyethylene - the main part of isofol. This choice was ensured, firstly, by the fact that the bituminous mastic will reduce the corrosion of the profile, and secondly, in the subsequent steps, the isofol layer will be additionally fixed with mechanical fasteners, and thirdly, I already had such a mastic left over from sealing the joints ... that something like "he has this shoe polish heaps."
Here, by the way, you should pay attention to two things: firstly, before pasting, the corners for attaching the window sill should already be screwed and leveled, and secondly, all joints, cracks and corners of the isofol must be sealed with aluminum tape. This is necessary so that warm air from the room does not penetrate through the cracks to the cold surface of the U-shaped profile
Otherwise, frost or condensation will begin to form under the isofol layer.
And one more thing I read on the forums. The fact is that one of the coldest places in glazing is a plastic spacer profile under the windows. Since it is hollow inside, I drilled it every 20 cm and propelled it inside - this moment gives additional insulation and reduces the penetration of cold. After that, just in case, I glued it with isofol, naturally gluing the joints with aluminum tape. Since I read this a little later, I foamed it at the next stages, but it’s worth doing it right now or almost at the very beginning.
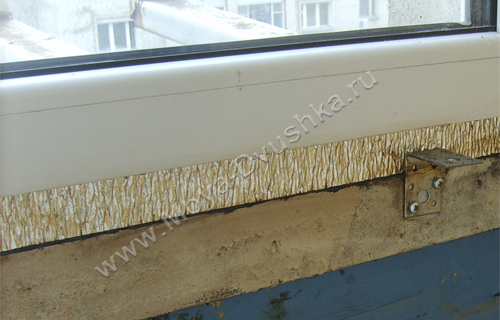
In the photo below, a metal U-shaped profile is clearly visible, lying on a blue-painted brick parapet. The support profile is glued with isofol. A corner for fixing the window sill is fixed on the profile.

Profile on a brick parapet with a corner for a window sill.
The first winter quickly revealed shortcomings and cold places - cold bridges (the spacer profile has not yet been foamed, but the parapet is insulated with EPPS - more on that later).

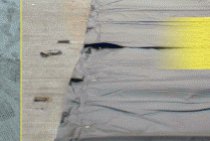
Frost on the railing
As a matter of fact, I had no doubt that the corners under the windowsill would freeze through at sub-zero temperatures, because they are the remaining bridges of cold. Later I solved this problem, but already at the stage of installing XPS boards and drywall
Also in the photo you can see that the unsealed seam between the vertical part of the isofol (along the spacer profile) and the horizontal one (along the U-shaped profile) gives frost at the junction, so once again I pay attention: the seams must be sealed with aluminum tape
Thus, having partially insulated, or rather fenced off from the internal atmosphere of the room, the U-shaped metal railing of the parapet with foil (or its analogues), sealing its seams and joints, proceeded to the next part of the parapet insulation, namely pasting with extruded polystyrene foam plates.
Analysis of the condition of the balcony
Before performing work on the installation of double-glazed windows, you should carefully inspect the balcony and determine its technical condition. In houses of old construction, quite often the concrete slab is in a deplorable state. It is a common house property, so it is impossible to decide whether it can withstand the weight of a reinforced parapet on its own. This requires an expert-diagnostic examination conducted by the ZhEK commission.

The fence on which the double-glazed window will be installed must have the following characteristics:
- Strength. The approximate weight of a single-chamber double-glazed window is 23-25 kg / m2, and a two-chamber one - 35-37 kg / m2. With a known quadrature of the glazing, it is very easy to calculate the load per linear meter of the fence.
- Fairly wide width. In addition to the plastic double-glazed window, an external tide will be installed on it, and possibly even a window sill.
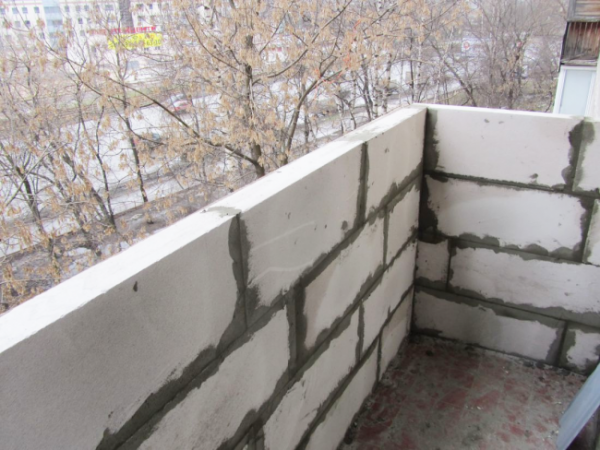
Strengthening the parapet with foam blocks
Foam blocks are easy to use and relatively light material with low thermal conductivity and hygroscopicity. For the construction of a balcony railing, it is recommended to use grades D600 - D700. Works are carried out according to the following technology:
- Clean the base of the plate from foreign objects, dust and dirt.
- Refill the screed if necessary. Lay a layer of waterproofing.
- Mark the location of the masonry.
- Conduct fence measurements. Calculate the required number of blocks. If the number of rows turned out to be fractional, then the trimmed row should be laid out first - this way the sections will be protected from moisture, which means that the structure will last a long time.
- A U-shaped profile is rigidly mounted along the reinforcement erection line as a mortgage. Between the old and new fences, you can lay a layer of insulation, but this will reduce the useful area of \u200b\u200bthe balcony.
- Lay out the first row of blocks, smearing the bottom and side faces with mortar. Pieces of galvanized mesh are laid in the first and subsequent horizontal seams so that they connect adjacent blocks - this is how the structure is reinforced.
- Lay out the next rows of blocks with an offset. Move the trimmed parts to the corners. The evenness of the masonry is periodically checked with a plumb line and level. The side walls of the parapet attract to the wall of the house. To do this, after each row, one end of the reinforcing bar is hammered into the wall, and the other is fixed in the seam with a solution.
- As the construction progresses, the blocks are impregnated with a primer from the outside and inside.
Video instruction:
https://youtube.com/watch?v=jjcKtJbFPsY
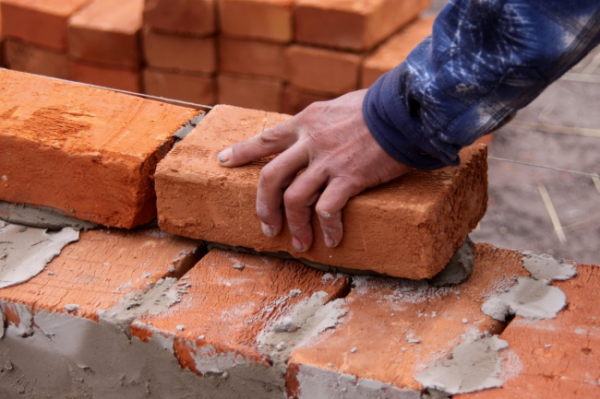
Bricklaying is carried out according to a similar technology. It should be borne in mind that this material is much heavier than foam blocks. In addition, it is able to absorb moisture, which further increases the total weight of a brick fence in wet weather. Therefore, in most cases, the use of bricks for the construction of balcony railings is irrational and unprofitable.
Ways of warming the loggia and balcony
You can expand the usable space of any apartment by using a loggia or balcony. Initially, such structures were not intended for year-round use, so the temperature regime in them seriously depends on external weather conditions. That is why, for the full use of this space, it is necessary to take care of the insulation of the loggia or balcony.
The basic thermal insulation schemes of both design options differ little. The main differences are in the need to install a frame wall for balconies that do not have a major external fence, and to insulate the parapet for loggias bounded on all sides by concrete structures.
Insulation options
When finishing a loggia or balcony, the most popular options are rigid insulation, for example, extruded polystyrene foam or polyurethane foam. These materials are easy to attach to a concrete or brick base, they are characterized by low thermal conductivity at the level of 0.035 W / mK and permeability. As a result, effective protection against heat loss can be achieved with a heat-insulating layer thickness of 50 mm, which reduces the cost of insulating a balcony or loggia.
When choosing polyurethane foam, it is best to apply it by spraying. The device of the protective layer is made after the assembly of all the frames for the exterior finish and the laying of the waterproofing. Spraying provides a monolithic structure of the insulation, which reduces the number of cold bridges. In addition, processing can be done immediately on all surfaces of the room, which reduces the finishing time.
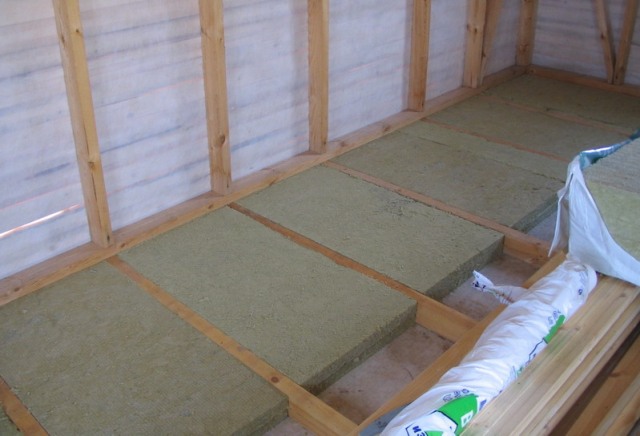
To protect the ceiling and floor, semi-rigid mineral wool is quite suitable. It must be remembered that such heaters are extremely sensitive to getting wet. When moistened, cotton wool almost completely loses its thermal insulation properties.
Therefore, for such heaters, it is important to strictly follow the rules for installing waterproofing and vapor barrier layers.
Internal and external editing of the railing space, methods of strengthening
Over the years of operation, the balcony and loggia are affected by weather factors, concrete and iron must be restored. To preserve the decorative effect, you need internal and external decoration of the under-railing space.
At the same time, when installing windows, the main load falls on it, so it is important to provide the necessary margin of safety for the enclosing structure around the perimeter of the balcony or the front part of the loggia. Everyone has their own technical details.
For example, a metal parapet on a loggia at the very edge of the slab will not be able to securely hold a double-glazed window, it must be moved inward. A collapsing slab can collapse under brickwork; in Khrushchev and Brezhnevka houses, a metal frame is often insulated. Loggias are more reliable. First, these houses are relatively new. Secondly, the slab is fixed by the side walls, which allows increasing the static load. Such parapets can be safely strengthened with gas blocks.
Types of parapets
The main difference between balcony parapets is the material from which they are made. Its selection should be approached very carefully and carefully. Of course, the choice depends on the functions of the balcony. It is worth remembering that one of its main features should be lightness. At the same time, it must withstand temperature fluctuations that are characteristic of any corner of our country, and be no less resistant to other external natural factors, such as direct sunlight, rain, wind, snow, etc.

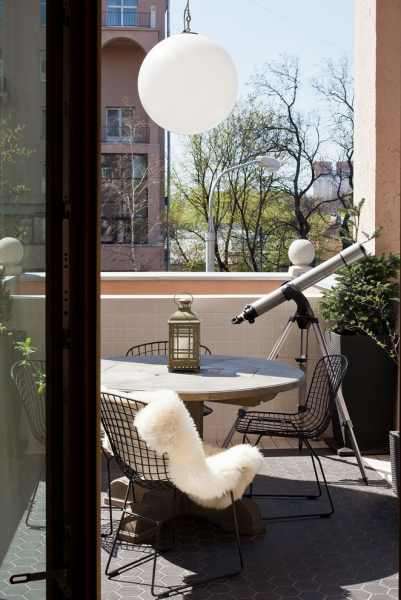
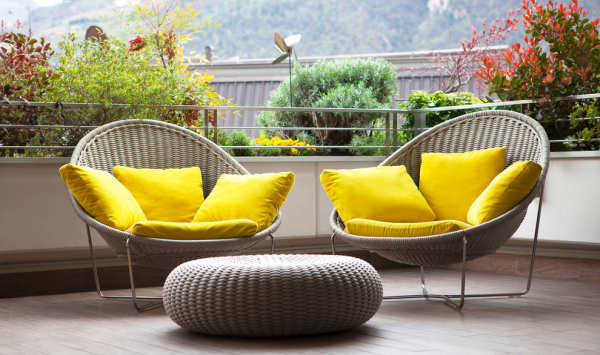
White wicker furniture looks very nice

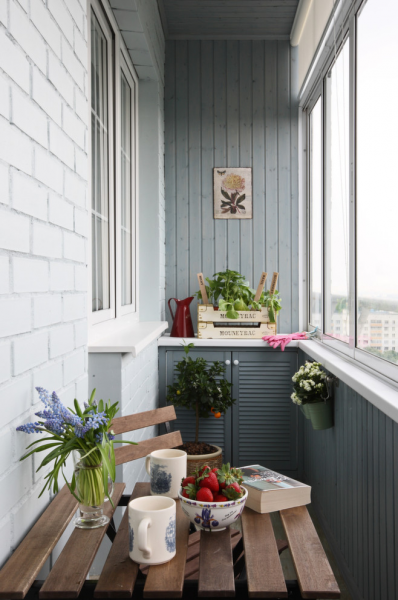
A small greenhouse on the balcony of a multi-storey building
To date, manufacturers offer a wide range of building materials for the construction of balcony railings. Let us consider in more detail how they differ, what is the feature and how to make the right choice.
On the lower floors, as well as for arranging a balcony in private houses, wood is often used. This option, despite the large amount of competition, has not lost its popularity for several centuries. It has positive aspects, which include light weight, ease of use, aesthetics.
14

But at the same time, it also has negative ones. Without special preparation and processing, he cannot bear the influence of external natural factors.
Glass parapet will help emphasize the modern style of the interior
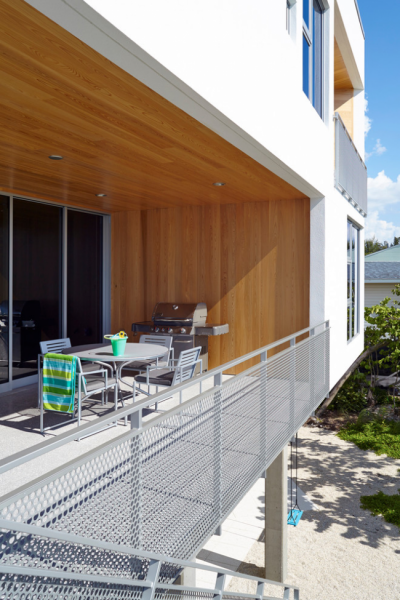
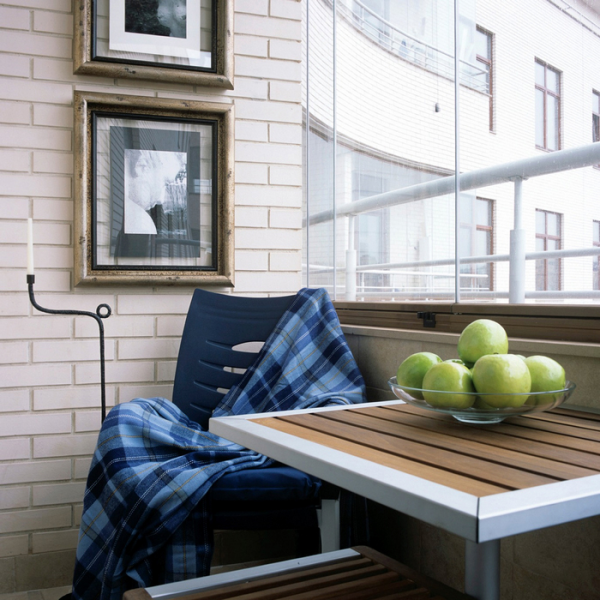
Wood flooring has many benefits.
The metal parapet is considered the most popular. He came to us during the Soviet Union and, due to the availability of material and ease of installation, is in demand today.It consists of a frame sheathed with sheet metal, for which pipes, angles, plates and other elements can be used.
It is important that the edges of the sheet are processed correctly. Otherwise, it may cause injury
Metal structures are particularly durable
The next most accessible can be considered a brick. When creating ground structures, it is one of the leaders in terms of reliability
But when it comes to the balcony, this material should be approached with extreme caution. First of all, you need to know the technical indicators of the endurance of the plate
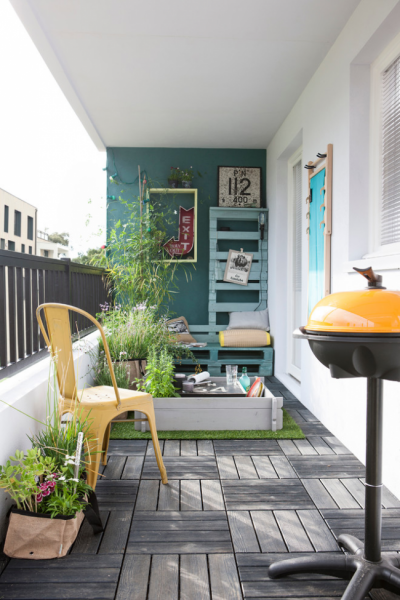
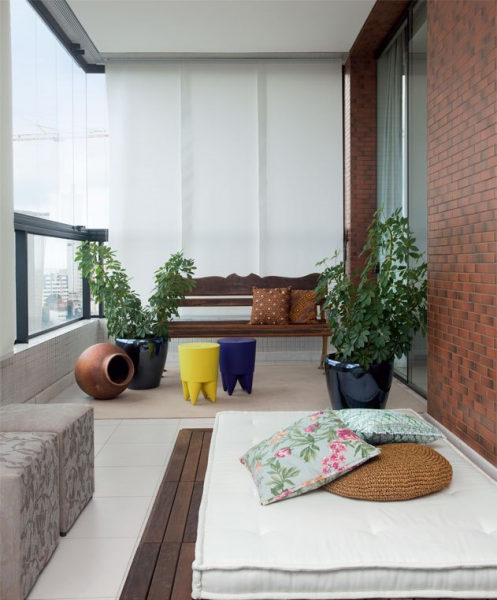
Loft-style balcony interior

Calculation of the mass of the load is a very important nuance when planning the repair of a balcony
Brick balcony parapets are the most popular
Foam blocks will help reduce the load on the carrier plate
- In addition to bricks, concrete blocks, natural stone, etc. can be used. Note that their weight may be greater, and therefore more dangerous. But due to their size, fewer elements may be needed for use, which will reduce weight and load. Therefore, as in the case of bricks, the pre-pressure on the substrate must be determined in advance.
- An excellent substitute for concrete materials today are foam or gas blocks. They have a minimum weight in comparison with the above options. At the same time, experts note high thermal insulation properties as the main feature. Block structures are durable and resistant to external factors.
https://youtube.com/watch?v=qqFKHde7AnY
The only drawback in this case can be considered the cost, since the blocks of the new sample are presented as one of the most expensive examples. At the same time, special glue is required for its installation. But all this allows you to brighten up the speed and ease of installation, which you can do yourself.
14
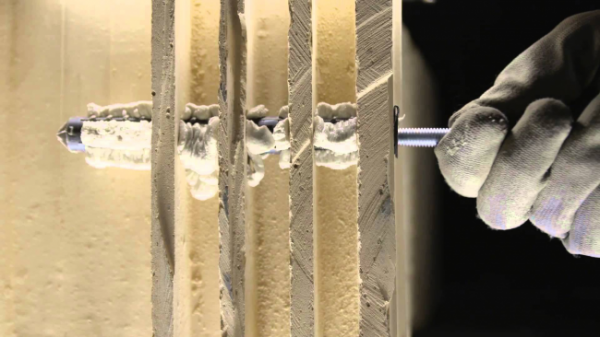
The anchor bursts into the wall and securely holds the object fixed to it
Interior decoration of the parapet
The lining of the parapet from the inside not only gives a finished look to the repair, but also is an additional heat-insulating layer. The type of finish is selected in accordance with the complexity of the work, financial costs, and the desired design of the room. The most popular ways of interior decoration:
- PVC panels;
- wooden lining;
- sheets of drywall with subsequent painting.
It is possible to use decorative stone or ceramic tiles, but these materials are more expensive and heavier - this is not the best choice for finishing the balcony parapet.
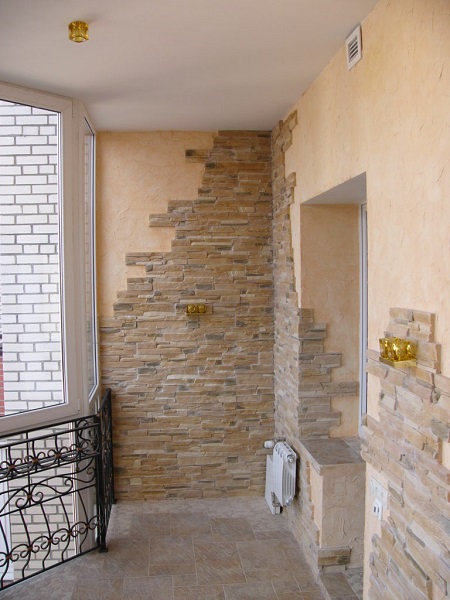 Combination of decorative stone and plaster
Most standard parapets, especially in older houses, are not structurally designed for installation of double-glazed windows on them.
Therefore, the construction of the base for window blocks should be given special attention, since the strength and stability of the entire glazing will depend on the correct implementation of this stage.
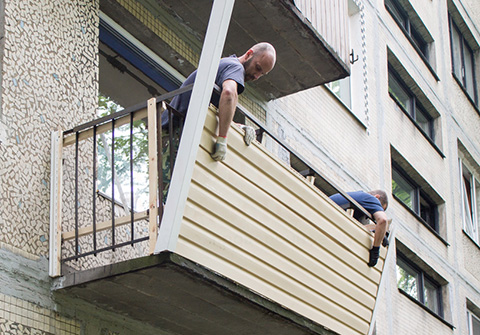
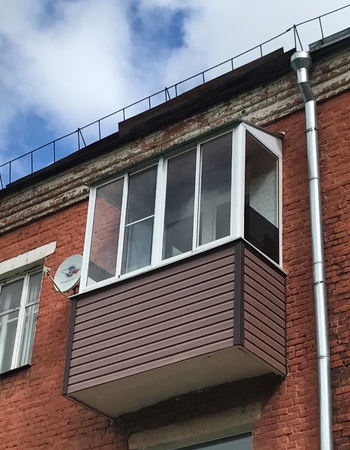
Sheathing of the parapet with siding outside
Vinyl siding has proven itself as a material for exterior decoration of balconies. Ease of installation, low weight, a variety of colors, durability and affordable price are the main advantages of siding panels.
If the parapet is a metal grill, then it is advisable to combine the insulation with the exterior finish. Sequence of work:
- On the metal railing, install in level and fix the horizontal support bar, which will serve as the basis for the glazing.
- From the outside, make a crate of wooden beams in increments of about 60 cm. If the siding is laid out in a horizontal direction, vertical racks are mounted; if in a vertical, then a horizontal crate is needed. Pre-treat the beam with an antiseptic. Work to be done using a level.
- To the crate, fix the guides and the starting bar for installing the panels in the selected direction.
- Mount the first 2-3 siding panels, turning them into a profile and fixing them to the battens with screws.
- At the same time as fixing the siding, the insulation is fixed. Penoplex sheets cut to size must be inserted between the finishing panels and the metal parapet so that they fall into the cells of the crate.
- Finish installing the siding on the outside of the balcony.
- From the inside, apply mounting foam to the joints between the insulation sheets and the wooden crate. The seams between the foam and the floor, walls are also sealed.
- Lay out the second layer of insulation on the outside of the balcony. Sheets are attached to the first layer with plastic fungi. The gaps between the parts are also blown out with mounting foam. A double layer of foam plastic reliably protects the balcony from moisture and gives a good degree of thermal insulation. Now the parapet is ready for glazing and interior decoration.