Schematic diagram of the thermostat
For electric underfloor heating, you need to purchase a thermostat. This device connects the heating system, controls the heating mode. For liquid heating, the thermostat is installed on the circulation pump.
The controller has a thermostat. It contains a liquid that is sensitive to temperature changes. When the liquid expands in the thermostat, the valve closes, which helps stop the pump. The heating system is turned off. Equipment for electric floor heating has a slightly different scheme.
- A cable from floor heating elements, a temperature sensor wire and conductors from the central electrical network are connected to the thermostat, which is designed for underfloor heating.
- The equipment is equipped with a thermostat, but it is represented by a touch metal plate. It is tuned to a certain mode, the norm.
- The sensor device captures the temperature of the floor, which is transmitted from the temperature sensor, and the air in the room, compares it with the indicator of the established norm.
- If the air temperature exceeds the norm, the thermostat turns off the heating. When the temperature drops, the heating switches back on.
- The wiring diagram is available in the passport to the device and on the panel of the regulator itself.
Most Legrand underfloor heating controllers require a mains voltage of 230 V. The maximum current of the heating cable is 13 A. In order for the device to continue working with a sharp increase in voltage, the manufacturer provides a mandatory resource reserve in the thermostat. Equipment from Legrand is designed for a current of 16 A.
On the regulator, manually or with the help of a program, a certain temperature regime is set. When testing equipment, the temperature is set 1 degree lower than the existing mode in the room. If the indicator is too low, the sensor device will determine the temperature difference and turn on the heating system.
The Legrand company offers thermostats of various modifications:
- by control method: mechanical, touch, with software;
- by the number of modules control: to control the mode of the electric heating system in only 1 room; connection of 5 modules;
- according to the installation method: with a remote or built-in sensor.
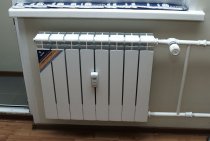
Installation of underfloor heating always begins with the installation of a place for the regulator. From it, the cable of the sensor and the heating system is removed and the laying of heating elements begins. What line of thermostats does Legrand offer?
Mosaic regulators
Mosaic underfloor heating thermostat is chosen to service the heating system in 5 rooms. The device is equipped with software, which makes it possible to set a certain thermal regime in the room not only during the day, but also during the week. All indicators can be seen on the display.
The passport for this device indicates the symbols that correspond to certain programs. You can set the time of day and comfortable temperature: it is already programmed into the device. Set the economy mode during the absence or while people are in the room.
The company "Legrand" produces equipment to ensure the efficient operation of the floor heating system. Purchase thermostats, cables, calipers, sockets. Products will facilitate the installation of the heating system, allow you to withstand a certain design in the room.
Installing the Legrand Celiane thermostat
- header
- Installing the Legrand Celiane thermostat
- header
- Review of PR-119: the ability to install in the Legrand Valena frame, anti-icing function
- header
- Thermostat in frame legrand forcemontage forcemont@zh
Mechanical regulators
Thermoregulators for floor heating contribute to the creation of a favorable microclimate in the room. Mechanical devices are easy to operate and maintain. Experts believe that they are more durable than touch devices.
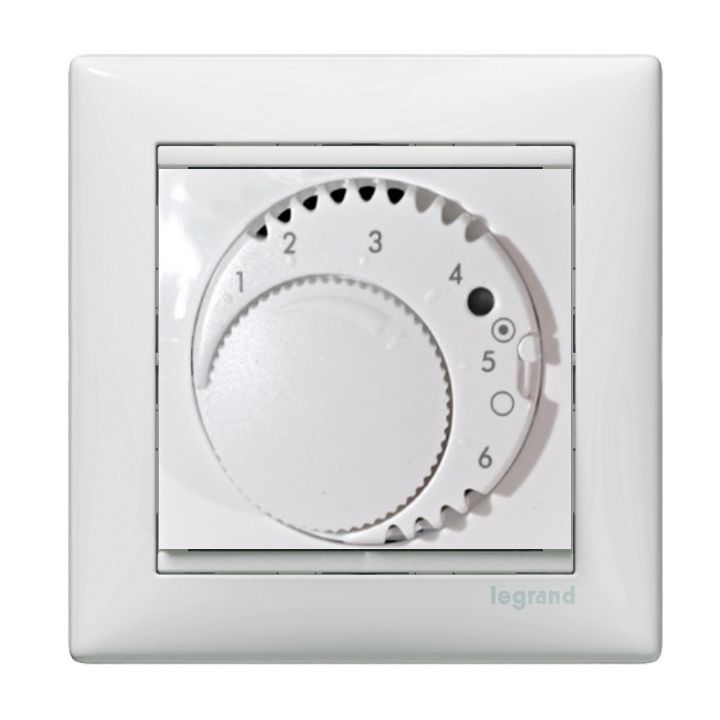
Regulator "Valena" belongs to the group of portable, mechanical thermostats. The case is made of white glossy plastic, but the manufacturer offers other shades of the panel: ivory and aluminum. The color is chosen in accordance with the design of the room. The device operates on mains voltage 220-250 V.
- For the system to work, you must click on the "Select" button. At the same time, the indicator in the “ON” position lights up. Pressing the button again will turn off the system.
- Set a certain mode. There is no temperature on the panel. The indicators are encoded with numbers from 1 to 6. Each number corresponds to a certain mode.
- The heating mode is regulated by turning the round knob. It has a mark on it.
- When the mark is located opposite the number "1", the heating system will warm up to 10 0C. Each digit adds 10 degrees: "2" - 20 0С, "3" - 30 0С, "6" - 60 0С.
The temperature controller for underfloor heating "Legrand Galea Life" allows you to set the temperature manually: range 10-60 0С. The device is equipped with an LED indicator that indicates the operating mode of the thermostat.
- The controller has a timer. For it, an additional terminal for 230 V is provided in the kit.
- Time is set on the timer; in what period it is necessary to increase the intensity of underfloor heating or switch to economy mode. Manipulations with the timer are carried out 1 time.
- The timer is connected to the control device. In the future, the thermostat will independently reduce or increase the air temperature at the set time of the day and night, or during the period when there is no one in the room.
- A caliper is included with Galea Life. It is designed to mask the regulator on the wall.
- The plastic panel can be of various designs: white, pearl, titanium, dark bronze, aluminum.
The Etika thermostat has a convenient control panel. Temperature indicators are not encoded with numbers. The device can be set to a mode from 10 to 30 0C. It is possible to increase or decrease the temperature in increments of 1 degree. The device is equipped with a support and a floor temperature sensor: a 4 m wire is provided for it. The body of the equipment is plastic. Color white, ivory, aluminium, anthracite,
Regulators "Celiane" have a mechanical control. For the device, it is necessary to equip a niche in the wall. A plastic cup is inserted into it, where the control device is placed. The mains wiring is brought into the glass, which is connected to the thermostat. Choose a device with temperature control in steps of 1 or 10 degrees.