Repair. Day 78. Living room painting, bathroom floor tiles.
Day of painting the living room and everything else.


In total, two 10 liter buckets of paint or 4460 rubles were spent on the whole apartment.

Apron protection. Same thing with windows.


Meanwhile, the second layer of waterproofing has dried up in the bathroom.

And yes, the cement mixture cracked in places, so I cleaned the most flimsy places and smeared everything with fugen (the perlfix was over, and I didn’t want to buy a 30kg bag again). In general, with the availability of modern gypsum mixtures, the use of cement mixtures in such works becomes meaningless.

It's time to lay the tiles.

I'm sketching out the layout. Under the tile there will be a sheet of warm floor.


The wire going to the thermostat will still be the temperature sensor wire that comes with the thermostat.

First 2 rows of tiles. I'll post the rest when this part is dry.

Laying tiles on the floor is more difficult than on the walls. Difficulty leveling up. Somewhere there are small height differences (mm or less), but where the lockers will stand, so I'm not really worried.
Equation underfloor heating benefits, features and installation rules.
Equation underfloor heating - advantages, features and installation rules.
Warm Equation has several advantages in terms of reliability and safety. The design of the cable thin mat is one-piece, and therefore accidental disconnections do not occur in it if the connection of the contacts is of poor quality. In addition, in such a warm floor there are no contact groups (to place them, you usually need to cut the thermal insulation). The Equation cable floor is absolutely not afraid of moisture, for example, during flooding, the warranty service life of the heating cable is much longer than the service life of film structures.
How to lay laminate on a water heated floor? Design advantages.
In our country, the weather is not always warm, so more and more people are installing heated floors in their apartments. In recent years, water-based underfloor heating has become the most popular. The popularity of this type of heating can be explained by the following advantages:
- During the operation of water heated floors, a rather low temperature regime is maintained, not exceeding fifty degrees. This significantly reduces the cost of space heating, in contrast to the heating systems used, by about twenty to forty percent.
- The water floor is an environmentally friendly design.
- A water floor is the safest option in terms of sanitation and hygiene.
- During operation of this design, there are no electromagnetic fields.
It is best to use underfloor heating in conjunction with ceramic floor tiles. But this option is not very profitable from an economic point of view, in addition, it may not correspond to the design and purpose of the room. As an alternative, you can consider laying a laminate on a warm water floor.
What are the benefits of Knauf underfloor heating? Design features.
The habitual laying of the floor on top of the cement screed is gradually being replaced by the Knauf superfloor. This installation method is faster and more convenient. This invention is by no means new, however, the German corporation Knauf gave it popularity, which improved the process and made it ideal. The installation work of the Knauf superpole consists of the following steps:
- first, an even layer of expanded clay dry sand is laid on top of the ceiling;
- after leveling, gypsum-fiber boards are laid on top;
- and the last layer is the main floor covering.
Any material can be used as the main coating, such as parquet, tiles, boards, porcelain stoneware, laminate, etc. Often, the Knauf warm floor is not laid in buildings that maintain high humidity.However, if the data is slightly different from the nome, film should be used initially. It is also worth mentioning the small mass of the finished structure. If the thickness of the warm floor does not exceed seven centimeters, then only 55 kilograms “presses” per square meter of area (similar volumes of cement screed are above 154 kilograms).
Feedback Heating mat Equation 490 W, 3.5 m2 Convenient installation and inconvenient lining
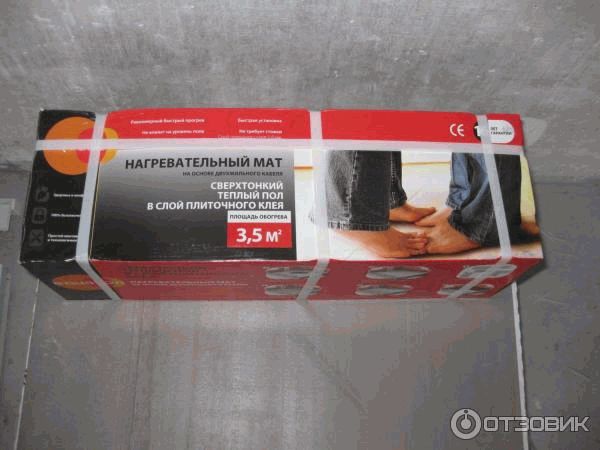
Underfloor heating is sold in a box about half a meter long, in general, all floors of this manufacturer have a mat width of 0.5 meters, and the length depends on the floor area.
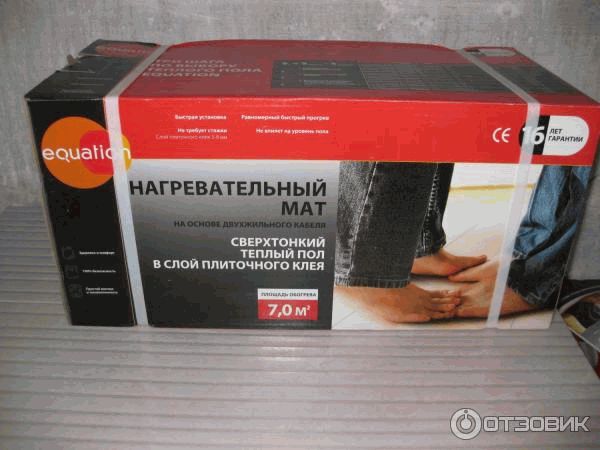
In the bottom photo, a package of underfloor heating with an area of 7 square meters, it is the same length, but wider and higher than 3.5 meters.
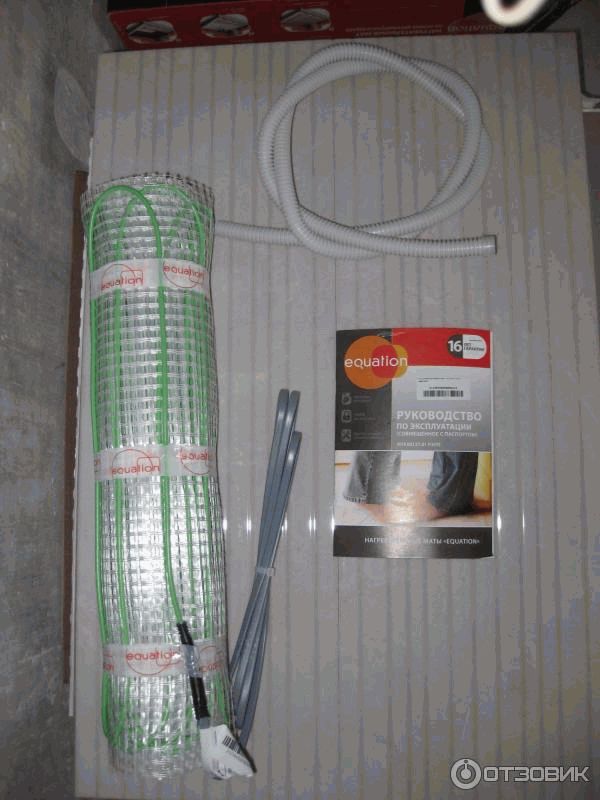
The delivery set includes the heating mat itself, a corrugated tube for the temperature sensor and installation instructions. The sensor itself and the thermostat are not included in the kit and must be purchased separately. I believe that this is correct, a person himself can choose which thermostat to buy, a cheaper mechanical one or a more expensive electronic one. A plug is installed on the corrugated tube, which sometimes does not happen with other manufacturers, but here everything is ready, you can lay the sensor and install the tube, but you can only install the tube, observing the installation parameters, and insert the sensor later.
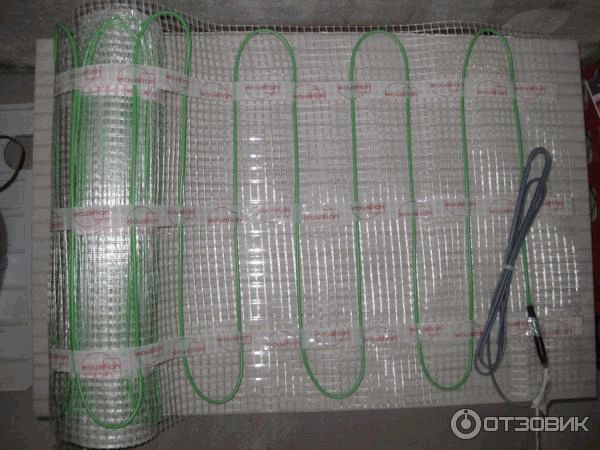
The heating element is fixed on a fiberglass mesh, during installation the mesh is cut in the right place, the mat sheet is rotated 90 degrees and the mat is rolled further, until a new cut and turn.
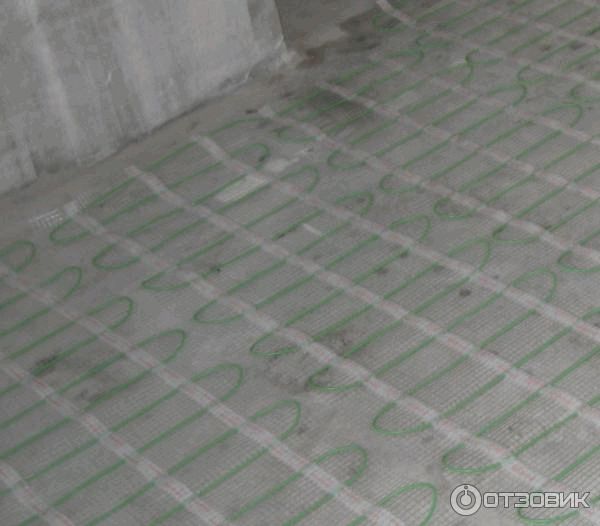
The warm floor is mounted quickly, in fact it just rolls out, unlike earlier modifications, when the kit included a heating element and a coil of metal mounting tape, which had to be attached to the screed with self-tapping screws or dowel-nails, and then calculate the step of the heating element.
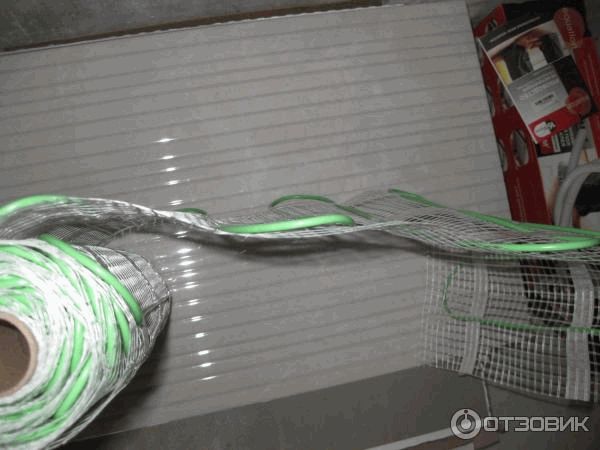
The upper photographs show that the green heating element itself is thin, its diameter is 4 mm, but the black coupling that connects the heating element to the gray electric wire is much larger, its diameter is about 10 mm. This creates difficulties when facing the floor, since with such a thickness of the coupling the layer of tile adhesive will be excessive, the tiles may “peck” when dried, especially if the base on which the warm floor was laid was initially uneven. Although the instructions say that if there is linoleum or laminate on top, then the warm floor is laid in a 30 mm thick screed and I think that the same should be done with tiles. On top of the warm floor, make an even screed along the beacons, and stick tiles on the screed, then a layer of glue can be made 3-4 mm and the floors will be even, not “pecked”.