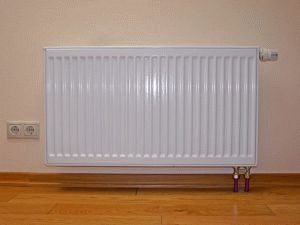
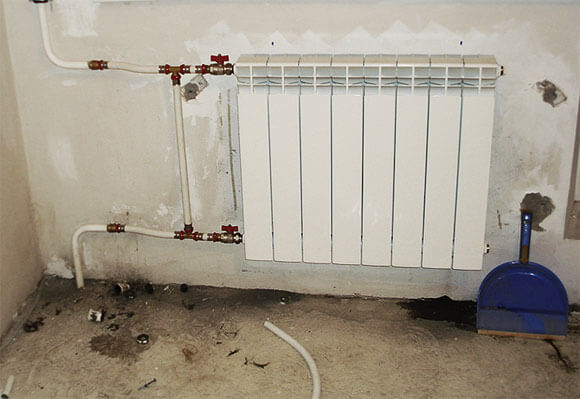
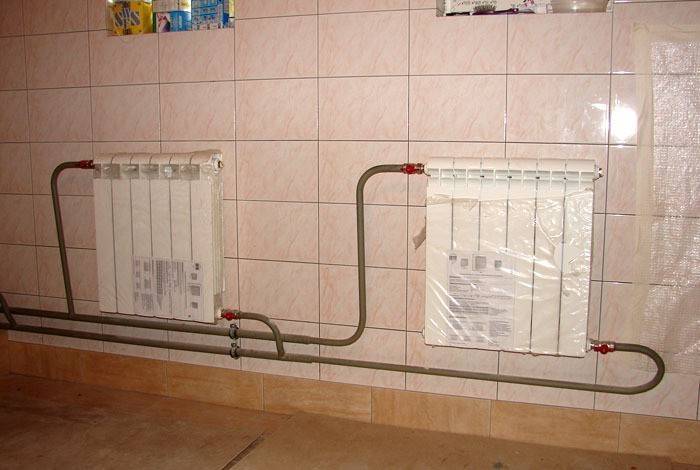
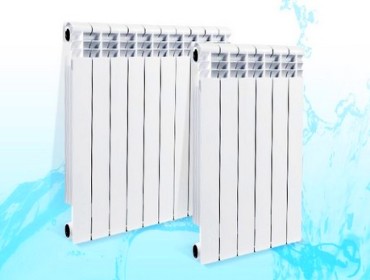
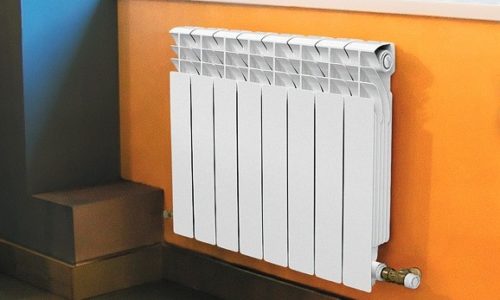
Radiators with bottom connection
You can hide bulky pipes if you make heating with a bottom connection. Of course, it is more familiar to understand standard systems when the coolant enters from above or from the side and exits down. But such a system is rather unaesthetic, and it is difficult to cover it with a screen or somehow ennoble it.
Bottom connection principle
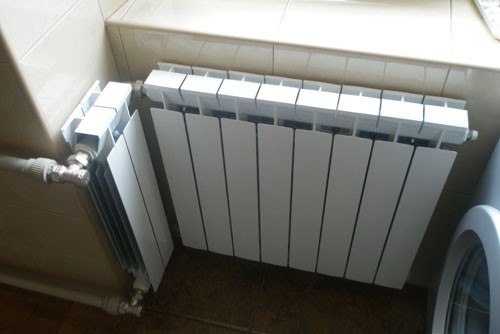
 The scheme with the lower connection of heating pipes is not familiar and common, as it is less efficient. than standard connections. But in some cases, this is a winning option. For multi-apartment apartments, such piping is not used. Most often, this type of connection can be found in private homes where aluminum and bimetallic heating radiators are used.
With a lower connection, the main part of the pipes is hidden under the floor covering, sometimes there are difficulties in seasonal inspection or preventive maintenance. But there are also pluses - this is a minimum of complex bends or joints, which reduces the risk of leaks or accidents.
The connection diagram for heating radiators with a lower type is simple - the return and coolant supply pipes are located nearby, in the lower corner of the radiator. It is also allowed to connect pipes from different sides of the radiator. The upper holes (if any) are screwed with a plug.
The radiator installation kit is identical to the standard one:

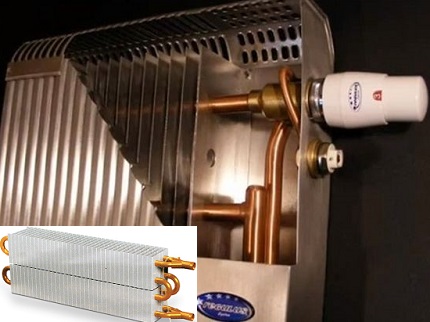
For bottom connection, it is best to use bimetallic radiators. they are strong, durable, have excellent heat dissipation due to heating, radiation and convection. Even when using the bottom connection, heat loss will not exceed 15 percent. Due to the supply of hot coolant from below, the bottom of the battery heats up and heats up the top by convection.
Selection and installation of radiators
For the bottom connection, bimetallic heating radiators are recommended, they are easy to assemble, install and repair. Radiator sections can be removed, added or replaced if damaged.
When buying, it is better to give preference to domestic manufacturers, it is important to check the integrity of the battery and packaging. Documentation must be understandable and written in Russian
Before installation, you need to make a markup. it is done with a pencil on the wall. In this case, the points where the brackets will be installed are marked. The bottom of the radiator must be at least 7 cm from the floor and 10 cm from the window (if located under the window). Distances are maintained so that the air in the room circulates freely. The distance to the wall should be about 5 cm.
For more efficient circulation of the coolant, heating radiators are installed with a slight slope. this eliminates the accumulation of air in the heating system.
When connecting, it is important to follow the markings and not confuse the return and supply. If connected incorrectly, the heating radiator can be damaged, and its efficiency will decrease by more than 60 percent
There are the following types of bottom connection:
- one-way connection - the pipes come out from the corner below and are located side by side, heat loss can be about 20 percent;
- versatile piping - pipes are connected from different sides. such a system has more advantages, since the length of the supply and return lines is less, and circulation can occur from different sides, heat losses are up to 12 percent;
A top-down connection is also used. but in this case it will not be possible to hide all the heating pipes, since the coolant will be supplied in the upper corner, and the output will be from the opposite lower corner. If the heating radiator is closing, then the return line will be brought out from the same side, but from the lower corner.In this case, heat losses are reduced to 2 percent.
If you plan to connect heating radiators with your own hands, it is important to follow the installation and safety techniques. The coolant must be drained during installation or repair, the batteries are cold
If in doubt, it is better to call the wizard or use the training video tutorial, since with a lower connection it will be difficult to repair the sections. It is better to plan a heating system with bottom heating together with the layout of the house.
The problem of choosing radiators
There is currently no universal solution. Different tasks require different solutions.
Let's say using aluminum radiators in district heating apartments is a bad idea:
- Aluminum is a soft metal and can simply not withstand large drops in coolant pressure.
- The steel from which the pipes are made for passing the coolant through them to the batteries gradually reacts with hot water under strong pressure. The resulting salt solution strongly interacts with aluminum.
- Aluminum itself is not an inert material at all. In the place of its contact with steel, noticeable corrosion reactions occur. The fact is that aluminum and unalloyed steel make up the so-called galvanic couple, that is, damage at the point of contact of these two metals is only a matter of time.
Bimetallic batteries are devoid of all of the following disadvantages:
- Their strength is such that the radiators are guaranteed to withstand a five-fold excess of the coolant pressure of 10 atmospheres that is usual for centralized networks.
- Excellent appearance and a wide variety of shapes and sizes.
- Mounting bimetallic radiators will be more difficult than aluminum ones, but not by much - with comparable dimensions, a bimetallic radiator will be about one and a half times heavier than pure aluminum.
Today, bimetallic radiators are used, made using two technologies:
- Steel frame - the coolant circulates through steel pipes and does not come into contact with aluminum. "Aviation" metal is only covered with steel pipes to improve convection and the appearance of the batteries.
- Reinforced channels - uses the principle of reinforced concrete (two materials complement and reinforce each other). According to this technology, aluminum pipes in critical areas are reinforced with steel inserts. You should be aware that if installed incorrectly, these inserts can block the lumen of the pipe.
A feature of the operation of bimetallic radiators is the characteristic tapping during heating and cooling of the batteries (read: “Bimetallic heating radiators: which ones are better to choose“). The fact is that aluminum and steel expand differently, so there are stresses at the point of contact.
What is needed for installation
Installation of heating radiators of any type requires devices and consumables. The set of necessary materials is almost the same, but for cast-iron batteries, for example, the plugs are large, and the Mayevsky tap is not installed, but, somewhere at the highest point of the system, an automatic air vent is installed. But the installation of aluminum and bimetallic heating radiators is absolutely the same.
Steel panel ones also have some differences, but only in terms of hanging - brackets are included with them, and on the back panel there are special shackles cast from metal, with which the heater clings to the hooks of the brackets.
Mayevsky crane or automatic air vent
This is a small device for venting air that can accumulate in the radiator. It is placed on a free upper outlet (collector). It must be on every heater when installing aluminum and bimetallic radiators.The size of this device is much smaller than the diameter of the manifold, so another adapter is required, but Mayevsky taps usually come with adapters, you just need to know the diameter of the manifold (connecting dimensions).
In addition to the Mayevsky tap, there are also automatic air vents. They can also be placed on radiators, but they are slightly larger and for some reason are only available in a brass or nickel-plated case. Not in white enamel. In general, the picture is unattractive and, although they deflate automatically, they are rarely installed.
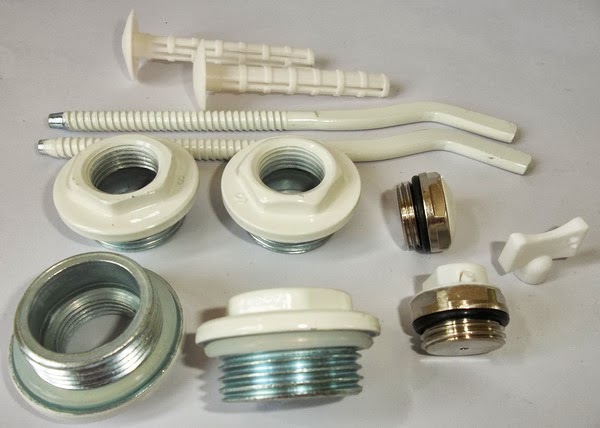
Stub
There are four outlets for the radiator with lateral connection. Two of them are occupied by the supply and return pipelines, on the third they put a Mayevsky crane. The fourth entrance is closed with a plug. It, like most modern batteries, is most often painted with white enamel and does not spoil the appearance at all.
Shut-off valves
You will need two more ball valves or shut-off valves with the ability to adjust. They are placed on each battery at the input and output. If these are ordinary ball valves, they are needed so that, if necessary, you can turn off the radiator and remove it (emergency repair, replacement during the heating season). In this case, even if something happened to the radiator, you will cut it off, and the rest of the system will work. The advantage of this solution is the low price of ball valves, the minus is the impossibility of adjusting heat transfer.
Almost the same tasks, but with the ability to change the intensity of the coolant flow, are performed by shut-off control valves. They are more expensive, but they also allow you to adjust the heat transfer (make it smaller), and they look better outwardly, they are available in straight and angular versions, so the strapping itself is more accurate.
If desired, you can put a thermostat on the coolant supply after the ball valve. This is a relatively small device that allows you to change the heat output of the heater. If the radiator does not heat well, they cannot be installed - it will be even worse, since they can only reduce the flow. There are different temperature controllers for batteries - automatic electronic, but more often they use the simplest - mechanical.
Related materials and tools
You will also need hooks or brackets for hanging on the walls. Their number depends on the size of the batteries:
- if the sections are not more than 8 or the length of the radiator is not more than 1.2 m, two attachment points from above and one from below are sufficient;
- for every next 50 cm or 5-6 sections, add one fastener at the top and bottom.
Takde need a fum tape or linen winding, plumbing paste to seal the joints. You will also need a drill with drills, a level (a level is better, but a regular bubble one is also suitable), a certain number of dowels. You will also need equipment for connecting pipes and fittings, but it depends on the type of pipes. That's all.
Installation of bimetallic batteries
It clearly describes the procedure for connecting bimetallic heating radiators for a specific model. It should be noted that the installation of all elements of the system is carried out in a polyethylene package of the radiator. And you can not remove this packaging until the entire installation process is completed.
Consider how to connect a bimetallic heating radiator yourself. When carrying out installation work, the following nuances must be taken into account:
- it is better to place the battery in the center of the window;
- equipment is installed only in a horizontal position;
- heating parts must be installed at the same level within the room;
- from the wall to the battery, the distance should be from 3 to 5 cm. Too close the heating system to the wall will lead to the fact that the thermal energy will be distributed irrationally;
- it is necessary to maintain a distance of 8-12 cm from the window sill. If the gap is too small, the heat flux from the battery will decrease;
- between the radiator and the floor, the distance should be 10 cm. If you install the device lower, the heat exchange efficiency will decrease. It will also be inconvenient to clean the floor under the battery. But too high an arrangement of the heating unit will cause the temperature indicators at the bottom and at the top of the room to be very different.
The installation algorithm for a bimetallic radiator is as follows:
- the marking of the place for installation on the wall of the brackets is carried out;
- fixing brackets. If the wall is brick or reinforced concrete, then the brackets are fixed with dowels and cement mortar. If you are dealing with a plasterboard partition, then the fixation is carried out by bilateral fastening;
- a battery is placed on the brackets;
- the radiator is connected to the pipes;
- a thermostatic valve or faucet is installed;
- an air valve is placed at the top of the battery.
Below are some recommendations regarding the self-installation of a bimetallic heater:
- before installation, the flow of coolant into the system at the outlet and inlet should be blocked. There must be no liquid in the pipeline;
- before installation, check the battery for completeness. The radiator must be assembled. Otherwise, it is necessary to assemble the unit according to the manufacturer's instructions;
- Do not use abrasive materials during assembly. Since the design of the battery must be sealed. And abrasive substances can destroy the material of the device;
- in bimetallic radiators, both right-handed and left-handed threads are used. This must be remembered when tightening fasteners;
- when connecting sanitary fittings, the right choice of material plays an important role. As a rule, flax with a thermally resistant sealant is used. Tangit threads or FUM tape are used;
- before starting installation, you must have a well-planned radiator connection diagram. It should be noted here that the connection diagram for bimetallic heating radiators can be lower, diagonal or side;
- when the installation is completed, the device is turned on: all the valves of the unit, which previously blocked the path to the coolant, open smoothly. If you open the taps abruptly, you can provoke clogging of the internal pipe section or cause water hammer. After the valves are open, excess air should be released using the air vent;
- do not cover bimetallic batteries with screens, install them in wall niches. This will lead to the fact that the heat transfer of the device will sharply decrease.
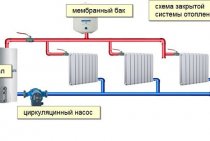
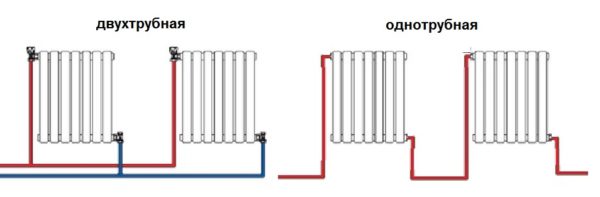
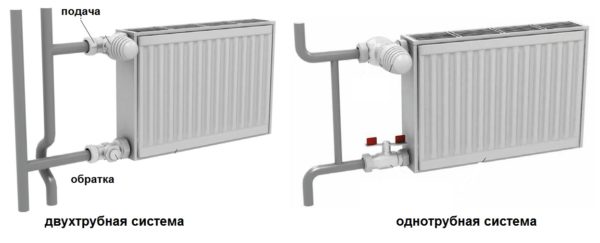
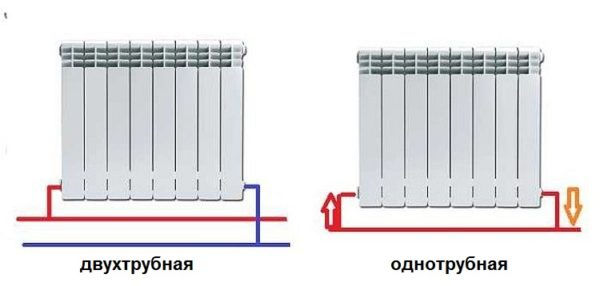
Radiator connection diagrams
How well the radiators will heat up depends on how the coolant is supplied to them. There are more and less effective options.
Radiators with bottom connection
All heating radiators have two types of connection - side and bottom. There can be no discrepancies with the lower connection. There are only two pipes - inlet and outlet. Accordingly, on the one hand, a coolant is supplied to the radiator, on the other hand it is removed.

Bottom connection of heating radiators with one-pipe and two-pipe heating systems
Specifically, where to connect the supply, and where the return is written in the installation instructions, which must be available.
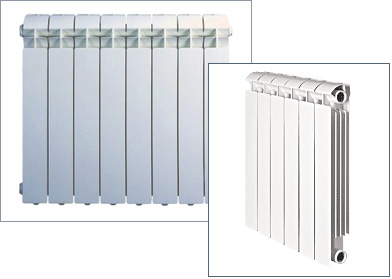
Radiators with side connection
With a lateral connection, there are much more options: here the supply and return pipelines can be connected to two pipes, respectively, there are four options.
Option number 1. Diagonal connection
Such a connection of heating radiators is considered the most effective, it is taken as a standard, and this is how manufacturers test their heaters and the data in the passport for thermal power - for such an eyeliner. All other connection types are less efficient at dissipating heat.
Diagonal connection diagram for heating radiators with a two-pipe and one-pipe system
This is because when the batteries are connected diagonally, the hot coolant is supplied to the upper inlet on one side, passes through the entire radiator and exits from the opposite, lower side.
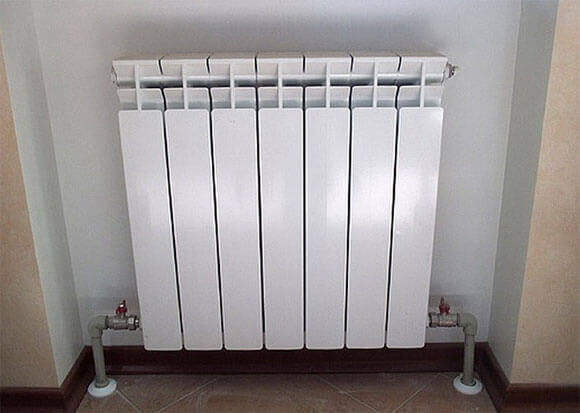
Option number 2. Unilateral
As the name implies, pipelines are connected on one side - supply from above, return - from below. This option is convenient when the riser passes to the side of the heater, which is often the case in apartments, because this type of connection usually prevails. When the coolant is supplied from below, such a scheme is used infrequently - it is not very convenient to arrange pipes.
Lateral connection for two-pipe and one-pipe systems
With this connection of radiators, the heating efficiency is only slightly lower - by 2%. But this is only if there are few sections in the radiators - no more than 10. With a longer battery, its farthest edge will not heat up well or even remain cold. In panel radiators, to solve the problem, flow extensions are installed - tubes that bring the coolant a little further than the middle. The same devices can be installed in aluminum or bimetallic radiators, while improving heat transfer.
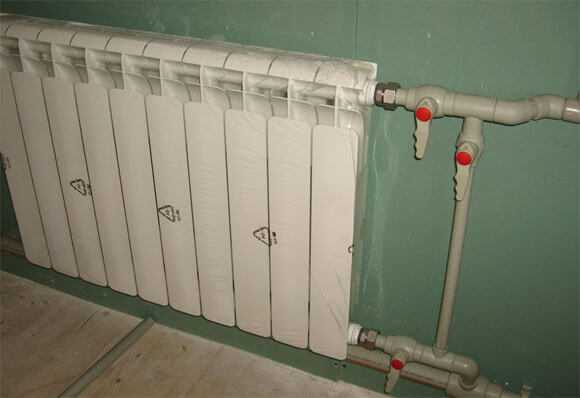
Option number 3. Bottom or saddle connection
Of all the options, the saddle connection of heating radiators is the most inefficient. Losses are approximately 12-14%. But this option is the most inconspicuous - the pipes are usually laid on the floor or under it, and this method is the most optimal in terms of aesthetics. And so that the losses do not affect the temperature in the room, you can take a radiator a little more powerful than required.
Saddle connection of heating radiators
In systems with natural circulation, this type of connection should not be done, but if there is a pump, it works well. In some cases, even worse than the side. It's just that at some speed of movement of the coolant, vortex flows arise, the entire surface heats up, and heat transfer increases. These phenomena have not yet been fully studied, therefore it is not yet possible to predict the behavior of the coolant.
The device of bimetallic batteries
As the practice of recent years has shown, of the listed series of radiators, bimetallic models are the most efficient and reliable. They have a clear advantage over other materials, which are:
- high resistance to corrosion;
- a wide range of operating temperatures and pressures;
- a simple possibility of changing the heat transfer of the device by changing the number of assembled sections;
- low inertia during heating and cooling;
- a small amount of coolant required for filling;
- low weight, facilitating installation;
- affordable for most people.
It should also be noted the ease of installation of bimetallic radiators. Due to the presence of standard fasteners, this process will not cause structural damage and will ensure high-quality fixation of heating equipment.

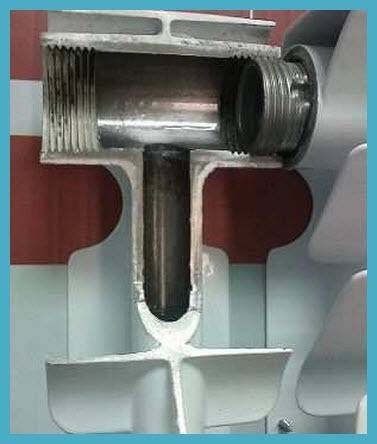
The design of bimetallic batteries consists of a set of sections. When assembled, such a package consists of two horizontal pipes connected by vertical hollow ribs through which the coolant circulates.
To increase the heat transfer of the heater, the outer surface of the fins and pipes is increased due to additional planes. The sections are connected to each other by means of hollow nipples with double-sided thread, provided that a sealing gasket is installed.
 Core.
Core.
To protect against corrosion, the inner surface of the sections is covered with a protective layer of aluminum alloy. The outer metal surface is painted according to the technology of thermal application of powder polymer paints. This gives the products a beautiful appearance and ensures their durability.
Before you install a bimetallic heating radiator with your own hands, you need to purchase a set of 4 special plugs. Two of them have a ½ inch internal thread, the third must be without a hole, and one has an air outlet device installed
When buying a kit, you should pay attention to the direction of the thread - there should be two right and two left
Features of bimetal radiators
Installation of a heating system with the participation of bimetallic radiators requires knowledge of their design and internal structure.
Design
A bimetallic heating radiator consists of two layers of metal - an aluminum body and a core made of steel or copper. There are two versions of this device:
- Absolutely bimetallic devices, in which the core is a tube through which the coolant flows without contact with the body material,
- Semi-bimetallic, the internal channels of which are simply reinforced with plates of another metal.
A different design gives differences in the properties of the device itself. Fully bimetallic heating radiators are much stronger, more resistant to sudden changes in operating conditions and, therefore, more durable.
 The design of the bimetal heater
Calculation of the number of sections
Correct installation of bimetallic batteries requires an accurate calculation of their number. It is best to entrust this matter to specialists. But if you plan to carry out the installation of heating with your own hands, then all the calculations will have to be done independently. This will require only two quantities - the power of the heating element you have chosen and the area of \u200b\u200bthe room:
- First, we divide the area by 10 to calculate 1 kW per 10 m2.
- Then we divide the resulting number by the power of the radiator, declared in the device passport.
- Rounding the resulting number up to integer gives the desired amount.
 Installation of bimetallic radiators
Do-it-yourself battery installation recommendations
- Before starting work, it is necessary to block the flow of coolant in the heating system at the inlet and outlet, or make sure that there is no liquid in the pipeline.
- Even before installation, you need to check the completeness of the radiator. It must be in the assembled state. If this is not the case, we take a radiator key and assemble the battery according to the manufacturer's instructions.
The design must be absolutely hermetic, therefore, abrasive materials cannot be used during assembly, as they destroy the material of the device.
When tightening fasteners, one should not forget that both left-handed and right-handed threads are used in bimetallic devices.
When connecting sanitary fittings, it is extremely important to choose the right material. Flax is usually used along with a heat-resistant sealant, FUM tape (fluoroplastic sealing material) or Tangit threads.
Before starting installation work, you need to carefully plan the connection diagram
Batteries can be connected in a diagonal, side or bottom pattern. It is rational to install a bypass in a single-pipe system, that is, a pipe that will allow the system to function normally when the batteries are connected in series.
After the installation is completed, the system is turned on. This should be done by smoothly opening all the valves that previously blocked the path of the coolant. Too abrupt opening of the taps leads to clogging of the internal pipe section or hydrodynamic shocks.
Following the opening of the valves, it is necessary to release excess air through an air vent (for example, a Mayevsky tap).
Note! Batteries must not be covered with screens or placed in wall niches. This will drastically reduce the heat transfer of the equipment.
Properly installed bimetallic heating radiators are the key to their long and trouble-free operation.If there is any doubt about the ability to install them with your own hands, it is better to contact specialists.
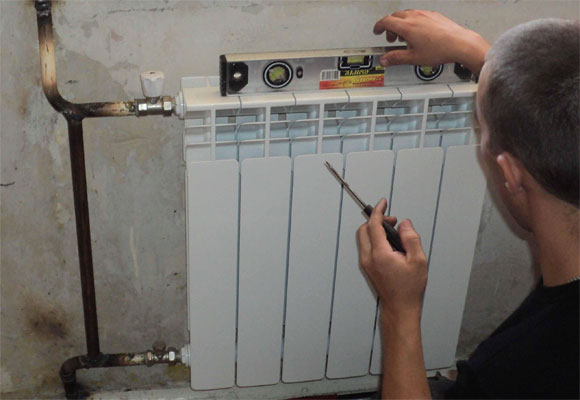
How to install
Now about how to hang the radiator. It is highly desirable that the wall behind the radiator be flat - it is easier to work this way. The middle of the opening is marked on the wall, a horizontal line is drawn 10-12 cm below the window sill line. This is the line along which the upper edge of the heater is leveled. The brackets must be installed so that the upper edge coincides with the drawn line, that is, it is horizontal. This arrangement is suitable for heating systems with forced circulation (with a pump) or for apartments. For systems with natural circulation, a slight slope is made - 1-1.5% - along the course of the coolant. You can’t do more - there will be stagnation.
wall mount
This must be taken into account when mounting hooks or brackets for heating radiators. Hooks are installed like dowels - a hole of a suitable diameter is drilled in the wall, a plastic dowel is installed in it, and the hook is screwed into it. The distance from the wall to the heater is easily adjusted by screwing and unscrewing the hook body.
When installing hooks for heating radiators, please note that the main load falls on the top fasteners. The lower one serves only for fixing in a given position relative to the wall and it is installed 1-1.5 cm lower than the lower collector. Otherwise, you simply will not be able to hang the radiator.
When installing the brackets, they are applied to the wall in the place where they will be mounted. To do this, first attach the battery to the installation site, look where the bracket will “fit”, mark the place on the wall. After putting the battery, you can attach the bracket to the wall and mark the location of the fasteners on it. In these places, holes are drilled, dowels are inserted, the bracket is screwed onto the screws. Having installed all the fasteners, the heater is hung on them.
Floor fixing
Not all walls can hold even light aluminum batteries. If the walls are made of lightweight concrete or sheathed with drywall, floor installation is required. Some types of cast-iron and steel radiators come with legs right away, but they do not suit everyone in terms of appearance or characteristics.
Floor installation of radiators from aluminum and bimetallic is possible. There are special brackets for them. They are attached to the floor, then a heater is installed, the lower collector is fixed with an arc on the installed legs. Similar legs are available with adjustable height, there are fixed ones. The method of fastening to the floor is standard - on nails or dowels, depending on the material.
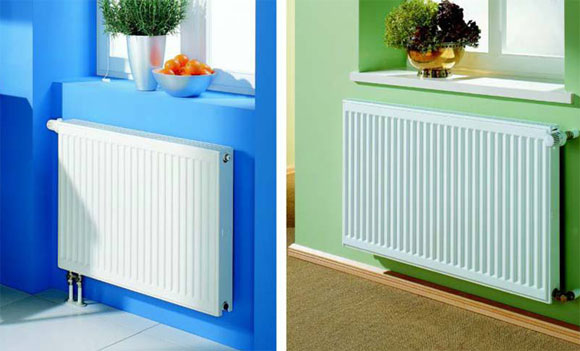
Which radiator is better to install
The modern market offers a wide selection of bimetallic radiators of different brands from different manufacturers. There are domestic and imported options. Among foreign models, Italian or German bimetallic heating radiators are popular.
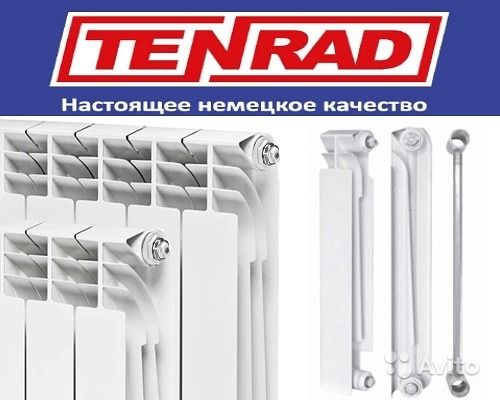 Popular German-made batteries include Tenrad radiators. All products of this company are distinguished by reliability and high performance parameters. The fins are three-row, which provides good heat transfer performance.
Among Italian products, it is worth considering the Italian bimetallic heating radiators Global STYLE PLUS 500. A side scheme is used to connect such a unit. The device is mounted on the wall. Thanks to the excellent technical characteristics and attractive appearance, the feedback on the bimetallic radiator Global STYLE PLUS 500 is only positive. Most often, users note efficient operation and durability. Heat dissipation is 185 watts. And the temperature of the coolant can reach a maximum mark of 110 degrees. There are numerous reviews on Global heating radiators.
The Italian company Radena also specializes in the production of bimetallic batteries. Only high carbon steel is used for manufacturing. The working pressure is 25 atmospheres. And the temperature of the environment reaches 100 degrees. There are batteries with a standard side connection and with a bottom connection. The reviews on Raden heating radiators are positive. Durability, good design, possibility of use in single-pipe and two-pipe heating systems with horizontal and vertical placement of heat pipes.
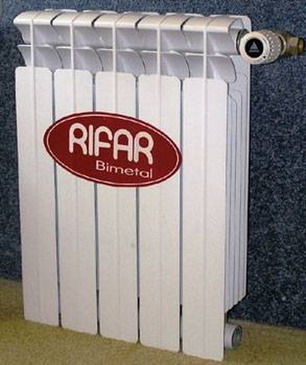 Consider domestic production models. For example, Russian bimetallic heating radiators Rifar Monolith. Although the Rifar brand appeared on the market quite recently, the products of this company have already managed to squeeze out the products of eminent German and Italian manufacturers. Rifar radiators are used in residential and office buildings. They have excellent features. Also, bimetallic radiators fully comply with GOST 31311 2005, TU.
 Rifar monolith is available in two sizes: 350 and 500 mm. Most often, radiators with a center distance of 500 mm are used. There are no joints between sections. Therefore, if you decide to install such a battery, you must immediately select the required length. For bimetallic heating radiators Rifar Monolith 500, the price is optimally combined with functionality and quality. Installing these batteries is quick and easy. Does not require the use of adapters.
 Not so long ago, Russian-made Thermohit radiators also appeared on sale. This equipment belongs to the budget class. It has not yet received wide distribution, therefore, reviews on Termohit heating radiators are not too numerous. Specifications are high. But still the quality is inferior to more expensive models.
 There are also Chinese-made batteries on the domestic market. Here it is worth noting Oasis radiators. Products have international certification, have good technical characteristics. Reviews of Oasis bimetallic heating radiators are mostly positive. Users highlight such advantages of these units as high technical performance, a long factory warranty and an affordable price.
Technical features of the installation of bimetallic heaters
An increasing number of owners today prefer such heating mechanisms as bimetallic heating radiators, the connection of which does not carry any particular complexity and at the same time has a number of advantages.
These devices today have gained much more popularity compared to traditional aluminum or cast iron radiators, due to their resistance to pressure drops inside the heating system and high performance (in more detail: “Which is better: aluminum or bimetallic radiators - a comparative characteristic“). These products can rightfully be called an alternative between standard devices made of cast iron and aluminum.
Before connecting bimetallic heating radiators, it is extremely important to make sure that all the materials required for work are available. The main list of equipment includes a set of direct components of the radiator, as well as fixing brackets designed for mounting bimetallic heating radiators on them
It is important to remember that the connection of bimetallic batteries of one type or another should be carried out exclusively with equipment suitable for its purpose. Many owners, when doing repairs, prefer to save some money and fix the batteries with old brackets, but in this case it is extremely important to make sure that these parts are not damaged by corrosion and are capable of holding the entire system tightly.
When mounting a bimetallic radiator with a bottom connection or other installation method, you need to have additional parts available if you plan to replace the heating pipes (read: “How to connect a heating radiator - methods and options“). As a rule, today, reinforced polypropylene samples are an alternative to steel pipes. Experts do not recommend the use of metal-plastic pipes equipped with collet clamps
It is important that high-quality and reliable cranes are used during the installation process; here you should not focus on the low cost of these elements at all
To monitor any temperature changes in the radiator, you should use a device specially designed for this - a thermostat.
So, in order to understand how to properly connect a bimetallic radiator, you should, first of all, have the following equipment available:
- directly bimetallic heater;
- installation kit for connecting a heating battery;
- additional functional parts for connecting the system.
Installation of bimetallic radiators
Installation of bimetallic radiators is a responsible event that will help ensure warmth and comfort in your home.
Bimetallic radiators are not inferior in power to cast iron ones, but it is lighter.
The very name of these heaters suggests that they are made of two different types of metals, namely: aluminum and steel. The radiator frame is made of aluminum, and the pipes are made of steel. Bimetal provides a combination of properties such as high strength and good thermal conductivity.
Like the installation of sectional radiators, this type of work involves the use of both standard right-hand and left-hand threads. This specific work is often the most problematic moment when installing bimetallic batteries, if you are planning to do it yourself. This feature often leads to the fact that the components are twisted in the wrong direction. This can lead to leaks later on.
Before starting installation, it is necessary to assemble them. As a rule, bimetallic radiators are assembled immediately at the manufacturing plant or at points of sale, however, in some cases, buyers have to assemble the radiators themselves, directly at the installation site. These works are carried out using a special radiator key, which can be used to connect all sections to each other. To perform such an assembly, some experience in plumbing work is required. Moreover, it is almost impossible to assemble radiators alone. If you are faced with the need to assemble sections, it is best to contact specialists in this field.
Calculation of the number of sections
To calculate the required number of sections, a number of factors must be taken into account. First of all, you need to know the battery power and the area of \u200b\u200bthe room
There are also more complex calculation methods that take into account additional parameters (for example, non-standard ceiling heights, the number of windows and doors, the number of external walls, etc.).
Before installing the radiator, it is necessary to calculate the number of sections
The simplest formula for calculating the number of sections looks like this:
number of sections = room area x 100 / battery power.
The standard ceiling height is 2 meters 70 centimeters.
If there is a 12 meter room and radiators with 180 watt sections, then the formula will look like this:
12 x 100/180 = 6.66.
The resulting value is rounded up and as a result we find out that 7 sections are needed to heat the room.