Varieties of Russian stoves
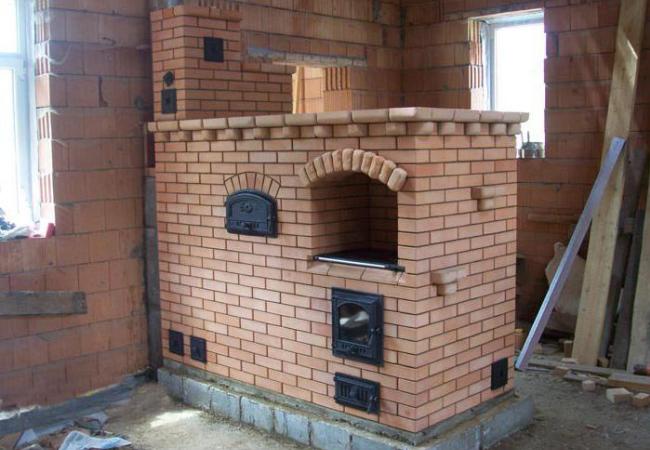 Russian stove with a fireplace
Modern versions of Russian stoves include a variety of designs for heating and cooking. The choice of model depends on the purpose, features of use and requirements for the device.
The classic model with a lounger allows you to arrange an extra bed, which can accommodate up to three people. Modern models are designed for one adult or two children's seats.
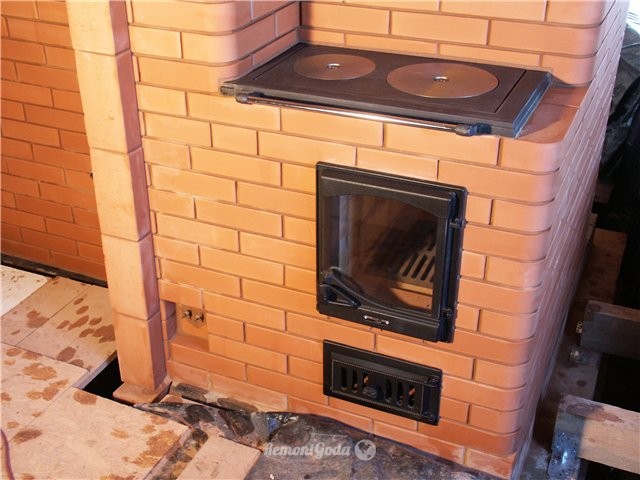
An oven with a stove, which is built into the structure, allows you to cook food. Often, these options are accompanied by the installation of a large hob, oven and firebox.
A model with a stove and a stove bench is suitable for a country house. The design has a large bed and a stove for cooking. The hob can be any - it all depends on the requirements for the oven.
Mini Russian stoves without a stove bench are used in baths and small kitchens. They can have a different design, but without a sunbed and plates.
A stove with a fireplace is a more modern option for heating a summer house. Instead of an open cooking chamber, a stylish fireplace is installed, thanks to which you can heat another room through a partition. When using this option, you can not put a second profitable pipe.
The Russian fired oven is the oldest of the designs. It has a furnace. Products for cooking are placed in the chamber, and fuel is placed through the mouth with a partition. With this option, you can cook food and heat the room at the same time.
Stove chimneys are multi-turn chimneys.
In multi-turn furnace chimneys, the smoke channel consists of vertical and horizontal sections connected in series. In such furnaces, flue gases overcome a large number of revolutions during their movement, which leads to soot settling in the channels. In such furnaces, a cleaning device is a prerequisite. In such a system, the gases are greatly cooled, and the draft in the furnace deteriorates. In the initial period of the furnace, the furnace smokes. Flue gas cooling can lead to condensation.
In a multi-turn system, the gases must pass through the channels, making turns, which leads to resistance to their movement. To overcome the resistance, it is necessary to have good draft in the chimney. Such draft can be created by increasing the height of the chimney, which is possible within certain limits. Another way to get good draft is to increase the temperature of the gases at the chimney outlet, which will inevitably lead to heat loss and increased fuel consumption. A multi-turn system of furnace chimneys makes sense only if they are small in length. Another disadvantage of multi-turn systems is the uneven heating of the furnace in the sections of the first and last channels, and this can lead to cracking of the masonry. But the biggest disadvantage of a furnace with multi-turn chimneys is that it requires a large amount of fuel to heat it, which is incommensurable with the amount of heat released. Therefore, the use of a multi-turn system without the improvements described below is generally not recommended.

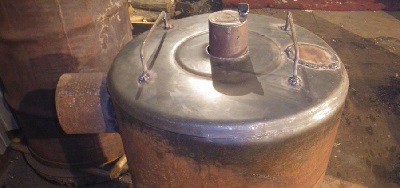
Homemade bubafonya of long burning
Cut off the welding seam from the upper end of the barrel with a grinder, align the sharp edges. The result is a cylinder and a lid with a finished flange. Using a hammer or sledgehammer, bend the edges of the cylinder inward. And bend the lid collar outward. Turn the cap over and put it on the cylinder. The lid will sit securely in place without slipping.
Use a chisel to cut a hole for the blowpipe in the center of the cover (for it to pass freely into the hole, it is enough to use a diameter of 102 mm).
Bubafoni assembly diagram.
The hole for the cork on the lid can be tightly welded, but it is better to leave it: looking inside, you can regulate the combustion process.
Then, in the upper part of the barrel, a place is marked for attaching a piece of the chimney pipe.
The intended hole is cut out, and a piece of a chimney pipe 20-25 cm long and 150 mm in diameter is welded. You can install a shut-off damper directly inside the pipe. The body of the stove is ready.
The next in line is the air supply device. For greater rigidity, the edges of the pancake are bent (so that the pancake does not twist from the heat). A hole is cut in the center of the pancake for the blower pipe, and it is welded. If a lid from another barrel is used for a pancake, then the cork hole is tightly welded: during combustion, gases will pass only around the circumference of the pancake. Channels or corners are welded to the pancake from the bottom side. The air supply device is also ready.
It will fit inside the cylinder. At the top of the blower pipe, an adjusting damper of the same diameter as that of the pipe is placed. A threaded pin is welded vertically to the inner wall of the pipe;
After fitting the damper, tighten it with the wing nut. By loosening the nut, moving the damper in relation to the edge of the pipe and tightening the nut back, it will be possible to regulate the flow of air into the furnace.
Install the lid on top - and the whole stove is ready.
It remains to install a pipe for the chimney. Its diameter must be less than 150 mm, otherwise the combustion products will not be completely removed. For good draft, it is better to have a pipe 5 m long. Install it near the stove, preferably on legs. Seal the bottom of the pipe tightly.
Connect the stove end-to-end to the knee, which is welded to the chimney, tighten with a clamp, placing fiberglass under it for tightness. To drain the condensate that collects in the pipe, a ball valve is welded under the elbow of the pipe (it will be possible to clear the blockage with a bar).
This valve is necessary, since when the condensate freezes, the weld can break. Condensate, in addition, can flow into the stove, and through the leaks of the connecting clamp - out.
Now it is already possible to heat the stove “bubafonya”. After removing the cover, pull out the air supply unit. Lay the firewood - at the same time, the height should not exceed the height of the lower edge of the chimney elbow. If you put firewood vertically, then more will come in. Logs can also be chosen large, up to 20 cm in diameter - they will burn without problems.
The top layer is formed from finely chopped chips. A rag or paper is placed on top, poured a little kerosene. Now the firewood is covered with a pancake of the air supply device, the stove cover is strung on top. Opening the blower damper, a piece of lit paper or a rag is thrown inside the air supply pipe (matches quickly go out due to strong draft).
When firewood flares up with a characteristic crackle, the blower damper is completely blocked. Bubafonya in this mode can work without any supervision for days.
This long burning wood stove produces little ash due to the fact that the wood burns almost completely. Ashes can be left uncleaned for a long time.
As you can see, it is quite possible to design the Bubafonya furnaces with your own hands. Many craftsmen make them not only from barrels, but also from old gas cylinders, large fire extinguishers. The main requirement for the future furnace is strong steel walls.
This is how you can make a long-burning stove.
Homemade wood-burning stoves for long burning scheme and principle of operation
If the air supply is free and the draft is strong, dry firewood burns very quickly.
If, with a full load of firewood, by controlling the air supply, combustion is transformed into smoldering, then heat release will drag on for hours or even days.
Here is the device of a simple, but rather effective wood-burning stove, oriented to long burning, which repeats the scheme of the Stropuva boiler. In the people, this stove is called "bubafonya" (after the name of the person who posted the scheme of the stove on the Internet for the first time).
Scheme of a homemade long-burning stove.
It is no more difficult to make such an oven than a potbelly stove more familiar to the general public.
However, the principle of combustion and the design of such a furnace are completely non-standard. Combustion does not take place from the bottom up, as in ordinary stoves, but, starting from the upper layers, goes down until the firewood burns out.
Firewood under the pancake in the firebox is lit from above, thanks to the air supply pipe. When burning, gases seep through the edges of the pancake and exit into the chimney. Pancake as the firewood burns down. It is possible to control the air supply with a damper at the ends of the air supply pipe.
Heating furnace made of bricks by Sergey Mikhailov drawings
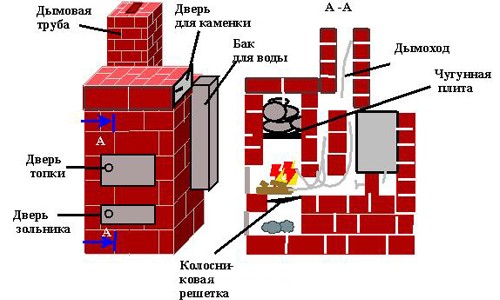
The scheme of the next furnace is shown in PICTURE 2.
A - general draft valve, B - stove, C - front view of the chimney section, D - furnace door, E - exit to the first well from the furnace (hailo), E - side view of the chimney section, G - furnace, I - stove, K - hailo, L - side view of the section of the furnace furnace.
A heating stove with horizontal chimneys is good because it does not require a clear and strict fixed marking for the chimney outlet. In ancient times, only a senior furnace master could perform such marking. Laying the first row and laying out the foundation was never trusted to apprentices
The reason for this strict subordination was not a formality, but the importance of making a fatal mistake.
The main advantages of a furnace with horizontal wells:
- It does not need an exact calculation when marking the first row.
- It warms up evenly (the hottest parts of the stove, which allow intensive heat removal, will be located below, and the less hot ones will gradually move to the upper zone of the room that is heated).
- It cools evenly (heat from the lower rows of the stove will gradually be transferred to the upper rows). The period of furnace cooling and intense heat transfer is the same period, which is measured in several hours. This is another advantage of a stove with horizontally arranged smoke channels.
- Allows you to integrate arched dryers into the furnace masonry with absolutely no problems.
There are other auxiliary drawings and diagrams of the furnace by Sergei Mikhailov:
- A Sergey Mikhailov oven with a built-in dryer niche in the side section shows IMAGE 3, where A is a valve, B is a cleaning door, C is a dryer, D is another cleaning door, E is hailo, E is a side view of the smoke well section.
- Well schemes, winter and summer options, in the side section shows IMAGE 4, where A is a valve for winter, B is a valve for summer, C is hailo.
Furnace classification
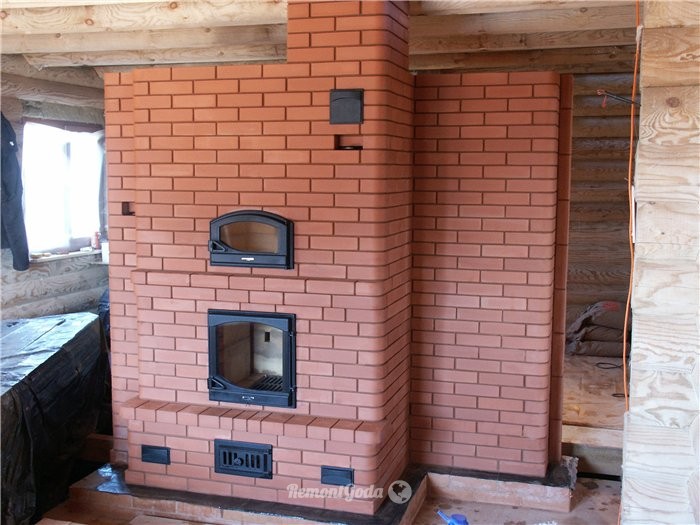
 Russian oven with a bench and a place for cooking and heating food
The Russian stove is a massive brick building used to heat the house and cook food. It can also have a stove bench, stove, fireplace.
Furnaces are classified according to size, internal structure, functionality, appearance and other parameters.
Three types of structures are distinguished by dimensions:
- Big oven. This is a device measuring from 1.5 × 2.3 meters with a bench, a hob and a place to heat the liquid.
- Small oven. It has dimensions of 1.5 × 1.75 m. Suitable for installation in small kitchens, living quarters. It may have a stove and a fireplace.
- Non-standard. Usually used for installation in the bath.
Preparatory stage
Any work requires the preparation of a place, material, tools, as well as the stove and the spiritual investment of the master.

Any wood-burning stove is laid out of two types of red brick:
- ceramic - performs a protective function, builds an external frame;
- heat-resistant (refractory) - laid out in the center of the stove, where the temperature is high.
On average, the cost of refractory bricks is 4200 rubles per 100 pieces.
In addition to bricks, you need to prepare:
- A clay compound used to join bricks together. The cement composition is inappropriate.
- Pig-iron doors for a fire chamber, an ashpit, compartments for cleaning of channels.
- Cast iron plate with holes (stove for cooking).
- Valves that will close the wells when the furnace is not in use or has already been heated.
- Grate-grate - firewood is laid out on it. From below, oxygen enters through the holes, supporting combustion in the furnace.
Having prepared the material, build a reliable foundation for the stove. The finished structure has an impressive weight. A simple floor will not withstand the design. A foundation pit is being dug for the foundation of the stove in compliance with waterproofing standards.
Having prepared the foundation for the brick structure, let it dry.
Economical do-it-yourself long-burning wood burning stoves
Solid fuel as the main source of heat has not lost its position for many decades. And even today, taking into account the electric and gas alternatives, solid fuel boilers are still very popular, especially when it comes to long-term burning.
Such equipment can work on different types, from sawdust to coal. Depending on the region and the cost of fuel, preference is given to one or another type. Of course, natural gas is the most inexpensive way of heating, but it is not carried out in all districts and regions. Electricity is the most expensive source of heat, although ubiquitous. And if we are talking about a do-it-yourself long-burning furnace, then it will be possible to save not only on operation, but also on manufacturing. Such a furnace can be made with your own hands, if you understand the diagrams and drawings and be able to work with metal.
Scheme of the furnace device
Having chosen one of the ordering schemes as the basis for collecting a wood-burning brick stove, it must be printed out and studied in detail.
Stove makers recommend choosing a Swede model for a home or a summer residence. You can build a Russian stove for the house. The choice is up to the owner.
Photos increase, click!
Consider the rules for laying a heating and cooking model, which is suitable for both home and summer cottages. A practical guide for the home master, we will back up the photo.
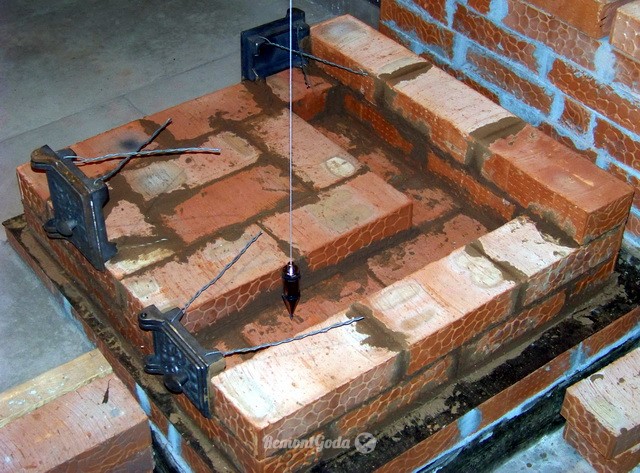
- The layout of any stove begins with the bottom row, which should be perfectly even. Here you need to apply a level, a building corner. Work begins with the outer contour and moves to the center. Bricks are connected with clay mortar.
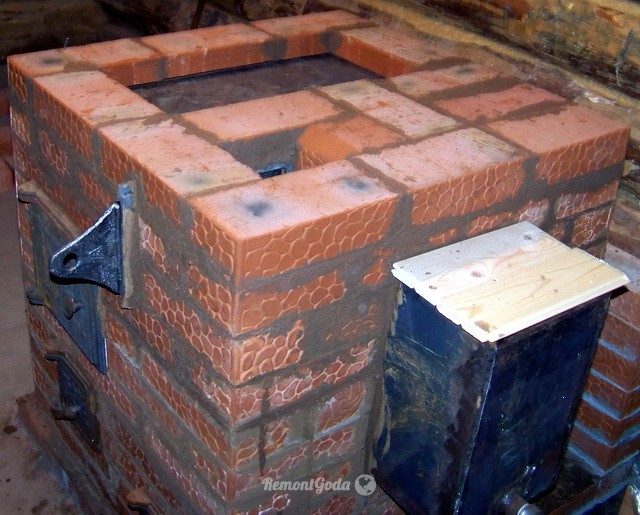
- The second row is functional. It is necessary to lay a blower hole with a door. Having determined the place of the door on the desired side, we lay out the bricks in a checkerboard pattern so that the seams do not line up in a single vertical line. Alternate long and short pieces.
- Raise the third row to the upper edge of the blower door, blocking it from above.
- The fourth row has its own peculiarity - the brick is laid on the left and another door is installed in the area of the blower. This compartment will be responsible for the accumulation and cleaning of the ash obtained from the combustion of firewood. The hole will be located in the fifth row. Therefore, the principle of work is the same. Here it is necessary to provide for the scraping of bricks so that sharp corners do not interfere with the cleaning of the compartment.
- From the sixth row, refractory bricks are used. The laying out of the firebox begins, where the temperature is the highest. Order drawings usually have a special hatching of the location of this material. Therefore, difficulties should not arise.According to the scheme, you can pre-calculate the amount of all materials. A grate is laid at the base of the row, on which firewood will lie. It is necessary to chop off rough corners so that the grate lies flat.
- From the seventh row, in addition to the furnace compartment, the channel is rebuilt, it is divided into three wells. Following the scheme, this nuance will not go unnoticed.
- A firebox door is mounted on the horizontal of the 6th row, which is gradually covered with a brick from above.
- We are gradually approaching the cooking compartment of a brick stove, observing the sequence of ordering schemes.
- After the laying of the cooking portal is completed, they move on to the nuances of the heating hearth. From the correctness of its construction depends on how warm it will be in the house in cold weather.
Separately, it is worth taking the time to study the chimney system, which in each house has its own characteristics.
Conclusion:
Separately, it is worth taking the time to study the chimney system, which in each house has its own characteristics. Some owners choose the method of embedding the furnace in an already finished pipe, which has separate wells for removing combustion products and filtering air. Sometimes you have to build a separate pipe for a wood-burning stove, which is removed from the exhaust duct. Then the specifics of the work on the construction of the stove at the end of the installation will have a different sequence. Create comfort and warmth in the house yourself, so that you can enjoy it later. Be sure to put your soul into the process of building a wood-burning hearth. The stove will give its warmth to each member of the family both in the winter cold and in the autumn slush. If you add ingenuity and design ideas for the design of the front part or around the entire perimeter of the hearth, then the stove can become a unique object in the interior of a country house or cottage.
Video footage:
We advise you to watch a video that tells how to build a stove with your own hands: