Classification and principles of operation
It is possible to find a great many different examples of assembling wind generators on the net, but they are all divided into two classes: vertical and horizontal. Each class has subspecies:
Vertical:
Industrial. The height of such power plants can reach more than 100 meters, the power varies from 4 to 6 MW.
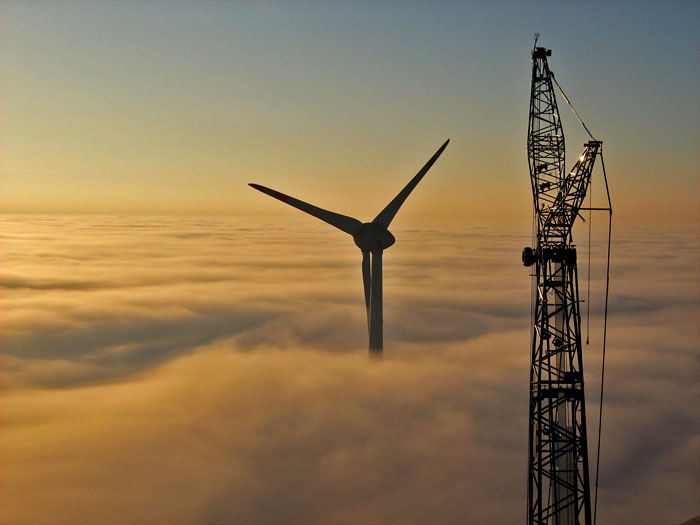
One of the most powerful wind farms Enercon E-126
Devices for household purposes. There are models made in specialized factories and do-it-yourself devices;
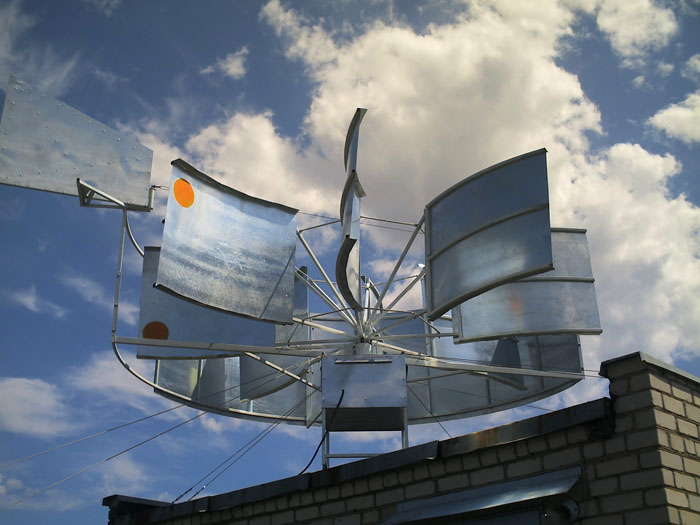
 Device with a power of 600 W
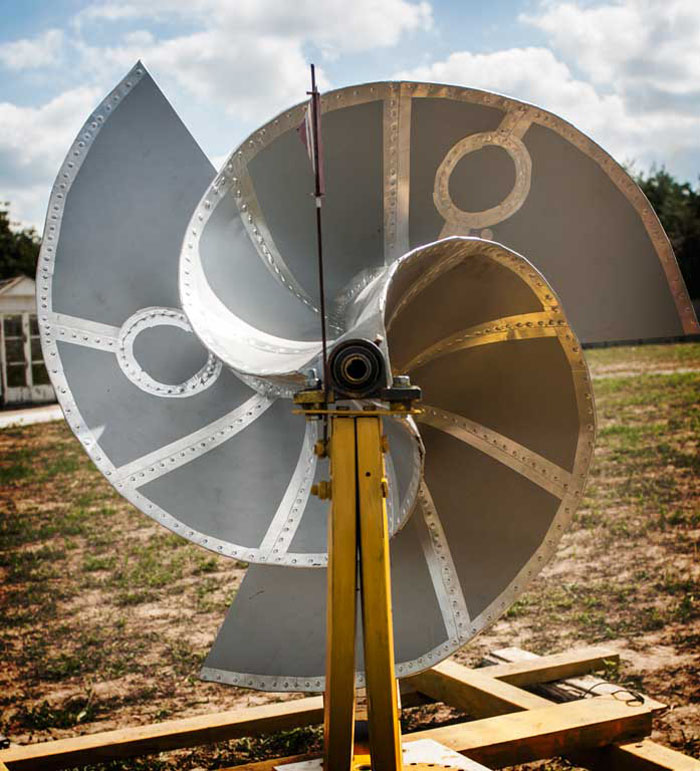
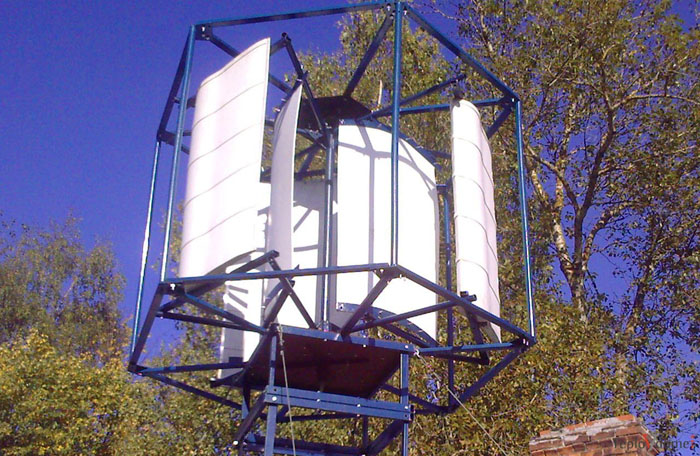
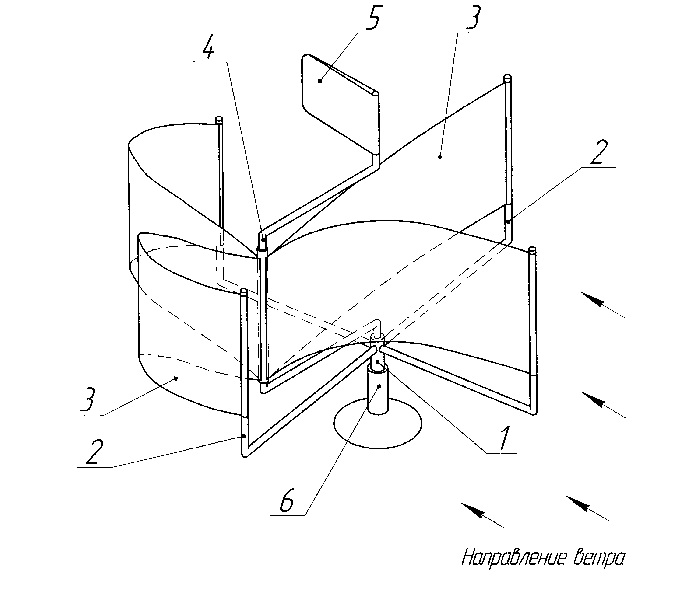
spiral device
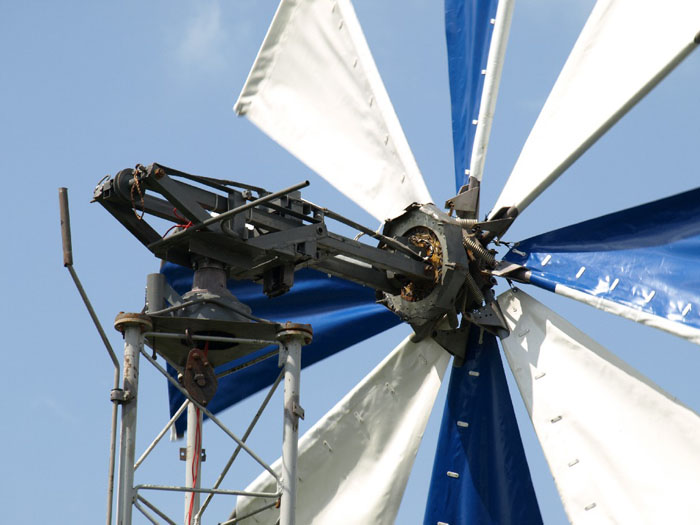
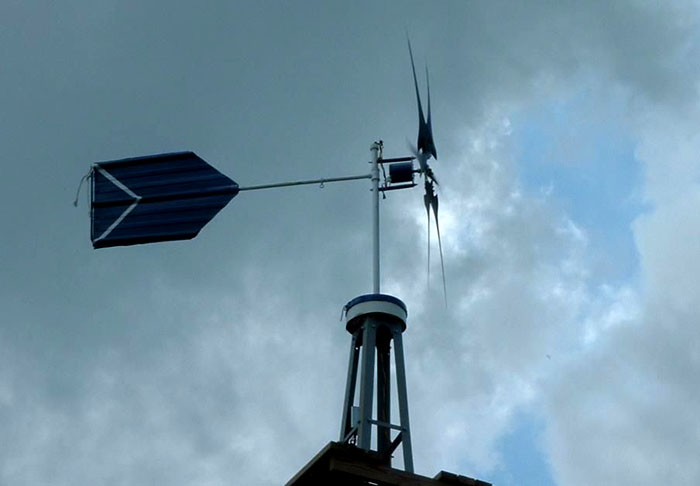
Sample with blades made of fabric materials
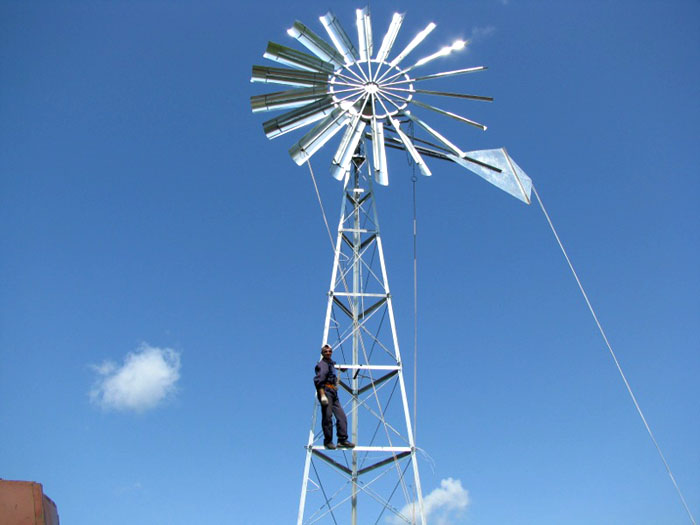
Windmill with metal blades
Horizontal:
Standard;
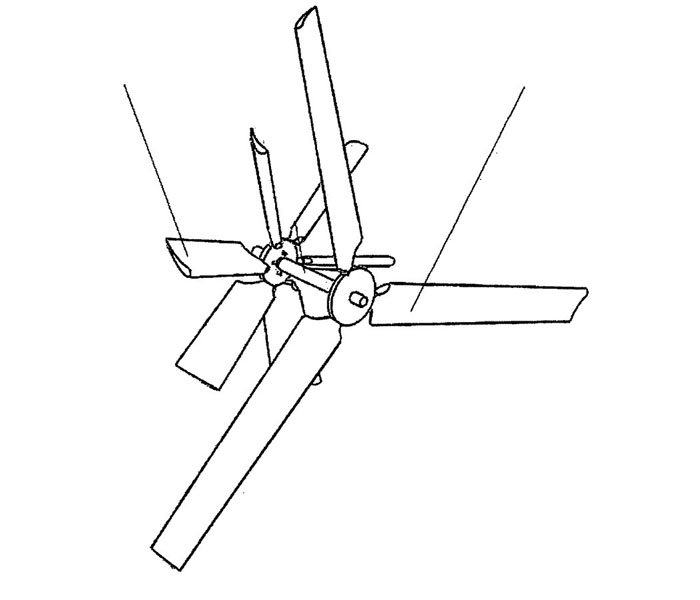
The unit with the classic arrangement of the blades
Rotary.
The structural elements of such devices can be located at different angles.
The entire class of do-it-yourself devices, whether they are wind farms or industrial ones, operate on the principle of electromagnetic induction, that is, magnets fixed in the rotor generate alternating current when the blades rotate. It is supplied to the storage batteries through the controller. This is a device that converts alternating current to direct current and controls the degree of charge of batteries.
The next node is an inverter that converts direct current into alternating current and equalizes the fluctuation of electricity to a value of 50 Hz, then the current is supplied to consumers.
Note! The controller switches the flow of electricity directly to the inverter when the batteries are fully charged. Standard scheme of operation of a wind farm
Standard scheme of operation of a wind farm
UZO: what is it. Let's try to figure out what an RCD is, its capabilities, features of work and application options.
And also consider the nuances that you need to pay attention to when choosing
Installation of the supporting structure and blades
When building a vertical windmill for a house with your own hands, special attention is paid to the basis of the entire structure, since the unit itself should be raised as high as possible above the ground. This will require more serious financial investments, but the energy saved will pay off these costs over time.
The higher the structure, the higher the wind speed, therefore, for a device with large dimensions and weight, foundation preparation is required.
This installation requires a solid foundation and a solid foundation.
The blades of any type of device should be mounted at a certain angle, both for vertical and horizontal devices.
The location of the blades at the horizontal unit
Drawing of the direction of the blades of the vertical device
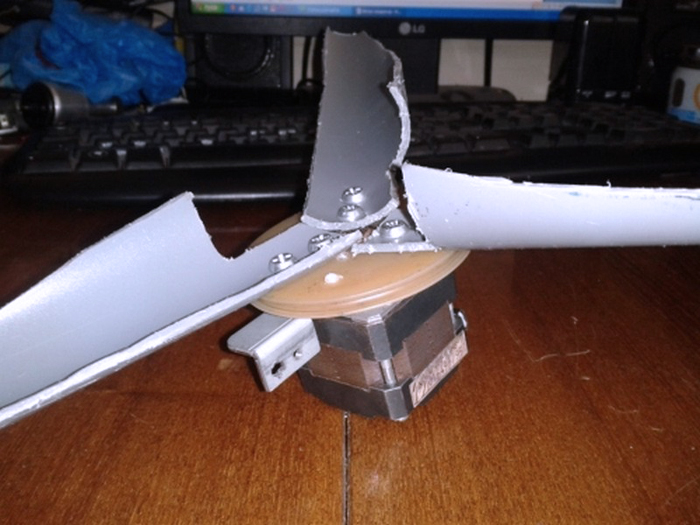
The blades of a small device made of plastic. It can be seen that exactly with their own hands
Important! In stormy winds, the operation of windmills is not recommended, as the blades may not withstand heavy loads. Provide an emergency stop for the rotor in your design.
Stages of work
Template preparation
So, the core is ready, now you can move on to processes that fall into the “do it yourself” category. To fix the magnets on the core of the washer, you need some kind of device. It can be made from a tin strip or from another material similar in technical characteristics.
The length and width of the tin strip is adjusted to the dimensions of the core diameter and the width of the grooves. That is, the template must exactly lie at the place where the magnets are installed.
Pay special attention to the fact that the distance between the magnets must be the same
Generator Assembly
Everything is ready, you can proceed to the assembly of the electric motor-generator with your own hands.We must say right away that this process requires special patience. There is no need to rush here. The thing is that the magnets will be installed in the grooves of the motor core with glue. Their small size creates difficulty and inconvenience in installation, the glue slips, its splashes will fall on the hands, sometimes even on the face. So it is not worth neglecting labor protection measures. Still, the adhesive composition is a chemical solution, quite active.
So, here is the assembly diagram, how to make a generator with your own hands:
a prepared tin template is glued across the rotor;
then neodymium magnets are installed in the prepared grooves, here it is very important, as mentioned above, to accurately observe the installation distance and the angle of inclination of the elements, because even a slight deviation from these two parameters can cause sticking, which will necessarily lead to a decrease in the power of the homemade generator;
now the gap between the magnets must be filled with a special material called cold welding, it is very similar to plasticine;
and the last stage is grinding the surface with sandpaper, it can be done by placing the rotor in a vise, or on the floor or table;
the whole electric motor is assembled by hand.
Generator testing
To check how the generator we have assembled works, a few additional elements are needed. Namely:
- small capacity battery, can be from a motorcycle;
- rectifier;
- multimeter to determine the charging power;
- charge controller.
 The generator connection scheme for testing is as follows: two generator windings are connected through a rectifier to the charge controller. The latter is connected to the battery. The multimeter is also connected to the battery terminals.
The most difficult thing to check is to turn the rotor of the electric motor. Manually reaching the required rotation speed will not work. Therefore, it is recommended to use either a drill or a screwdriver for these purposes. You connect one of these tools to the motor rotor (there are different options here, and there are many of them) and start spinning at a rotation speed of 800-1000 rpm. If the generator you made produces a voltage of 220-300 volts, then this is an excellent indicator. If the voltage is very low, then it means that the rotor was assembled poorly. This mainly concerns the installation of magnets (uneven installation and not all elements are attached at the same angle).
Where to use
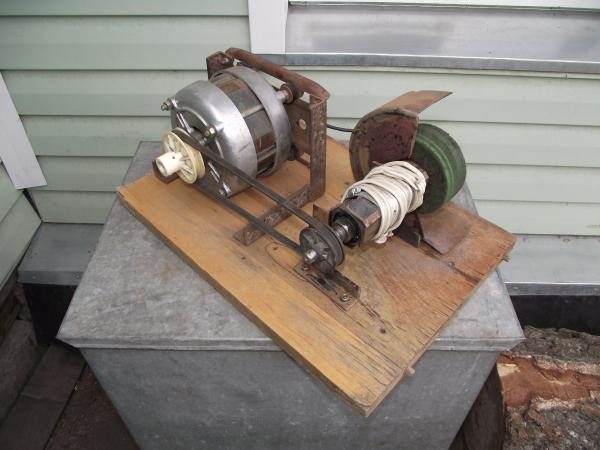
We managed to make a generator from the electric motor of the washing machine. Testing has shown that it works. So, what is next? Where can this unit be used?
In principle, if you find the energy that could rotate the rotor, then there would be no problems with electricity, for example, in a small country house. Therefore, home masters offer several commonly used options:
- Install the generator to the gasoline engine. For example, it can be an old Druzhba saw or a motor from a motorcycle.
- Connect to a windmill, thereby making a wind current generator.
- Connect to a hydro turbine, which is installed in a makeshift waterfall or a fast-flowing stream.
 The last two options are the cheapest, since there is no need to buy an additional energy source. These are environmentally friendly installations operating on alternative fuels.
And one moment. Make a 5 kW generator out of the washing machine motor and it will no longer work. Therefore, do not rely on the fact that this unit can be used to make a device that completely replaces the electrical network. But for a couple of rooms or for a bath (garage and so on) it will do. The maximum that such a generator can produce is 2 kW. In addition, do not expect 380 volts from it either.
We add that a generator can also be made from a DC motor. Moreover, in some washing machines, such units are installed.In such motors, graphite brushes are a distinctive feature.
The use of wind power generators at home
Based on the above factors, the question arises: why not install a windmill in every house? The answer has two main points:
- Price. The cost of devices of sufficient power is very high. For example, the cost of a unit with a power of 2 kW and a voltage of 24 V is from 75,000 rubles;
- The average wind force in most regions does not even reach 4 m/s.
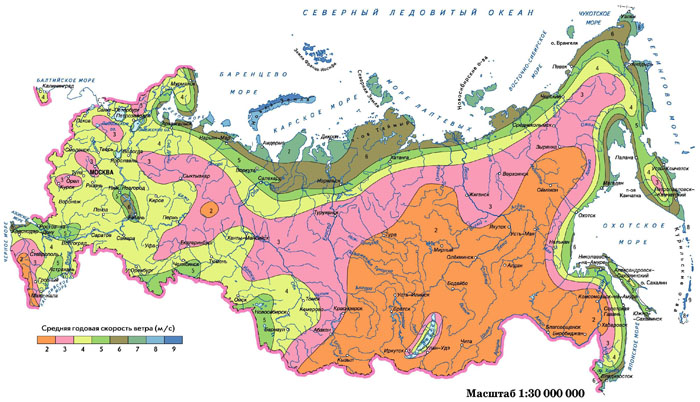
Map of the average annual wind speed in Russia
That is, the use of windmills as the main source of energy is irrational. In a standard house, with the simultaneous operation of all household appliances, up to 1 kW per hour is consumed, and when powerful power tools are used, this figure increases, increasing the required voltage in the network.
To ensure uninterrupted power supply, you will need at least: a set of three wind turbines of 3 kW, or one with a capacity of at least 10 kW; several batteries of sufficient capacity; reliable controller and inverter.
Installation of the entire system will cost at least 400,000 rubles, and with variable wind speeds, this method of power supply is no longer relevant.
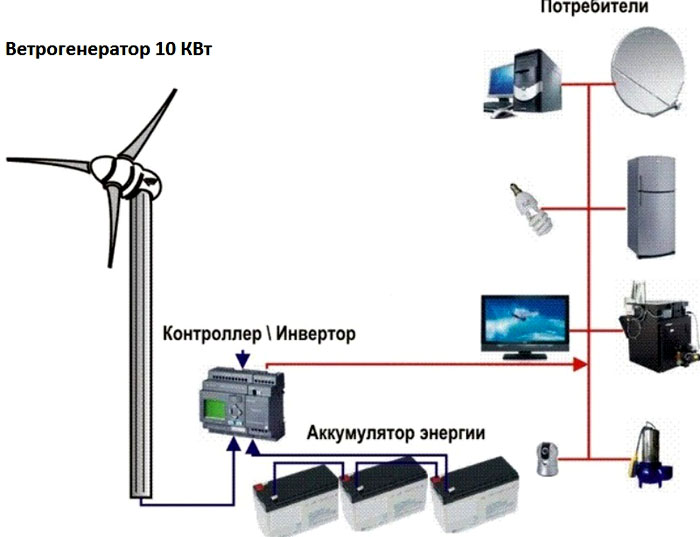
An illustrative example of a circuit with a high power device
It is advisable to use self-assembled 220-volt windmills as an alternative source of energy. Together with solar panels, a fuel generator of sufficient power or with a central power grid.
Important! With a combination of sources, it is necessary to include ATS in the system (automatic switching on of backup power). This device controls the power supply by changing the power source
Scheme of the combination of a windmill and city power supply
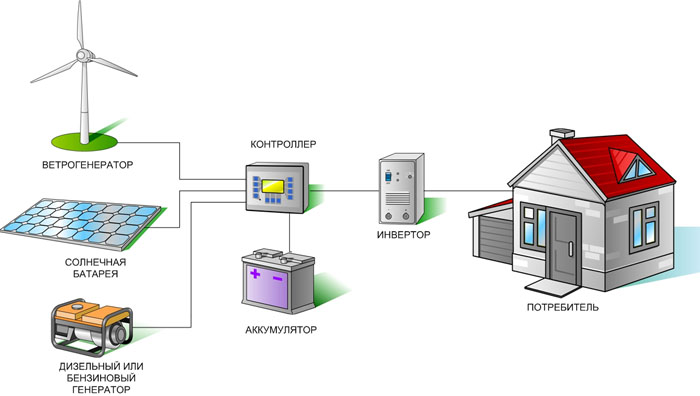
Electrical system using three sources
The basis of a home wind generator
The topic of manufacturing and installing homemade wind generators is very widely represented on the Internet. However, most of the material is a banal description of the principles for obtaining electrical energy from natural sources.
The theoretical method of the device (installation) of wind turbines has long been known and is quite understandable. But how things are practically in the domestic sector - a question that is far from being fully disclosed.
Most often, it is recommended to choose car generators or AC induction motors supplemented with neodymium magnets as a current source for home-made home wind generators.
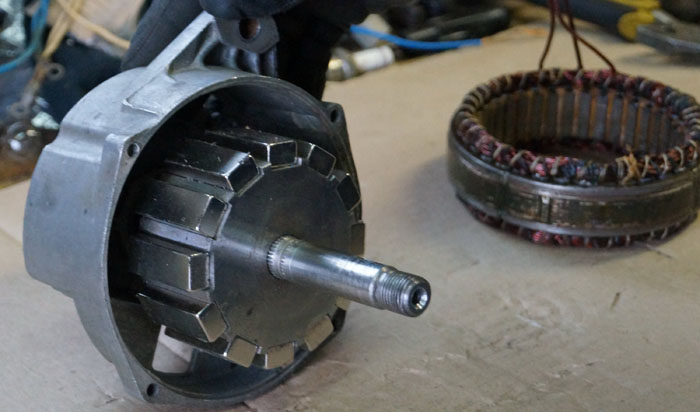
 The procedure for converting an asynchronous AC motor into a generator for a windmill. It consists in the manufacture of a "coat" of the rotor of neodymium magnets. Extremely complex and lengthy process
However, both options require significant refinement, often complex, expensive, and time-consuming.
Much simpler and easier in all respects to install electric motors like those produced before and are now produced by Ametek (example) and others.
For a home wind turbine, DC motors with a voltage of 30 - 100 volts are suitable. In generator mode, approximately 50% of the declared operating voltage can be obtained from them.
It should be noted: when operating in the generation mode, DC motors need to be spun up to a speed above the rated one.
At the same time, each individual motor from a dozen identical copies can show completely different characteristics.
Therefore, the optimal selection of an electric motor for a home wind generator is logical with the following indicators:
- High operating voltage setting.
- Low parameter RPM (angular speed of rotation).
- High operating current.
So, a motor manufactured by Ametek with an operating voltage of 36 volts and an angular speed of rotation of 325 rpm looks good for installation.
It is such an electric motor that is used in the design of a wind generator - an installation that is described below as an example of a home windmill.
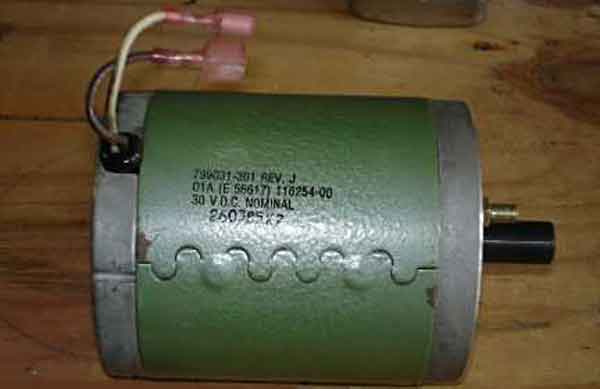 DC motor for home wind generator. The best option among the products manufactured by Ametek. Similar electric motors manufactured by other companies are also well suited.
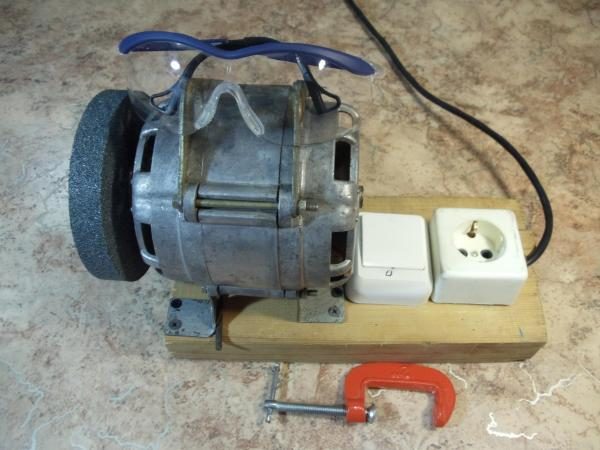
Checking the efficiency of any similar motor is easy. It is enough to connect a conventional 12 volt incandescent automotive lamp to the electrical terminals and turn the motor shaft by hand. With good technical indicators of the electric motor, the lamp will definitely light up.
How to make a wind generator with your own hands
To mount this device at home you will need:
- Thorough knowledge of an electrician;
- Source of power. It can be an alternator or an asynchronous motor.
- A safe place to install the device. Since the weight of individual household units can reach from 200 to 800 kg.
- neodymium magnets. This class of magnets has greater performance;
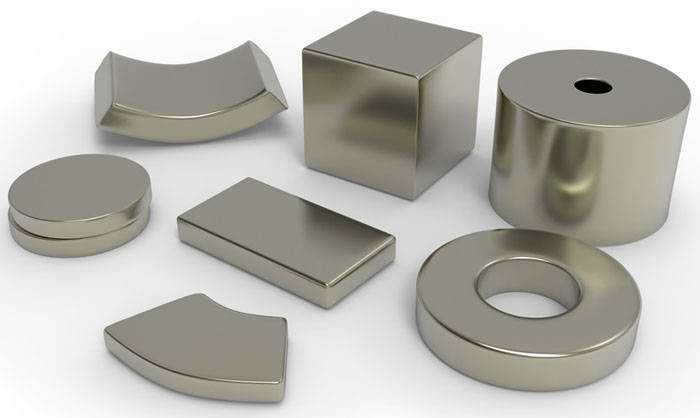
Various types of forms. In our case, rectangular or round are more suitable.
- Wires of suitable section;
- Materials for mounting the frame and the windmill itself.
As already described above, there are many design options. The noise background created by the unit depends on the dimensions and method of connecting the nodes. If you don't want trouble with the neighbors, discuss this issue in advance, as individual units are quite noisy, for example, like the self-assembled wind generator in the next video.
After carrying out all the preliminary activities, you will need to choose a power source that suits your needs. With limited financial resources, two budget options are possible:
- Automobile generator;
- Asynchronous motor from a washing machine.
Each option has its positive and negative sides.
Voltage stabilizer 220V for home: which one to choose. In the article, we will consider in detail what this equipment is for, types, connection diagrams, average prices and technical characteristics, how to do it yourself.
Do-it-yourself wind generator option from a washing machine
To increase power, the engine is being upgraded by replacing ferrite magnets with neodymium ones. It should be noted that the installation of magnets is a rather laborious process that requires certain skills.
An example of the location of neodymium magnets in the engine from a washing machine
Recommendation! Neodymium magnets are very powerful, be extremely careful when working with them.
In order to save time and nerves, a simpler option is to buy a ready-made rotor of a suitable size. It is rational to use such an engine in a device with small dimensions.
Making a wind generator with your own hands from a car generator
This option also needs to be improved, since the standard sample operates at 5000 - 6000 rpm. The upgrade includes:
The device is equipped with neodymium magnets. They are installed in a strict order, that is, the poles alternate. For convenience, a template is cut out of thick cardboard;
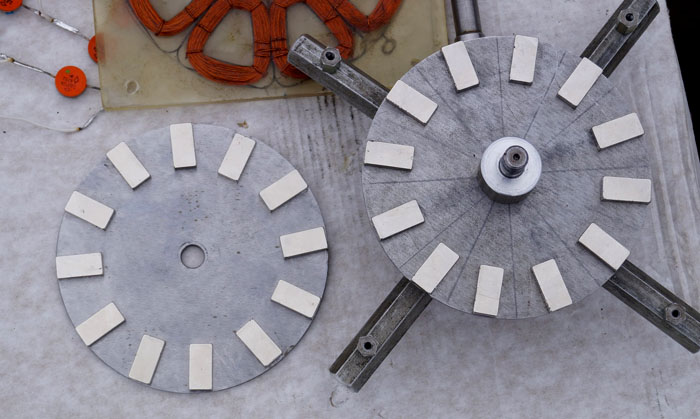
Magnets layout template
- The stator winding is rewound. The number of turns increases, therefore, the cross section of the wire decreases.
- There are no magnets as standard, so the central shaft must be made of a non-magnetic material, such as titanium.
But even if all the requirements for optimal voltage are met, the rotor must rotate from 500 times per minute.
General negative characteristics:
- Both options are short-lived, requiring annual repair or replacement;
- The generated power is not enough for a full power supply;
- Needs significant improvement.
If you already have the necessary knowledge and roughly know how to make a 220V wind generator with your own hands, it will be more rational to mount a unit of greater power.
When assembling a horizontal or vertical wind turbine with your own hands, observe the rigidity of the entire structure, from the blades to the control braces. Unreliable structural components can lead to an accident.
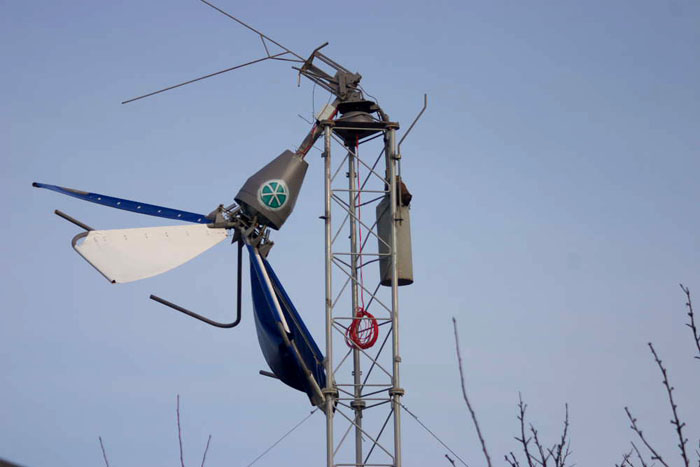
One of the many accidents