Non-woven wallpaper is becoming more and more popular and is gradually replacing its paper counterparts. This is due to the presence of a number of positive properties: resistance to deformation, durability, the ability to hide minor defects in the base, the possibility of subsequent painting. Both the home master and the professional finisher need to know how to properly glue non-woven wallpaper.

Features of gluing non-woven wallpaper
This finishing material is based on interlining - a non-woven fabric made from cellulose fibers.
Before starting work, you need to get acquainted with several important features of this wallpaper:
- canvases do not stretch and retain their original size;
- the width of the rolls is often 700–1400 mm, due to which fewer strips are required to finish the room than when using standard half-meter-width wallpapers;
- glue non-woven fabrics end-to-end, without overlaps. An exception is the gluing of corners (but more often the masters make the joint with a double cut);
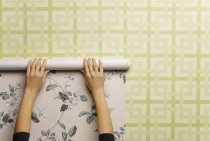
- glue is smeared only on walls or ceilings, the canvases themselves are applied dry.

Gluing non-woven wallpaper with your own hands is easier than paper-based canvases.
Tools and materials for work
Necessary tools and materials include:
- roller for applying glue (preferably with a long pile);
- brush or brush for processing corners and hard-to-reach places;
- a bucket for diluting glue;
- tape measure 5–8 meters;
- laser level or building plumb line (the simplest device can be made independently);
- plastic spatula for smoothing stripes;
- knife;
- sponge to remove excess glue;
- dry rag;
- pencil.
Particular attention should be paid to the preparation of glue: it should be designed specifically for non-woven wallpaper. The universal composition recommended by some consultants in stores has, as a rule, much less adhesion to interlining. With its use in the future, the canvases may begin to move away.

Wall preparation
For high-quality wallpapering, the walls must be prepared. Main stages:
- Removal of old canvases or paint. How to remove the old finish with minimal effort, it is written here. All paint removal methods are described in this article. If the paint layer is very strong, then the surface should be treated with medium grit sandpaper.
- Plastering - carried out with significant irregularities.
- Priming with a deep penetration compound.
- Leveling surfaces with putty.
- Re-priming. Masters recommend that instead of the usual primer, apply a thin layer of wallpaper paste to the walls.

In more detail, all stages of preparing walls for wallpapering are described in this article. The rules for preparing drywall will be different, step-by-step instructions for drywall can be found here.
Surfaces must be completely dry before sticking canvases on non-woven fabric.
markup
Work begins from any corner of the room. It is allowed to glue the first sheet with an indent, for example, if the calculation of the number of blanks with a pattern around the entire perimeter of the room showed that it is better to do the finishing joint not in the corner, but the corners themselves are quite even. In any case, you need to glue the first blank as evenly as possible: all subsequent work depends on this.
- A distance equal to the width of the wallpaper minus 2 cm retreats from the corner.
- Using a laser level or a plumb line, a vertical line is applied to the wall with a pencil.
- If the wallpaper is light, then they do not draw a solid line, but make notes at the top, bottom and in the middle.

Similarly, they pass the entire room.Even if overlaps are made somewhere in the corners, these lines will help you navigate the correct gluing, especially if canvases with a pattern are selected.
Material cutting
This process looks like this:
- A roll of non-woven wallpaper is rolled out and the height of one sheet is measured.
It is recommended to make an additional allowance of 3-7 cm, the remains will be trimmed after drying.
- Draw a line with a pencil using a ruler. The canvas is folded along it, laying the roll on top, and carefully smoothing it.
- Next, cut off the first blank with a knife or scissors.

- They measure the height of the room at different points and, taking into account a small margin, cut the required number of sheets.
If non-woven wallpaper has a pattern that requires docking, you need to find out the size of the rapport - the height of the repeating image. The length of the strip to be cut must be a multiple of this number, but it must be greater than the height of the room.
- The necessary margin in height will allow you to shift each sheet for an accurate selection of the pattern. To simplify the work, you can periodically apply two sheets together in order to check the conformity of the image.
- Wallpaper cutting is always performed sequentially on one side of the roll.
At this stage, the main thing is not to make a mistake in size, so that you do not have to glue the missing pieces.
The technology of gluing non-woven wallpaper on the walls
Step by step instructions for gluing:
- Diluted glue is applied with a roller on the surface between two lines. You need to capture a width slightly larger than the size of the wallpaper. This will help the joints stick well.
- The top, bottom edge and corner are smeared with a brush, since there is always less glue here.
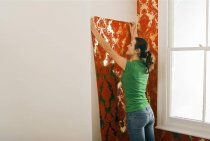
- The finished sheet of non-woven wallpaper is held by the upper corners, gently applied to the wall and, starting from the top, smoothed with a plastic spatula, but no strong pressure is needed. Particular attention is paid to the exact correspondence to the previously made vertical marks on the wall.

If the wallpaper has a deep texture, then it is better to use a wallpaper roller to avoid damaging it.
- Remaining air and excess glue are removed with a spatula from the middle to the sides.
- The glue that has come out must be immediately removed with a damp sponge or cloth, and then wipe these areas with a dry cloth.
- The second sheet is glued end-to-end to the first.
Do not be afraid that gaps will appear at the joints: non-woven wallpaper does not change its size after drying.
The rest of the sheets are glued in the same way.
It is necessary to ensure that the glue on the wall does not dry out, especially in places where the edges of the blanks are glued, otherwise the canvases may move away.
For this reason, it is desirable to work with non-woven wallpaper quickly. When it is clear that little glue has been applied, it is better to immediately smear this place by bending the sheet.

Trimming "tails"
It is more convenient to trim the wallpaper when it is already dry. The cutting technique is as follows:
- a wide metal spatula is held almost vertically and pressed against the top or bottom of the wall;
- the knife is driven strictly parallel to the spatula, without tearing it off, only the spatula moves.
The nuances of pasting corners
With perfectly even wall joints in the room, non-woven wallpaper can be glued to the adjacent surface. But this rarely happens. More often in the corners, the double cut technique is used:
- The sheet is glued with an overlap (2-5 cm is enough).
- A metal spatula is applied to the junction of the blanks.
- Both sheets are cut with a clerical knife.
- After that, the cut off upper strip is removed. The joint will be smooth and almost invisible.

It is important to press the knife not too hard so as not to cut the putty on the wall, which can crumble, but not too weak, otherwise only the top sheet will cut through.
- When the procedure is completed, both blanks are pressed tightly against the wall, if necessary, additional glue is applied and the joint is smoothed out.
When a pattern is joined, especially a large one, sometimes you have to glue the wallpaper from the corner in the opposite direction. In this case, overlaps are possible depending on the width of the workpiece.
We glue wallpaper around sockets
In advance, holes for sockets and switches are not made in the canvases, since it is difficult to calculate their location, and it will be more difficult to glue the sheet. It would be better to do this:
- First remove the plastic cases and turn off the electricity.
- Glue the wallpaper blank and carefully pierce the canvas in the center of the outlet hole.
- Make small cuts crosswise and bend the pieces.
- After finishing the finishing work, fix the housing in place.
How to glue non-woven wallpaper on the ceiling?
The technology of gluing non-woven wallpaper on the ceiling has no fundamental differences from the work on the wall.
- When pasting the ceiling, it is advisable to get an assistant who will support the sheets.

On a note. Fiseline wallpaper is the best option if you have to work alone. Dry strips can be rolled into small rolls and simply rolled out over the surface.
- To mark the ceiling, a cord or rope is used, which is stretched between the indents along the width of the wallpaper from wall to wall.
- A hole for a chandelier is cut out in the same way as for sockets: they are pierced in the middle and a cross-shaped cut is made. The ends of the web are bent into the hole, and the wires are let out.
If it so happened that the non-woven wallpaper does not want to stick well and lag behind the ceiling, you need to additionally glue the canvases themselves with glue.
When can I paint wallpaper for painting
Painting non-woven fabrics is carried out after they are completely dry, 48 hours after the completion of gluing.
Paints are used different: water-based, latex, water-dispersion. For each of them, an appropriate roller is selected.
After applying the first layer, wait a few hours and paint the surface again, and if necessary, a third time.
The whole process of gluing non-woven wallpaper is presented in the following video.