Bonding of marble surfaces
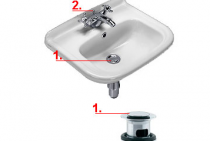
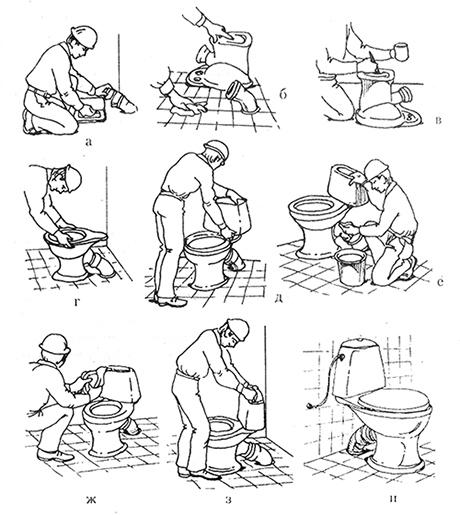
Some faucet designs: a - kitchen faucet, b - kitchen faucet with shower screen, c - washbasin faucet with controlled outlet.
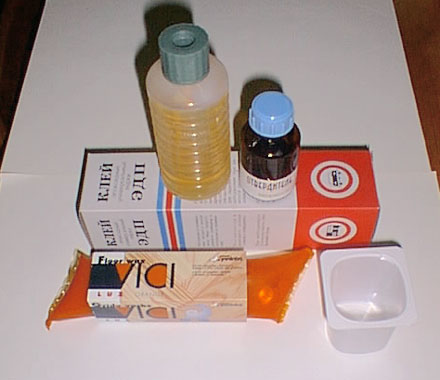
For gluing marble sanitary ware (toilet shelf, faucet body, sink, cistern), very different adhesives are used, which require a certain application. Consider some adhesive compositions.
Universal and familiar to many universal adhesive BF-2 is used in almost any plumbing repair. It is suitable both for gluing plastic pipes, siphons, thermoplastics, fittings and other similar equipment, as well as for repairing and gluing sanitary ware. And gluing with BF-2 glue accelerates with subsequent heating of the gluing site.
It is for this purpose that faience items, cracked ceramic-coated faucets, toilet bowl lids, after gluing, are heated over an electric stove or in an oven heated to 100 ° C. Faience and ceramics are quite reliably glued by ready-made adhesives: EPD, EPO, MTs-1, Mars, Unicum, Rapid and the like.
Best Answers
Raptor SD:
Nothing, buy a new one.
CAT:
better buy a new one
Sergei:
It would be better, of course, to buy a new one, but I can advise Poxipol cold welding.
cat:
epoxy is more reliable and more reliable: it served as glued for about thirty years on the street. And it’s not for nothing that boats, cars and planes are glued to her.
BLIZNEC:
Situations are different. Epoxy - DIFFERENT.
janna:
It's easier to buy a new one and forget about the problem.
Yuri:
Are they in short supply? Why not buy a new one
Truculentus:
Synthetic adhesive designed for gluing faience and ceramics: BF-2, EDP, MC-1, EPO, Mekol, Rapid, Ago, Mars, Elastostil-2, Supercement, Unicum ”, “Moment”, “Grokim”.
Alex:
Dear! Buy yourself a new one! But if you really feel like it) ) glue on the construction Moment waterproof or universal, and then coat with sealant from the side of the water.
Pasha PKX:
Epoxy would be better. I don’t know about faience, but I successfully glued the windshield washer tank in the car like this: 1) I applied automotive putty with fiberglass to the gap. 2) I covered it with a bandage impregnated with epoxy (but a fabric with fiberglass is better; then you can skip the first point. 3) I smeared this entire structure with the remaining epoxy so that nothing passes between the bandage and the tank.
Heinrich Mont:
Glue, plus the time spent, plus the dismantling of rusted fasteners, plus hand cuts with sharp edges of earthenware, plus nerves, will cost more than a new tank. In addition, a darned condom looks more aesthetically pleasing than a glued tank.
SHOULD YOUR THOUGHTS! Is this why you graduated from KhNTU (KhII; former Odessa Technological University; Kherson National Technical University)?
Konstantin Medkov:
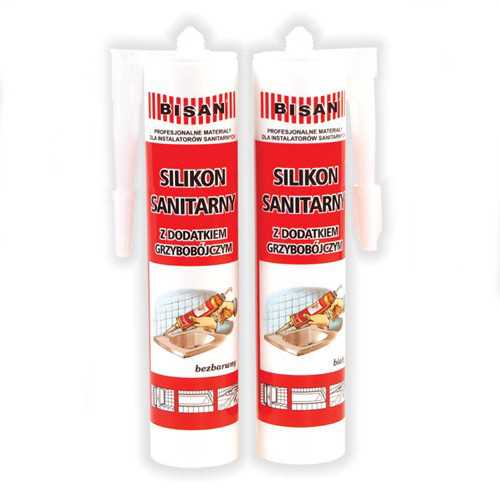
Better than the second - colorless.
Anatoly Korneichuk:
I usually glue toilet bowls only with materials that are homogeneous with the cistern, I used a technique taken from the experience of craftsmen gluing ancient porcelain for household purposes - Chinese services created earlier than the 17th century, Russian porcelain of the 18th, 19th centuries, road repairs in the Vologda region of the 20th-early 21st century.
Expert answers
Mikhail Sidorov:
The sidewall of the tank was cracked all the way to the bottom. I put it on silicone, missed the wall inside and out. Two years no problem. And I did it for a while, I thought I would replace it later. No need.
Veronika Ivanova:
cold welding
Base of torpedo boats:
quality - nothing
Roman Mikhailov:
Epoxy resin, then wipe the seam with zero and cover with a thin layer of enamel on top.
Demitros:
can be glued with liquid nails for plumbing
Selector:
I suppose that initially water was dripping or flowing there, and instead of unscrewing and changing the gaskets, you decided to clamp it ...I bought another toilet!
Anton Antonenko:
here
Lily Kalide:
If “only silicone sealant”, then you lubricate the split with sealant and attach it. then you fill everything with this sealant from the floor and walls to the broken piece, allowing the layers of the fill to seize - so that there is support. how glue sealant is not good, but how replacing the prop can last for a while
Gda:
Someone climbed up with legs ...)))) Change .... or don't change
Sergey Drozdov:
They used to do it themselves, but now there seem to be adhesive mixtures containing liquid glass (especially for ceramics) on sale. You just need to look for them. All the pieces stick together perfectly. In some magazine from "Young Technician" for the 80s there was a recipe for such glue. You can google old collections.
GT:
in the tank, stick a piece of pipe on the sealant and bring it into the toilet, the place where the degrease broke off and glue it on epoxy or silicone.
Vasilevich:
Glue this piece with EDR glue (epoxy resin), I repaired the sink in this way, it has been serving for 10 years already.
Vladimir Nikitin:
Breakage of the toilet shelf under the tank - not repairable. Toilet replacement.
What to do to prevent cracks on the toilet and cistern
In fact, by adhering to the basic rules, you can easily avoid these unpleasant consequences:

- Always close the lid on the toilet, this will protect it from foreign objects. In this simple way, you will avoid damage to faience and save your cosmetics or other products from unplanned bathing.
- Never pour hot liquids down the toilet, this will lead to a temperature difference and your faience can be easily damaged. When you need to pour something down the toilet, first all liquids should be thoroughly cooled.
- Follow all the rules when assembling the toilet, do not put much effort. In addition, all bolts must be tightened in moderation, not too hard, but not too weak, find a middle ground. Also, do not allow any distortion.
These fairly simple rules will allow you to keep your plumbing intact and safe for many years of operation.
Best Answers
Maygli:
there are brutal glues (china in a small package), dries - 10 seconds. This is just for crack. He will seep where he needs to. Just need it fresh. Without dirt. Try it can catch on, and the hole - cold. welding for ceramics.
e with:
replace
Roman Serdcev:
Transparent silicone will help you, you just need to dry the edges of the wound))) and degrease... At the same time, glue the cat's ass so that he goes to his push)))
Michael:
silicone will not help, and it will be very rough. there is such a substance crystallizer. used to fill cracks in ceramics and granite. the substance is transparent, similar to varnish. if expensive, try waterproof varnish. in both cases, dry and degrease the surface. good luck!
Gulia:
call the plumber
Alexander Bakushev:
if inside the toilet, then it’s better not to risk it, you will flood the neighbors! borrow and buy a new one!
Michael Shirokov:
if it’s not very good with the mating position, you shouldn’t cover up the hole, buy a new one, it will become cheaper, believe me!
Truculentus:
Cold welding. But buy branded, then it will keep.
Heinrich Mont:
I wonder where people "with a difficult financial situation" put a brush? For example, I have it next to the toilet. Or do you have a cat trained to wipe the toilet with a brush? And then the paws slipped?
Ways to get rid of cracks
Of course, all the methods that are used to seal a crack cannot give a one hundred percent guarantee of getting rid of leaks, but they effectively help to temporarily solve the problem.
First, let's figure out how to repair cracks. In the modern world, there are many materials for these purposes. A small crack or chip can be glued together with an adhesive that is designed specifically for ceramic surfaces. In addition, cold welding or epoxy glue can be used.
In the case when a part that is not involved in ensuring tightness has broken off, then absolutely any universal glue can be used. First of all, it is necessary to clean the damaged plane from all kinds of contaminants. Leave the faience alone for a while, let it dry properly. After that, it is worth degreasing the surfaces with acetone or gasoline. On the surface, apply glue in a small layer and press the broken fragment into the right place. Hold in this position for a while, which is necessary for the glue to dry completely.
Keep in mind during further use that your toilet is no longer new, and do not stress the adhesive joint to prevent further damage.
If it is necessary to seal the crack in the place where water accumulates, then it is best to use a two-component epoxy resin. First, prepare the resin, hardener and mix the components in a container convenient for you according to the manufacturer's instructions. Wipe all surfaces from dust and dirt, and wait for them to dry completely. Next, turn off the water. Degrease with gasoline or acetone. On the surfaces to be glued, apply the solution prepared in advance.
Fix the chips in the right place, this can be done with adhesive tape glued to the outer surface of the toilet bowl. After the resin is completely dry, sand down any visible seams. Walk, first of all, with sandpaper zero, after which it is worth applying felt. Do not lose sight of this stage, because in the future, various unpleasant contaminants will accumulate on these seams without treatment, which will be difficult to remove.
When a crack is visible on both sides of the toilet bowl, then the repair operations will be a little more difficult. Using a drill with a thin drill, which is designed specifically for tiles, it is necessary to drill two through small holes at the ends of the crack. Thanks to this technology, we will not allow the crack to become even larger.
Along the length of the crack, it is necessary to make a recess with the help of a turbine, while avoiding overheating of the toilet bowl, which can lead to new damage, be very careful. Dilute epoxy with hardener in any container according to the manufacturer's instructions. In this recess, apply a layer of the solution prepared in advance
Be careful, remove all excess resin immediately, before it has time to harden. Otherwise, you will add yourself extra work, which is to grind surfaces.
When all the mortar in the recesses is dry, using sandpaper and then felt, sand all the seams so that they do not collect excess dust and dirt.
If your toilet is cracked in the base area, and there is no way to get there from the outside, then do not take any action, otherwise you will only make it worse. Many enterprising people in such cases tend to drown the base of the toilet bowl in concrete, but this does not lead to anything good in the end, because the neighbors from below begin to complain about the appearance of fungus in their apartment. Therefore, in this case, you still have to replace your toilet with a new one.
Now you know what causes cracks in faience, as well as all the recommendations that will help you prevent these troubles. Follow all of the above rules, and your toilet can serve you for many years. If the trouble did happen, you learned with what materials you can seal all the cracks and chips, as well as how this can be done.
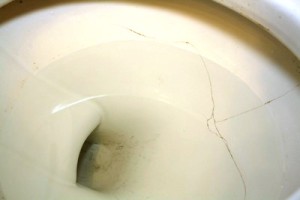
We went into the bathroom, and there is a puddle on the floor next to the ceramic toilet, and you are completely unaware of what it could be? If the gasket at the entrance to the drain tank is leaky, work for a couple of minutes, another thing is when the problem arose due to a crack in the same tank or the bowl of the plumbing fixture itself.
In this case, not so easy work is ahead, which can even end with a complete replacement of equipment. If you want to know how to close a crack and how you can glue the toilet yourself, read our article further.
Expert answers
PENSIONER:
Grisha:
tape
Boris N. Eroshkin:
Epoxy glue.
grach-w:
silicone sealant... it is white and transparent...
Serg Havr:
Dry properly, clean the damaged area with an iron brush, sandpaper, dilute the epoxy according to the instructions, add dry cement to the glue, mix thoroughly and seal the crack in two layers on a medical bandage. After a day, apply another layer of glue of a larger area. If you do everything right, it will keep you for a hundred years.
lyudmila dyomina (Malakhova):
Epoxy glue, but you still have to change!
Margarita Nevaeva:
Try Hydrotex
Michael:
Prepare a paste of epoxy resin (sold in markets and hardware stores) and filler in a ratio of 2:1. Titanium white or fragments of porcelain utensils can serve as the latter, mix thoroughly into the prepared paste and leave for several days to make it homogeneous. Mix the paste with a hardener (included in the kit with epoxy resin), apply the resulting mixture to the damaged area. Smooth the surface with a razor blade. The mixture will harden completely only after 5 to 10 days,
Oleg:
There is a sealant!
Ilya:
it’s better to buy a new one, it can burst at any moment, and it won’t be very good if at that moment someone sits on it
I am the one who comes to help.:
buy a new toilet, otherwise you will pay the neighbors for the flood that will happen soon.
misjar:
buy a new one!!!
Oleg Zhestov:
Meat from the priests! And if you seriously change, until it comes to trouble.
alexander m:
I once punched a hole in the toilet bowl, so my father sealed it with epoxy resin, then I stood for a long time.
Magdalene Paterson:
It will heal itself over time, you do the main thing there more often
Work order
First of all, the split site must be cleaned of dust and various small fragments. For this you will need:
- sandpaper;
- soft fabric;
- solvent.
The first step is to clean the place where the piece is chipped off. The more complex the crack, the less it is necessary to clean the place so as not to aggravate the situation. After a little sanding, quickly wipe the cleaned area with a soft cloth.
After wiping, lubricate the clean surface with a solvent or acetone to degrease the bonding site. After all these procedures, you need a regular or building hair dryer, which can quickly dry the damaged area.
The split is lubricated with an adhesive waterproof solution or sealant, then a fragment is applied. In some cases, you can use a double layer of glue. It is necessary to apply the maximum possible force to create a good adhesion to the adhesive.
But if you overdo it, the chipped part or the place of the split will collapse even more, so it is important to calculate your effort.
The fragment can be fixed with adhesive tape or a tight tourniquet. If everything is done correctly, the chipped part will be firmly glued and can last for quite some time.
This method is suitable for gluing minor chips to the outside of the toilet. If the split occurred inside the bowl, then instead of the adhesive mixture, it is better to use epoxy resin. But some serious damage cannot be repaired by this method.
For the flush tank, the procedure is exactly the same as in the case of the toilet. Usually the material from which the tank is made is a little thinner, so it should stick together faster. For bonding extensive cracks, epoxy resin can be used.
When using resin, it will be necessary to sand the seams and wipe them with felt to avoid contamination. The toilet cistern is much easier to restore than the toilet bowl.
First gluing option
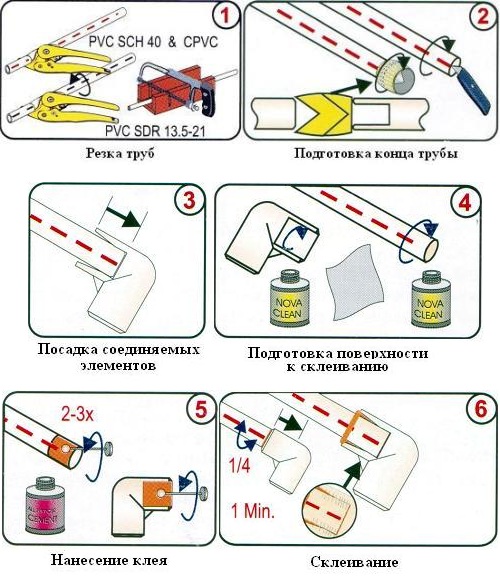
Steps for gluing sewer pipes.
In order to seal a crack or glue a chipped toilet bowl or tank, you need to prepare the following:
- waterproof glue, cold welding, epoxy or silicone sealant;
- fine sandpaper;
- acetone or solvent;
- narrow spatula for easy application of the adhesive;
- rags;
- building hair dryer (you can also home).
First of all, the chipped and damaged surface is carefully cleaned with sandpaper, a hairdryer or rags, freed from small particles. Then both surfaces are degreased with a solvent or acetone and then warmed up well with a hair dryer in order to evaporate moisture from the area of \u200b\u200bthe future seam as much as possible.
Toilet installation steps
So, on a cleaned, degreased and well-dried surface, you need to very carefully apply a thin layer of glue and, according to the attached instructions, withstand the required time. Only after this, the pieces need to be pressed against each other as tightly as possible for a few minutes.
If this stage is carried out correctly, then it will be possible to forget about the chip for several years. But you should know that a damaged cistern and toilet bowl, even if the cleavage site is not very noticeable or not visible at all, will require additional processing of the seam. First of all - to enhance it, and secondly - for aesthetic purposes.
So, the outer seam, obtained as a result of gluing a toilet or cistern, must be treated with a joint putty used for ceramic tiles, or a special epoxy with a filler that matches the color of the repaired plumbing as much as possible. The inside of the toilet bowl or cistern at the junction of the seams is reinforced with an additional layer of glue and a strip of soft stainless metal or thin plastic. Previously, the area of reinforcement is cleaned with sandpaper, degreased and dried with a hair dryer.
You can glue a crack in a tank or toilet bowl in a similar way. The inner and outer surfaces of the crack area are cleaned, degreased and thoroughly dried. Then the treated area is thoroughly smeared with epoxy. And from the inside, the tank or toilet bowl at the split site is reinforced by gluing a strip of plastic or soft stainless metal. On the outside, after the epoxy glue has dried, the crack area should be additionally smeared with waterproof glue.
How to glue ceramic toilets and installations from other materials
What are toilets made of? This question arises when the device needs to be repaired, because in a modern comfortable house it is impossible to do without this installation. If you believe the statistics, then, taking into account certain conditions, the device is used every 6-7 minutes.
Given these circumstances, the toilets are made from:
- Porcelain;
- Ceramics;
- faience
- Become.
Toilet bowls require not only mechanical strength, but also the ability to endure chemical influences. Speaking of devices that use ceramics, we can say that they are not only the most popular, but also the best among other products.
At the moment, people have vast experience in installing and repairing toilets, but as practice shows, if the installation is carried out correctly, then there is no further operation. This is what leads to both partial and complete destruction of products.
What could have happened
Before we learn how to seal a ceramic toilet, let's understand where our crack came from, so as not to waste time in vain.
Falling objects
In a cramped bathroom in a city apartment, everyone wants to make the most of its space. Therefore, a cabinet with various household chemicals, and often with tools, is often installed above the toilet bowl.
By negligence, they can fall into the toilet, because of which it will immediately crack.
Sudden temperature drop
Ceramics do not like sudden changes in temperature. In this case, an uneven expansion of the material is created, due to which internal stresses increase in it.
The result of such actions is a crack. This can happen due to a faulty mixer, when hot water begins to flow into the pipes with cold water. Plastic parts will begin to deform. After that, cold water will rush again, which may cause cracks, and you will have to think about how to seal the toilet bowl.
Incorrect assembly
Do not apply force in large quantities during the process. Make sure the bolts are evenly tightened.
Otherwise, these two conditions will become harbingers of the appearance of cracks. In this case, the tank and the toilet can burst after a while, even a very long one.
-
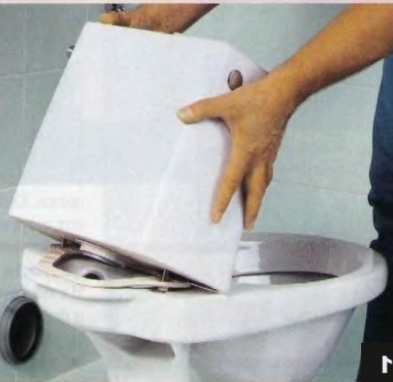
Close the toilet lid
. A seemingly simple operation will help protect the bowl from foreign objects entering it, which can cause chips and cracks. In addition, your valuables will also not fall into the water. -
Do not pour hot liquid into the toilet, be sure to let it cool
. Agree, the purchase of a new toilet and its installation will cost much more than an old pot or pan. This also applies to winter. Do not direct water at a temperature of 80-90˚ into the toilet bowl.
-
During assembly, make sure that there are no distortions, and do not apply excessive force
, remember that the product is made of clay, not metal or wood. If the toilet cistern is cracked, you will find out how to seal it in the article below.
So, we found out what can basically lead to cracks in a ceramic toilet bowl or cistern. Now let's move on to repairing them.
How to independently glue the toilet and drain tank
We use universal glue
This method will help repair the product when a fragment has broken off that is not related to ensuring tightness. For example, a part of the base and an eyelet for attaching a shelf.
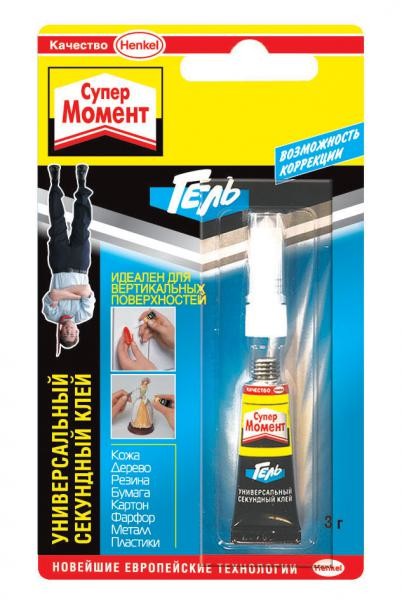
Buy any generic adhesive from a reputable manufacturer, the price can't be cheap. Henkel's "Supermoment" is quite suitable.
The instruction is as follows:
- Clean the surface of the defect from crumbs and dust.
- Let the product dry completely.
- Degrease surfaces with gasoline or acetone.
- Apply glue and press the broken fragment. Fix in any way for the time indicated in the instructions for the composition.
Crack only outside
In this case, consider the moment when an object fell into the toilet bowl and damaged it. Universal glue is best replaced with a two-component epoxy.
So, how to glue the toilet:
- Prepare the components - resin and hardener, as well as a container for mixing them.
- Dry the surfaces to be bonded well.
- Close the water supply to the tank, install a fan, wipe off any drops. Make sure the bonding area is completely dry.
- Degrease surfaces.
- Mix the resin and hardener together according to the manufacturer's recommendations.
- Apply adhesive to the surfaces to be bonded.
- Be sure to fix the gluing area in any way. For example, you can use ordinary adhesive tape by sticking it on the outside of the bowl.
- When the resin is dry, carefully sand down the glue lines where they are visible. First use sandpaper M20 or M40, then felt. Otherwise, pollution will accumulate here.
The crack is visible on both sides of the bowl
Now we will find out how to seal a crack in the toilet, which affects its tightness. In this case, it is also necessary not to allow the defect to increase.
Prepare:
- epoxy resin with hardener;
- drill with a thin drill bit for tiles;
- grinder with a stone disk;
- sandpaper and felt for grinding the gluing area.
It remains to learn how to seal the toilet with your own hands:
Drill 2 thin through holes at the ends of the crack. So you stop its lengthening. Using a grinder, select a recess along the entire crack by about 50% of the thickness of the faience. At the same time, do not forget that overheating the material will only aggravate the situation, it may begin to crack in other places.
It doesn't matter where you do it - outside or inside the bowl, the crack will still be noticeable. Fill the prepared recess and holes with a mixture of resin and hardener, remove the excess immediately to reduce the need for sanding later.
Sand hardened resin.
Conclusion
Any glue is supposed to be a temporary measure for plumbing cracks
But, if you can ignore the aesthetic side of things, an epoxy-repaired toilet can last a long time. The video in this article will provide an opportunity to find additional information on the above topic.
In general, I will do it for the 3rd time ...... ..
burned a hole with a muffler. with a diameter of 5 millimeters, he closed them through cold welding, inserted a piston into the hole and covered it with welding. everything was normal until the tank was loaded. those are a full tank, or if you scratch the tank, then because the welding is tough and bounces.
actually interested in how to fix it. something flexible...
Godfather
You take poxypol and a bandage ... You cover the hole with a large radius around it with poxypol abundantly, glue the bandage tightly drowning it in poxypol, then poxypol again and bandage again .. 3-4 layers and let it dry .. it should be elastic enough ..
Godfather
how does poxypol with polymers contact? let's say epoxy will not roll. right now that's thinking to take and repair as well as the bumper. reinforce and solder. I just don't know what?
Godfather
DoH
, excellent contact ...
Godfather
, I will eliminate the cause while it is temporarily eliminated
the thing was that my silencer krpelnie fell off and he pressed against the tank and burned a hole. I have a muffler assembled from what was. and nothing good was at hand. in the near future I will put a normal one, and by design it goes far from the tank.
isn't poxypol hard? just if it is not elastic, then it will be the same with cold welding
here I think to pack something to come today and think about soldering or sealing
Godfather
Poxipol has more flexibility than cold welding, so give it a try..
Godfather
, Zhenya, you are a specialist in tanks
I'll try because I have nothing to solder
the diameter of the hollow of the hair dryer is such that there the floor of the tank can be charred
What plastic is the tank made of? If polyethylene - figs what will stick to it
Two options come to mind: 1. brew. (this is probably the most correct option, but I don’t know where and how) 2. cultivate the hole (so that it turns out to be the correct shape, without sagging, then take two pieces of benzo / oil-resistant rubber, cut out two washers from them so that they overlap the diameter of the hole with a large margin. next, find / make two thick metal washers according to the diameter of the rubber washers and bolt of suitable diameter and length.
well, then, I think, everything is clear - from the inside: bolt_head> met_washer> rubber_washer> tank_wall> rubber_washer> met_washer> nut and we tighten this whole sandwich. On the threaded end of the bolt (which will stick out from the outside) you can make a slot to make it more convenient to tighten it.
not very pretty, but should hold.
Godfather
DoH
, sand the place of pasting with a rough sandpaper so that it sticks well and degrease!
Godfather
, this is how it was done, it’s just that yesterday I flew along a country road in a slut od 70 and maybe I hit the tank. and cold welding, it doesn’t bend, so it burst again
it is difficult to offer without seeing the design of the tank / neck / location of the hole, but here is an option that can turn out: we put everything that should be inside the tank (i.e., a washer and an elastic band) onto the bolt, then we remove the wire (for example, copper) through the hole into the neck or aluminum, so that it is not very rigid) further, to the wire, behind the threaded end, we fasten (for example, with tape, or you can drill a transverse hole) a bolt with washers already mounted. well, then, if all the above succeeds, we tighten the bolt from the inside into the hole with a wire.
seeing the design live, maybe something more convenient will come to mind, but for now, just this.
pavor
, savvy Or experience?
pavor
I don't want to remove the tank
in my case, it doesn’t work out because the tank is curved and the hole is in the most inconvenient place and farthest from the neck
although the drain plugs can be unscrewed ... ..
I will glue today
by the way, polyethylene melts and sticks to it, everything sticks to it, you just need to try to solder not plastic
rather the first.
alternatively, you can throw a bolt with mounted washers into the tank and bring it to the hole with some powerful magnet through the tank wall. Yes, if you decide to do this, then tie a rope to the bolt just in case, so that in case of failure, pull it back out.
at the expense of melting - I know, but at the expense of "sticking" ... I have never managed to achieve a reliable and tight seam on polyethylene.
from "soldering" you can try a glue gun, but there are no guarantees of the durability of such a connection.
ps: by the way, I would not advise you to carry out any thermal procedures with the tank without dismantling and steaming it! otherwise it may end very badly ... or do you have a diesel engine? .. (although ... I wouldn’t joke even with a solarium, because a tank, especially an empty one, is very explosive)