DIY shower cabin examples
Where to start work on creating your own shower cabin? Yes, it is probably better to study the experience of those people who have already passed this stage and are now enjoying the fruits of their own efforts.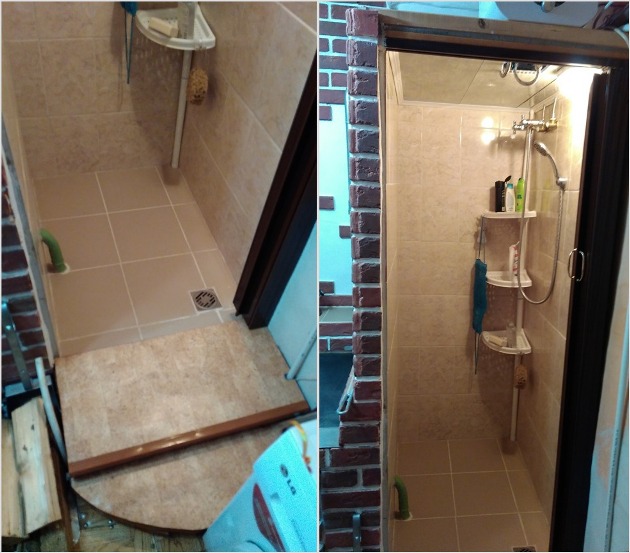
If we talk about a shower cabin in a private house, then it can be placed anywhere. Or rather, where does she go?
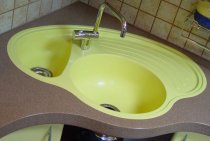
If you pay attention to the photographs, then on them the booth is comfortably located in the space between the wall and the stove, in an ordinary kitchen. This creation of engineering thought does not have a steel pallet, it is replaced by a tile, which was laid out at a slight angle to the gutter
The floor in the cab is raised above the floor in the kitchen. In this case, this is a necessary measure so as not to dismantle the floor to install a drainage funnel. So that water from the cabin does not get into the kitchen, it was separated by a threshold with two degrees.
The craftsman needed brick, tile, and damp-resistant drywall to create his booth. Plastic seamless panels are installed on the ceiling. Even the kitchen stove looks harmoniously together with the shower cabin, as they are finished together in the same style.
Water is supplied by a pumping station from a well. There is a compact size water heater. All this made it possible to obtain a small shower cabin with cold and hot water.
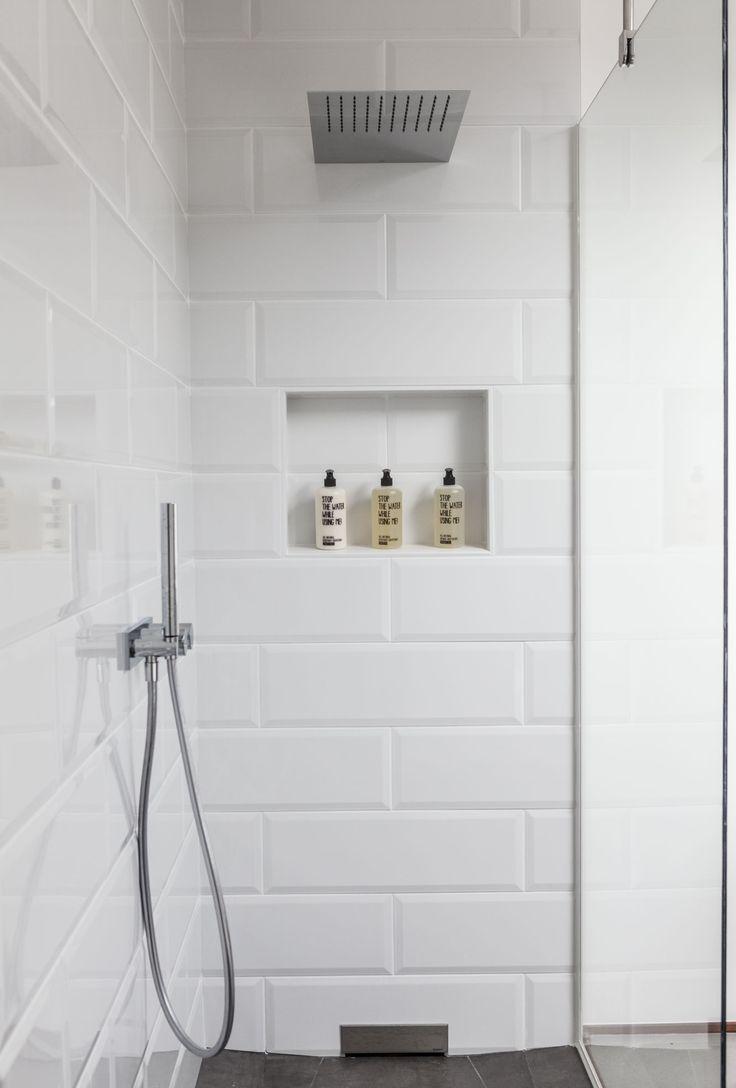
A shower stall will look very good and unusual if you assemble it yourself from glass blocks. This material is no less durable than brick, but at the same time it looks very decorative. You can learn how to lay glass blocks very quickly, and you can make the most unusual forms from it. If you look at the photo, you can see how stylish the glass block looks paired with natural stone tiles.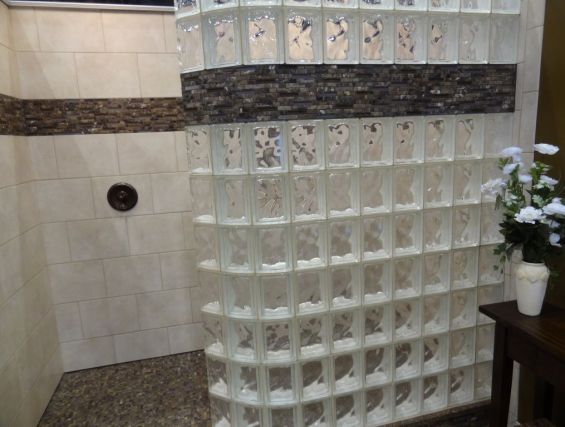
On the floor of the cabin there is a concrete screed, on top of which there are porcelain tiles. The walls are also ceramic tiles.
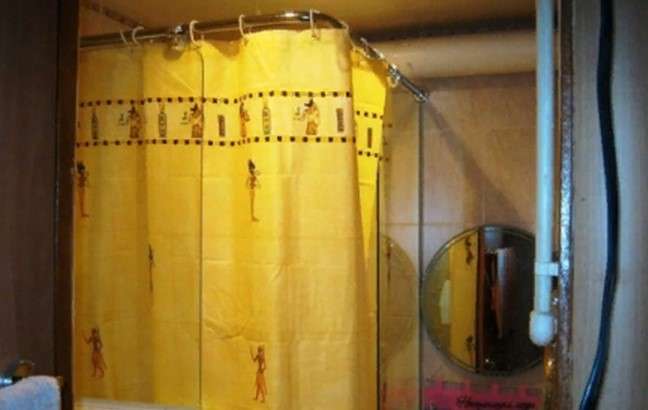
Not everyone likes the option of replacing a transparent screen with a film curtain, but in this case it looks very good.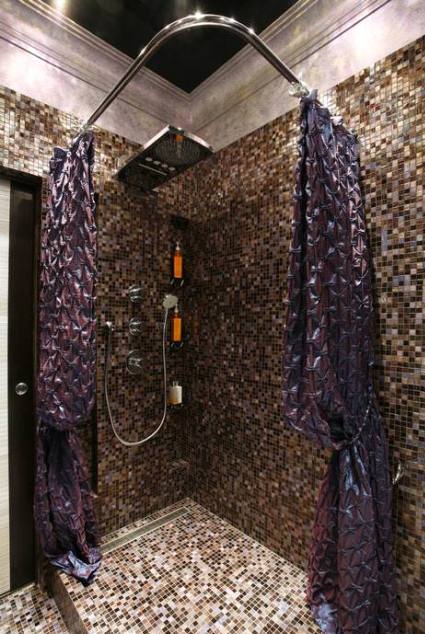
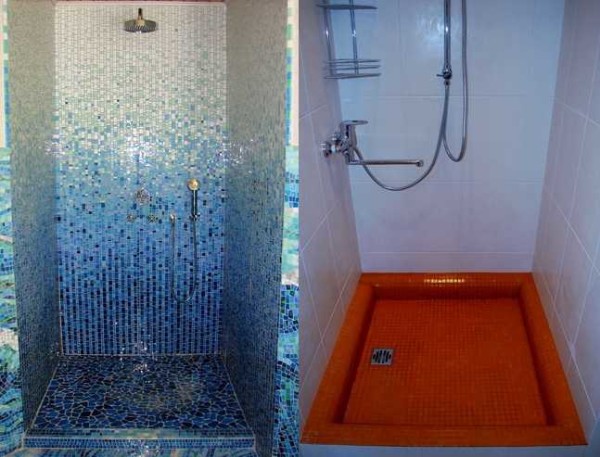
Mosaic cladding and waterproof fabric suspended from a chrome-plated bow. The whole composition looks like a work of a real designer.
When choosing material to create your soul, you should pay attention to cellular polycarbonate. It is quite durable, not afraid of water and looks beautiful.
On its basis, nice transparent cabin walls and a door will turn out.
The edging for it is made on the basis of aluminum or plastic. The door itself can be hinged, but you can also put a sliding door. This is easy to do if you fix the wheels from the cabinet on the underside of the polycarbonate and insert them into the guide.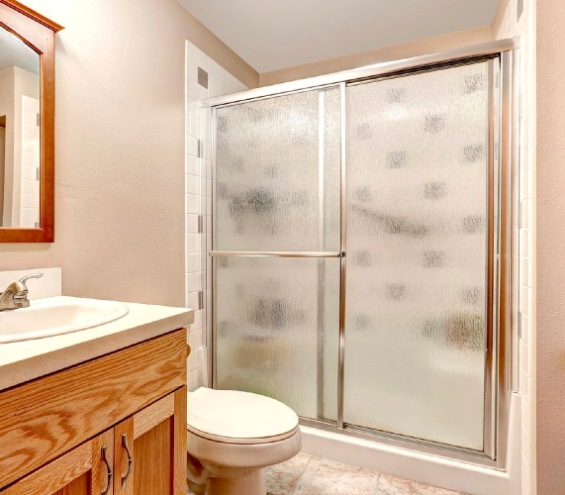
Due to its flexibility, polycarbonate allows you to create a wide variety of shapes.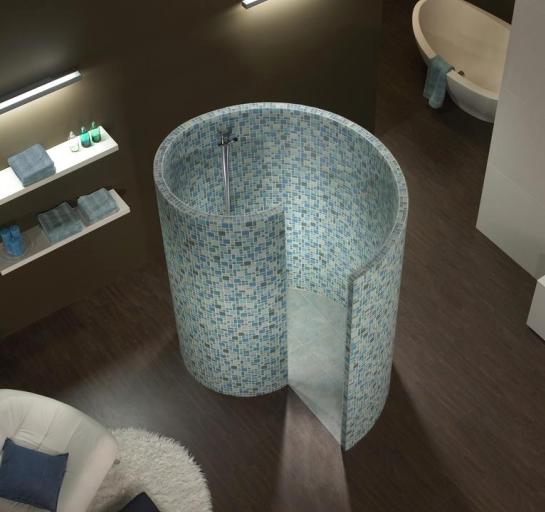
No less popular for creating showers and plexiglass. It is not as strong as polycarbonate, so it will have to be framed with stainless steel corners.
On the basis of glass, simple and airy home-made structures are obtained.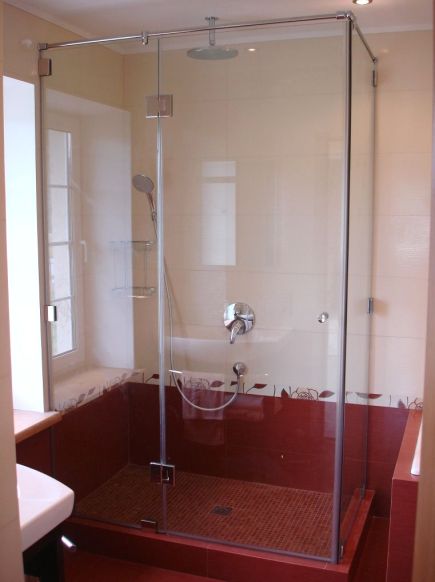
It is easy to combine with tiles.
Quite a good option for facing - plastic lining. It can be easily and quickly connected into a single panel that is not afraid of moisture. It sticks to absolutely any surface.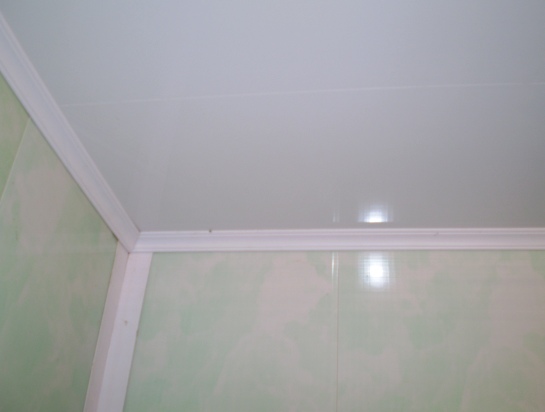
The walls can be made on the basis of a homogeneous material, or they can be assembled from different ones.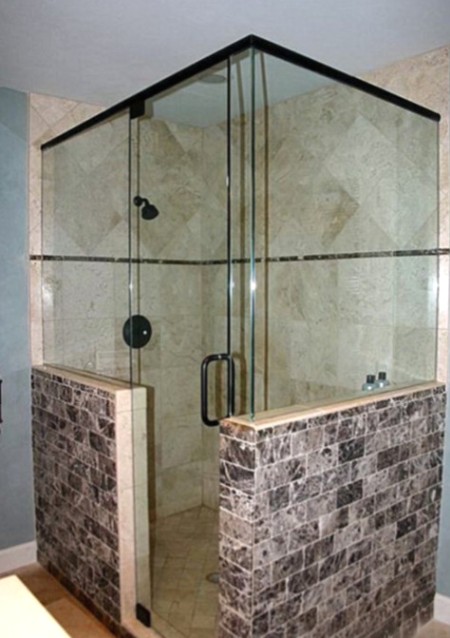
Turning on the fantasy, and from durable plastic, you can create a cozy corner of relaxation. As if in an oasis, you can not only bathe here, but also relax under the jets of warm water and meditate.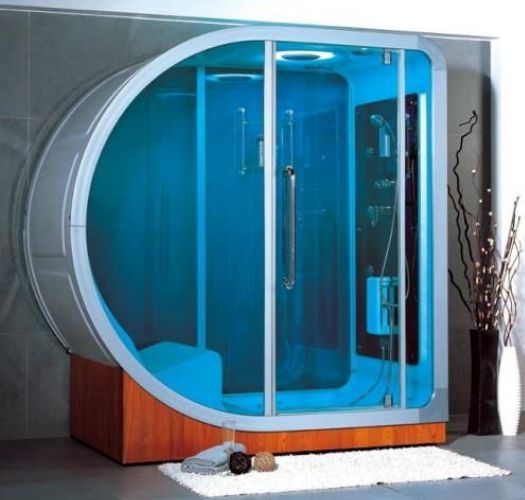
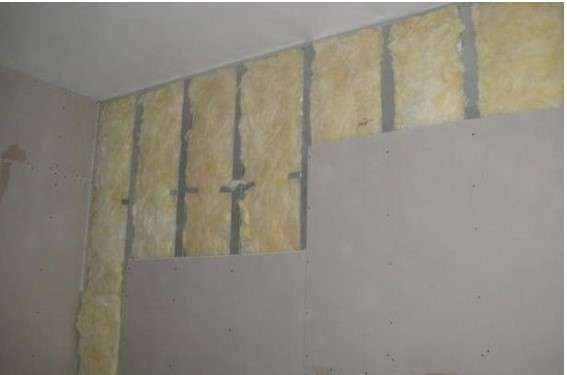
Quite easily and quickly, you can make a cabin frame out of drywall, then finish it with moisture-proof material and tile it. The design will be inexpensive and easy to install.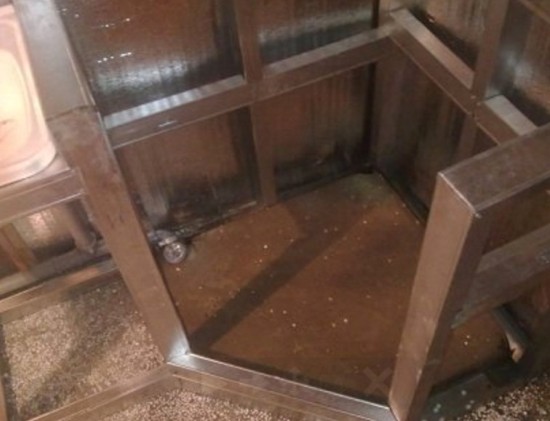
Partitions
To highlight the zones use plastic, drywall, glass. Each material has advantages and disadvantages:
- drywall allows you to build a fence of any configuration with internal shelves. The main disadvantage is the thickness of the partitions (at least 5 cm), and this is a significant drawback for small-sized bathrooms in Khrushchev;
- glass is the best option that allows you to effectively divide the room into zones, without compromising its visual perception. Individual decor will give the room originality and originality;
- plastic (plexiglass) is also very practical - easy to clean, does not take up much space. The disadvantage is that the material is easily damaged, scratched.

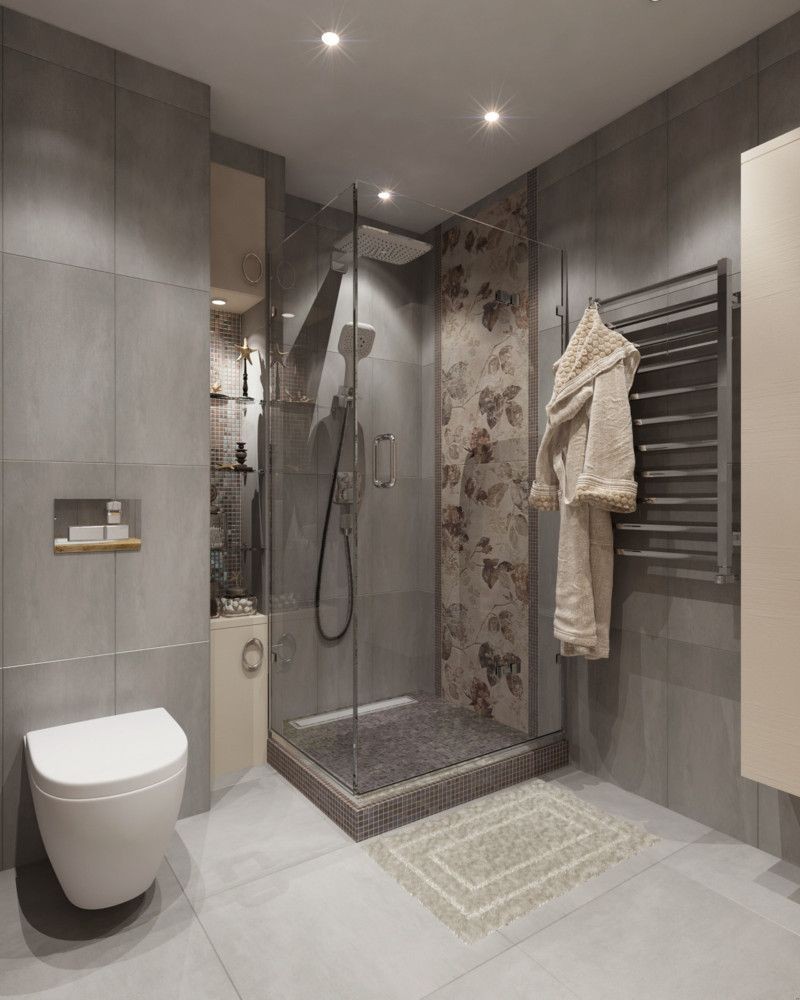
Shower design without tray with wood effect tiles

Glass shower without tray in the bathroom
Shower design without tray with sloping floor

Shower without a tray in a black and beige bathroom

Glass shower without tray in the bathroom

Shower without tray with wooden floor
How to make a shower stall with a tile tray
Shower cabins are often made in small bathrooms. It is popular in baths and cottages, they put them instead of a bathroom in apartments and houses, they do it in addition - who knows how. But not everyone likes plastic cabins: they are too flimsy. A do-it-yourself shower cabin, although it takes more time, is more reliable.
From the outside, there isn't much difference.
If you want to make your own shower stall in order to save money, do the math first. You will need good waterproofing, and most likely for pools. You just need a good drain, for which you will need to raise the floor, and this is a decent amount of a solution with plasticizers that increase water repellency. For finishing, you will need a good floor tile with a non-slip surface or mosaic, and glue (water-repellent). It would also be nice to have floor heating - it is very unpleasant to stand on a concrete floor in winter. You will also need doors, although you can get by with a curtain. It's already a big amount. There are cheaper options - simple shower enclosures.
If you also need to build walls, even from drywall, then there will be no savings for sure. Many note that a do-it-yourself shower cabin is not cheaper, and this is at least. But what's good is that you can make it exactly the way you like it, in the size you want (or how it turns out). An independent shower cabin is inexpensive only if there is a ready-made nook that is simply fenced off with a door or curtain, but the cost of installing a drain and a floor does not disappear.
Shower walls
- brick
- glass
- Polycarbonate
Glass walls are very durable, for them you need to take tempered glass, or ordinary thick glass and stick the film yourself at home, this will help protect you from damage if the glass breaks.

Polycarbonate walls must be cut from large sheets, as gluing small pieces together increases manufacturing costs and reduces their strength.

Having installed brick walls, we just have to veneer them with ceramic tiles. This is the tile shower. We choose options suitable for the color scheme of the bathroom. And be sure to have a non-slip tile surface to reduce injuries when taking a shower.

There remains the final stage. Installation of a shower, faucets and shelves for soap and other soap accessories. Take care of the purchase of which is necessary at the stage of purchasing materials. We take into account the style in which the cabin and the whole room as a whole are designed.

Preparation for work tools and materials
Any work should begin with the preparation of the necessary tool. Materials for work should also be chosen, starting from the features of the future design. To summarize, you need the following:
- pipes for sewerage with branches and seals;
- waterproofing;
profile, fasteners, etc. To lay out the pallet, you can take a brick or expanded clay blocks. To fill the pallet with cement mortar, you will need plastic to form a shape out of it. If the fence is brick or block, then you will need to prepare:
- trowel with a hammer;
- solution mixer;
- building level.
For plastic pipes you will need:
- soldering iron;
- pipe knife;
- screwdriver.
In addition, you need to have on hand:
- sealant gun;
- roulette;
- construction corner.
It should be remembered that laying out the pallet is not enough. It needs to be lined. For decoration, as a rule, tiles are used. Perhaps it will require adjustment in size, so you need to have a tile cutter or a grinder with a stone circle.
If a factory acrylic pallet is installed, then screwdrivers and sealant will be needed.
Dimensioning and material selection
After everything has been decided with the cabin installation site, you can begin to calculate the dimensions of the future structure. The main thing is that the cabin does not take up all the available space for itself, but also does not lose functionality due to its small size.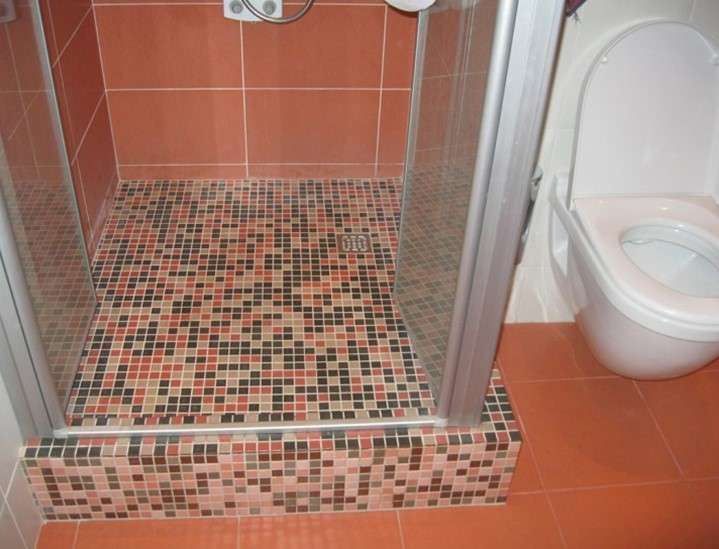
According to the standard, the shower cabin has dimensions of 900 by 900 millimeters. If the pallet is low, then the height is 2000 millimeters, and if it is deep, then the height of the structure will be 200 millimeters more.
For the construction of the cabin, you can choose materials that are available in a wide range on the market. Widely used:
- cellular polycarbonate;
- plastic panels;
- glass.
The most inexpensive way to fix these materials is aluminum profiles. For the construction of the fence, it is quite possible to take moisture-resistant drywall, which then remains only to be tiled.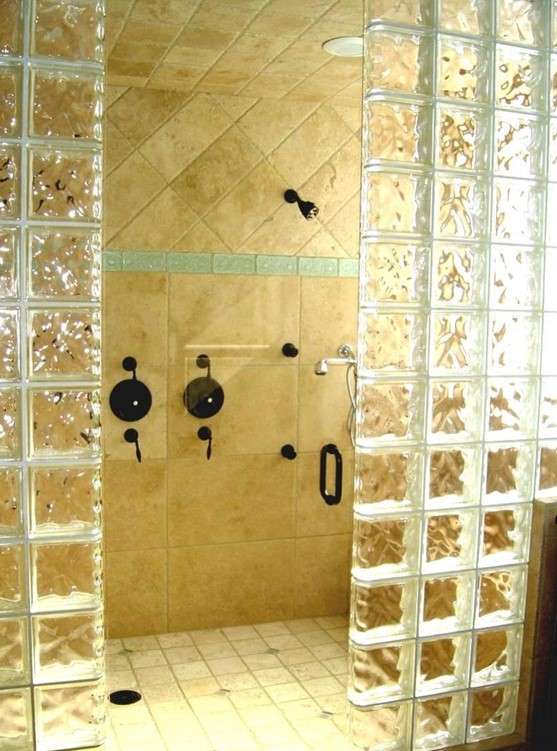
It will be budgetary and beautiful to make a fence based on glass blocks.
Do-it-yourself shower cabin stages of creation
It's time to get down to the creative process of creating the shower stall of your dreams. As mentioned above, the pallet can be made independently, or you can buy it ready-made in the store. The second option is easier to install, so let's start with it.
We use moisture-proof drywall as a material for fencing. Before you start, you need to stock up on the necessary building material. You will need:
- sheet silicate glass;
- expanded clay concrete blocks;
- brick for laying sides;
- facing tiles;
- moisture resistant tile adhesive;
- cement mortar;
- waterproof screed;
- waterproofing.
Naturally, you will need to purchase a drain and a siphon. Water must somehow get into the sewer system.
Installing the factory tray
To install the purchased pallet, you need to make a frame. It can be in the form of a metal frame or assembled from timber, which must be treated with a moisture-proof compound.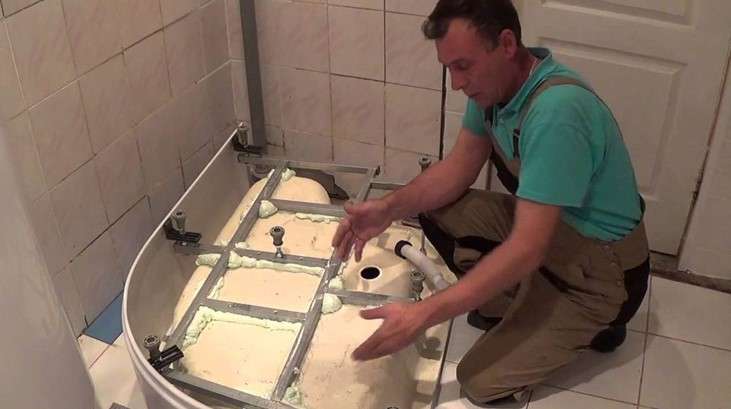
The sequence of work will be as follows:
- We fix the frame to the pallet with metal studs. We attach one of their ends to the frame supports, and the other to the holes on the edges of the pallet.
- We fasten metal beams to the studs with nuts. After their position is adjusted, they need to be countered.
- We install the pallet, adjust its height and inclination. It should slope towards the drain.
After that, we put a drain with a siphon, if they are not already installed at the factory. We process the joints and joints with sealant.
Making our own pallet
Creating your own pallet compares favorably with the fact that it will be possible to make a cabin of arbitrary sizes and shapes. This is especially true for a small bathroom. We adhere to the following work plan:
- First of all, we prepare the solution. The mixture must be diluted, adhering to the proportions indicated by the manufacturer. It would be better to use a large bucket and a mixer. Instead of a mixer, a drill with a special nozzle is suitable.
- We put the blocks on a prepared and waterproofed base. Between the blocks we lay communications and a ladder for draining water.To facilitate further maintenance, free space should be left between the blocks and communications.
- Along the edge we build sides of brick laid on its side. This will be the basis for the fence.
- The pallet is filled with a waterproof screed. Fill layer, up to about five millimeters.
We are building a corner
We use brick as a material for building walls:
- we will apply a solution on the sides and we will lay out a brick horizontally in a row on it - you need to lay it with an edge;
- in order for the masonry to be monolithic, proper dressing should be ensured - for this, the longitudinal seams lying in adjacent rows should be shifted by half a brick;
- the corner is raised to a height of seven rows - the thickness of the seam should be twelve millimeters;
- the brick is attached to the wall with steel bars - the bars are placed in the seams between the bricks and driven into the main wall.
We install a fence
Once the corner is laid out to the desired level, you can begin to put up a fence. For example, consider a silicate glass fence six millimeters thick:
- On the walls of the corner and on its upper edge we fix the corner plastic profile. Dowel plugs, as well as impact self-tapping screws, will help to securely fix it.
- The glass in the profile is fixed with a sealant. To ensure safety, the edges of the glass that are left open are chamfered.
- A curtain will be installed as a cabin door. It will be held on a stainless steel frame. The pipe will be fixed to the wall with flanges.
As you can see, everything is quite simple. With due diligence, patience and skill, the task can be dealt with quite easily and quickly. However, we have considered the simplest options, if there is a task to create a shower cabin of a more complex shape and with additional functions, this will require more time and work experience. In any case, if you do nothing, then nothing will work!
The right place for the shower
The main limitation that is imposed on the place for installing a shower cabin is the size of the room and, of course, the presence of communications for draining and supplying water. 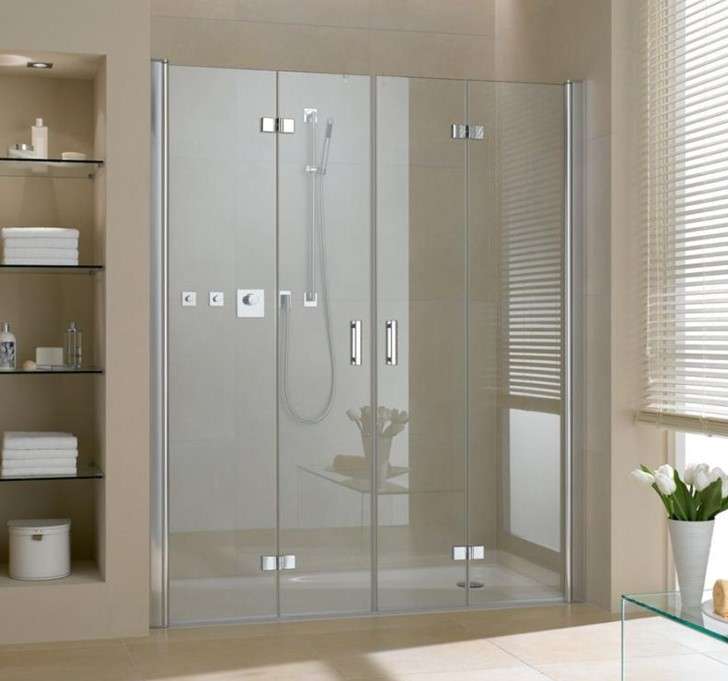
First of all, before you start making your dream a reality, you need to carry out preparatory work:
Check the plumbing and sewer system. Make sure there are no leaks, rusted areas. Evaluate the quality of connections and seals. If something is of inadequate quality, these elements should be updated.
Be sure to check the condition of the partitions: walls, ceiling and floor
Particular attention should be paid to the part of the floor in the place where it is planned to put the booth. If required, level the floor, ensure good waterproofing.