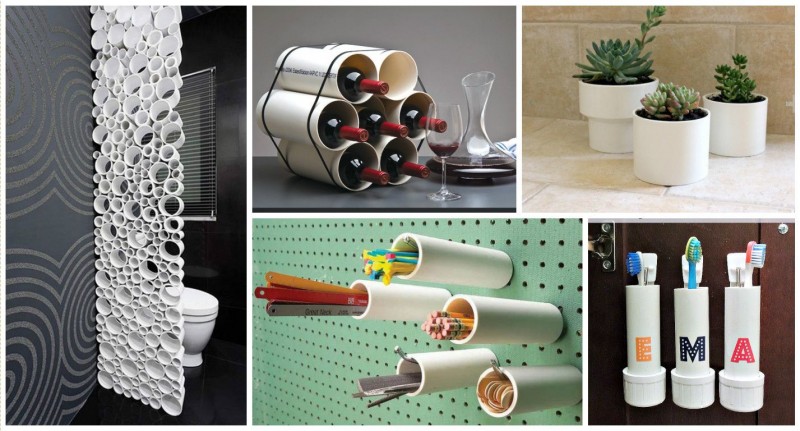
Creative crafts for the interior
From pipe segments of various diameters and lengths, you can get a lot of different household products. There are many interesting pipe crafts on the Internet, and to make them, it is enough to have basic skills in building tools.
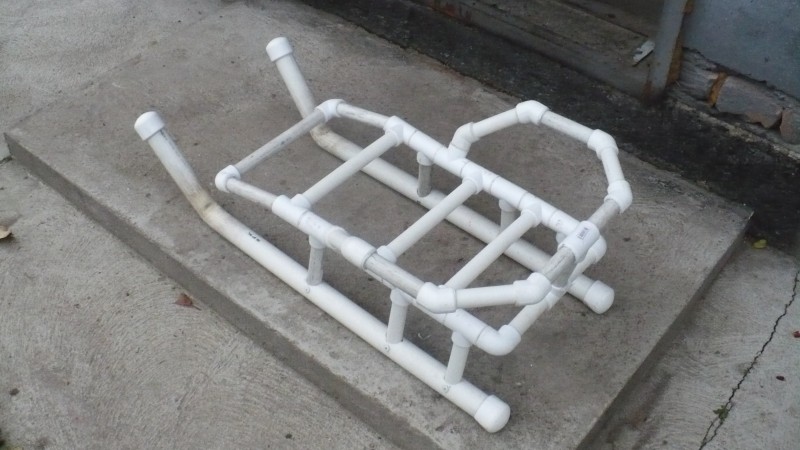
Car trunk. To make such a device, you will need plastic water pipes. It is better to choose the most reliable method of fastening them - with the help of bolts or glue.
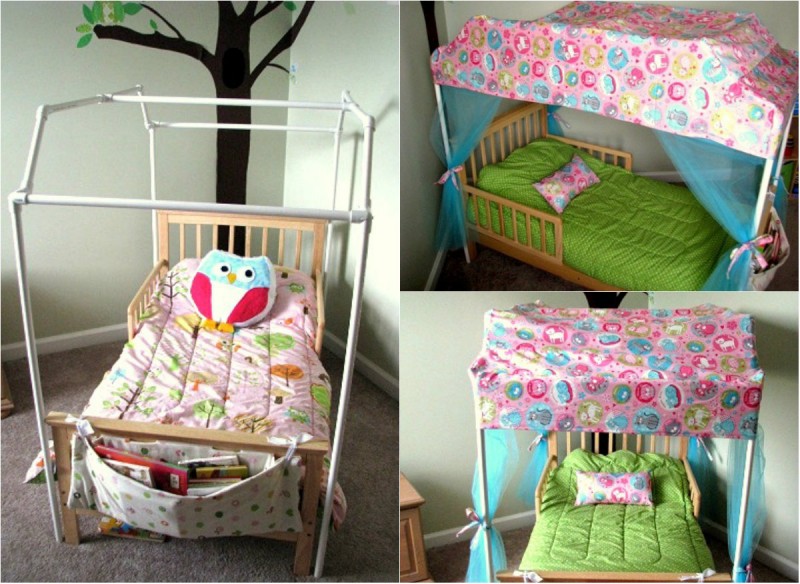
Small bed rails. The diameter of the tubes should be small, then the product will have a more aesthetic appearance. Side rails on the bed will save the child from falling at night.
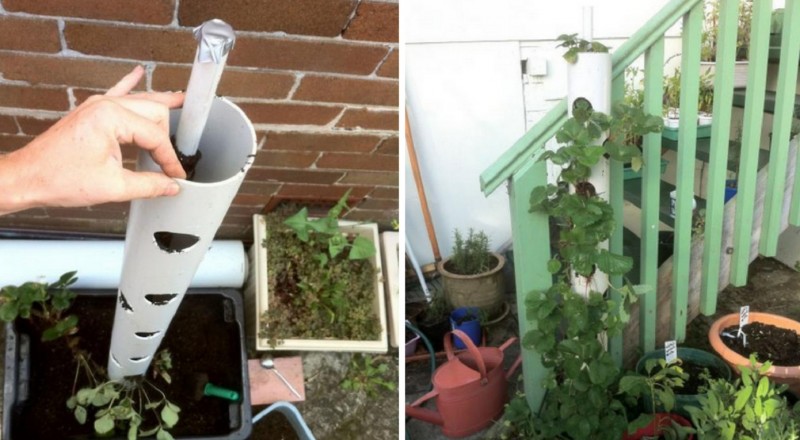
Flower pots and vases. Using a hacksaw for metal, you should cut the desired segments from plastic pipes of medium diameter. Further, their outer walls are pasted over with a beautiful film, and inside a small dish of water is placed on the bottom. The result is a vase for fresh flowers. Flower pots are made in a similar way.
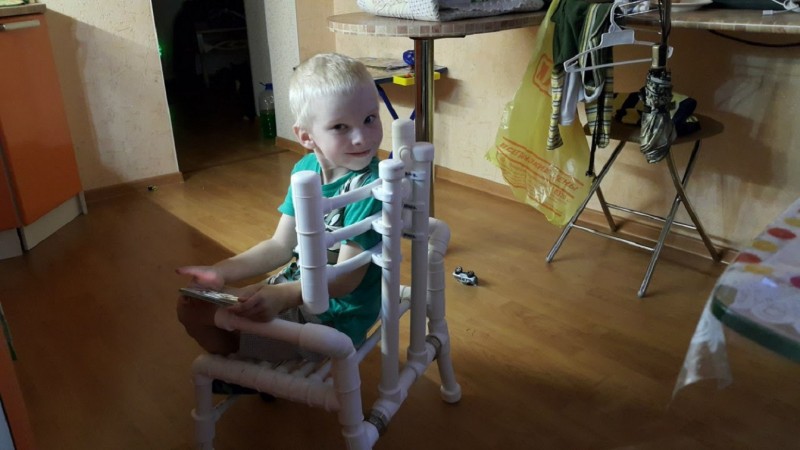
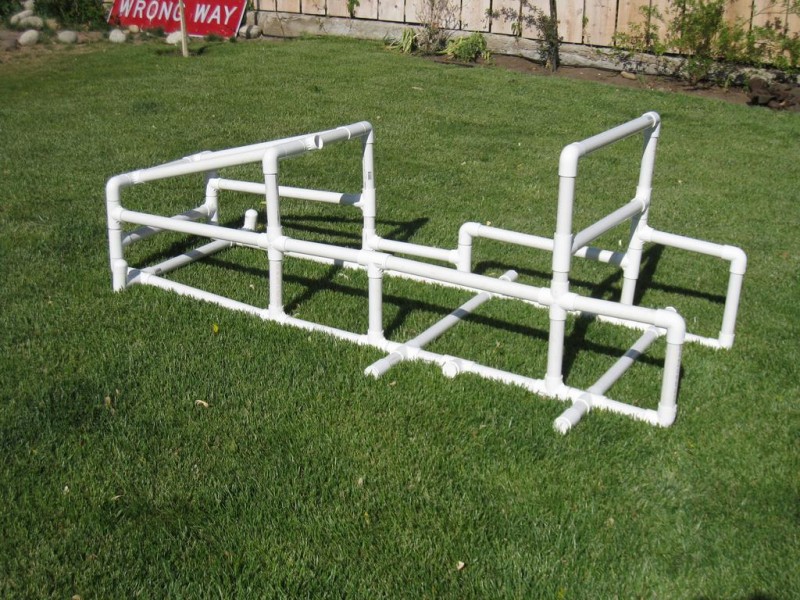
Barrier in the doorway. You will need a small diameter PVC pipe, and connecting tees. This homemade device will not allow the child to leave the nursery.
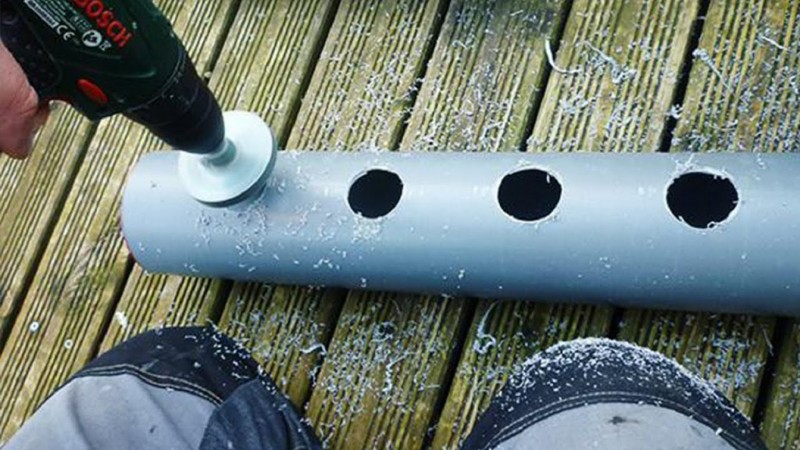
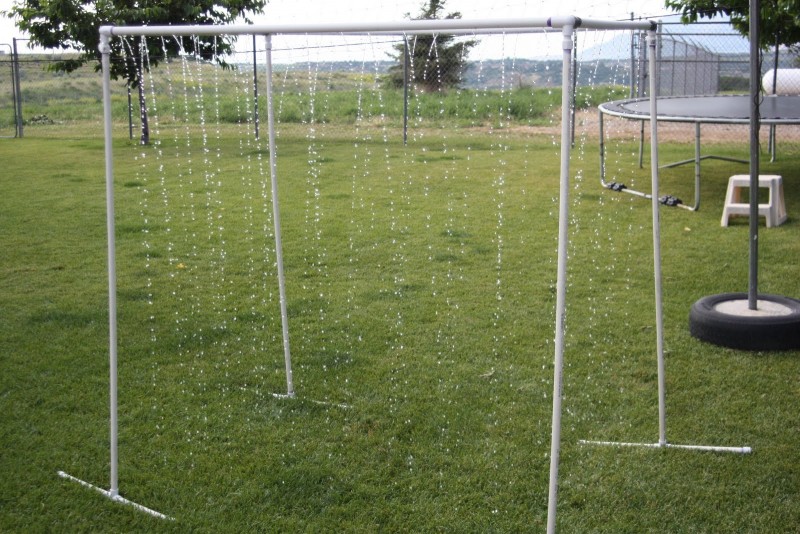
Waterfall for children. With the help of a homemade waterfall, you can carry out hardening procedures for children. The product requires a minimum of materials, and a little time for assembly. In the upper crossbar, it is necessary to drill many holes through which water will drain, and it will be supplied through the lower supports.
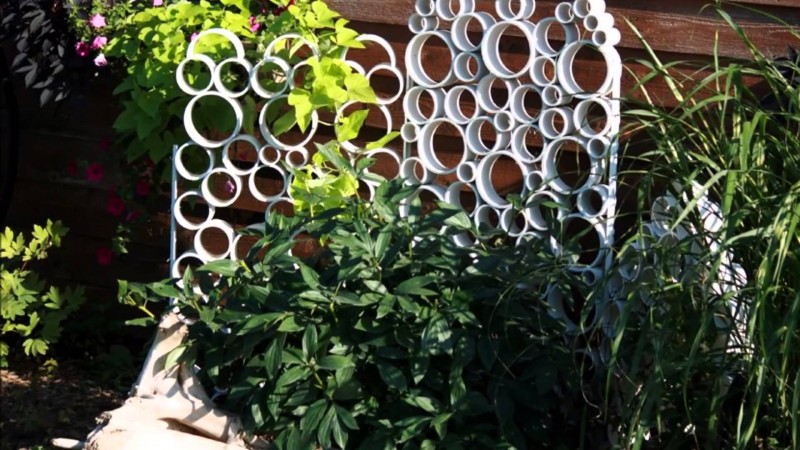
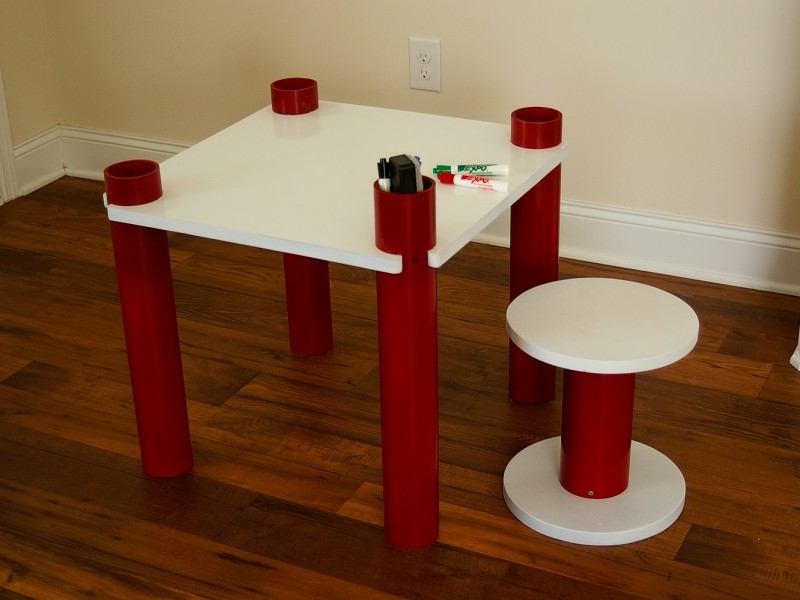
A photo of pipe crafts will help you decide on the choice of product.
Wall lamp made of flexible metal-plastic
Metal-plastic pipes have 1 significant advantage over PVC products - they bend. A light source with such a body can be turned in any direction without worrying that movement will lead to breakage.
For assembly, you will need a blank made of wood or thick plywood. A base is made from it, which is attached to the wall. In addition, you should prepare a pipe of the right size, a suitable cartridge, cable, electrical tape.
Installation instructions
First you need to draw the design of the future product, which will show how to make the main components. To work, you will need a drill, a jigsaw, a clerical knife and a few self-tapping screws.
A blank of any shape is cut from a piece of wood or thick plywood. In the place of the intended fastening of the pipe, a hole of the appropriate diameter is drilled.
For full functioning, a pipe of 20-50 cm (or more) is suitable. It is inserted into the hole in the base. Then an electric cable is passed through the pipe. On the reverse movable side, it is necessary to fix the cartridge. If necessary, you can use additional plumbing fittings.
When the flexible metal-plastic wall lamp is fully assembled, it is screwed to the wall with dowels or self-tapping screws, the LED element is installed and put into operation.
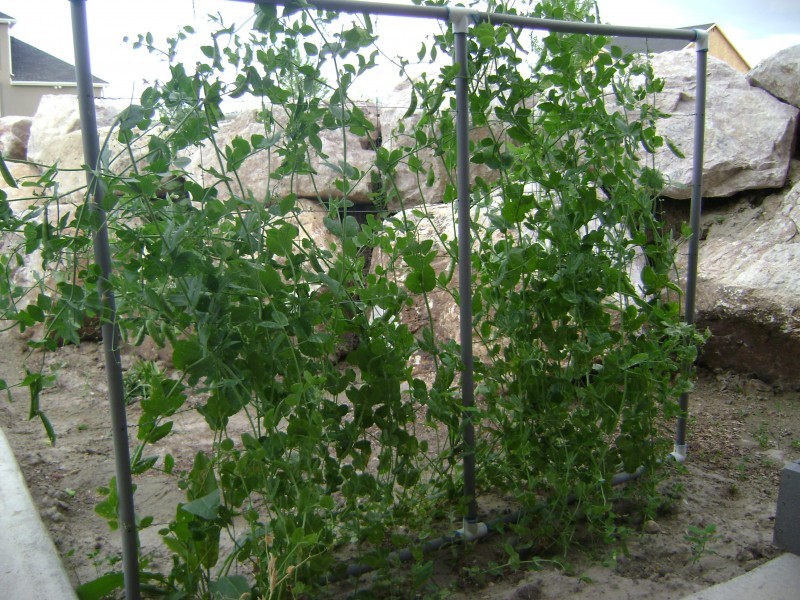
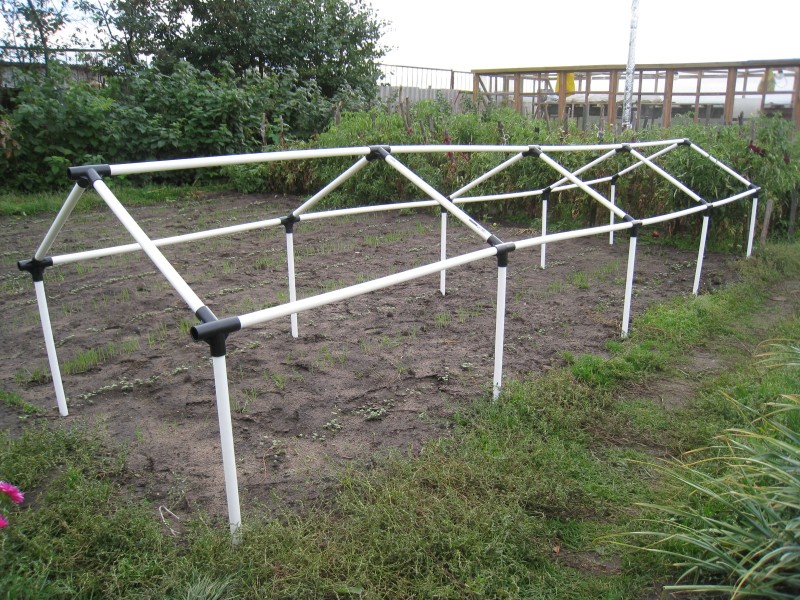
Making a greenhouse from PVC pipes
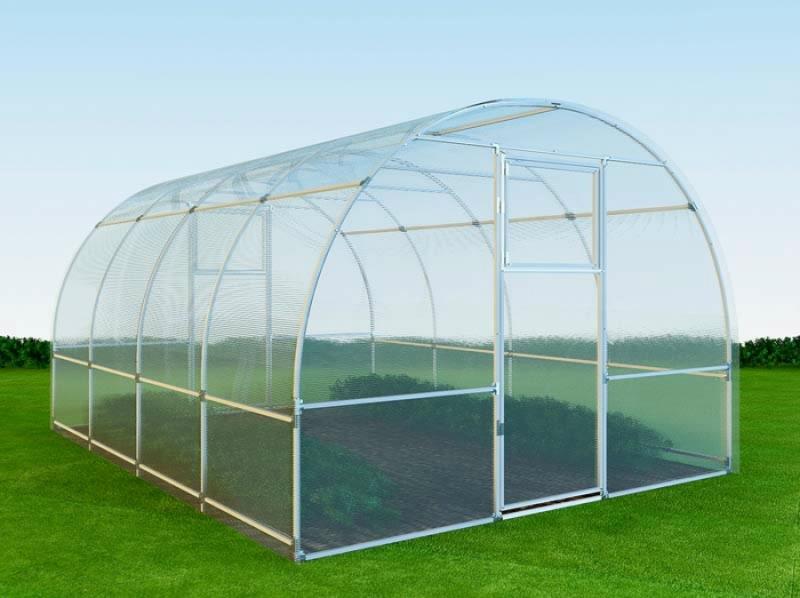
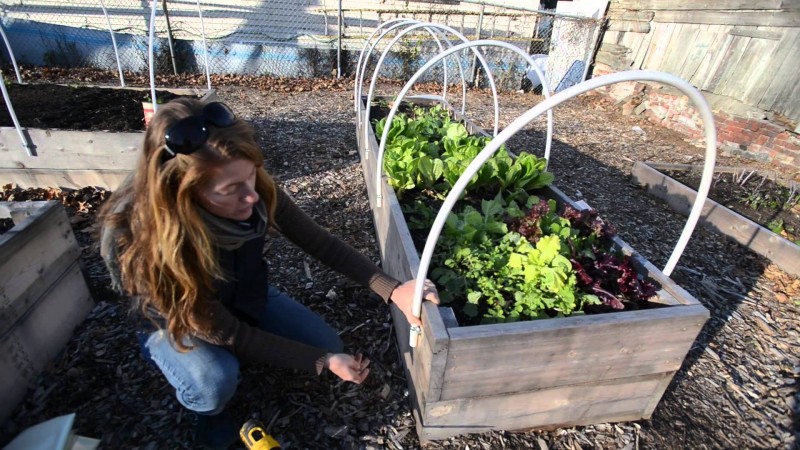
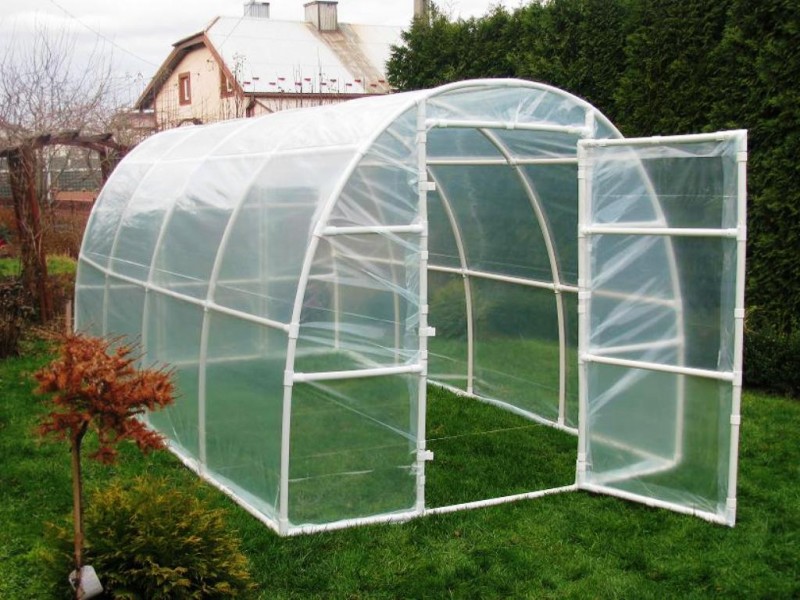
Greenhouse made of arched PVC pipes
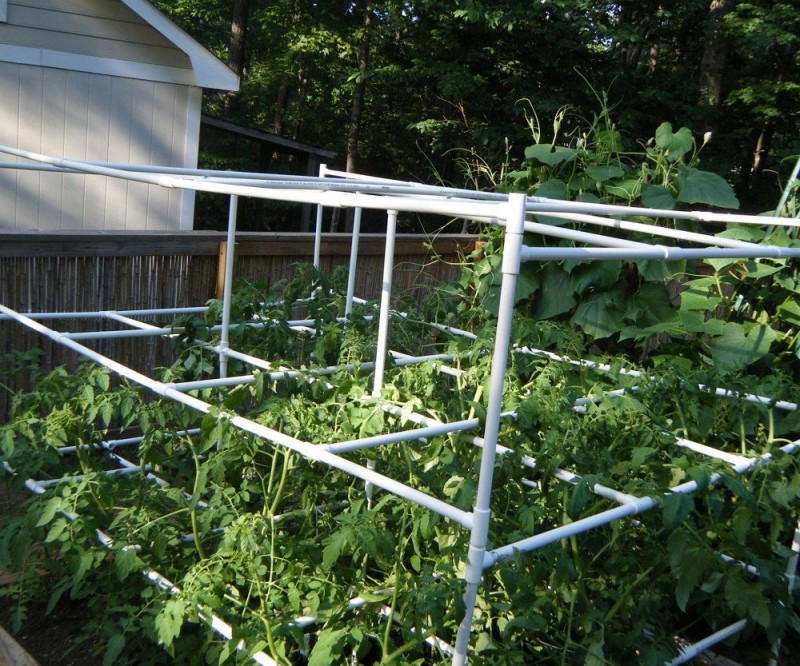
It is most expedient to make a greenhouse from PVC pipes, giving them an arched shape, since this design eliminates sagging of the film and increases its service life. A home-made greenhouse made of PVC pipes can be covered with both plastic wrap and polycarbonate. Such greenhouses are not suitable for all-season use, but they are quite suitable for early spring and late autumn cultivation of berries, vegetables and herbs.
The design of the greenhouse consists of a foundation, a frame and a cover. You can install it without a foundation, the work will not take more than 2 days.
If it is planned to cover the greenhouse with a film, then its size can be chosen arbitrarily, but if polycarbonate is used as a coating, then the size is tied to the size of polycarbonate sheets.
A polycarbonate sheet with standard dimensions of 2100x6000 mm is sold on the Russian market.
The recommended and most popular size of a homemade greenhouse is 3820 by 6300 mm. This size is convenient to manufacture and use.
Taking into account the standard dimensions of the pipe, polycarbonate sheets are assembled in a greenhouse of exactly this size so that there is less sawing work and less waste
Materials and tools
To make a PVC pipe frame, we need the following materials and tools:
- PVC pipes with an outer diameter of about 25 mm.
- Crosses and tees for pipes, including oblique tees.
- Metal strip, rebar, wooden board.
- Hacksaw for wood and metal.
- Machine for welding plastic pipes.
- Screwdriver or screwdriver.
- Hammer, screws, nails, building level and tape measure.
Manufacturing process
The step-by-step manufacturing process looks like this:
- We take boards of a suitable length with a width of about 20 cm and soak them with an antiseptic.
- We install a rectangular base of boards on a leveled piece of land, fixing it at the corners with reinforcement driven into the ground. We check the correctness of the form along the diagonal of the inner rectangle.
- We fix 7 pieces of reinforcement along the long sides of the base, with the expectation that on the surface of the earth their length is about 50-70 cm, we will fix the arcs of pipes on them, the step will be about 900 mm.
- We divide the width of the base in half, mark the middle of the board with a marker and retreat from it 400 mm in each direction, and also hammer the reinforcement from the outside of the board.
Manufacture and installation of arcs
The arcs are made by welding two pieces of pipe 300 cm long, in the middle of which a cross is inserted. This is how the internal elements are made, the external ones are connected using plastic tees.
Arcs are installed by putting on the ends of the pipe on the fittings located on two long sides of the base.
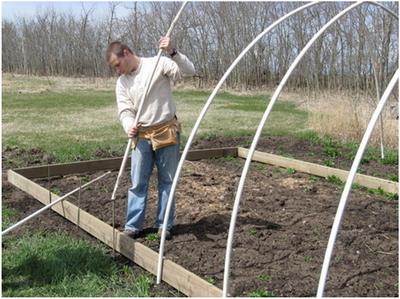
Arcs are put on reinforcement
Mounting the central stiffener
To prevent the greenhouse from warping, it is necessary to install stiffeners. The central rib is made from pipe sections of 850 mm, welded between the crosses and the central tees and fixed on a wooden base using metal clamps and self-tapping screws.
door, window
To enter the greenhouse and ventilate it, it is necessary to install a door in the end part of the greenhouse, and install a window in the opposite part.
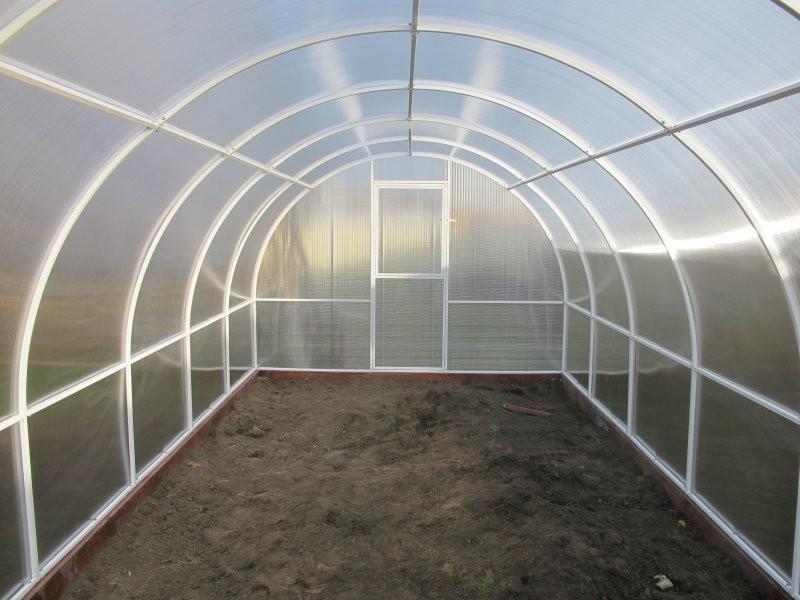
The door in the greenhouse is made in its end part
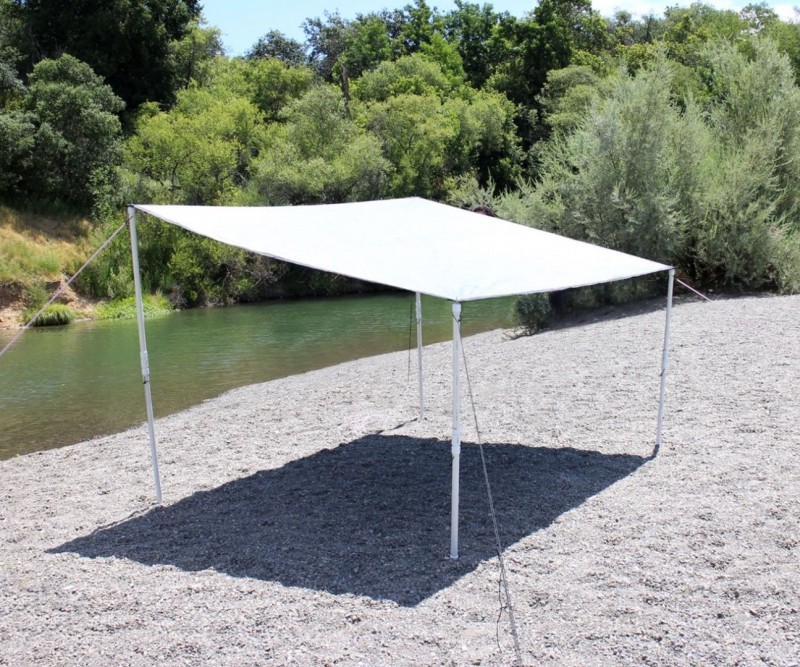
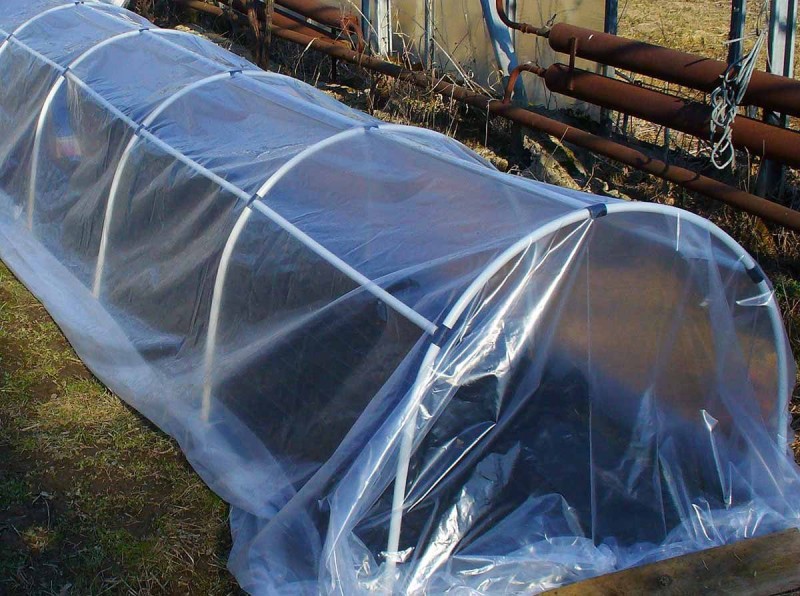
As you can see, a lot of useful things can be made from plastic pipes, by analogy with the manufacture of a greenhouse, you can make a canopy from PVC pipes to shelter a car, hay, firewood, etc.
If you started a construction or major overhaul in the house with the replacement of old pipes with new ones made of PVC, then do not rush to throw away the remnants, put them in a barn or garage, you may need them to make some homemade products of simple shapes or, on the contrary, you you want to make an exclusive thing for your beloved home.
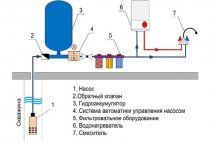
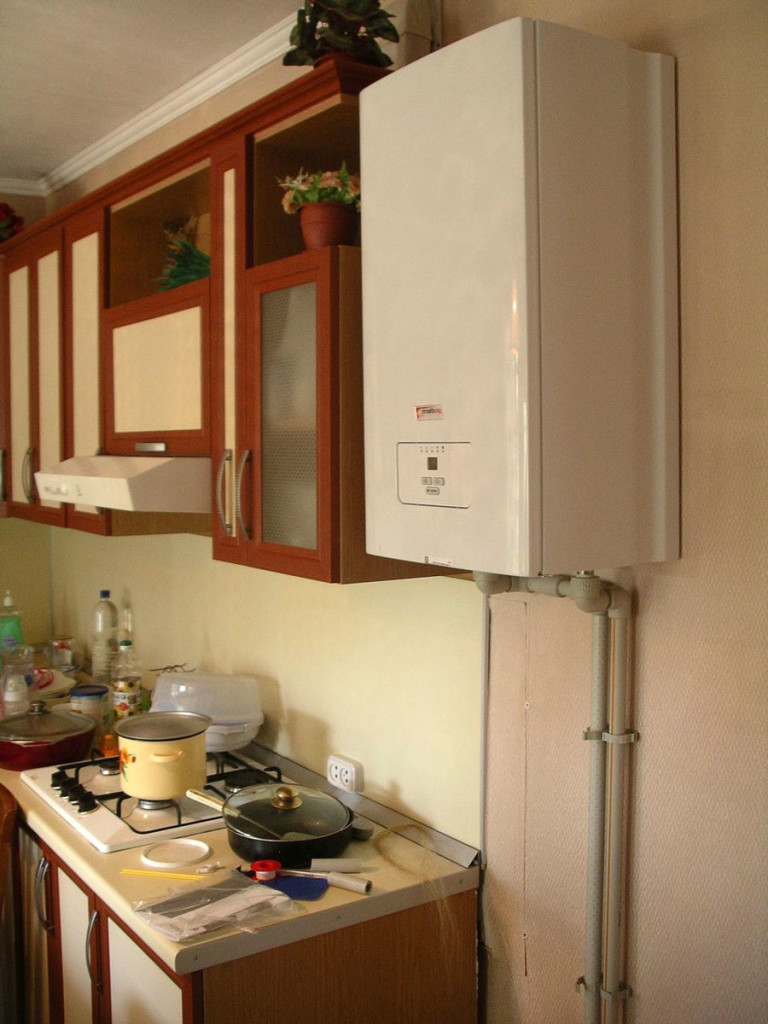
Recommendations for choosing a heating source
Before proceeding with the installation of polypropylene heating on your own, you need to select a suitable source of heating.

If there is a main gas pipeline near the house, you need to buy the appropriate equipment. The best option for arranging a heating system made of polypropylene is a modern wall-mounted boiler model with protective mechanisms, the necessary pumps and automatic control and management.
If desired, you can abandon the traditional chimney by choosing a boiler model with a closed combustion chamber and a special coaxial tube, through which oxygen will be supplied to the unit and exhaust air will be removed from it.
The air exchange pipe can be brought outside through the wall of the building, which is a much more financially profitable undertaking when compared with the arrangement of a standard type chimney.
Electricity
Electric boiler Proterm
If electricity will be used to heat the house, then it is best to buy an automated heating boiler equipped with a pump, the necessary safety equipment, and an expansion tank.
The easiest way to handle the installation of such a heating system is on your own.
solid fuel
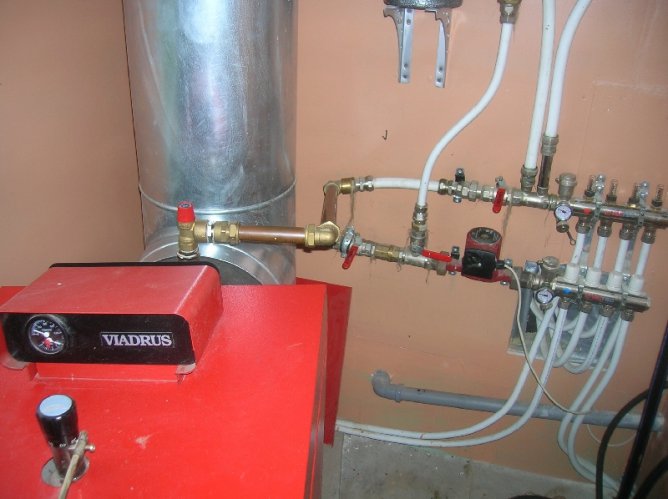
If it is planned to use various kinds of solid fuel for heating, it is necessary to correctly approach the development of a heating boiler piping scheme in order to avoid many mistakes. At the outlet of the heating unit, the temperature of the coolant reaches about 1000 degrees, which imposes a number of additional requirements for the installation of the heating system.
There are also options for arranging heating systems using other energy sources, however, in the case of installing polypropylene pipes, it is better to refrain from using them.
Plastic Tube LED Night Light
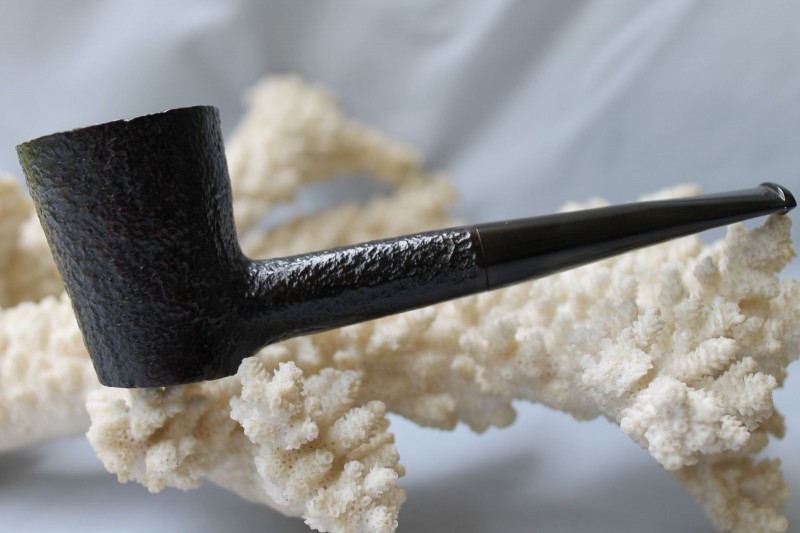
If cast iron products are more suitable for making loft-style lamps, then delicate white plastic is best used to create night lamps that fit into any interior. They are decorated with openwork patterns of any stylistic orientation, ranging from exquisite floristry to images of fairy-tale characters.
Manufacturing instructions
Making a plastic lampshade is very simple. To do this, you will need a wooden or metal base with a built-in cartridge, a piece of PVC pipe with a diameter of at least 15 cm and a length of 20-30 cm, a drill with a set of drills, a clerical knife.
To begin with, the edges of the future lampshade are ground and a pattern is applied. Then holes of different sizes are drilled along the marked lines. Oblong lines are cut with a knife. If you want to give the image more realism, you can cut off some areas of the surface, making them thinner to increase throughput. You can change the shape and bends of some sections by heating them with a building hair dryer and arching them.
After the pattern is worked out, the lampshade is attached to the base and the light bulb is screwed in. Now the whole structure is assembled and it can be connected to electricity. If desired, the plafond can be painted.
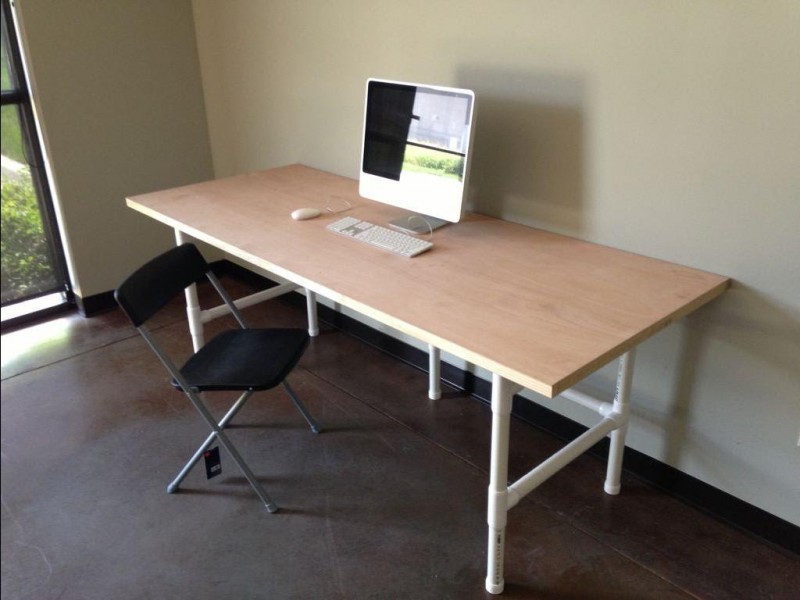
Methods for connecting pipes in structures
From plastic pipes, you can make not only convenient household items, but also pieces of furniture. In order for such a home-made product to last a long time and be reliable in operation, care must be taken to properly connect the individual segments. Since it has already been said about the connection of polypropylene pipes, we will consider the connection of only PVC pipes.
PVC plastic pipes can be connected in the following ways:
- in a bell with a rubber seal;
- with the help of an adhesive composition;
- bolts by drilling holes.
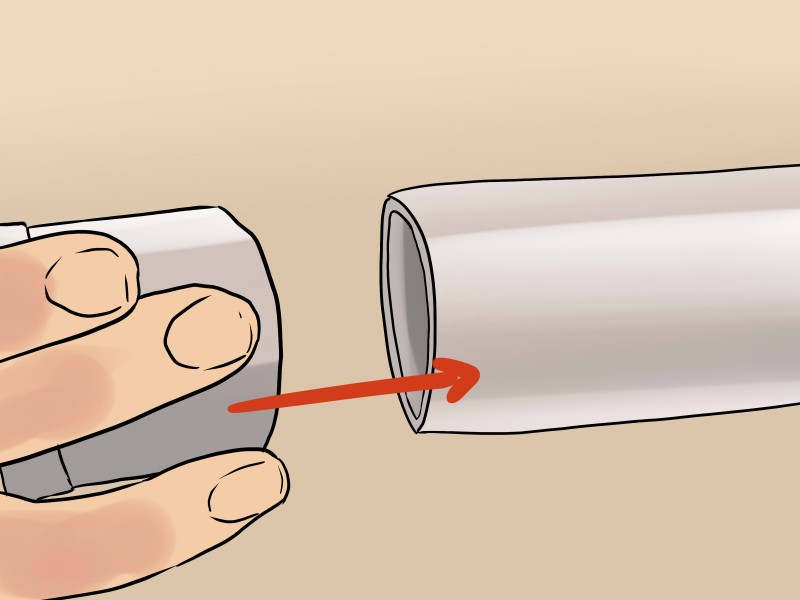
The first connection method is characterized by simplicity, but insufficient rigidity. Before connecting, it is recommended to clean the internal and external surfaces of the pipes at the joint from dust particles and treat the inserted part of the pipe with silicone grease
First, the pipe is inserted into the socket until it stops, after which it is carefully pulled back by 0.7 - 1 cm. The structures assembled in this way can later be dismantled, which is convenient for seasonal products
The second method of assembling pipes is distinguished by reliable fixation and greater labor intensity. Work on connecting parts begins with the processing of the mating surfaces of the socket and pipe with sandpaper for better adhesion. Then they must be degreased with methylene chloride. The adhesive composition is applied along the entire length of the prepared outer surface of the pipe and 2/3 of the length of the inner surface of the socket. Finally, the pipe is inserted into the socket until it stops and rotated a quarter of a turn.For gluing, it is required to press the parts for 1 minute. For good fixation, all operations to connect two segments must be carried out quickly enough. The connected elements are left for several hours until the adhesive composition dries completely.
The third method is more time consuming, as it requires marking and preparing holes, but allows you to get collapsible structures with a reliable connection.
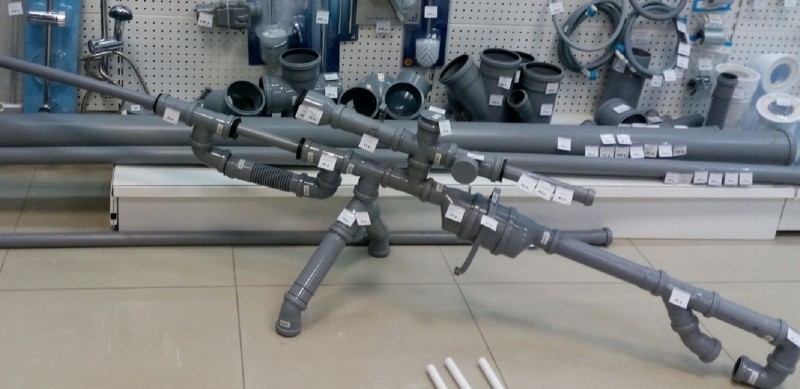
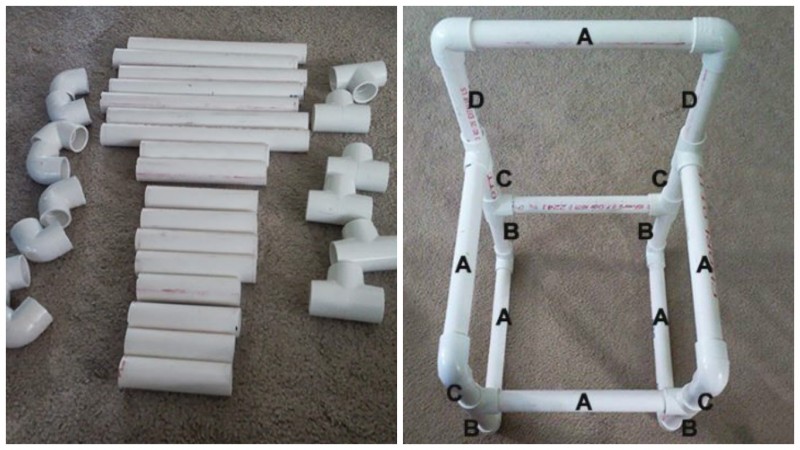
For corner joints and connecting several segments at once in one node, it is convenient to use a variety of fittings. Plastic pipe structures can be of any complexity using numerous tees and fittings. Consider useful homemade products in order of increasing complexity of execution.
Chandelier manufacturing technology
It may seem to many that when using pipes and plumbing accessories, the chandelier will look rustic and even clumsy, but this is not so. With the right approach and careful execution, they create a work of art even from such simple materials.
Assembly process
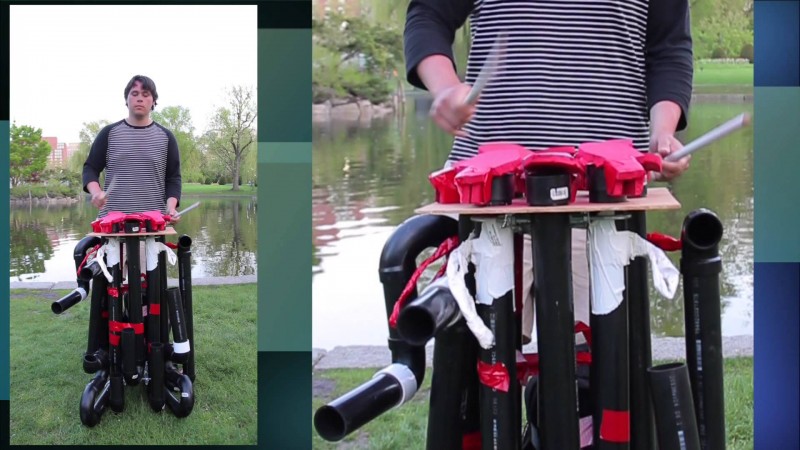
For manufacturing, you will need pieces of metal-plastic pipes, splitters, a ceiling socket, cartridges.
Watch this video on YouTube
To begin with, they think over the design of the future product and the number of lamps that will be installed. In the center of the whole structure there will be a splitter, to which pipes are connected and bent into the desired shape. Wires are passed through the resulting workpiece. Since the cord will pass through several endpoints, it is recommended to run parallel lines into each individual branch, connecting them only under the ceiling outlet, excluding breaks inside the chandelier.
Cartridges are fixed to each pipe at the ends, having previously connected them to the cable. Through a small piece, connect the outlet to the splitter. Then the electricity is connected.
The finished product is painted and supplied with shades. The main thing is that the result pleases the inhabitants of the house.
Do-it-yourself installation of polypropylene pipes

Making your own modern heating system from polypropylene is a simple task. To mount the system, it is necessary to use two main special technologies:
- socket welding. when one end of the pipe is inserted into the other, purposely expanded for this;
- sleeve welding. when special parts and couplings are used when connecting pipes.
Threaded connection is rarely used. Fittings with sockets are required for its installation. If the plan requires pipes with a wider caliber, butt welding is used. In this case, an excellent result is obtained, joints of high reliability and it does not require the use of couplings.
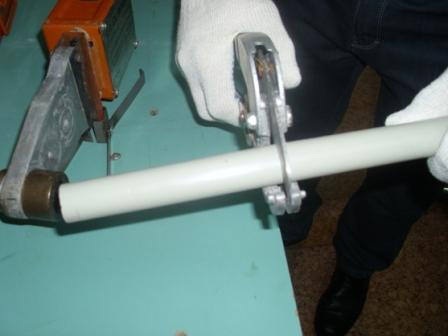
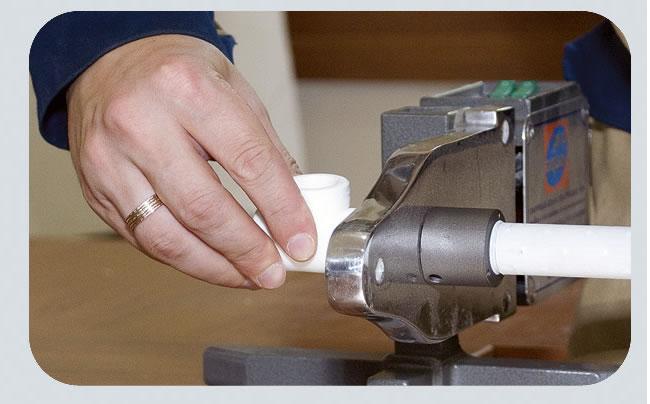
Before starting work, you should cut the pipes of the desired size. A hacksaw cannot be used for this, as it leaves burrs. The connection of polypropylene pipes or their welding is carried out with a special heating device. To do this, the pipe at one end is placed in a nozzle in size and heated to 270 degrees. After that, it is inserted into a heated clutch and held for several seconds. After cooling, the parts are securely and hermetically connected. It is worth remembering that polypropylene pipes are subject to fastening more often than from metal, because they are softer and more flexible. Fastenings are made every 50 cm.
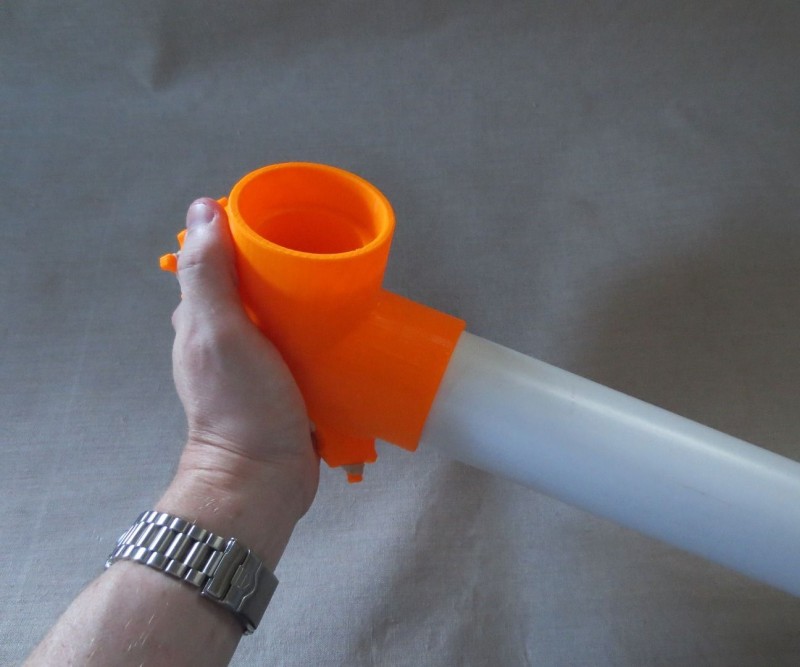
Manufacturing
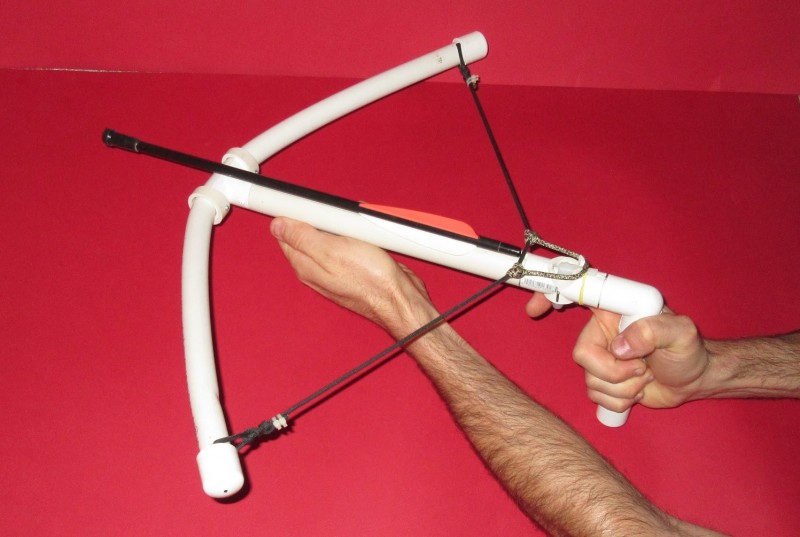
A homemade PVC pipe bow is a structure of three main parts, the central part of which is the handle, the peripheral ones are the bowstring and shoulders.
Manufacturing process:
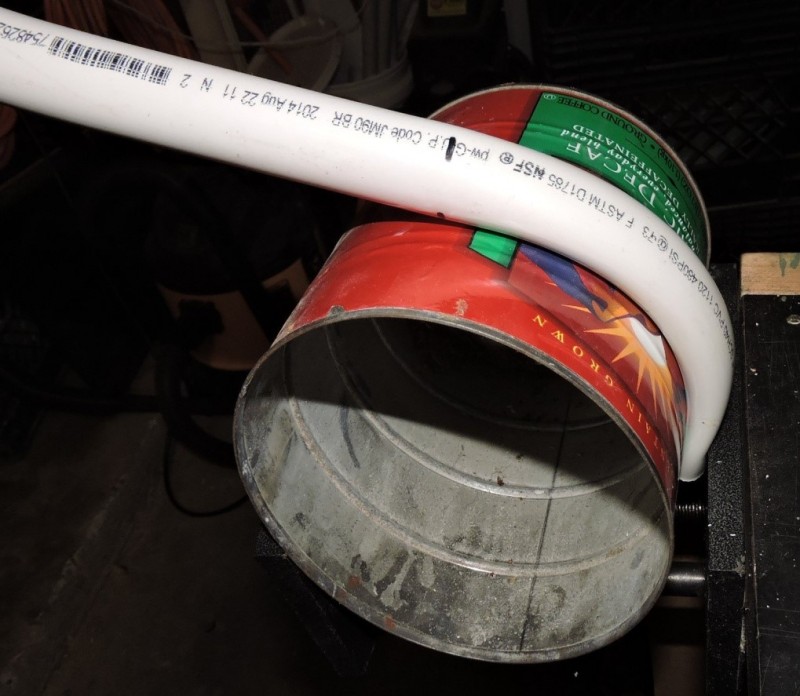
- We cut a piece of the desired length from the PVC pipe, the most common is the size of 1.5 meters. Such a bow will be convenient for an adult man and a physically developed teenager.
- Using a ruler (tape measure), we find the middle of the workpiece, mark it with a marker and measure from the middle two segments of 5 cm in both directions. This part will be the handle, before continuing, you need to try on the handle. The palm should be completely included in this gap.If your palm is wider, then you need to increase the size to the desired one, and make marks with a marker.
- Using a heating device, we heat one half of the pipe from the edge to the first mark at a temperature of about 150-180 degrees. We use foil so that the ignition of improvised means does not occur. The pipe must be heated until it becomes plastic and pliable from the action of the hand along its entire length.
- We lay the heated pipe on the table, press the molding board against it with clamps, put wooden blocks under the future onion handle.
We put wooden blocks under the future bow handle
- We wait for the time until complete cooling and the formation of the pipe. Outwardly, it should look flat at the edge with a diameter increasing towards the center. We have formed one shoulder of the bow, the second is done in a similar way. You need to try to keep the details the same.
- We also form the handle by heating and flattening in the direction perpendicular to the shoulders. You need to form it by wrapping it with a thick cloth and squeezing it with your fingers, under your palm.
- To fix the bowstring, we measure 8 cm from the edges of the shoulders on both sides, mark with a marker and make protrusions for attaching the bowstring. For this:
- We heat the end section to a pliable state;
- Bend it at an angle of about 90 degrees;
- We mark the future protrusion with a marker and a ruler and cut it out with a hacksaw;
- We process the protrusion with a file and sandpaper to remove burrs and form a finished product;
- We repeat steps 7.1 - 7.4 and make a ledge on the other shoulder.
We form the tip on which we will fix the bowstring
- We stretch the bowstring from the propylene rope. The pulling force of such a bow is 19 kg.
Advantages of polypropylene pipes
- High rates of thermal insulation. You can verify the correctness of this statement even without the presence of special devices - simply compare the surfaces of pipes made of polypropylene and metal to the touch. Polypropylene walls will be barely warm, and metal, other things being equal, can even leave a burn. This confirms that the metal is losing thermal energy.
- High resistance to chemical and corrosive influences. This contributes to a significant increase in the service life of polypropylene pipes.
Polypropylene pipes KAN-therm PP Stabi Al reinforced with aluminum
High technology. Polypropylene pipes are easy to cut and weld. To connect the elements, it is enough to have a soldering iron specially designed for this and additional connecting elements. At the same time, you can handle all the work on wiring and connecting the elements of the heating system with your own hands.
Photo crafts from PVC pipes


We also recommend viewing:
- Making a diaper cake with your own hands
- Crafts from egg trays with your own hands
- DIY crafts from birch bark
- What can be done from the constructor
- Crafts from baby food jars
- DIY matryoshka for kindergarten
- Beautiful colored paper applications
- Crafts from pumpkin and sunflower seeds
- What can be done with PVA glue
- DIY mushroom crafts
- Walnut Shell Crafts
- DIY paper angels
- The best DIY foam crafts
- Balloon figurines
- How to make a paper frog
- Simple DIY straw crafts
- Do-it-yourself volumetric paper application
- Interesting DIY wood crafts
- DIY crafts from old things
- Interesting ideas for applications from circles
- Interesting plasticine crafts for children
- The best DIY wine cork crafts
- Beautiful fabric appliqué
- Application from colored paper Cockerel
- Toilet paper roll crafts
- Application of geometric shapes for children
- Overview of hot glue craft ideas
- Do-it-yourself original crafts from wood cuts
- Funny felt toys
- Educational soft books made of felt
- Beautiful DIY crafts from socks
- Original crafts for the cement garden
- Crafts from light bulbs with your own hands
- DIY crafts from coffee beans
- We sew a phone case from felt
- What can be done from dried roses
- What can be done from old tires
- DIY original valentines
- Amazing towel figurines
- DIY felt crafts
- How to make DIY rattle toys
- DIY felt animals
- DIY felt letters
- Craft paper bunny do it yourself
- DIY crafts from scraps of fabric
- Original crafts from tin cans
- Ideas for using old fur
- Epoxy resin jewelry
- Original do-it-yourself pumpkin crafts
- DIY wallet for paper money and coins
- Charming flowers from felt do it yourself
Please repost
Heating installation guide
Soldering technology for polypropylene pipes
Pre-prepare the system wiring diagram, battery installation, boiler connection. In the future, you will perform all the necessary work in accordance with this scheme.
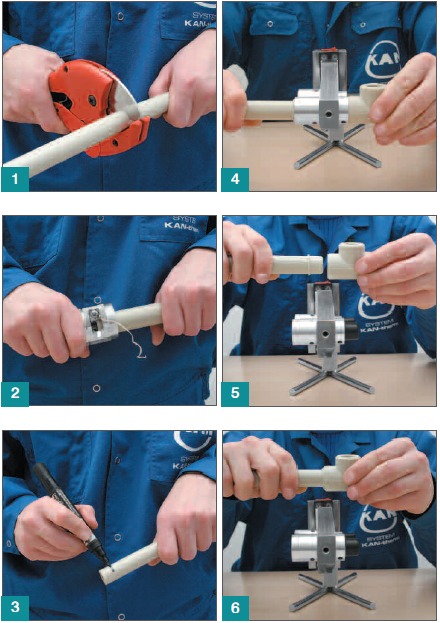
Direct work on the installation of pipes is carried out in a few simple steps.
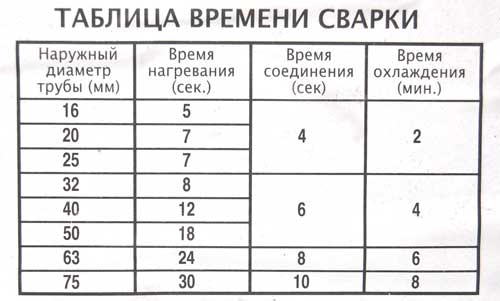
Table of welding times for polypropylene pipes
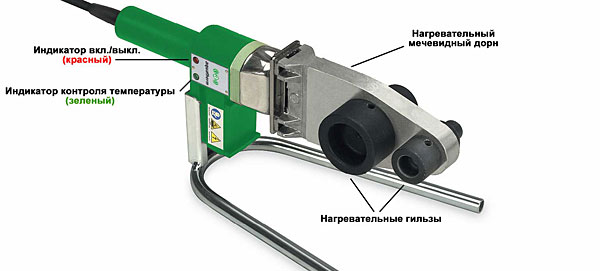
Plastic pipe soldering machine
Second step
Calculate the length of the segments of polypropylene pipes in each section of the heating system. Install the correct type of fitting.
Third step
Determine the required welding time for the joints. It depends on the diameter of the pipes used and is specified in the relevant reference literature. First bring all the elements of the heating system into the room and let them warm up to room temperature.
Fourth step
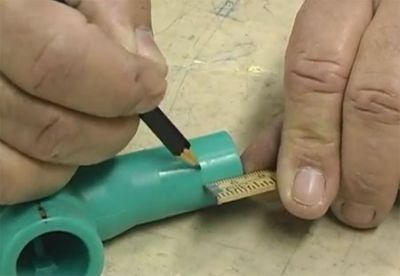
In accordance with the calculated data, mark the pipe cutting points with a marker.
Make a cut with special scissors. Cut perpendicular to the surface.
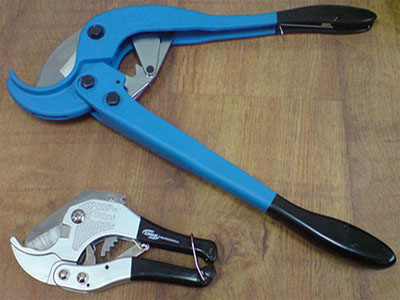
Scissors for cutting polypropylene pipes
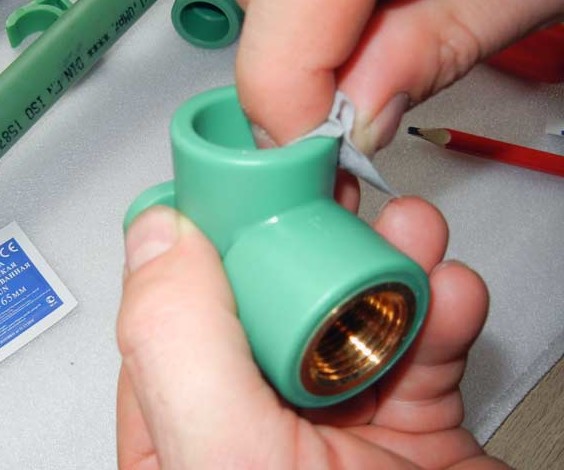
Wipe the sections with an alcohol solution, remove any dirt present with a dry cloth.
seventh step
Take a nozzle for a soldering iron that matches the diameter of the pipe section, degrease it, and then install it horizontally and let it heat up to 265 degrees.
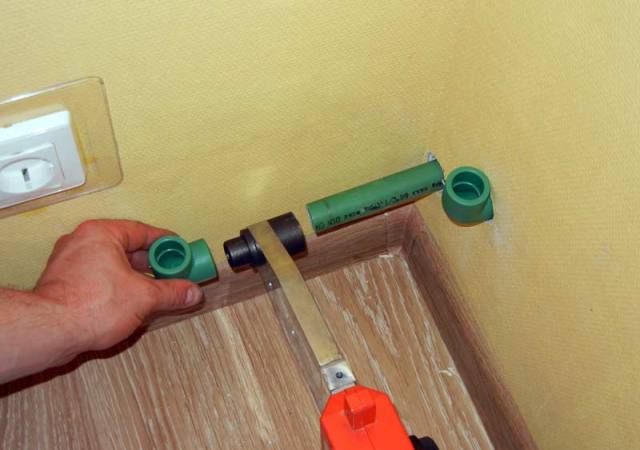
Place the pipe and fitting into the holes of the heater, select the required heating time from the table and directly heat the elements to be connected. After that, carefully remove the products, insert the pipe into the fitting and hold for the required time. It is better not to touch the connected elements until they have completely cooled down.
In a similar way, solder all the pipes of the heating system, focusing on the drawings you have. Connect pipes to the heater and radiators also according to the drawings.
To prevent the pipes from sagging in the future, ensure that they are often fastened to the surface with clips. For a polypropylene system, the optimum coolant temperature is 60 degrees.
Follow the recommendations received, and your propylene heating will serve you flawlessly for many years.