Frame installation
Installation work begins with the fact that you need to take the profiles of the desired size (cut them according to the measurements obtained) and number them. In each profile with a certain step, make holes for fasteners. Profiles are alternately attached to the lines, observing accuracy. For this, the building level is used. To create a frame, the guide profiles are made double - 2 profiles are nested into each other. Horizontal jumpers are also made double, for structural strength. Each attached part must be checked for "flatness".
The base of the frame should be reinforced with spacers - double profiles. Two spacers are placed horizontally with the same distance. To do this, the total height is divided into equal three parts. Vertical struts are placed on the sides where the racks are. It will be easier to install the upper lintels if you put a model of a cardboard washbasin.
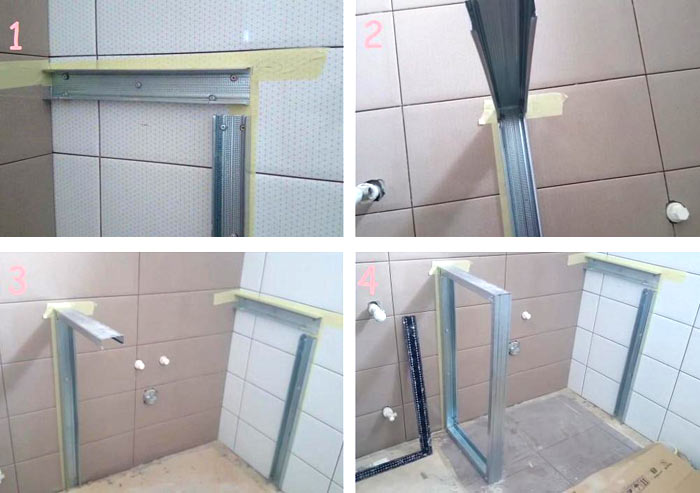 The process of assembling the frame under the drywall countertop
After the frame is completely ready, it needs to be checked again with a level for accuracy. To make a little effort by pressing on the structure, it should not “walk”, but stand clearly - this is the practicality of the countertop.
Plasterboard sheathing
For a countertop under the sink in the bathroom, you will need 2 identical blanks from GKL. They are cut to size. One blank must be attached on top of a horizontal surface, and the second under the first horizontally. After that, the prepared templates are taken under the sink, attached to the GKL from above and below, holes for the sink are carefully cut out.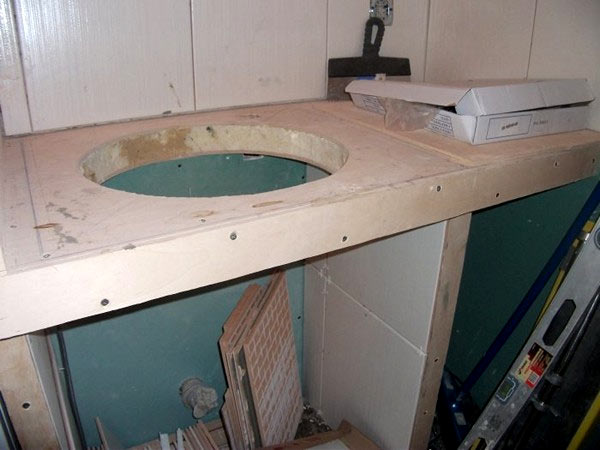 The sides require sheets cut to size. First, drywall "sits" on the glue, after which it is fixed with self-tapping screws. They are attached every 20 cm. At the bottom, the GKL should not touch the floor so as not to get wet. To do this, it must be shorter by 5 mm. The side parts are sheathed on 2 sides, on the outside and inside. The ends are sheathed with cut-out GKL strips. First, the strips are glued, and then fastened with screws.
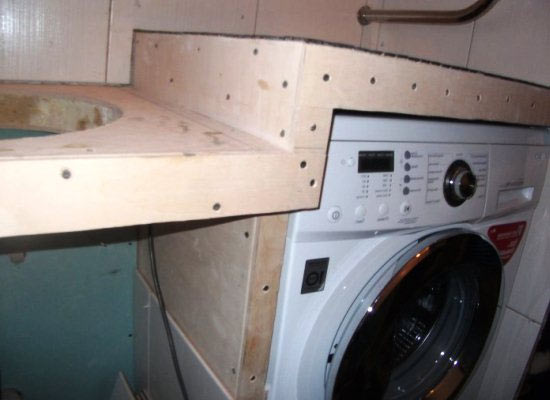 An example of plasterboard sheathing of the side parts of the countertop
After completing the plasterboard sheathing, all corners of the structure should be “sanded” with sandpaper. After that, they should be treated with a primer. The basics of installing a countertop in a bathroom combined with a bathroom can be viewed on the video.
What elements does the cabinet consist of?
Not the most time-consuming of the many options is the process of assembling the cabinet under the sink. Especially if you have a finished sketch with all the markups
When assembling a product, it is important to represent its structure as a whole and the features of the arrangement of individual parts. At the curbstone, these components are:
- the frame is constructed from wooden bars;
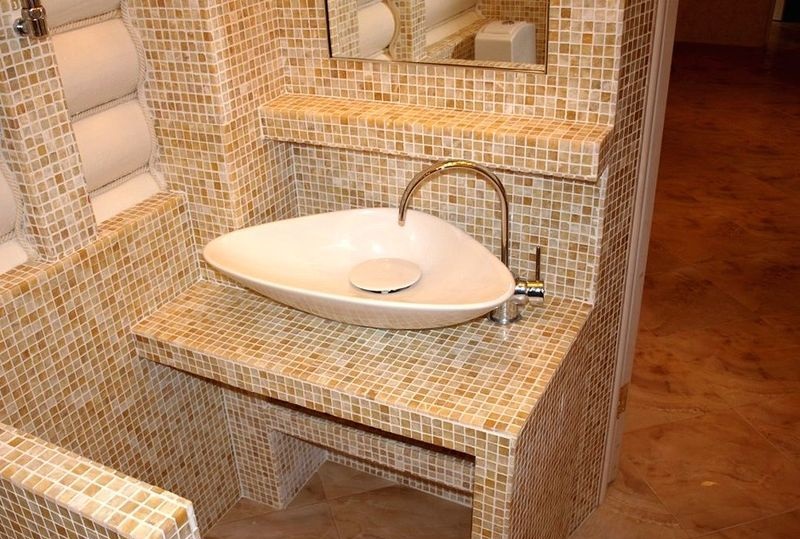
- the countertop (the upper surface of the product) is constructed both from GC panels and from wood, stone, glass, and other materials;
- end walls can be both drywall and lighter plywood, which is not particularly important in terms of load perception (they do not apply to load-bearing elements);
- additional parts of the structure - shelves, drawers, hinged components are made of a material that is most capable of perceiving a functional load (glass, plywood, drywall).

The following assembly tool is required:
- electric jigsaw;
- hammer;
- drill;
- hacksaw;
- screwdriver;
- pliers;
- sandpaper;
- screwdriver;
- pencil and tape measure;
- chisel.
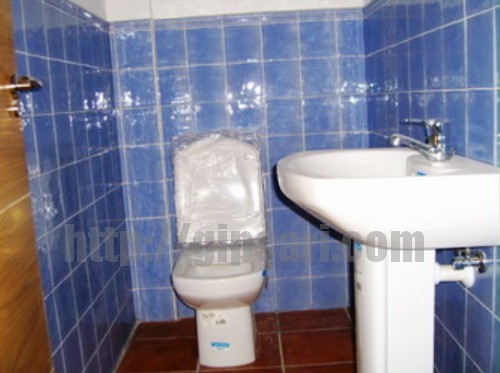
how to install a washbasin
This work can be done in different ways. But we are interested in how to do everything with the highest quality and at the lowest cost.
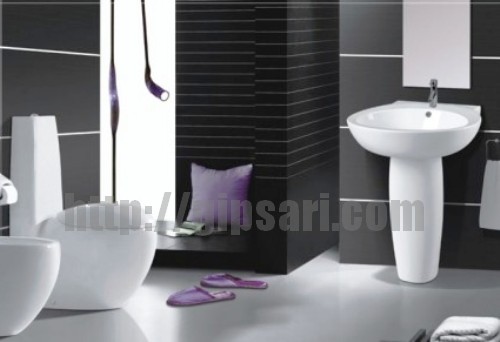
Today, there are many different designs of washbasins, large and small, with various types of floor and wall mounting, on various brackets. The easiest to install and most common is a washbasin with a footboard. It is called "tulip", at the bottom there is a ceramic leg, at the top there is a cup.
To install, we need a tool: a puncher. With this tool we will drill holes for the brackets to screw the sink. Level, to check the clear horizon of the bowl. A set of keys, 10-12 or adjustable, pliers and a screwdriver.
Everything else is connected by hand, meaning the lower part: a knee, a corrugated hose that is inserted into the sewer.
To seal the joints and seams, you will need silicone, and to twist the threads - fum tape.
We start by fixing the sink.
Put the leg in the place where it will stand, and there will be a washbasin. Place the cup on top and you will see where the mounting holes are. With a marker, where you need to make holes, make two marks. Move the cup and leg aside and drill holes. We remove the bowl and attach a faucet and a siphon to it, the assembly scheme depends on the type of the faucet with the siphon itself. On the kit you bought, a diagram of its assembly will be drawn.
We install dowels in the holes and screw the brackets. We substitute the leg, put the bowl on it, making holes in the brackets, and clamp it with nuts. For reliability and sealing, we glue the edges of the bowl and legs with silicone.
Now
connect flexible hoses to the water supply.
This can be done through spacers or using investment material. Wrap a small amount of tow on the thread, on the thread that you have external. We wind from the root of the fitting to its edge clockwise. And then we make another 3-4 turns of fum tape, and screw the hoses to the riser. Clamp with keys.
After installing the "tulbpan" and connecting hot and cold water to the tap, it is necessary to bring the siphon into the sewer.
To connect the siphon to the sewer pipe, it is best to use a corrugated hose. This will allow you to easily bend to the desired angle. It also comes in various sizes and diameters, which will allow you to easily select the desired diameter for the siphon and drain pipe.
At the end of the complete installation and installation, fill the sink with water, then open the plug,
What kind of furniture can be made from GC
A gypsum board is a kind of “sandwich”, the layers of which are gypsum with additives (core) and thick cardboard (core frame). In this case, the cardboard takes on the role of a kind of frame for the internal contents with a looser structure. The layers have a reliable adhesion to each other, which is very difficult to damage when the sheet is simply moved and even when it is installed without special application of physical effort.
Manufactured plasterboard furniture is distinguished by such qualities as practicality, reliability, durability. Arches, niches, shelves, tables, bar counters, cabinets and lockers, and even a whole kitchen set - this is not a complete list of what can be constructed from drywall sheets. At the same time, special skills are not required to assemble any of the interior elements. But the knowledge of working with drywall will come in handy.
The main thing is to have a drawing with the indicated dimensions in front of your eyes, to be able to “hold in your hands” a puncher, metal shears, a screwdriver. Well, many people know how to take measurements with a ruler and tape measure from school. Experienced craftsmen recommend starting to gain experience with drywall, choosing not the most complex pieces of furniture. These include shelves, countertops, mini-lockers. The following is a small guide to making a washbasin cabinet.
Step-by-step instructions for making countertops
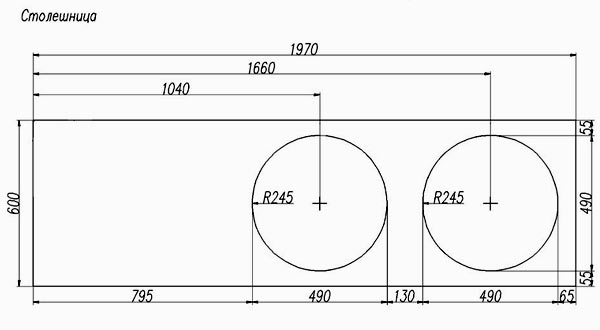 Dimensional drawing of plasterboard worktops
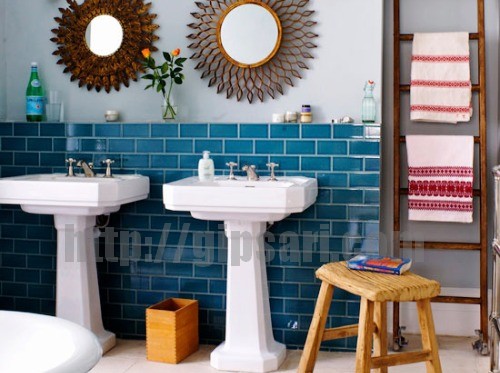
To make the installation of drywall countertops in the bathroom, you should decide where it will be located. It is most convenient to mount it around the sink, constructing a niche for a washing machine next to it. It looks modern and practical.
Necessary materials and tools
To design and install countertops in the bathroom, you need the following tools:
- A simple pencil, sheet of paper, ruler.
- Meter or tape measure.
- A set of screwdrivers of different lengths and types.
- Scissors for cutting metal.
- A set of spatulas.
- Water level.
Necessary materials:
- Moisture resistant "green" drywall.
- Metal profiles of various types.
- Self-tapping screws for various surfaces.
- Moisture-resistant putty for drywall.
- Glue.
- Reinforced tape.
- Tiles or mosaics.
- Crosses for tiles.
- Special grout.
- Silicone or other waterproof insulator.
The amount of material is calculated after the measurements taken.
Design and marking
In order to proceed with the installation of the tabletop frame, it is necessary to draw a diagram, with accurate measurements and drawing all the important points. For this you should:
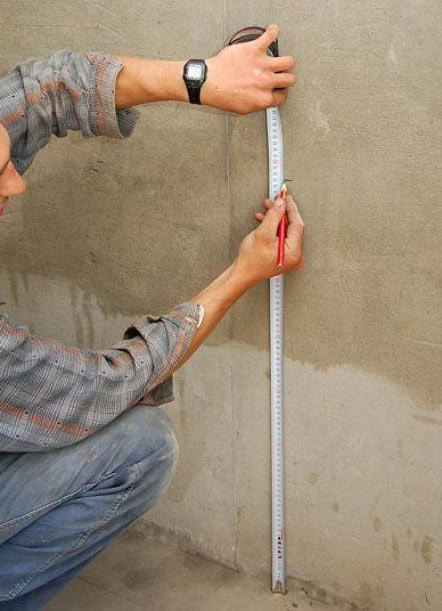
- Take a measurement of the length in the place of the future countertop.
- Calculate the height and width of the structure.
- Record all received data on paper. It is necessary to draw all the lines, indicate the places of fastenings.
 Important are the measurements of the sink, its diameter, since they are different. For a more accurate drawing, you need to make a contour along the sink on cardboard. After the drawing is fully designed, all data is transferred to the wall and floor. Lines are drawn with a level and a corner. It is required at this stage of work to observe the accuracy of the construction of the drawing. And also apply attachment points and places to strengthen the structure.