Expert answers
Nikita Koruzhenets:
You can buy cold welding for 30 rubles at any hardware store and fix it. After 40 minutes, you can use the sink again
Benjamin Glonty:
Of course you can! buy a new one and the leak will be gone.
Alexander Bakushev:
crap welding, 15 minute US auto epoxy!
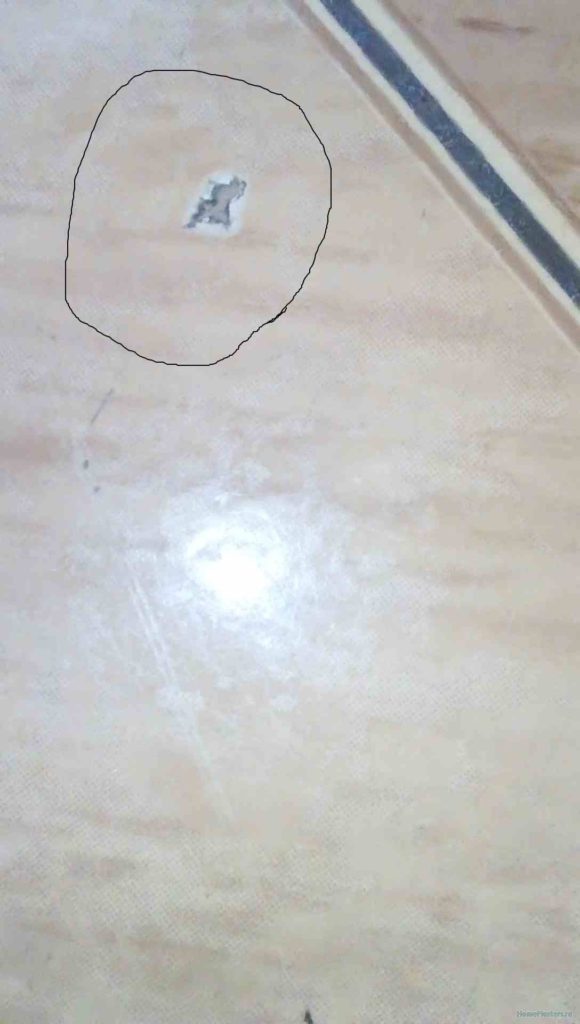
gonzalez:
Wow! AS? ! Can you crack this sink?
Oleg:
epoxy adhesive. it is possible with a filler under color of a sink. just glue the crack with masking tape from the bottom and top, then cut through the top along the crack and fill it with glue after setting, clean it and remove the tape. so you don't stain the rest of the sink.
Val Franco:
I have a repair kit in my garage. Pickup, free. Well, seriously, turn to the people who make granite and all sorts of tops for kitchens. They are aware... Or buy an epoxy grout to match the color of the sink, it is Oleg's best answer ... Everything is written there ...
HE T0T K0T:
Change. You don't glue broken cymbals
Andrey:
you need to see this in order to give advice, maybe a sealant, moisture-resistant grout, and so oneeeeee
Bolshevik cats:
Grout, ceramic restoration enamel, epoxy enamel, tile replacement. And your tile will not fall off if glued with good glue.
Angela Kasyanova:
Seams can be sealed with grout. Coat the joints of the tiles with a colorless finish to prevent moisture from penetrating under the tiles.
I WILL NOT GIVE UP TO DRINK BUT I WILL BE SMOKING:
call a professional and he will replace the cracks when laying tiles, if the tile is not of very high quality, the master seems to be too lazy to change or did not notice, although I tend to think that I was too lazy
Druid:
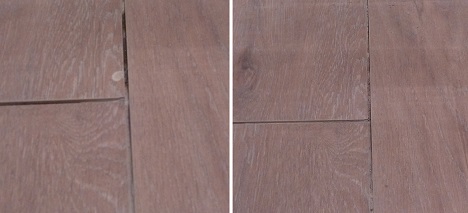
Such cracks do not appear on their own, but as a result of strong blows with a rubber hammer when laying tiles, that is, the master “tried”. If you want it to be durable, then you need to carefully knock out this tile with a puncher and put a new one in its place. There won't be much dirt.
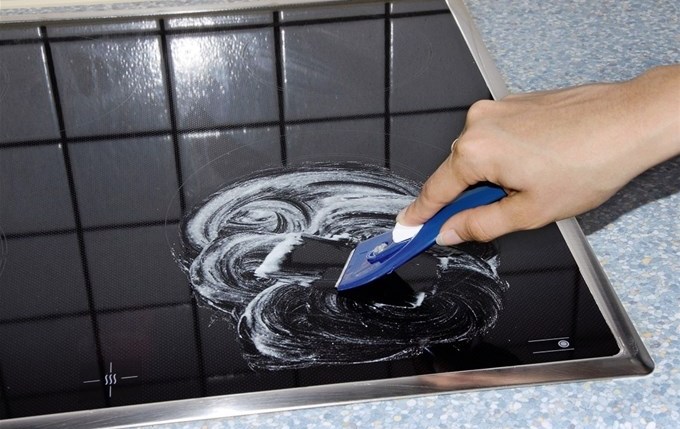
Features of glass-ceramic stoves
One of the latest achievements in the field of household kitchen appliances has become electric stoves with a smooth glass surface and with burners marked on it. Glass-ceramic hobs are more expensive than conventional electric cooktops, but their high cost is offset by lower energy costs during their operation. Savings are achieved due to the increased thermal conductivity of glass ceramics, due to which the burner heats up instantly, and the heat generated is quickly transferred to the pan.
In addition, glass-ceramic stoves have a number of advantages compared to conventional electric stoves:
- Little inertia. The glass-ceramic surface quickly heats up and cools down just as quickly when the heating intensity changes, providing high control sensitivity.
- High efficiency. The heat from the burners is practically not transferred in the horizontal direction, so all the energy is spent only on heating the dishes.
- Flexibility of customization. In many models of stoves, it is possible to change the size and shape of the heating zone of the burner, which allows you to evenly heat various non-standard types of dishes. Automatic power reduction and shutdown modes may also be available.
Best Answers
Marousel:
I usually restore such small defects with ordinary nail polish. Rummage around in your wife's makeup bag, pick up a varnish that is similar in color, and make one stroke with a brush over the chip. This will help, unless, of course, there are sharp edges that you can get hurt on. Then you need to remove them first.
Milli Seven:
Pick a color, even gouache, coffee, tea, wood stain. Then parquet varnish.Apply layer after layer (cover with a box until it dries, from dust). When equal to the main surface, sand with zero, then burnish with suede. Apparently it won't be for long. Do not fill in one time, it is in layers through drying.
Vasina's faith:
And they didn’t try grout for tiles if there is a chip, and then you can use colorless nail polish, or change the tile if there is a spare, then there are no problems.
User deleted:
gently, with a chisel, break the tile, then pull it out in parts, buy exactly the same in the store, clean out all the mortar and put in a new one, you must always buy with a margin of 0.3-0.5 square
If the tile is broken
If one tile is split for any reason, it must be removed. The seams around the damaged tile are pre-cleaned, after which it is chipped off by prying with a spatula or other tool that is convenient in this case.
If the tile does not want to lag behind the wall, the trowel can be helped with a small hammer, tapping the tile obliquely. However, you must be careful not to damage adjacent tiles.
After that, the space under the damaged tile is cleaned of mortar and a sufficient amount of epoxy adhesive is applied. As for the tile itself, you first need to glue it with epoxy glue, and then install it in its place and press it well.
The tile will be glued and installed in its place. Now it needs to be restored. Restoration of chips and scratches can be carried out in different ways.
Porcelain stoneware and artificial stone
To repair cracks and chips in products made of artificial stone and porcelain stoneware, there are many options for special polyester adhesive-mastics - transparent, colored. Mastics can be fast-setting, which fully harden in 5-6 minutes.
Algorithm for removing chips and cracks:
- Clean the chip from dirt and dust, degrease*.
- Dry. It is better to use a hair dryer - if you wipe it with a rag, the villi may remain on the chip.
- Mix the composition of the glue-mastic according to the instructions (ready-made compositions can be sold).
- Apply putty, but remember - it dries out, so let it be “with a slide”. Within reason, of course.
- Allow time to dry and harden the mastic.
- Sand with a grinder (or by hand) with grit p220, then p2000.
- Polish with GOI paste (or other polishing paste) and a soft cloth, such as flannel.
Epoxy resin is also used to repair sinks and sinks made of artificial stone. The principle of operation is the same as with glue-mastic.
Material of poor or inadequate quality
Incorrectly selected material is another reason that will soon return to repair. The choice of tile adhesive must be approached carefully, because it is he who is the link between the base and the finish coating.
For example, when buying even the highest quality glue on the market, you need to pay attention to the date of its manufacture (in large industries, bags are always marked with a date accurate to the second)
After all, if he lay the season in the rain, then he probably lost his quality properties. The same will happen if you store pre-purchased material in a damp place. When purchasing a tile, you need to take an interest in its moisture resistance. There is a tile not intended for the bathroom.
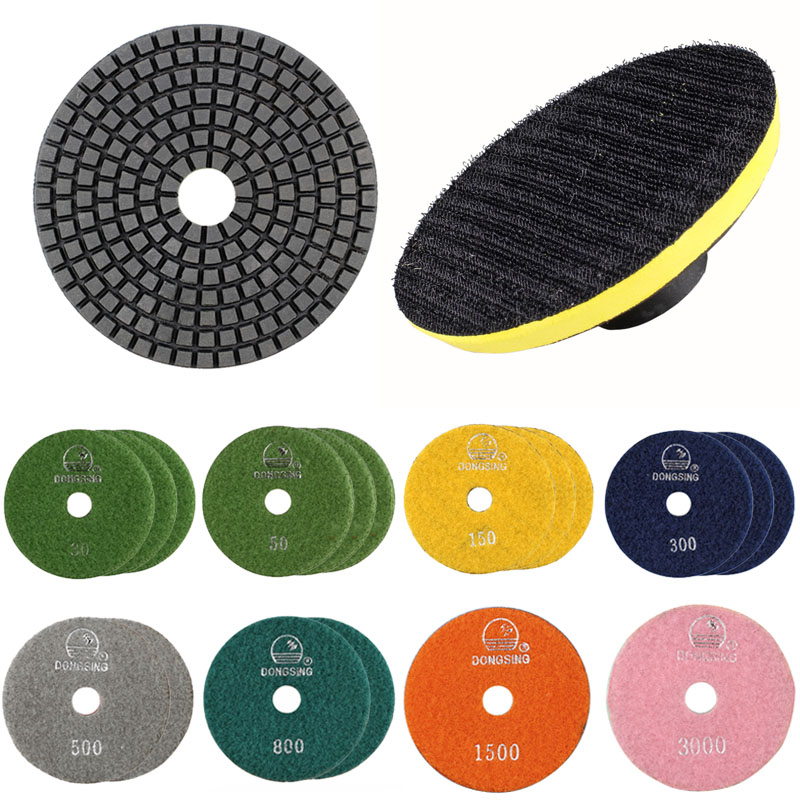
Polishing porcelain tiles on the floor

To restore the original brilliance of glazed or high-gloss porcelain stoneware floors, cleaning products alone are not enough. When walking on the floor, by means of the smallest grains of sand and other solid debris, a lot of tiny scratches form on the decorative surface, into which dust and other contaminants accumulate. As a result, the porcelain stoneware flooring becomes dull, and ordinary washing and cleaning are not effective.In this case, the problem is solved by applying porcelain stoneware polishing with your own hands or by hiring professionals who will restore the floor to its former shine with the help of specialized equipment.
Tools and materials for polishing
When it comes to the restoration of large floors, lined with artificial stone, professional polishing tools are indispensable. This type of equipment includes electric driven floor polishers, which are characterized by high productivity. But a professional tool for polishing porcelain stoneware floors costs a lot, so it is not rational to purchase it for private use. If you need to polish a ceramic surface of a small area at home, it is better and cheaper to use a tool suitable for the working volume.

What do homeowners use when polishing glossy porcelain stoneware, for example? There are two ways to solve the problem. The first is applicable if the area of the surface to be polished is not at all large. Then the issue is solved by using hand tools and special polishing products produced by various manufacturers.
When it is necessary to restore the appearance of the porcelain stoneware coating on a surface of 4-5 m2 or more, it is better to use an affordable, moreover, available in almost every home power tool - an angle grinder, better known as a grinder. For this versatile tool, a variety of nozzles are available, including for polishing surfaces from various materials. For polishing porcelain stoneware and smooth surfaces made of natural stone, felt discs are used, which are put on directly on the working axis of the tool. Another option is a replaceable felt nozzle, attached according to the Velcro principle to a universal disk mount, which, in turn, is fixed on the rotating angle grinder axle.
In addition to the right tool, for a full-fledged polishing of a porcelain stoneware surface, you will need special compounds designed for this purpose. For example, when polishing glossy porcelain stoneware, various products based on liquid wax are used. After treatment with such a composition, not only the former attractiveness and luster of the ceramic floor cladding is restored, but also the anti-slip properties of the smooth surface are imparted. In rooms where there is contact with water, or simply high humidity, it is advisable to use a paste for polishing porcelain stoneware flooring, which contains water-repellent silicone.
Polishing technology

It is clear that there is a difference between polishing a tiled floor surface with a porcelain stoneware diamond sponge by hand and using a professional polishing floor polisher. But the sequence of working stages when using tools and mechanisms of various complexity and productivity does not change significantly. Polishing a porcelain stoneware floor goes like this.
- The surface is thoroughly cleaned of dirt, dust, solid particles. For this, dry and wet cleaning of the floor is used.
- A porcelain stoneware polishing agent is applied to the cladding in a thin layer, evenly and without gaps. Depending on the technology used (when it comes to professional restoration of the coating), two layers of polishing agent can be applied.
- After the specialized paste has dried, the surface is mechanically polished with felt nozzles.
As a result of such restoration treatment of porcelain stoneware flooring, the coating returns to its original appearance, matte or glossy (depending on the type of porcelain stoneware used in the finishing).In addition to external attractiveness, polishing protects the decorative surface from mechanical and chemical damage, exposure to excess moisture, thereby extending the service life of the facing material.
Sink restoration, crack masking
Ceramics tend to crack, impacts are especially dangerous for it, or such a process occurs over time. That's when the question arises, how to close a crack in a ceramic sink and give it a neat look.
Often used for such work are specially designed sealants that are water resistant. You should purchase a good quality composition suitable for a ceramic sink in a store and simply cover the cracks with it.
Naturally, you should first clean the place of repair from rust, mold and grease, and dry it. Now you know exactly how to close the crack and you can safely go to the store for materials.
Repair of a chipped ceramic sink
It is possible to independently repair the chip on the sink using specialized sealants or putties. For a reliable result, you should perform the following actions:
- clean the damaged surface;
- dry the repair site;
- dilute the putty for ceramics in accordance with the instructions on the package;
- apply a bonding material (putty) to the place of the chip so that it protrudes beyond the edges (the putty will dry out);
- let the putty dry;
- clean with fine-grained sandpaper to an even and smooth state;
- paint the seam with the appropriate color, and remove excess paint from the surface with acetone.
How to drill a hole
Very often, ceramic sinks are made without a special tap hole. This happens because most modern faucets are installed on the wall near the sink.
But there are situations when the faucet needs to be built into the side of the ceramic sink, then it is advisable to watch a video on how to drill the sink.
But when it is not possible to see the whole process on the screen, we suggest that you familiarize yourself with the written version of how to drill a hole in a ceramic sink yourself.
The first step is to decide how to drill a ceramic sink, the answer is simple - with a drill. This is done not with an ordinary drill, but with a special nozzle for ceramic products.
A drill bit with a diamond core is suitable for such a case, which will allow drilling without adding water and cooling the drill itself.
The sales consultants in the store will help you choose the right crown. If everything is done correctly, then the problem will be solved.
how to drill or seal a hole.
Now it’s important not to radically change everything during repairs, but to breathe new life into old objects that have an attractive appearance. Therefore, the question may arise how to seal a ceramic sink for restoration.
There are such adhesive materials for ceramics:
- waterproof glue;
- silicone sealant;
- cold welding.
Use a hair dryer first to get rid of unwanted moisture. Now you can seal the crack (for example, with waterproof glue), leave to dry for at least four hours.
Then you should apply epoxy putty at the joints and grind the repair site with a fine-grained sandpaper.
Also watch the video with an example of the restoration of a marble sink.
Causes of damage
Glass-ceramic cooktops are strong enough to support the weight of heavy pots and pans. However, the dishes that were used for cooking on a gas stove are not suitable for these purposes. The use of pots with a thick or uneven bottom, or aluminum cookware, not only reduces the efficiency of the glass ceramic hob, but can also cause visible marks on the surface of the hob.In addition, melted plastic and sugar can spoil the appearance of the product.
If stains and dirt can still be dealt with by various means, then cracks and scratches can become a real problem. The appearance of scratches on a flat and smooth surface of the plate can be caused by:
- Using cleaners containing abrasives.
- Using metal scrapers, brushes and sharp objects to remove dirt (hard-bristled dishwashing sponges can also leave marks on a smooth surface).
- Point impact (for example, when a metal cover or a sharp object falls on the glass-ceramic surface).
- Contact with water or liquid food on a hot burner.
- Putting a pot with a wet bottom on a hot burner.
Repairing large scratches and large chips on tiles
Large chips can hardly be masked with paint. Of course, the chip and scratch will match the tone of the tile and become less noticeable, so, as a last resort, this should be done. But if possible, it is better to carry out a more overhaul, especially since it will not require anything special.
You need to stock up on alabaster, with which the tiles are restored. Alabaster can fill even the deepest scratches and cracks in tiles. If you try, you can restore the corner or edges of the tiles, which were completely repulsed. And only after that, the repaired tile is sanded with emery, and then painted with acrylic paint or paint for ceramics.
The quality of tile repair will depend entirely on how well you can pick up the paint. Ideally, the paint should be the same color and shade as the tile. This can be achieved if you use special dyes for paint, which are added to the paint in the right amount.
Guessing the ideal amount of dye is not easy, but you can conduct several experiments in an inconspicuous area, somewhere behind the furniture and choose a shade that matches the shade of the tile as closely as possible.
How to wash porcelain stoneware without scratches and damage in order to keep stone tiles safe and sound? Such material is often used for masonry in the bathroom and in the kitchen, which often raises the question of cleaning methods and products for this interior cladding component. Video footage
in the article and our advice can help you in choosing high-quality materials for regular washing and care of such a beautiful building decoration option.
To get the most out of your investment in renovations, follow these guidelines for caring for your granite tiles. This will help you find out if porcelain stoneware can be washed and what tips to follow.
Water
It is necessary to use only filtered and boiled water for this procedure. It will not leave streaks, as is the case with chlorinated tap water. Rags should be soft, without hard sides, and after washing, the countertop should be dried well with a hair dryer or maximum ventilation.
Plaque
To get rid of plaque, wipe the countertop with distilled water. Then you can remove mineral salts and stains with a dry towel. You can apply the method an unlimited number of times.
Tile
If food particles or fumes get on the granite tile during cooking, blot the moisture with a paper towel without smearing the residue on the surface. Abrasives will leave small scratches, which will cause oils and food to clog into cracks, making the stain bigger each time. Washing small indentations will be more difficult
Be careful with wine and chocolate - extra stains will make porcelain stoneware look dull even after cleaning
If you do not know how to wash the primer from porcelain stoneware, use soapy solutions where plain water cannot cope with pollution.By keeping it clean, it will be easier for you to remove a fresh stain than one that has lasted a week.
Means and rules for the daily care of porcelain stoneware

It is not difficult to clean porcelain stoneware floor cladding from common contaminants. It is enough to vacuum the surface, getting rid of solid particles, and then do a wet cleaning with plain water or a mild soapy solution. It is not advisable to wash the floor without first removing solid debris, especially when facing with glossy porcelain tiles - fine sand in the dust can make small scratches on the surface of the tile, which will eventually lead to the need to grind porcelain tiles. Matte artificial stone is the least susceptible to mechanical damage and the effects of chemically active substances, therefore, with such a cladding, the choice of means and methods for cleaning the surface is not limited.
Often there are problems with cleaning structured porcelain stoneware, which has a relief decorative surface, due to which some substances eat into the tile, and it can be difficult to wash the resulting stain. This is where specialized cleaning products designed to clean dirt on porcelain stoneware cladding will help. The most famous and reputed manufacturer of such products is the German company Glutoklin (Pufas), which offers a line of substances for cleaning porcelain stoneware cladding from various contaminants. Here are the types of dirt on the tile surface that this brand has special products to combat:
- wax, grease, oil stains;
- adhering residues of cement and tile grout;
- stains from organic dyes;
- rust streaks.
In addition, Glutoklin offers a variety of products for cleaning and caring for porcelain stoneware from detergents for daily cleaning to all kinds of protective impregnations for artificial stone.
Methods for the restoration of floor porcelain tiles

Regular proper care of the ceramic flooring and the use of protective compounds significantly prolong the wear of the floor cladding. But long-term operation still inevitably leads to the need to restore the surface. The main method of restoring a porcelain stoneware floor surface is deep grinding of the facing material. In small areas, it is possible to grind porcelain stoneware with your own hands, although the preference is for the services of professionals who are able to give the flooring its original appearance with the help of specialized equipment.
Grinding
A feature of many types of porcelain stoneware is the deep structure of the substance of the tile. This makes it possible to grind the top layer of the coating (up to 0.5 mm) without changing the decorative texture. Complete restoration of porcelain stoneware, carried out by professional teams, consists of several successive stages.
- Sealing large damage, removing grout and filling the joints with fresh mortar.
- Mechanical leveling of the floor surface with the removal of significant irregularities (large diamond abrasive is used).
- Fine grinding of a porcelain stoneware coating, with each subsequent pass, the grain size of the abrasive decreases.
- Surface polishing with the use of an abrasive fine-grained paste, during which small scratches and abrasions are removed, the original color and gloss of the facing are restored.
- Treatment of ceramic granite tiles with hydrophobic compounds that repel water and increase the resistance of the material to various organic pollutants and chemically active substances.
Professional polishing of porcelain stoneware has different prices, depending on the region and the range of additional services. The cost of one of the companies are shown in the table.
The rules for operating a glass-ceramic hob include not only constant proper care and maintenance of cleanliness, but also the use of suitable utensils. Failure to comply with these rules can lead to defects that spoil its appearance. Even small scratches on a glass-ceramic hob are immediately noticeable, so if they occur, you should take immediate action.
Ways to remove scratches from glass ceramics
If cracks or deep scratches appear on the surface of the glass-ceramic plate, then you will not be able to get rid of them yourself. In this case, only specialists of the service center will be able to restore the original appearance of the product. Minor surface defects can be dealt with at home, but this will not be so easy. There are several ways to remove scratches from a ceramic plate, the choice of which depends on the nature and degree of damage.
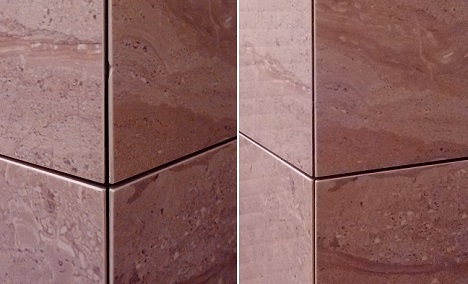
If chips and large cracks appear on the tile
, and redoing the entire finish is not rational, you can get by with repairs and restoration. It is possible to eliminate chips on the tile. The quality and invisibility of the restoration depends mainly on how carefully the work is done. There is no need to rush here. It is better to spend some time on painstaking work, but get a wonderful result.
Causes of chipping
There are several reasons that could lead to the destruction of the tiled floor. The tile is a durable material, and if the chips appeared rather quickly, it means that a mistake was made during the installation or surface preparation.
- If there are differences on the base, they must be minimized so that the thickness of the tile adhesive is the same over the entire surface. The maximum allowable layer for walls is 1 cm, and for the floor 1.5 cm. Deviation from the norm will lead to cracks.
- The tile is laid on a fresh screed or plaster. After preparing the surface for masonry, the mortar must dry completely. This will take a minimum of 5 days, depending on the humidity and temperature in the room.
- Violation of proportions when mixing the solution, all the same way to cracks. You must strictly follow the manufacturer's instructions.

You can fix a chip on the tile.
For this, two main methods are used:
With the dismantling of tiles - if the surface has burst, and in addition to chips, there are cracks. This option is considered more complex and resource-intensive, which significantly affects the cost of work.
The removal of the tiles is carried out carefully so as not to damage it even more and not to hurt those in the neighborhood. This happens by carefully cleaning the seams and prying with a spatula
After removal, the reverse side is cleaned of mortar or glue, the fragments are glued together and the tile is glued into place. After that, the seams are rubbed and all the flaws are carefully masked. Without dismantling - if the defect is very small, there are chips without large cracks. This method involves making repairs directly on the wall or floor.
How to repair a chipped tile and return it to its original appearance?
First of all, the surface to be restored must be cleaned, dried and degreased. After that, you can proceed directly to the restoration. To do this, our craftsmen use a set of special waxes for ceramics.

It is necessary to choose the required shade of wax, often you have to mix several colors with a melter. The resulting soft wax mass is distributed in small portions over the deformed area. Wax is applied with a slight excess, because after hardening it shrinks.
Repairing chipped tiles cannot be done without a ribbed wax spatula, which is used to remove excess wax. On a flat surface, use the side with pointed ribs, for corners - with rounded ribs.
The sharp edge of the spatula can be rubbed and leveled.At this stage, you can correct the color with a different shade, imitate a pattern, we can say that repairing chips on a tile is also an art.
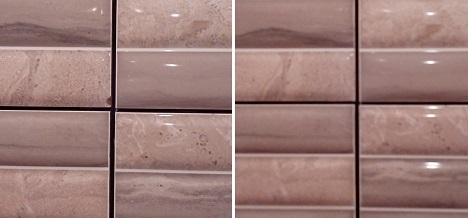
After the done actions, the area is cleaned and polished. As soon as the wax hardens, the restoration site is fixed with a varnish spray or a varnishing felt-tip pen-brush with an appropriate level of gloss or matt effect. The degree of gloss can be changed with a special polishing pad. The spatula must be cleaned of wax after use.
Who to contact?
If you are wondering how to hide a chipped tile, and you do not have enough experience in this area, we recommend that you involve specialists in this work. Eliminating such imperfections in the cladding on your own is quite labor-intensive, and besides, you will have to acquire a variety of equipment that may never come in handy again. In addition, self-repair can take a long time, and it will not be possible to achieve the desired result.
It will be more convenient and faster to entrust the restoration to professional craftsmen of our company. We work quickly and use only high-quality proven materials and tools. We can remove chipped tiles on floors and walls without leaving a trace, and we guarantee a high level of results.
Contact us in any way convenient for you from the Contacts page or use the button to request a call, it is located in the lower right corner of the page.
Call us!