What else should be considered when installing a crane
Lever location if single grip model selected. Many manufacturers of plumbing fixtures have a bathtub faucet lever positioned vertically. This constructive nuance is not decisive in the question at what height to place the faucet above the bath, but it affects the comfort of receiving water procedures. The horizontal arrangement of the control mechanism is fraught with mechanical damage to the crane, since inaccurate movements can damage the lever. Recovery will be expensive. Therefore, not only the height of the faucet in the bathroom is important, but also the design features of a particular model.
Height Requirements
If earlier, during the construction, the craftsmen were guided by the requirements of SNiP 3.05.01-85, now the installation of plumbing equipment is carried out in accordance with the manufacturer's instructions and common sense considerations. The shower faucet is installed according to the following rules:
- The installation height of the savior in the bathroom from the floor should be about 800 mm. It should be borne in mind that, according to sanitary standards, the upper side of the bath should be located at a distance of no more than 60 cm from the floor level so that its use is safe.
- The distance between the edge of the basin for washing and the mixer should be no more than 25 cm. This height ensures a more accurate filling of the bath without splashing and loud noise.
How to determine the correct mounting height?
In practice, determining the optimal distance at which it is better to install the mixer is much more difficult. After all, when installing plumbing equipment, not only practical considerations are important, but also aesthetic perception. To correctly determine the optimal height, you must follow the following tips:
- First you need to purchase a suitable mixer model. After that, you need to determine its functional purpose, that is, answer the question of what it is used for - for a shower, for a bath or for a universal purpose.
- The next step is to choose the installation location. Usually, the installation site is tied to the hot or cold water outlet, however, with the help of flexible hoses, it can be slightly shifted.
- Then you need to try on the mixer in height. If the device is a shower, then it is placed at a height of at least 800 mm, if for a bath - at a height of 200 mm, and universal models are installed at a height of at least 250 mm.
-
After that, you can proceed with the installation of equipment. However, keep in mind that it is undesirable to mount the device directly to ceramic tiles, as it is an unreliable mounting location.
Choose a price range
Choosing a faucet for the kitchen is not so easy: the choice is huge, the difference in prices is cosmic. Where to stop, how not to miscalculate. First of all, you should decide on the price range in which you agree to look:
- Dear models. Usually these are German and Danish firms, whose production facilities are located in Europe. In addition to the high price, they are distinguished by a significant warranty period - at least 5 years. This means that if you have a correctly completed warranty card, you can repair it for free or get a new one (if repair is impossible).
- Average price range. Most often, these are firms that have transferred production facilities to China. Most often, the products are of good quality, since the control at the bottom remains still tight. Also in this category are kitchen faucets that are made in countries that have recently joined the EU or are in the Eurozone.
-
Cheap. This is pure China. Here, how lucky - it can work for a long time and successfully (a couple of years), or it can break in the hands during installation (the worst case) or fail after a few months.
If you want to put a faucet on the kitchen sink and forget about it, then the choice is clear - only expensive models. If periodic minor problems do not scare you, you can look in the middle price range. Cheap ones are a really bad choice. Only in case of extreme shortage of funds. And how to calculate: if you have to install another crane in two months, the amount as a result will be far from small.
How to correctly calculate the height of the installation
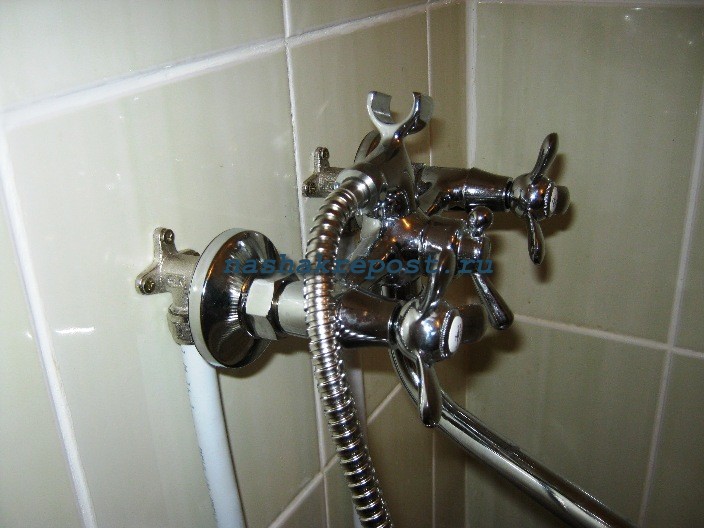
Practical experience does not contradict the standards and appointments for the assembly of cranes - the mechanism is installed at a distance of 20 cm from the tank. But the practice is not hard on the location of the faucet - you can install it at a suitable point, at a comfortable distance from the bath or shower, you just need to follow the main points when installing:
- before installing the device, measure it by elevation and ask about the convenience of the position of the crane;
- if we are talking about the shower, then the device is installed on a hill from 120 cm from the shower. It is necessary to measure the represented figure from the bottom of the tank;
- a frequent oversight in the accounts, at what distance the device should be installed above the container from the floor, appears because the elevation of the bowl is taken as a starting point even before installation. This is wrong - because sometimes you need to provide the bathroom with great durability by installing special stands. It may turn out that the calculated installation height of the structure above the bath at 20 cm at the end of the work will turn into 10 cm, the crane will hang over the capacity, and will not only look ugly, but will be very inconvenient to use. Moreover, not all types of cranes can be placed at such a small distance;
- the establishment of the structure from the end of the tank is a parameter that must be measured and calculated first. This is especially necessary when it is supposed to turn the tap from the bathroom to the sink and vice versa. Remember the size of the sink - it is usually more than 850 cm. And to this parameter you need to add the magnitude of the mechanism itself, as well as the distance between the gander and the sink - here it is better to make a mistake in the plus side than in the minus;
- installation indications are also affected by additional parts that are often supplied with current taps - for example, water softeners, as well as the desires of those who will use the bathroom, many people want the tap to be installed above the tank on a high hill - this way you can wash your hair, without the need to take a shower or collect a large amount of water;
when installing the mechanism on the wall, it is necessary to try to avoid attaching the structure to the tile, to its edges - hard application of matter will not allow the crane reflectors to be firmly fixed. Therefore, the elevation of the crane installation can be firmly connected with the height of the curb laying (it is standardly laid at a height of one meter from the floor).
Bathroom Faucet Tips
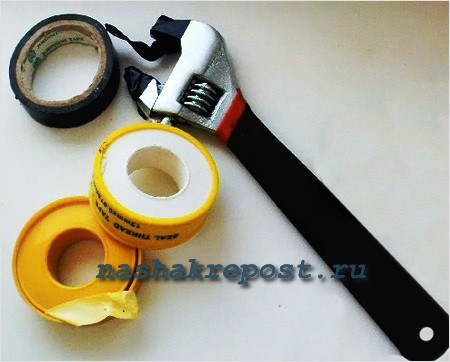
Installation of the mixer will not cause many problems for a person who is more or less familiar with the design of this device and knows how to handle the tool. To do this, you need a device with a complete set and an adjustable wrench. The dismantling of the old faucet is done carefully so as not to spoil the external coating of the bathroom.
If you want to install a faucet on the side of the bowl, do not place it clearly in the center. For greater comfort during further operation, it is recommended to move the design to the feet. Between outlets for hot and cold water, the distance in axial directions must be at least 150 mm. To determine the installation depth of the fittings, it is best to do a trial assembly of the structure.
When working with a fitting, be sure to use the building level. This tool will help to mount water outlets in the required axes and parallels with each other.It must be remembered that the location of the mixer plays a big role in its installation - the taps are mounted both on the body of the bathtub, and on a special podium or directly on the wall.
The simplest thing is to install a mortise mixing device, the modern design of bathtubs provides for this special technological holes. If the holes were made independently, then installation here will not cause much trouble - the mixer is connected to the water supply using flexible pipes through which water will be supplied. After sealing with washers and gasket materials, the valve is fixed in the hole with a fixing nut. The water supply pipes are fixed in the same way. If they turned out to be a little longer than required, cut off the excess, and sand the cuts.
When installing a mixer on a podium or a rack without the help of a specialist, it will be a little difficult - this will require skills not only in plumbing, but also in construction, because when installing this structure, you need to connect water pipes to the rack.
Now you know that the height of the faucet in the bathroom will be the most optimal in your case, but do not think that the indicated distance is the standard, ergonomics should play the main role. So some bathtubs with legs can be either higher or lower, so the optimal distance must be determined taking into account this parameter.
Mechanism types
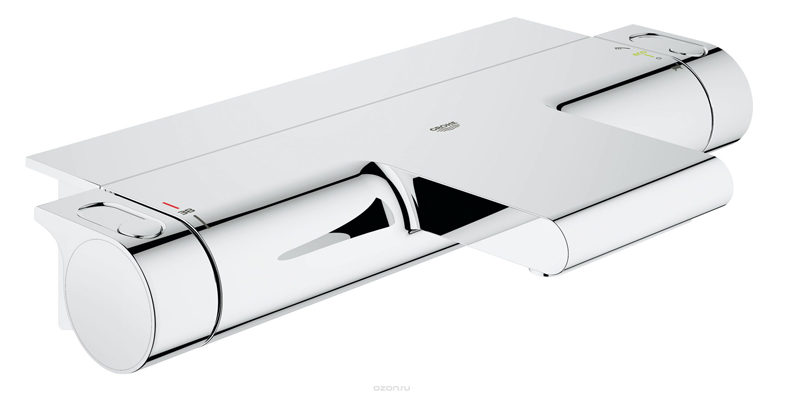
Today there are three types of faucets: herringbone, single lever and thermostatic. Herringbone is a pair of crane-boxes located in one body. They are made with a ceramic disc or with a rubber gasket. Valves control the flow of water, pressure, regulate the temperature.
When acquiring such a design, it is necessary to examine the quality of the connection of parts: it often happens that poor installations do not completely block water or have valves that circle to different ends without meaning. The second designs contain a pair of polymer plates or layers, the interval between them can be adjusted using a lever.
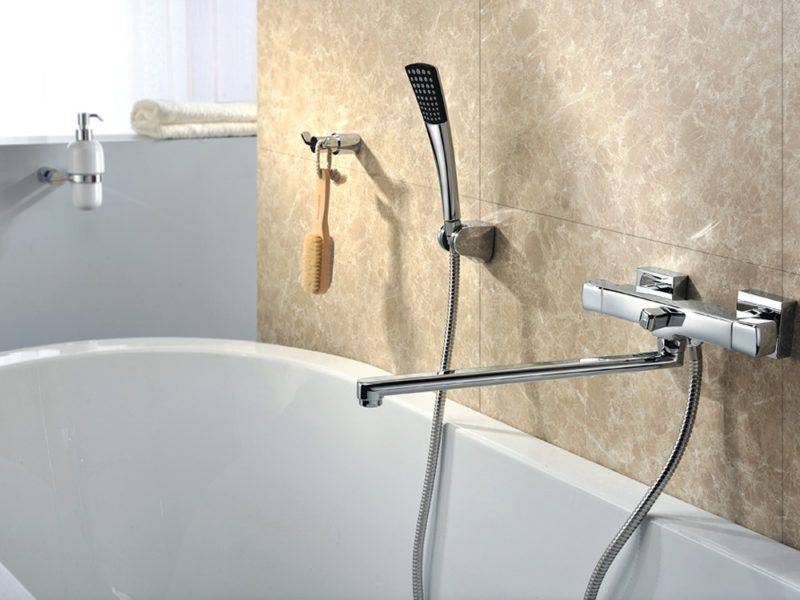
Thermostatic designs for the bathroom and shower are the most expensive, they allow you to adjust the required temperature, and this does not depend on the pressure and warmth of the water. Such devices have a security system that does not allow the water to be very warm or cold.
The most faithful and reliable material for the release of the body of the structure can be called brass, which is made from copper alloy and zinc. A galvanized layer is often applied on top of it. It is better to buy other spare parts from stainless steel - it is not very exposed to unnecessary precipitation that accumulates in pipes.
Removing the old faucet
Before changing the mixer, you must remove the old one. Before doing this, it is imperative to shut off the supply of cold and hot water from the inlet riser. It is also advisable to put rags on the bottom of the sink or bathtub, so that any part, falling by accident, does not damage the enamel and does not fall into the drain.
To remove the mixer, there is absolutely no need to disassemble it. It will be enough to unscrew the nuts securing it to the nozzles.
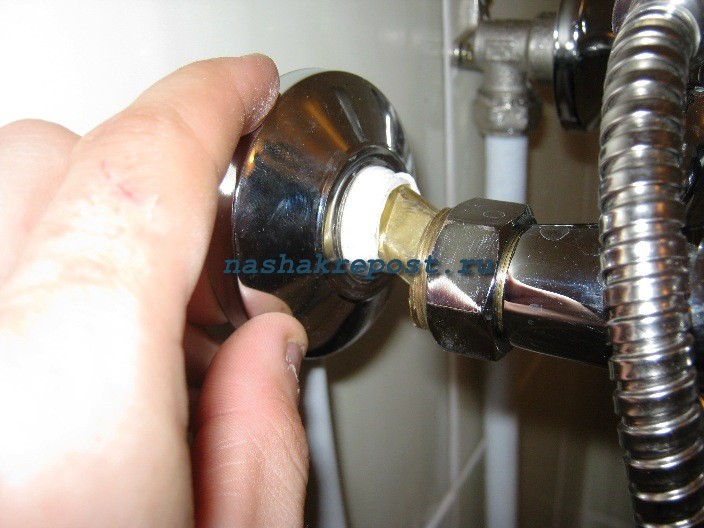
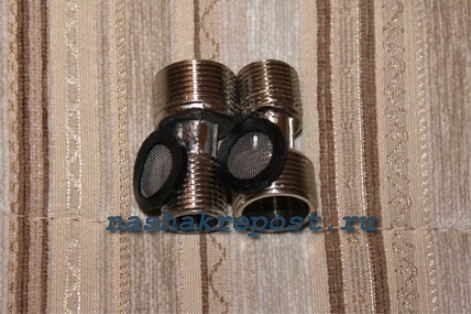
Branch pipes, which are otherwise called eccentrics (we will use both names below), are short curved tubes attached to supply pipes. Eccentrics are always supplied with the mixer, so they will most likely have to be changed.
In order to unscrew the nuts, the easiest way is to use an adjustable (or gas) wrench. Since these nuts cannot be overtightened, it will not take much force to loosen these nuts. After dismantling the mixer, it will be necessary to remove the old eccentrics, because they were installed based on the old mixer, which means that the new one may not fit under them. Although, if you look, the nozzles are not at all the same as the eccentrics.The pipes on the outside often have nothing to grab onto, while the holes inside them are rectangular. Eccentrics, on the other hand, have special edges on their surface designed for an adjustable wrench. Dismantling the mixer is not at all difficult. It is much harder to put a new one in its place.
Installing a new faucet
As already mentioned, the standard distance between the axes of the riser pipes is 15 cm. Despite this, it should be borne in mind that absolutely everything (and pipes are no exception) is performed with a small error. As a result, even the center distance may differ from the standard. In order for the mixer to fit, nozzles are used. Thanks to their curved shape, it is possible to change the distance between the axes of the pipes while twisting them into pipes.

First, you need to screw the new nozzles into the pipes a little (before that, you need to put nuts on them, through which the mixer will later be connected) for a couple of turns. Then you need to try to connect the nozzles to the mixer (first determining where it has the top and bottom). By twisting the nozzles, you should determine the most suitable distance at which the mixer can be easily connected to the nozzles without distortion. In this case, it is necessary to remember the position of the nozzles and the number of revolutions by which they are screwed.
After that, screw the nozzles in properly (they must be hermetically connected to the pipes), which will require flax and paste (you can use Unipak). Instead of pasta and flax, you can use fum tape.
First, of course, you need to put a nut on the pipe (to connect to the mixer) and a decorative washer. Eccentrics do not have nuts, because it is located on the mixer. Linen must be wound very tightly around the thread of the branch pipe, so that when screwing into the pipe, flax does not unwind from the branch pipe (hence, it must be wound against the direction of screwing). After that, the flax is covered with sanitary paste and the pipe is screwed into place by the required number of turns.
After installing both nozzles in place, you can install the mixer. It is mounted on nozzles through large gaskets made of rubber. In order for the mixer to snap into place without distortion, the nuts should be tightened alternately. At the end, you can turn them another half turn with an adjustable wrench. In no case should they be pulled too hard, so as not to damage the gaskets.
Dear readers, comment on the article, ask questions, subscribe to new publications - we are interested in your opinion 🙂
Articles that will be of interest to you:
Introduction to faucets
Each resident performs water procedures regularly, so they allocate a lot of money to equip the bathroom with comfortable sanitary ware with a convenient location.
The mixer is one of the important elements in the plumbing device.
With its help, the temperature flows of water, its pressure and quantity are regulated.
Structurally, the mechanism consists of the following elements:
- body and cone
- sidewalls
- bushings
- nuts
- gaskets
- hoses and pipes
Faucets, manufacturers produce:
- single-lever
- thermostatic
- with two taps
Release and widespread use, devices with a single valve, received recently. The rotary knob contains two polymer spheres, with tightly aligned holes. The lever regulates the water alignment and flow rate, shutting them off with the push of a hand.
The handle works smoothly and easily controls the flow of water, which makes operation much more convenient than its counterparts. The price of the devices is quite reasonable.
Thermostats provide water outlet with a given temperature, in appearance they are similar to two-valve installations. In thermostatic mechanisms, two handles are mounted that control pressure and temperature.
The classics of sanitary equipment, in the form of mixers with two taps, are gradually becoming a thing of the past, they are being replaced by innovation in the development of new models.The Christmas trees, called by specialists, consist of elements placed on both sides of the body.
Usually, manufacturers mark valves with different colors, red and blue, which means the temperature output of water, with adjustable pressure and heating. Cranes are sealed with gaskets, ceramic discs.
Installation height of plumbing fixtures according to SNiP SP
In order not to look for the recommended installation height of water fittings and the distance from the faucet to the bathroom, sinks and other values from different sites, we advise you to use the tables below. Installation height of taps and faucets according to SNiP 3.05. -technical systems of buildings":
|
Water tap |
Installation height from the level of the finished floor, mm |
|
Water folding taps in baths, toilet flush taps, inventory sink faucets in public and medical institutions, bath faucets |
800 |
|
Viduar mixers with oblique outlet |
800 |
|
Viduar faucets with direct outlet |
1000 |
|
Faucets supplying water for washing floors in toilet rooms in public buildings |
600 |
|
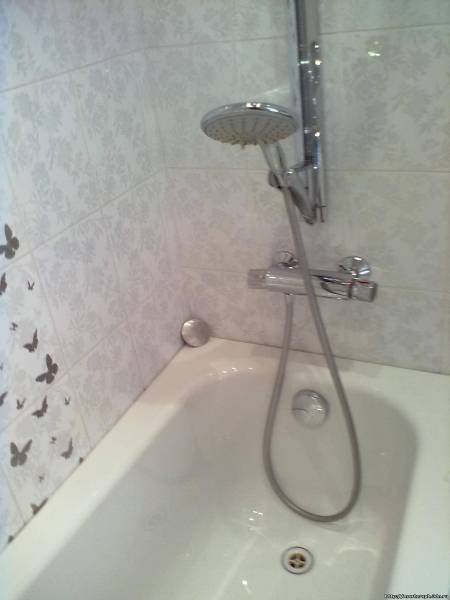
Mixer shower |
1200 |
Installation height of shower nets according to SNiP 3.05.01-85 and SP 73.13330.2012 "Internal sanitary systems of buildings":
|
Where to use the shower screen |
Installation height from the level of the finished floor, mm |
|
Shower screens in the bathroom |
2100-2250 |
|
Shower screens in cabins for the disabled |
1700-1850 |
|
Shower nets in preschool institutions |
1500 from the bottom |
The installation height of plumbing fixtures from the level of the finished floor to the side according to SNiP 3.05.01-85 and SP 73.13330.2012 "Internal sanitary systems of buildings":
|
Name of plumbing fixture |
Installation height from the level of the finished floor to the edge of the board, mm |
||
|
In residential, public and industrial buildings |
In schools and children's medical institutions |
In preschool institutions and facilities for people with disabilities moving with the help of various devices |
|
|
Washbasins |
800 |
700 |
500 |
|
Sinks and sinks |
850 |
850 |
500 |
|
Baths |
600 |
500 |
500 |
|
Wall and tray urinals |
650 |
500 |
400 |
|
shower trays |
400 |
400 |
300 |
|
Hanging drinking fountains |
900 |
750 |
— |
For stand-alone sanitary appliances, installation height deviations from those recommended in the table up to 20 mm are allowed, and for group installation - up to 45 mm. the following installation heights are recommended: - inventory cast-iron sink - 650 mm to the top of the side; - sink for oilcloths - 700 mm; - viduar (to the top) - 400 mm; you know at what height to install the faucet above the bath and you will be able to install it in accordance with the current norms of SNiP and SP. Save the signs for future reference, or bookmark this page.
- How to change the faucet in the bathroom
- Do you need a heated towel rail in the bathroom?>
How to attach
Installing the mechanism is not particularly difficult for a person who knows this device and knows how to use tools. To install, you need an adjustable wrench and a mixer mechanism with an absolute complete set. The old mixer must be dismantled carefully so as not to damage the application in the room.
Install the mechanism in this way:
it is necessary to partially assemble the mixer device by firmly pressing the rubber and other gaskets. When mounting, make sure that all parts, except for the lever and the valve part, have become fixed;
then you need to screw the sealant onto the thread. Plastic tape can go behind it
When screwing, it is important that the thread of the nut is located in the same direction as the winding, otherwise depressurization may occur;
nuts need to fix the device with pipes. If the nuts are not included in the construction kit, then they can be bought on the construction market
It is often necessary to use special adapters in the form of small metal parts, which are used for a variety of plumbing sizes and the axis of the structure;
at the final stage of installation, you need to make sure that the mechanism is tightly mounted, and then attach the crane.
Then you can open the valves. Do not apply intense water pressure after opening, first wait a certain time, gradually increasing to the highest.If, with the mechanism completely open, the amount of splashes is not very large, then the height of the installation is chosen correctly.
Calculation of the installation height of the mixer
Consider the distance from the edge of the container to the faucet
Despite the established standard for the distance between the mixer and the bathroom, which is 200 mm, the faucet is installed at a distance that is convenient for users.
When calculating the mounting height, the following requirements must be observed:
Before installation, you need to try on the mixer to the intended installation site to determine the position in which it will be convenient to use this plumbing equipment.
Be sure to take into account the distance from the edge of the container to the faucet when there is a need to turn the faucet from the bathtub to the sink
When calculating this parameter, it must be taken into account that the size of the sink is usually 850 mm. In addition, when calculating in this case, you need to take into account the length of the tap itself and the distance between it and the sink
When turning the faucet, it should be in the middle of the sink.
The installation site of the mixer should be in places convenient for its fastening, without destroying existing structures and finishing elements. So, for example, you can not install fasteners at the edges of the tile, because it can crack in these places.
The location of the mixer may be affected by additional elements that are part of the system or installed at the request of the owners.
For example, if there is a water softener or the owner of the apartment wants to install a tap higher so that he can wash his hair.
Approximate parameters for the installation of mixing equipment can be taken according to the values \u200b\u200bspecified in the table:
| № | equipment identification | Installation options |
|---|---|---|
| 1 | Sink faucet | 250 mm from the edge of the sink |
| 2 | Sink faucet | 200 mm from the edge of the sink |
| 3 | Washbasin faucet | 200 mm from the edge of the washbasin |
4
Bath faucet
800 mm from the floor
5
General Bath & Sink Hardware
1000 mm from the floor
6
Shower equipment
1200 mm from the floor
Experts recommend
- When figuring out the question at what height the faucet is placed in the bathroom, do not forget that the axial distance between the hot / cold water inlets is 150 mm. This is the standard value. It will need to be taken into account if the conclusions for the eccentrics are performed independently. Remember: the width of the bathroom faucet does not affect the spacing. It is always equal to 15 cm (there are imported models with a larger or smaller center parameter (!), But they are quite rare), and the width of the body of sanitary equipment can be 25 cm.
- Before deciding on the height of the shower faucet, find out if the hot/cold water inlets will match the faucet levers. It will come in handy in case you are more comfortable using two-valve models or you need to find out how to raise the faucet in the bathroom higher to increase the comfort of its operation. European standard - hot water tap on the left, cold on the right.
- When using taps with thermostats, you should carefully study the nature of the water supply - in 69% of cases, such models are non-standard (products from different manufacturers have different features). But advice on how high to make a faucet above the bath will be the same for a device with a thermostat as for a classic device.
- The fittings are mounted flush with the level of the tile. Experts recommend that after buying a crane, assemble it and measure it. Then outline at what height to install the mixer in the shower room, then carry out work on the fittings. There are frequent cases when they have to be recessed into the wall in order to reach the level with the cladding. If the fittings protrude, the appearance of the room will deteriorate, even if the height of the installation of the faucet above the bathroom has been calculated with high accuracy.
- Be sure to use a level when installing a faucet.The plumbing fixture must stand exactly horizontally.
It should be noted that there are no strict rules and recommendations on how far a mixer is installed from the bath. This value is determined purely individually. The main rule: the height of the faucet taken from the floor above the bathroom should be comfortable for receiving water procedures. Agree to take a shower, bending over - uncomfortable, and reach for the faucet lever, if necessary, adjust the temperature or water pressure too.
Therefore, experts recommend not to rush. Calculate the options at what height from the bathtub the mixer is installed, and only then proceed with the installation. Remember: it will be problematic to raise or lower the crane after attaching it to the wall or into the wall. If you are unsure of your abilities, invite a specialist, he will tell you what height the installation of the bath faucet will be comfortable in specific operating conditions.